
My Garage
My Account
Cart
Genuine Lincoln Town Car Differential Seal
- Select Vehicle by Model
- Select Vehicle by VIN
Select Vehicle by Model
orMake
Model
Year
Select Vehicle by VIN
For the most accurate results, select vehicle by your VIN (Vehicle Identification Number).
2 Differential Seals found
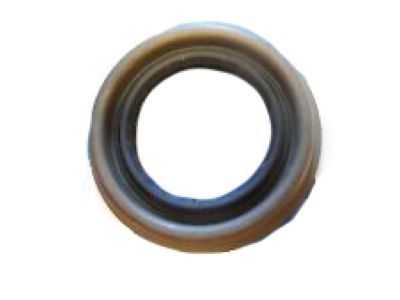
Lincoln Town Car Seal Assembly - Oil
Part Number: F89Z-4676-AA$18.24 MSRP: $26.67You Save: $8.43 (32%)Ships in 1-2 Business DaysLincoln Town Car Seal Assembly - Oil
Part Number: E8TZ-4676-C$18.24 MSRP: $26.67You Save: $8.43 (32%)Ships in 1-2 Business Days
Lincoln Town Car Differential Seal
We provide a wide range of Lincoln Town Car Differential Seal at the best prices possible. If you need Lincoln Town Car Differential Seal, you can shop with confidence on our website. All our OEM parts come with a manufacturer's warranty and are delivered to your door step with a fast delivery service.
Lincoln Town Car Differential Seal Parts Questions & Experts Answers
- Q: How to remove and replace a Differential pinion oil seal on Lincoln Town Car?A:Loosen the rear wheel lug nuts, raise the rear of the vehicle and place it securely on jackstands. Remove the rear wheels. Remove the brake drums or calipers. Mark the driveshaft and companion flange for ease of realignment during reassembly, then remove the driveshaft. Mark the relationship between the pinion and companion flange. Using an inch-pound torque wrench, measure and record the torque required to turn the pinion nut through several revolutions (pinion bearing preload). Using a suitable tool, hold the companion flange and remove the pinion nut. Using a suitable puller, remove the companion flange. Pry out the old seal with a slide hammer and reversed jaws or other appropriate tool. Clean the oil seal mounting surface. Tap the new seal into place, taking care to insert it squarely. Inspect the splines on the pinion shaft for burrs and nicks. Remove any rough areas with a crocus cloth. Wipe the splines clean. Install the companion flange, aligning it with the marks made during removal. Gently tap the flange on with a soft-faced hammer until you can start the pinion nut on the pinion shaft. Using a suitable tool, hold the companion flange while tightening the pinion nut to the minimum torque. While tightening, take frequent rotational torque measurements, using the inch-pound torque wrench, until the measurement recorded is reached. Caution: If the measurement was less than the pinion bearing preload torque, continue tightening until the specified preload is reached. If it was more than specified, stop when the specified preload is reached. Under no circumstances should the pinion nut be backed off to reduce pinion bearing preload. Increase the nut torque in small increments and check the preload after each increase. Reinstall the driveshaft, brake drums and wheels. Check the differential oil level and fill as necessary. Lower the vehicle and take a test drive to check for leaks.
Related Lincoln Town Car Parts
Browse by Year
2011 Differential Seal 2010 Differential Seal 2009 Differential Seal 2008 Differential Seal 2007 Differential Seal 2006 Differential Seal 2005 Differential Seal 2004 Differential Seal 2003 Differential Seal 2002 Differential Seal 2001 Differential Seal 2000 Differential Seal 1999 Differential Seal 1998 Differential Seal 1997 Differential Seal 1996 Differential Seal 1995 Differential Seal 1994 Differential Seal 1993 Differential Seal 1992 Differential Seal 1991 Differential Seal 1990 Differential Seal 1989 Differential Seal 1988 Differential Seal 1987 Differential Seal 1986 Differential Seal 1985 Differential Seal 1984 Differential Seal 1983 Differential Seal 1982 Differential Seal


