- Live Chat
- 1-888-788-9341


Why choose FordPartsGiant
- Dedicated Service
FordPartsGiant.com is your #1 online source for genuine Mercury parts and accessories. Our team of experts is available to answer all your questions and guide you toward a fast shopping experience. From part compatibility to part and accessory information before purchasing, our team is ready to provide you with exceptional service via email or phone. We strive every day to exceed our customer's needs and build future relationships here at FordPartsGiant.com.
- Unbeatable Prices
No matter which vehicle you have, FordPartsGiant.com offers unbeatable quality without breaking your wallet. FordPartsGiant.com is proud to deliver a wide array of genuine discounted parts and accessories to fit your needs at prices lower than wholesale. We work hard to connect with our customers and earn their loyalty for life.
- Fast Delivery
FordPartsGiant.com is committed to packing and shipping out your orders in no time to get your vehicle up and running. FordPartsGiant.com delivers your genuine parts professionally and promptly. Explore the complete line of genuine Mercury auto parts and accessories to elevate your next auto parts experience here at FordPartsGiant.com.
Popular Genuine Mercury Parts
- Engine Parts View More >
- Chassis Parts View More >
- Body And Paint Parts View More >
- Lamps & Wiring Parts View More >
- Electrical Parts View More >
- Wheels & Brakes Parts View More >
- Fuel System & Manifolds Parts View More >
- Speedometer, Bumpers, Mirrors & Wipers Parts View More >
- Automatic Transmission Parts View More >
- Transmission Parts View More >
- Radiator & Grill Parts View More >
- Front Suspension & Steering Parts View More >
Shop Genuine Mercury Parts with FordPartsGiant.com
Mercury is a division of Ford, which has an esteemed 71-year history, which was meant to be a gap between the average Ford model and their high end luxury car offerings. Mercury was introduced over 80 years ago with the Mercury 8, which deployed a V-8 engine, and subsequently gained strong popularity. The years during World War II and periods of redesigns were difficult for the brand through the 1940s and 1950s, though the 1949 Mercury Eight became a very iconic vehicle for the brand. Genuine Mercury parts are still available for enthusiasts and owners.
Mercury throughout its lifespan produced many notable models that have left an indelible mark on the automotive world. The Mercury Grand Marquis, was a full-size sedan, celebrated for its spaciousness, and traditional American design. The Mercury Milan, was a mid-size sedan, which positioned itself as a more luxurious alternative to the Ford Fusion, by infusing unique Mercury styling. The Mercury Mountaineer, was a SUV Iteration of the Ford Explorer, with an added touch of luxury and premium features only found on Mercury cars. And of course the Mercury Sable, which was well renowned for its innovative aerodynamic design.
Mercury vehicles typically used genuine Mercury parts, and variants of Ford's engines and transmission systems. Mercury's used powertrains such as the Duratec V6 engine paired with a 6-speed automatic transmission, in models such as the Mercury Milan, as well as the Mariner. The 2011 Mercury Grand Marquis was an iconic and ubiquitous midsize 4 door sedan with a standard V8 Engine with 224 horsepower on single exhaust versions, and 239 horsepower on dual exhaust versions. Those interested in Mercury parts are encouraged to visit FordPartsGiant, to learn more about official Mercury parts available today.
Opting for OEM Mercury parts is the ultimate decision for ensuring top-notch quality and optimal functionality. These parts undergo rigorous quality inspections and are meticulously crafted to meet Mercury's factory standards, thereby guaranteeing a hassle-free installation process. Wondering where to get high-quality and affordable OEM Mercury parts, including Alternator, Regulator, Battery, Starter & Distributor, Frame, Exhaust System, Spring & Stabilizer? You have already come to the right place, FordPartsGiant. At FordPartsGiant we offer all genuine Mercury parts, such as Accelerator Linkage, Air Cleaner & Speed Control, Manual Transmission at reasonable prices with the Mercury manufacturer's warranty. All our parts, like Air Conditioner, Radios & Shock Absorbers make it to you in a short amount of time due to our fast shipping times. Our professional customer service staff at FordPartsGiant is ready to help you with any problems during your shopping experience. Please enjoy your shopping experience, shop for your Mercury parts at FordPartsGiant today!
Mercury Parts Questions & Answers
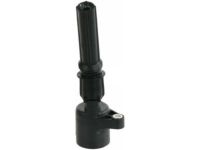
- Q: How to check and replace ignition coils in different types of ignition systems for the Mercury Grand Marquis?A: For the distributor type ignition system (Duraspark II and TFI-IV), start by checking the primary and secondary coil resistance. With the ignition off, disconnect the wires from the coil and connect an ohmmeter across the coil primary terminals. If the resistance is not within the specified range, replace the coil. Next, measure the resistance from the positive primary terminal to the case of the ignition coil. If the resistance is less or more than the specified range, replace the coil. To replace the coil, disconnect the battery cable, detach the wires from the primary terminals, unplug the coil secondary lead, remove the bracket bolts, and detach the coil. Installation is the reverse of removal. For the electronic distributorless ignition (EDIS) system, start by checking the primary and secondary coil resistance. With the ignition off, disconnect the electrical connector(s) from the coil and connect an ohmmeter across the coil primary terminals. If the resistance is not the same for all four tests, replace the coil. Next, connect an ohmmeter between the secondary terminals of each coil pack. If the resistance is not within the specified range, replace the coil. To replace the coil, disconnect the negative cable from the battery, disconnect the ignition coil electrical connectors from each individual coil pack, disconnect the ignition wires, remove the bolts securing the ignition coil, and install the new coil following the reverse of the removal procedure. For the integrated electronic ignition system (COP), follow the diagnosis outlined in section 6. When it has been determined that a coil needs replacement, unplug the coil, remove the retaining bolt, remove the coil, inspect the spark plug, check the coil harness connector terminals, and then replace the coil and reconnect the harness.
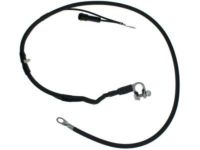
- Q: How to inspect and replace battery cables for the Mercury Cougar?A: Periodically inspect the entire length of each battery cable for damage, cracked or burned insulation and corrosion. Poor battery cable connections can cause starting problems and decreased engine performance. Check the cable-to-terminal connections at the ends of the cables for cracks, loose wire strands and corrosion. The presence of white, fluffy deposits under the insulation at the cable terminal connection is a sign that the cable is corroded and should be replaced. Check the terminals for distortion, missing mounting bolts and corrosion. When replacing the cables, always disconnect the negative cable first and hook it up last, or the battery may be shorted by the tool used to loosen the cable clamps. Even if only the positive cable is being replaced, be sure to disconnect the negative cable from the battery first. Disconnect and remove the cable. Make sure the replacement cable is the same length and diameter as the cable being replaced. Clean the threads of the relay or ground connection with a wire brush to remove rust and corrosion. Apply a light coat of petroleum jelly to the threads to help prevent future corrosion. Attach the cable to the relay or ground connection and tighten the mounting nut/bolt securely. Before connecting the new cable to the battery, make sure that it reaches the battery post without having to be stretched. Connect the positive cable first, followed by the negative cable.
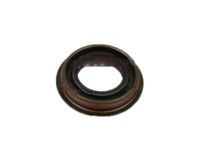
- Q: How to remove and install a driveaxle oil seal in a Mercury Mariner?A: Raise the rear of the vehicle and support it securely on jackstands. Place the transaxle in Neutral with the parking brake off. Block the front wheels to prevent the vehicle from rolling. Remove the wheel(s). Carefully pry out the wheel seal with a seal removal tool or a large screwdriver. Be careful not to damage or scratch the seal bore. Using a seal installer or a large deep socket as a drift, install the new wheel seal. Drive it into the bore squarely and make sure it's completely seated. Lubricate the lip of the new seal with multi-purpose grease, then install the wheel. Be careful not to damage the lip of the new seal. Check the differential lubricant level and add some, if necessary, to bring it to the appropriate level.
