×
- Live Chat
- 1-888-788-9341


My Garage
My Account
Cart
Genuine Mercury Lynx Valve Stem Seal
Engine Valve Seal- Select Vehicle by Model
- Select Vehicle by VIN
Select Vehicle by Model
orMake
Model
Year
Select Vehicle by VIN
For the most accurate results, select vehicle by your VIN (Vehicle Identification Number).
1 Valve Stem Seal found
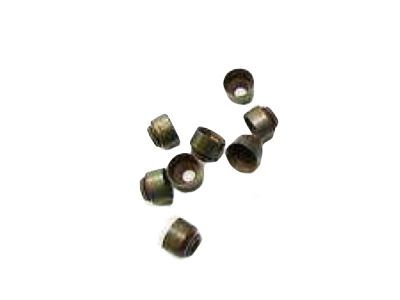
Mercury Lynx Valve Stem Seal
We provide a wide range of Mercury Lynx Valve Stem Seal at the best prices possible. If you need Mercury Lynx Valve Stem Seal, you can shop with confidence on our website. All our OEM parts come with a manufacturer's warranty and are delivered to your door step with a fast delivery service.
Mercury Lynx Valve Stem Seal Parts Questions & Experts Answers
- Q: How can broken valve springs and defective valve stem seals be replaced without removing the cylinder head on Mercury Lynx?A: Valve spring failure and valve stem seal failure can be remedied without removing the cylinder head that normally needs two special tools and a compressed air supply. If compressed air is not attainable, it is possible to employ a string of nylon to avoid the valves from falling into the cylinder. Start by extracting the spark plug of the cylinder which is having the bad component and in case you are replacing all valve stem seals, extract all spark plugs. To do this, rotate the crankshaft until the piston in the troubled cylinder is at the position of top dead centre in the compression stroke and this sequence commences with cylinder number one and then follows the firing sequence. Insert a spark plug and attach an air hose adapter to it and then tape it to a canister of compressed air. When this is done, take out the nut, fulcrum, and Rocker Arm of the defective valve before blowing compressed air to the cylinder but a note of warning due to crankshaft oscillation. The air pressure expects to retain the valves tightly on the valve seats; therefore, if there are leaks, the condition of the valves may be poor. If compressed air is not available the piston should be placed about 45 degrees before TDC, and the combustion chamber filled with nylon rope, leaving one end protruding for easy extraction. Take shop rags by wiping off the debris so that it cannot find its way into the engine after that compress the valve spring with the help of what is called a valve spring compressor and then remove the keepers. Following the removal of the spring retainer, shield and valve spring, take out the umbrella type guide seal. The valve may be damaged in such a way that air pressure cannot hold the valve closed, then this may call for cylinder head removal. Place a rubber band or tape around the valve stem to keep it from going down, then look for sign of tear, wear and check for free movement in with the guide. To retain the valve in the closed position, apply air pressure, lubricate the valve stem with engine oil, replace with a new guide seal. Put the spring and the shield on the valve, screw in the spring retainer, compress the spring, and put the keepers in place; use a small amount of grease to fix them in place. Take off the pressure at the spring tool making sure the keepers are in place, then disconnect the air hose and remove the adapter from the spark plug hole. Last, replace the spark plug(s), re-connect the wire(s), and start the engine, expend a few minutes look for any signs of oil leaks or unusual noise from the valve cover area.


