Make sure this part fits

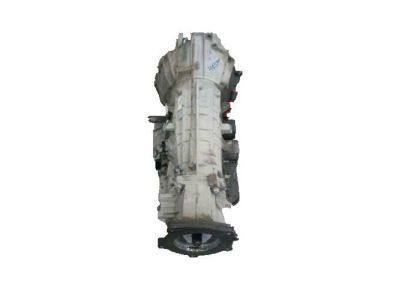
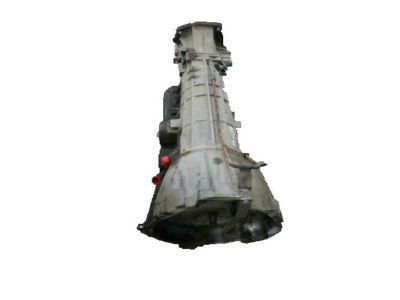
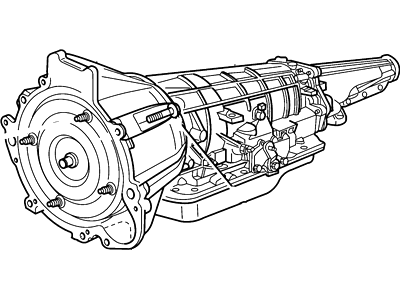
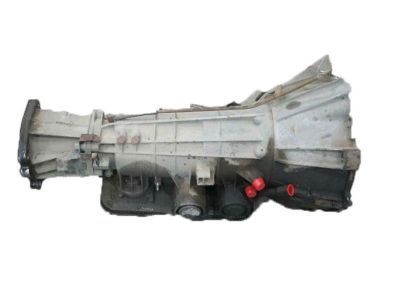
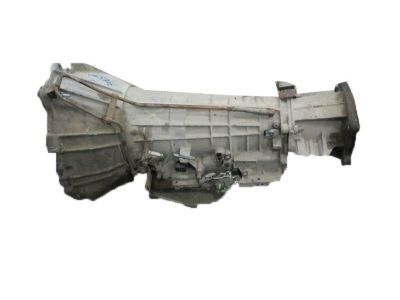
Ford 1L5Z-7000-EA Automatic Transmission Assembly

2001-2005 Ford 1L5Z7000EA

Customer Questions & Expert Answers (4)
Ford 1L5Z-7000-EA Automatic Transmission Assembly
  • Part Description
    Automatic Transmission Assy
  • Replaced By
    1L5Z-7V000-ERM
  • Manufacturer
    Ford
Make sure this part fits
$2009.00 MSRP: $2366.67
You Save: $357.67 (16%)
Core Charge: $1000.00
Ships in 1-3 Business Days
1
ADD TO CART
  • Related Parts
  • Product Specifications
  • Vehicle Fitment
  • Customer Questions & Expert Answers
  • Product Specifications

    BrandGenuine Ford
    Manufacturer Part Number1L5Z-7000-EA, 1L5Z7000EA
    Part DescriptionAutomatic Transmission Assy
    Item Dimensions25.5 x 23.4 x 45.2 inches
    Item Weight218.00 Pounds
    ConditionNew
    Fitment TypeDirect Replacement
    ManufacturerFord
    SKU1L5Z-7000-EA
    WarrantyThis genuine Ford part is guaranteed by Ford's factory warranty.
    Shipping & ReturnShipping Policy Return Policy
    Warning: California’s Proposition 65
  • Vehicle Fitment

    Year Make Model Engine Important vehicle option details
    2001-2003 Ford Explorer Sport6 Cyl 4.0L SOHC EFI5-Speed Automatic Transmission - 5R44E/5R55E, Four-Wheel Drive (Part Time) (Left Hand Drive), Left Hand Drive
    2001-2005 Ford Explorer Sport Trac6 Cyl 4.0L SOHC EFI5-Speed Automatic Transmission - 5R44E/5R55E, Four-Wheel Drive, Left Hand Drive
    2001-2003 Ford Ranger6 Cyl 4.0L5AT 5R44E
  • Customer Questions & Expert Answers

    Q:
    Does the PN fit my vehicle? Posted by FordPartsGiant Specialist
    A:
    You can Select Your Vehicle to check if 1L5Z-7000-EA fits your vehicle.
    Posted by FordPartsGiant Specialist
    Q:
    How to remove and install a transmission on 2000-2011 Ford Ranger? Posted by Customer
    A:
    Disconnect the negative cable from the battery and remove the transmission fluid level dipstick, along with the dipstick tube on 2011 4.0L models. Raise the vehicle and support it securely on jackstands. For 4WD models, remove the transfer case and take caution to remove the Vehicle Speed Sensor (VSS) from the transfer case. Drain the transmission fluid only if disassembling the transmission, then reinstall the pan; otherwise, you may face disposal issues. Mark one of the torque converter studs and the driveplate with white paint for reassembly. Unbolt the starter and tie it up out of the way. On vehicles with a 3.0L V6 engine, remove the transmission access cover from the converter housing to access the torque converter nuts, using the starter mounting hole for four-cylinder and 4.0L V6 engines. For 2001 and later 2.3L engines, accessing the torque converter nuts through the wheel well may be easier. Remove the four torque converter-to-driveplate nuts, turning the crankshaft clockwise for access, and consider removing the spark plugs for ease. On 2WD models, remove the driveshaft and cover the extension housing with a plastic bag to prevent dirt entry and catch residual fluid. Remove the speedometer cable retaining bracket and disconnect the speedometer cable from the transmission. Disconnect the shift cable from the manual shift lever, the transmission range sensor connector, the 16-pin transmission connector, and any other electrical connectors and brackets attached to the transmission. Place a transmission jack beneath the transmission, applying pressure to slightly raise it, and use safety chains for stability. Remove the bolts and nuts securing the rear mount and insulator to the frame crossmember, then remove the crossmember-to-frame side support mounting bolts and the crossmember itself. Support the engine with a jack, using a block of wood under the oil pan. For V6 engines, remove the catalytic converter. Slightly lower the transmission, ensuring it does not hang free. Disconnect the transmission oil cooler lines and plug them to prevent dirt entry, using a flare nut wrench to avoid rounding off the nuts. Remove the lower converter housing-to-engine bolts and the transmission fluid filler tube. Ensure the transmission is securely mounted on the jack before removing the two upper converter housing-to-engine bolts and the vent tube for 4WD models. Remove the four side converter housing-to-engine bolts, then carefully move the transmission rearward to disengage it from the engine block dowel pins, ensuring the torque converter is detached from the driveplate. Secure the torque converter to the transmission to prevent it from falling out during removal. Installation is the reverse of removal, ensuring the converter hub is fully engaged in the pump gear, aligning the bolt drive lugs and drain plug with the holes in the driveplate, and keeping the transmission level during positioning. Align the studs with the holes in the driveplate, ensuring the white paint marks line up, and carefully move the transmission forward until the dowel pins and torque converter are engaged. When installing the driveplate-to-converter nuts, position the driveplate so the pilot hole is at six o'clock, install one nut through the pilot hole and tighten it, then install the remaining nuts, tightening them to the specified torque with new nuts. Adjust the shift cable, lower the vehicle, and fill the transmission with the specified fluid, running the engine to check for leaks.
    Posted by FordPartsGiant Specialist
    Q:
    How to remove and install the transmission on Ford Explorer Sport Trac? Posted by Customer
    A:
    To eliminate the transmission, one has to unscrew the negative terminal of the battery and safely lift the car using the jack to place it on the stands, if the car uses Automatic Ride Control, its switch shall be off. Remove the transmission pan and dump its contents, replace it back in its rightful position. On the 4WD models, you have to take out the transfer case, and unscrew the starter, which you should then secure somewhere in order to access the torque converter head nuts. Paint one of the studs and the torque converter with white paint so that they would be easy to reconnect. Loosen the four torque converter-to- drive plate nuts, while turning the crankshaft anticlockwise to get better access. For the 2 wheel drive models, the driveshaft should be unbolted and the extension housing covered to reduce cases of moister and dirt penetration. Remove the speedometer cable from the VSS if there is a cable or pull out the electrical connector in case of electric VSS. Pull the transmission shift cable / kickdown cable out of the transmission, then unplug electrical connectors on the harness, stow the harness aside. Jack up the transmission by placing a transmission jack below the transmission and exert some pressure to lift it slightly and use chains to secure it to prevent any accidents. Eliminate the transmission mount and cross member; place jack under the engine and use a block of wood at the oil pan. Lower the engine and transmission slightly and unbolt the two transmission oil cooler lines and plug them. As for the lower transmission-to-engine bolts, and dipstick tube, then, they must be undone with the same manner of bolts that secure the tube to the cylinderhead. Safeguard the transmission on the jack and take off the two upper transmission to engine bolts. Slowly shift the transmission backward in order to come off the dowel pins on engine block; ensure that torque converter has come off the drive plate. To install, reverse the above process you have to ensure that the convert hub is tightly engaged in the pump gear and ensure that the bolt drive lugs and the drain plug are perfectly located in the drive plate holes. After this raise the transmission to a parallel position with the ground to ensure that the gears mesh together properly, align the hole in the drive plate with the stud with the help of the white marks that have been painted on the plate then slowly advance the transmission forward until it engages. Fit the numerous drive plate-to-converter nuts, using first one nut through the pilot hole and then fasten it, followed by the other nuts. Loosen the shift cable, decrease the height of the car, add the required type of the transmission fluid, start the engine, and examine the presence of any leakage.
    Posted by FordPartsGiant Specialist
    Q:
    How should the crankshaft be turned to remove the torque converter nuts for the 2010 Ford Ranger? Posted by Customer
    A:
    Turn the crankshaft in a clockwise direction only (as viewed from the front). You can remove the spark plugs to make this easier.
    Posted by FordPartsGiant Specialist
    If you have any questions about this product, please don't hesitate to ask us. We will be happy to help you!

Genuine Ford Part 1L5Z-7000-EA, the Right Choice

To ensure reliability, purchase Ford part # 1L5Z-7000-EA Automatic Transmission Assembly. It is sometimes referred to as Ford Transmission Assembly. In terms of quality and longevity, OEM parts are top-tier. This is because they are made according to Ford's demanding factory specifications and go through strict quality control. This part fits specific Ford Explorer Sport, Explorer Sport Trac, Ranger models.

FordPartsGiant.com is a leading supplier of genuine Ford parts and accessories such as Ford 1L5Z7000EA Automatic Transmission Assembly. On our platform, we provide genuine Ford parts at incredible prices while ensuring top-tier quality. Feel at ease shopping with us, knowing our parts have a hassle-free return policy and rapid delivery service. For detailed Ford parts information, click here.

Why choose Ford Parts Giant

  • Dedicated Service

    Your complete satisfaction is our #1 goal

  • Lowest Prices

    Best deals on genuine OE parts from dealerships

  • Fast Delivery

    Orders are processed and delivered promptly