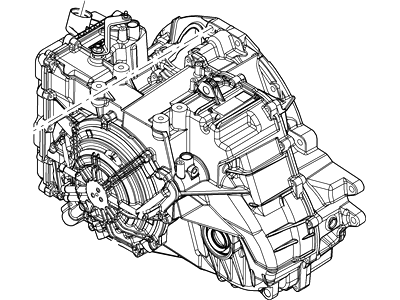
Loosen the front wheel lug nuts, then place the vehicle on a hoist or raise and support the front on jackstands before removing the wheels. Have an assistant depress the brake pedal and loosen the driveaxle/hub nuts. Drain the transaxle fluid into a suitable container for recycling and drain the cooling system. Remove the battery and battery tray, followed by the air filter housing and duct, then the housing bracket bolts and bracket, and the throttle body intake hose. Disconnect the shift cable from the shift lever and housing from the bracket, and if possible, remove the bracket from the transaxle with the cable attached. For 2007 and earlier models, remove the wiper arms and wiper cowl panel, the upper engine torque rod bracket, and on non-CVT vehicles, disconnect the Transaxle Control Module harness electrical connector at the transmission range sensor. Disconnect the ground straps and remove the bolts holding the electrical harness to the transaxle, unbolt the auxiliary electric coolant pump on CVT vehicles without disconnecting the coolant hoses, and remove the upper engine torque rod mount from the engine. Remove the PCV hose, disconnect the throttle body vacuum lines, and remove the bolt securing the power steering hose bracket to the engine. Remove the starter, disconnect the large ground cable from the transaxle, and for CVT vehicles, disconnect the transaxle connector at the firewall and the harness from the transaxle. Remove the four upper transaxle bolts, the driveaxles, disconnect the oxygen sensor connectors, and remove the exhaust y-pipe. Remove the knock sensor(s) and the knock sensor harness from the transaxle. Attach an engine support fixture to the lifting hook at the transaxle end of the engine, disconnect the charcoal canister purge valve lines, and disconnect any power steering hose brackets from the transaxle or subframe. Drain the cooling system, disconnect the lower radiator hose, and secure it out of the way. Remove the steering gear-to-subframe mounting bolts and secure the steering gear to the vehicle body, then remove the left and right inner fender liners and disconnect all electrical harnesses from the subframe. Remove the right and left motor mount nuts from the subframe, the transaxle torque rod bracket from the transaxle, and the transaxle mount subframe bolts. Disconnect the stabilizer bar end links from the struts and the lower control arm ball joints from the steering knuckle. Support the subframe with two floor jacks, remove the subframe brackets and mounting bolts, and slowly lower the subframe while checking for any harnesses, hoses, or components still attached, disconnecting them as necessary before removing the subframe from the vehicle. Remove the two upper bolts and bracket bolts to take out the catalytic converter, then remove the torque converter access cover retainers and the cover. Mark the relationship of the torque converter to the driveplate, remove the converter mounting nuts, and disconnect the transaxle cooling lines from the transaxle and remove the cooling line bracket. Support the transaxle with a jack, preferably a transmission jack, and remove the remaining bolts securing the transaxle to the engine. Move the transaxle away from the engine to disengage it from the engine block dowel pins, carefully lower the transmission jack to the floor, and remove the transaxle, ensuring the torque converter is secure. For 2008 and later V6 models, remove the upper intake manifold, disconnect the auxiliary coolant pump bracket without disconnecting the hoses, and secure the pump out of the way. Disconnect the transaxle connector and harness retainer, remove the transaxle dipstick tube nut, and rotate the tube counterclockwise to remove it. Remove the upper transaxle-to-engine bolts, attach an engine support fixture, remove the front wheels, inner fender liners, and splash shield, detach the power steering line retainers from the subframe, and remove the left and right half-shafts. Disconnect the oxygen sensor connectors and harnesses, remove the bolts attaching the steering gear to the subframe, and secure it to the vehicle. Remove the stabilizer bar brackets from the subframe, disconnect the torque rod bracket from the transaxle, and for AWD models, remove the transfer case. Disconnect the lower control arm ball joints from the steering knuckles, support the subframe using two floor jacks, and remove the subframe brackets and mounting bolts. Slowly lower the subframe, checking for any harnesses, hoses, or components still attached, and remove the subframe from the vehicle. Remove the torque converter access cover by removing the two retainers, mark the relationship of the torque converter to the driveplate, and remove the converter mounting bolts. Remove the transaxle cooler line covers and disconnect the cooler lines from the bypass valve. Support the transaxle with a jack, remove the transaxle mount through-bolt, lower the transaxle about 2 inches, and remove the mount bracket from the transaxle. Remove the remaining transaxle-to-engine bolts, move the transaxle away from the engine to disengage it from the engine block dowel pins, and carefully lower the transmission jack to the floor to remove the transaxle. For 2013 and later four-cylinder models, remove the transaxle cooler line-to-transaxle nuts and disconnect the lines, ensuring the cooling line seals do not get stuck in the transaxle. Remove the temperature control valve and transaxle fluid warmer mounting nuts, disconnect any harness clips from the top of the transaxle, and remove the upper transaxle-to-engine bolts. Remove the starter, then the insulator, mark the relationship of the torque converter to the driveplate, and remove the converter mounting nuts. Disconnect the torque rod bracket from the transaxle, disconnect the steering column coupler at the steering gear, remove the stabilizer bar links from the strut assemblies, and disconnect the tie-rod ends from the steering arms. Disconnect the lower control arm ball joints from the steering knuckle, support the subframe using a pair of floor jacks, and remove the subframe brackets and mounting bolts. Slowly lower the subframe, checking for any harnesses, hoses, or components still attached, and remove the subframe from the vehicle. Remove the driveaxles, disconnect any brackets securing the transaxle cooling lines, and remove the catalytic converter bracket nuts. Support the transaxle with a jack, remove the transaxle mount through-bolt, and then remove the mount bracket from the transaxle. Remove the remaining transaxle-to-engine bolts, move the transaxle away from the engine to disengage it from the engine block dowel pins, and carefully lower the transmission jack to the floor to remove the transaxle, ensuring the torque converter is secure. For installation, follow the reverse of removal, ensuring the torque converter engages properly with the automatic transaxle fluid pump inner gear, aligning the matchmarks made on the torque converter and driveplate, installing all driveplate-to-torque converter nuts before tightening, and tightening all specified bolts to the correct torque. Fill the transaxle with the correct type and amount of automatic transmission fluid and adjust the shift cable as necessary.
Posted by FordPartsGiant Specialist 


