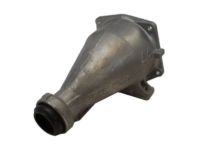
Make sure this part fits

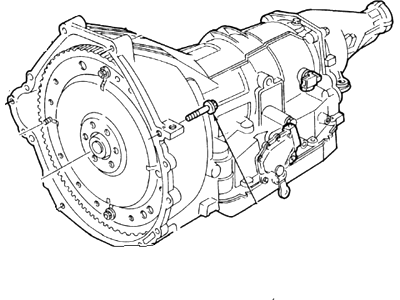
Ford F6AZ-7000-AARM Automatic Transmission Assembly

1996 Ford F6AZ7000AARM

Customer Questions & Expert Answers (3)
Ford F6AZ-7000-AARM Automatic Transmission Assembly
  • Part Description
    Automatic Transmission Assy
  • Replaced By
    F6AZ-7V000-AARM
  • Manufacturer
    Ford
  • Manufacturer's Notes
    This part is discontinued.
Make sure this part fits
  • Related Parts
  • Product Specifications
  • Vehicle Fitment
  • Customer Questions & Expert Answers
  • Product Specifications

    BrandGenuine Ford
    Manufacturer Part NumberF6AZ-7000-AARM, F6AZ7000AARM
    Part DescriptionAutomatic Transmission Assy
    Manufacturer NoteModel #PKE-R, 4.6L - 2V
    Item Dimensions25.0 x 23.5 x 44.7 inches
    ConditionNew
    Fitment TypeDirect Replacement
    ManufacturerFord
    SKUF6AZ-7000-AARM
    WarrantyThis genuine Ford part is guaranteed by Ford's factory warranty.
    Shipping & ReturnShipping Policy Return Policy
    Warning: California’s Proposition 65
  • Vehicle Fitment

    Year Make Model Engine Important vehicle option details
    1996 Ford Crown Victoria8 Cyl 4.6L4AT 4R70W
    1996 Mercury Grand Marquis8 Cyl 4.6L4AT 4R70W
  • Customer Questions & Expert Answers

    Q:
    Is the the correct part for the attached VIN? Posted by FordPartsGiant Specialist
    A:
    You can Select Your Vehicle to check if F6AZ-7000-AARM fits your vehicle.
    Posted by FordPartsGiant Specialist
    Q:
    How to remove and install the transmission on Mercury Grand Marquis? Posted by Customer
    A:
    To take out this transmission it is required to unplug the cable from the minus terminal of the battery and then to securely jack up the car. Solo remove the transmission pan and drain the transmission fluid, reconnect the oil cooler line fitting to avoid contamination. Some bolts will need to be removed to provide access to the torque converter so pull the torque converter cover and pull any associated plugs - Using a white marking paint, paint the torque converter and one stud so that it can easily be re-installed. Take out the torque converter-to-driveplate nuts by utilizing the crankshaft pulley until you have an access; afterward rotate the torque converter as low as possible utilizing the crankshaft pulley so that you can effectively drain the fluid then re-insert the drain plug. Disconnect the starter motor and driveshaft, cancel the speedometer cable/speed sensor, and withdraw all the electrical connectors associated with the transmission; there are also several interconnected exhaust factors which also require deletion. For AOD units, remove the TV cable, the shift cable from the manual lever and the bracket. Safely lift the engine and transmission with the jacks and take out the bolts of the mount-to-transmission extension housing and then drop the crossmember if necessary. Lower the transmission in order to unlock the fluid cooler connections and take away the top and bottom bolts connecting the transmission to the engine, and take out the dipstick tube connection. Shifting the transmission backwards thus freeing it off the dowel pins on the engine block and ensure that the torque converter is holding. The torque converter hub should be slid into the pump, lift the transmission upwards and level it, then thread the torque converter studs through the driveplate holes. Shift the transmission forward until it engages; thereafter fix and tighten the bolts that hold the transmission to the engine and the nuts holding the torque converter to the drive plate. Attach the transmission fluid cooler lines, fasten the transmission mount and crossmember bolts and there should be no need for jacks. Install the dipstick tube, oil cooler line fittings, starter motor, vacuum hoses, shift and TV linkage and the transmission wire harness connectors. Lastly, bolt the torque converter cover, driveshaft, speedo cable/sensor connector, then set the shift linkage, any exhaust parts that were removed, drop the vehicle, fill with the correct transmission fluid, start the car, and look for leaks.
    Posted by FordPartsGiant Specialist
    Q:
    How to remove and install the transmission on Ford Crown Victoria? Posted by Customer
    A:
    To take out this transmission it is required to unplug the cable from the minus terminal of the battery and then to securely jack up the car. Solo remove the transmission pan and drain the transmission fluid, reconnect the oil cooler line fitting to avoid contamination. Some bolts will need to be removed to provide access to the torque converter so pull the torque converter cover and pull any associated plugs - Using a white marking paint, paint the torque converter and one stud so that it can easily be re-installed. Take out the torque converter-to-driveplate nuts by utilizing the crankshaft pulley until you have an access; afterward rotate the torque converter as low as possible utilizing the crankshaft pulley so that you can effectively drain the fluid then re-insert the drain plug. Disconnect the starter motor and driveshaft, cancel the speedometer cable/speed sensor, and withdraw all the electrical connectors associated with the transmission; there are also several interconnected exhaust factors which also require deletion. For AOD units, remove the TV cable, the shift cable from the manual lever and the bracket. Safely lift the engine and transmission with the jacks and take out the bolts of the mount-to-transmission extension housing and then drop the crossmember if necessary. Lower the transmission in order to unlock the fluid cooler connections and take away the top and bottom bolts connecting the transmission to the engine, and take out the dipstick tube connection. Shifting the transmission backwards thus freeing it off the dowel pins on the engine block and ensure that the torque converter is holding. The torque converter hub should be slid into the pump, lift the transmission upwards and level it, then thread the torque converter studs through the driveplate holes. Shift the transmission forward until it engages; thereafter fix and tighten the bolts that hold the transmission to the engine and the nuts holding the torque converter to the drive plate. Attach the transmission fluid cooler lines, fasten the transmission mount and crossmember bolts and there should be no need for jacks. Install the dipstick tube, oil cooler line fittings, starter motor, vacuum hoses, shift and TV linkage and the transmission wire harness connectors. Lastly, bolt the torque converter cover, driveshaft, speedo cable/sensor connector, then set the shift linkage, any exhaust parts that were removed, drop the vehicle, fill with the correct transmission fluid, start the car, and look for leaks.
    Posted by FordPartsGiant Specialist
    If you have any questions about this product, please don't hesitate to ask us. We will be happy to help you!

Genuine Ford Part F6AZ-7000-AARM, the Right Choice

To ensure reliability, purchase Ford part # F6AZ-7000-AARM Automatic Transmission Assembly. It is sometimes referred to as Ford Transmission Assembly. In terms of quality and longevity, OEM parts are top-tier. This is because they are made according to Ford's demanding factory specifications and go through strict quality control. This part fits specific Ford Crown Victoria models. It fits Mercury Grand Marquis.

FordPartsGiant.com is a leading supplier of genuine Ford parts and accessories such as Ford F6AZ7000AARM Automatic Transmission Assembly. On our platform, we provide genuine Ford parts at incredible prices while ensuring top-tier quality. Feel at ease shopping with us, knowing our parts have a hassle-free return policy and rapid delivery service. For detailed Ford parts information, click here.

Why choose Ford Parts Giant

  • Dedicated Service

    Your complete satisfaction is our #1 goal

  • Lowest Prices

    Best deals on genuine OE parts from dealerships

  • Fast Delivery

    Orders are processed and delivered promptly