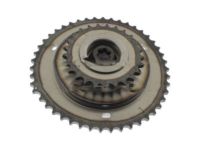
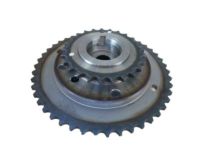
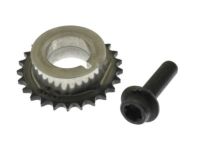
Make sure this part fits

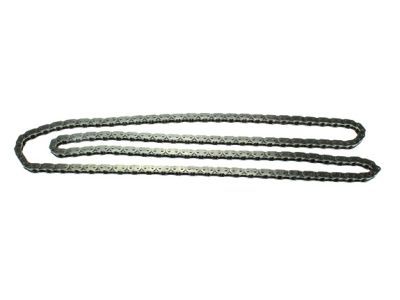
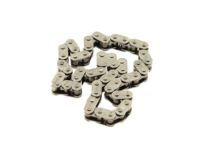
Ford 7T4Z-6268-A Chain - Timing

2007-2012 Ford 7T4Z6268A

Customer Questions & Expert Answers (9)
Ford 7T4Z-6268-A Chain - Timing
  • Part Description
    Chain - Timing
  • Base No.
    6268
  • Manufacturer
    Ford
Make sure this part fits
$31.71 MSRP: $45.17
You Save: $13.46 (30%)
Ships in 1 Business Day
1
ADD TO CART
  • Related Parts
  • Product Specifications
  • Vehicle Fitment
  • Customer Questions & Expert Answers
  • Product Specifications

    BrandGenuine Ford
    Base No.6268
    Manufacturer Part Number7T4Z-6268-A, 7T4Z6268A
    Part DescriptionChain - Timing
    Other NamesTiming Chain
    Item Dimensions6.6 x 4.3 x 1.5 inches
    Item Weight2.20 Pounds
    ConditionNew
    Fitment TypeDirect Replacement
    ManufacturerFord
    SKU7T4Z-6268-A
    WarrantyThis genuine Ford part is guaranteed by Ford's factory warranty.
    Shipping & ReturnShipping Policy Return Policy
    Warning: California’s Proposition 65
  • Vehicle Fitment

    Year Make Model Engine Important vehicle option details
    2007-2010 Ford Edge6 Cyl 3.5L DOHC VCT SMPI6-Speed Automatic Transmission 6F Mid-Range, 6-Speed Automatic Transmission 6F50, Four-Wheel Drive (Full Time) (Left Hand Drive), Four-Wheel Drive (Part Time) (Left Hand Drive), Front-Wheel Drive (Left Hand Drive), Left Hand Drive
    2009-2011 Ford Flex6 Cyl 3.5L DOHC T/C, 6 Cyl 3.5L DOHC VCT SMPI6-Speed Automatic Transmission 6F50, 6-Speed Automatic Transmission 6F55, Four-Wheel Drive (Full Time) (Left Hand Drive), Front-Wheel Drive (Left Hand Drive), Left Hand Drive
    2007-2012 Ford Fusion6 Cyl 3.5L DOHC VCT SMPI5-Speed Automatic Transmission Mazda FNR5, 5-Speed Manual Transmission (G5M), 6-Speed Automatic Transaxle - AWF21, 6-Speed Automatic Transmission 6F Mid-Range, 6-Speed Manual Transmission Mazda G6M, CVT Auto Trans Powersplit Elec, Four-Wheel Drive (Full Time) (Left Hand Drive), Front-Wheel Drive (Left Hand Drive), Left Hand Drive
    2008-2011 Ford Taurus6 Cyl 3.5L DOHC T/C, 6 Cyl 3.5L DOHC VCT SMPI6-Speed Automatic Transaxle - AWF21, 6-Speed Automatic Transmission 6F Mid-Range, 6-Speed Automatic Transmission 6F50, 6-Speed Automatic Transmission 6F55, CVT Select Shift Transmission, Four-Wheel Drive (Full Time) (Left Hand Drive), Four-Wheel Drive (Part Time) (Left Hand Drive), Front-Wheel Drive (Left Hand Drive), Left Hand Drive
    2008-2009 Ford Taurus X6 Cyl 3.5L DOHC VCT SMPI6-Speed Automatic Transmission 6F50, Four-Wheel Drive (Part Time) (Left Hand Drive), Front-Wheel Drive (Left Hand Drive), Left Hand Drive
    2009-2011 Lincoln MKS6 Cyl 3.5L DOHC T/C, 6 Cyl 3.7L DOHC, 6 Cyl 3.7L PFI NA6-Speed Automatic Transmission 6F50, 6-Speed Automatic Transmission 6F55, Four-Wheel Drive (Full Time) (Left Hand Drive), Four-Wheel Drive (Part Time) (Left Hand Drive), Front-Wheel Drive (Left Hand Drive), Left Hand Drive
    2010-2011 Lincoln MKT6 Cyl 3.5L DOHC T/C, 6 Cyl 3.7L DOHC, 6 Cyl 3.7L PFI NA6-Speed Automatic Transmission 6F Mid-Range, 6-Speed Automatic Transmission 6F50, 6-Speed Automatic Transmission 6F55, Four-Wheel Drive (Full Time) (Left Hand Drive), Front-Wheel Drive (Left Hand Drive), Left Hand Drive
    2007-2010 Lincoln MKX6 Cyl 3.5L DOHC VCT SMPI6-Speed Automatic Transmission 6F Mid-Range, 6-Speed Automatic Transmission 6F50, Four-Wheel Drive (Full Time) (Left Hand Drive), Four-Wheel Drive (Part Time) (Left Hand Drive), Front-Wheel Drive (Left Hand Drive), Left Hand Drive
    2007-2012 Lincoln MKZ6 Cyl 3.5L DOHC VCT SMPI5-Speed Automatic Transmission Mazda FNR5, 5-Speed Manual Transmission (G5M), 6-Speed Automatic Transaxle - AWF21, 6-Speed Automatic Transmission 6F Mid-Range, 6-Speed Manual Transmission Mazda G6M, CVT Auto Trans Powersplit Elec, Four-Wheel Drive (Full Time) (Left Hand Drive), Front-Wheel Drive (Left Hand Drive), Left Hand Drive
    2007-2011 Mercury Milan6 Cyl 3.5L DOHC VCT SMPI5-Speed Automatic Transmission Mazda FNR5, 5-Speed Manual Transmission (G5M), 6-Speed Automatic Transaxle - AWF21, 6-Speed Automatic Transmission 6F Mid-Range, 6-Speed Manual Transmission Mazda G6M, CVT Auto Trans Powersplit Elec, Four-Wheel Drive (Full Time) (Left Hand Drive), Front-Wheel Drive (Left Hand Drive), Left Hand Drive
    View More
  • Customer Questions & Expert Answers

    Q:
    Does the PN fit my vehicle? Posted by FordPartsGiant Specialist
    A:
    You can Select Your Vehicle to check if 7T4Z-6268-A fits your vehicle.
    Posted by FordPartsGiant Specialist
    Q:
    How to remove and install the timing chain cover,Timing Chain and Timing Chain Tensioner in four cylinder engine on Lincoln MKX? Posted by Customer
    A:
    To take out the timing cover, then turn off the engine and release the fuel rail pressure and unbuckle the negative terminal of the battery. Remove the water pump pulley bolts, next to the drivebelt and idler pulley you should remove the water pump pulley. After that, stand off the fuel injection high pressure pump and housing in addition to the crankshaft pulley and remove the valve cover so that the engine will stay at TDC. Pull the Crankshaft Position sensor electrical connector and then unbolt the sensor and finally position it with the help of special tool no. 303-1521. On any car of the 2014 model and previous years, unscrew the fastener and remove the bracket of the power steering hose from the bottom of the cover and then with the assistance of any attached stand raise up the engine to a level which will permit you to remove the right engine mount. For 2015 through 2018 models, loosen the turbocharger vacuum control valve bracket nut and harness retainer and push the assembly aside. On 2014 and earlier models, free the power steering pump and take it to the side without detaching the hoses, then, remove the power steering pump bracket bolts and the bracket itself. Take out the crankshaft front oil seal, all the bolts, stud bolts and the timing cover. Removal is performed with similar procedures but in reverse order, cleaning the mating surfaces of all sealant, attaching the crankshaft position sensor with alignment tool no. 303-1521 but not tightening the sensor mounting bolt until the tool is in place, installing new front crankshaft oil seal, tightening the bolts in sequence to torque specification in a definite time period after applying 2.5 mm bead of RTV sealant to the engine cover. To remove the timing chain and the tensioner, the timing cover should be pulled off, the timing chain tensioner compressed so that it can be held with a pin which will ensure that only the round plunger is compressed and not the ratchet mechanism. There are instances that it requires resetting if it is jammed, to reset the ratchet, you temporarily and gently place the tensioner in a vise, release the tension on the ratchet mechanism and then you put back the tensioner. The next step is to take off the two tensioner mounting bolts and this also gives ways to the tensioner and finally the loose timing chain guide and the timing chain. The left chain guide and camshaft sprockets can be unbolted in case of need, and if the camshaft alignment tool was applied before, it is to be withdrawn at this stage. Lose both the camshaft phaser and sprocket bolts but do not remove them. Tighten the nut of hexagonal area of the camshaft using a wrench and simultaneously turning the camshaft sprocket bolt. To install, do not rotate the camshafts during the process, then reinstall the LH chain guide if it was removed, and then the timing chain, and the RH chain guide. Place the timing chain tensioner, and tighten the bolt on the tensioner to lock it in position and then remove the pin that provides pressure to the tensioner. After engaging these areas, insert the camshaft alignment tool and while using a wrench to hold the camshafts, tighten the camshaft sprocket bolts. Lastly, there is the timing cover, the fuel injection pump housing and this must have the camshaft bearing lobe in the lowest position, and other parts installed vice-versa.
    Posted by FordPartsGiant Specialist
    Q:
    How to remove and install the timing chain,tensioner and Timing Cover in four cylinder engine on Ford Taurus? Posted by Customer
    A:
    Relieve the fuel system pressure, then disconnect the negative battery cable. Loosen the water pump pulley bolts, remove the drivebelt and drivebelt idler pulley, and then remove the water pump pulley. Remove the fuel injection high pressure pump and housing. Remove the crankshaft pulley, ensuring the engine remains at TDC with the valve cover removed. Disconnect the Crankshaft Position (CKP) sensor electrical connector and remove the sensor, noting that a new sensor must be installed each time it is removed, along with a special alignment tool. Remove the power steering hose bracket fastener and bracket from the bottom of the cover. Support the engine from above with an engine support fixture and raise it enough to remove the right engine mount. Unbolt and set aside the power steering pump without disconnecting the hoses, then remove the pump bracket bolts and bracket. Remove the crankshaft front oil seal and the timing cover. Installation is the reverse of removal, ensuring to clean the mating surfaces of all sealant, install the engine cover within ten minutes of applying a 2.5 mm bead of RTV sealant, tighten the bolts in sequence to the torque specifications, install a new crankshaft front oil seal, verify proper crankshaft/camshaft timing, and install a new CKP sensor with the necessary alignment tool, not tightening the sensor mounting bolts until the installation tool is in place. For the timing chain and tensioner, remove the timing cover, compress the timing chain tensioner, and place a pin into the hole to hold it in the compressed position, being cautious to compress only the round plunger and not the ratchet mechanism. Remove the two tensioner mounting bolts and then the tensioner, followed by the loose timing chain guide and timing chain. The left chain guide and camshaft sprockets can be removed if necessary. Remove the camshaft alignment tool if installed, loosen both camshaft phaser and sprocket bolts without removing them, and use a wrench on the hexagonal area of the camshaft to hold it while turning the camshaft sprocket. Install the left chain guide if removed, then the timing chain, followed by the right chain guide. Install the timing chain tensioner and tighten the fasteners to the torque specifications, removing the pin to release the tensioner to engage the chain guide. Install the camshaft alignment tool, hold the camshafts in place with a wrench on the hex surface, and tighten the camshaft sprocket bolts to the torque specifications. Finally, install the timing cover, install the fuel injection pump housing ensuring the camshaft lobe is at its lowest point, and complete the remainder of the installation in reverse order.
    Posted by FordPartsGiant Specialist
    Q:
    What are the procedures and precautions for replacing the timing chains and Timing Sprocket in V6 engine on Ford Edge? Posted by Customer
    A:
    These engines some how are not easily serviceable and usually they need special tools. Any procedure that requires getting close to the timing chains should be done with caution, and any disassembly must be done with the special tools; otherwise, an engine is doomed. Again, since this is an interference engine design, if the timing chain has broken, there is bound to be valve and possibly piston damage and this will mean that the cylinder heads have to be pulled. Timing is especially tricky, and errors will lead to serious damage to the engine, for instance. Do not perform this procedure unless very comfortable with this type of repair; if in any doubt seek advice from a specialist. Check all work and be absolutely sure that all is correct before trying to switch on the engine. On 2010 and earlier engines, this procedure must be carried out with the engine removed and a pair of narrow-headed camshaft holding tools are needed. On 3.5L and 3.7L engines, the water pump Is located behind the timing chain, and it is convenient to replace the water pump during the timing chain replacement. First, you keep off the negative terminal of the battery, then the valve covers along with the timing chain cover. As for the 2.7L models, replace the old crankshaft pulley bolt, rotate the engine to the direction of the keyway on the crankshaft being in the 11 o'clock position, and be certain that the triangle timing marks on VCT units. Take off the right side tensioner and guide, take the timing chain off the VCT units, and turn over pulley bolt. The same should be done to the left-side chain with the same specification of the alignment of the timing marks. For removing the VCT unit engage the special tool over the camshafts to pull the locking tabs the center bolts of VCT unit and then slide off the VCT unit from the camshafts. Finally for 2010 and earlier 3.5L and 3.7L models replace the crankshaft sprocket bolt, align the engine TDC for the cylinder number 1, and fit the special holding tools for the camshaft. The following should be done: VCT assembly mounting bolts, primary timing chain tensioner and chain should be taken out. For the models produced after the year 2011, make the engine clockwise rotate until the VCT units align themselves to 90 degrees of camshaft position and then remove the tubes of valve train oil and install the two special camshaft locking tools. Take out the principal timing chain and the second timing chains, if they are required. For installation make sure the timing marks are aligned, install new VCT unit center bolts and tighten to the specified torque value. Insert all the other parts in reverse manner, then turn the crankshaft by your hand at least two full turns and check whether there is any DO NOT APPLY resistance. Last is to fit a new oil filter, replace engine oil and coolant and start the engine let it to warm up to examine any leakage.
    Posted by FordPartsGiant Specialist
    Q:
    How should the timing chain tensioner be handled for the 2018 Ford Fusion? Posted by Customer
    A:
    Compress the timing chain tensioner and place a pin (a drill bit or paper clip will work) into the hole to hold it in the compressed position. Note: Compress only the round plunger on the tensioner and not the ratchet mechanism.
    Posted by FordPartsGiant Specialist
    See expert answers on similar Timing Chain
    Q:
    What is the next step after verifying TDC for the 2017 Ford Fusion? Posted by Customer
    A:
    Recheck the marks on the sprockets. If there are no marks on the chain links, mark the links directly above the camshaft sprocket marks.
    Posted by FordPartsGiant Specialist
    Q:
    What are the steps for removing the timing chain on the 2018 Lincoln MKX? Posted by Customer
    A:
    32. Turn the engine clockwise until the VCT units (camshaft sprockets) on each intake camshaft are positioned at 90-degrees (12 o'clock) in relation to the top surface of the cylinder heads. 33. Remove the bolts that secure the valve train oil tubes to each cylinder head (Remove three of the camshaft cap bolts to remove the valve train oil tubes). 34. Install the special camshaft locking tools (303-1248), with the tools holding the flats on each camshaft. 35. If you can't see the timing marks on the timing chain, add a paint dot to align with the marks on the VCT units and the crankshaft timing sprocket. 36. Remove the two bolts and the primary timing chain tensioner arm, then unbolt and remove the two tensioners. 37. Remove the mounting bolts and remove the lower left chain guide, then the lower right chain guide. 38. Remove the bolts securing the VCT solenoids to the cylinder heads (Remove the VCT oil control solenoid mounting bolts). You may have to twist or wiggle the solenoids to disengage them. 39. Keep the VCT solenoids in clean plastic sandwich bags, marked with their location. 40. Remove the primary timing chain. 41. The two camshafts on each cylinder head are jointly driven by a smaller secondary timing chain. 42. Depress and lock the secondary chain tensioner on each bank, using the factory tool (303-1530) inserted in the large hole at the first camshaft bearing cap, or use a length of threaded rod and nuts to hold the tensioner down, by pushing from the camshaft bearing cap. 43. With the camshafts still locked at TDC, remove the mounting bolts from the VCT units (camshaft sprockets), then remove the sprockets and secondary timing chains from the camshafts. 44. If the primary timing chain sprocket (at the center of the front of the block) is to be replaced, remove the nine bolts securing the plate that mounts the gear to the front of the block.
    Posted by FordPartsGiant Specialist
    Q:
    How should the camshafts on the rear cylinder head be set in their neutral position for the 2011 Ford Taurus? Posted by Customer
    A:
    Continue to turn the crankshaft clockwise until the keyway is at the 3 o'clock position, which will set the camshafts on the rear cylinder head in their neutral position.
    Posted by FordPartsGiant Specialist
    Q:
    What should be removed after the left chain guide and camshaft sprockets for the 2018 Ford Edge? Posted by Customer
    A:
    Remove the camshaft alignment tool (if installed).
    Posted by FordPartsGiant Specialist
    If you have any questions about this product, please don't hesitate to ask us. We will be happy to help you!

Genuine Ford Part 7T4Z-6268-A, the Right Choice

To ensure reliability, purchase Ford part # 7T4Z-6268-A Chain - Timing. It is sometimes referred to as Ford Timing Chain. In terms of quality and longevity, OEM parts are top-tier. This is because they are made according to Ford's demanding factory specifications and go through strict quality control. This part fits specific Ford Flex, Fusion, Taurus X models. It fits Lincoln MKS, MKT, MKX. It also fits Mercury Milan, Sable.

FordPartsGiant.com is a leading supplier of genuine Ford parts and accessories such as Ford 7T4Z6268A Chain - Timing. On our platform, we provide genuine Ford parts at incredible prices while ensuring top-tier quality. Feel at ease shopping with us, knowing our parts have a hassle-free return policy and rapid delivery service. For detailed Ford parts information, click here.

Why choose Ford Parts Giant

  • Dedicated Service

    Your complete satisfaction is our #1 goal

  • Lowest Prices

    Best deals on genuine OE parts from dealerships

  • Fast Delivery

    Orders are processed and delivered promptly