Make sure this part fits

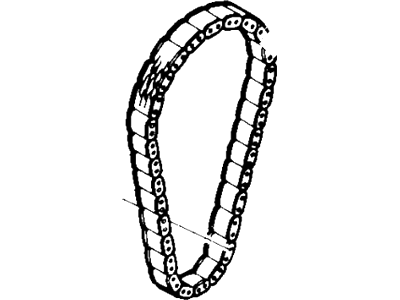
Ford C8SZ-6268-A Chain - Timing

1980-1987 Ford C8SZ6268A

Customer Questions & Expert Answers (9)
Ford C8SZ-6268-A Chain - Timing
  • Part Description
    Chain - Timing
  • Manufacturer
    Ford
  • Manufacturer's Notes
    This part is discontinued.
Make sure this part fits
  • Related Parts
  • Product Specifications
  • Vehicle Fitment
  • Customer Questions & Expert Answers
  • Product Specifications

    BrandGenuine Ford
    Manufacturer Part NumberC8SZ-6268-A, C8SZ6268A
    Part DescriptionChain - Timing
    Other NamesTiming Chain
    Manufacturer Note52 links
    Item Dimensions5.0 x 4.6 x 1.9 inches
    Item Weight1.70 Pounds
    ConditionNew
    Fitment TypeDirect Replacement
    ManufacturerFord
    SKUC8SZ-6268-A
    WarrantyThis genuine Ford part is guaranteed by Ford's factory warranty.
    Shipping & ReturnShipping Policy Return Policy
    Warning: California’s Proposition 65
  • Vehicle Fitment

    Year Make Model Engine Important vehicle option details
    1986-1987 Ford Aerostar4 Cyl 2.3L, 6 Cyl 3.0L4AT A4LD, 5MT
    1980-1987 Ford Bronco8 Cyl 5.0L, 8 Cyl 5.8L3AT C6, 4AT AOD, 4MT
    1985-1987 Ford Bronco II4 Cyl 2.3L, 6 Cyl 2.9L4AT A4LD, 4MT, 5MT
    1980-1987 Ford E-1508 Cyl 5.0L, 8 Cyl 5.8L, 8 Cyl 7.5L3AT C6, 3MT, 4AT AOD, 4MT
    1980-1987 Ford E-2508 Cyl 5.0L, 8 Cyl 5.8L, 8 Cyl 6.6L, 8 Cyl 7.5L3AT C6, 3MT, 4AT AOD
    1980-1987 Ford E-350/E-350 Super Duty8 Cyl 5.0L, 8 Cyl 5.8L, 8 Cyl 6.6L, 8 Cyl 7.5L3AT C6, 3MT, 4AT E4OD, 4MT
    1980-1987 Ford F-1506 Cyl 3.8L, 8 Cyl 5.0L, 8 Cyl 5.8L3AT C5, 3AT C6, 3MT, 4AT AOD, 4MT
    1980-1987 Ford F-2508 Cyl 5.0L, 8 Cyl 5.8L, 8 Cyl 6.6L, 8 Cyl 7.5L3AT C6, 3MT, 4AT AOD, 4MT, 5MT
    1980-1987 Ford F-3508 Cyl 5.0L, 8 Cyl 5.8L, 8 Cyl 6.6L, 8 Cyl 7.5L3AT C6, 4MT, 5MT
    1983-1987 Ford Ranger4 Cyl 2.0L, 4 Cyl 2.3L, 6 Cyl 2.9L3AT C3, 3AT C5, 4AT A4LD, 4MT, 5MT
  • Customer Questions & Expert Answers

    Q:
    Does the PN fit my vehicle? Posted by FordPartsGiant Specialist
    A:
    You can Select Your Vehicle to check if C8SZ-6268-A fits your vehicle.
    Posted by FordPartsGiant Specialist
    Q:
    How to remove and install Timing Chain and Timing Cover in V8 engine on Ford F-250? Posted by Customer
    A:
    To dismantle the components, turn and plug the fuel inlet line at the fuel pump, also the fuel line at the carburetor and remove the fuel feed line from the fuel pump. Next, it is necessary to unbolt the radiator and a water pump. There are bolts and washers securing the crankshaft pulley to the vibration damper, remove the crankshaft pulley and large bolt and washer joining the vibration damper to the crankshaft. Remove the vibration damper with the help of a puller, then, if it is possible, the damper key and the crankshaft pulley spacer if it exists. Go ahead and take out the oil pan-to-front cover bolts and the timing cover retaining bolts. Trim the oil pan seal to be level with the engine block mating surface and remove the timing cover. Inspect the condition of the timing chain; measure the deflection, if found to be beyond the manufacturers requirement, replace the timing chain and sprockets. If removal is required, position the timing marks, then take out the camshaft sprocket retaining bolt together with the washer, and the eccentric of the fuel pump if there is, as well as the front oil slinger if there is any. You have to slide the timing chain and sprockets in one piece out of the way and the timing gasket cover and the oil pan seal should be removed at this time in order to clean all the gasket material. For installation, it is advisable that at the outer circumference of the additional crankshaft oil seal, coil of engine oil before the seal fits into the cover until it snaps in fully. Reconnect the timing chain and sprockets so that the timing marks match with one another, then fit the chain and sprockets on the camshaft and crankshaft to have the timing marks aligned. In the case of car with this feature, fit the oil slinger and the fuel pump eccentric, camshaft sprocket retaining bolt and washer then tighten the bolt to the required torque. Place the pan gasket on the surface of the oil pan, apply RTV sealant on the gasket surface of the oil pan, install new front cover to oil pan seal and lastly apply the RTV sealant on the four corners of the mating surfaces of the two parts. Paint the gasket surfaces of the cover and fit the new gasket; paint the surface of the block that mates with the cover with sealant. Set the timing cover on the block correctly, without rubbing front seal or misplacing any of the gasket. The cover alignment tool/harmonic balancer is used to align; it's alternatively advisable to coat the bolts' threads with RTV sealant. While holding the cover in alignment tighten the cover bolts and the oil pan-to-front cover retaining bolts to the specified torque then remove the alignment tool or punch. Put some thin oil on the crank shaft contact area of the seal, fit the crank shaft spacer if used, then fit the vibration damper. Specify the damper and its retaining bolt and washer, tightening to the amount of torque required as appropriate. Fit the crankshaft anti-vibration pulley, tighten the crankshaft anti-vibration pulley bolts. The rest of the installation is the exact opposite of removal; it means that all bolts need to be tightened to the right standard. If coolant has leaked into the oil pan during the process, then discharge the crankcase oil, remove the oil filter, replace it with the new one and then add the correct grade and quantity of oil. Lastly, crank the engine at a fast idle speed, check for any anti freeze leaks and oil leaks and ensure the engine idle speed is correct and the ignition timing is right.
    Posted by FordPartsGiant Specialist
    Q:
    How to remove and install Timing Chain and Timing Cover in V8 engine on Ford Bronco? Posted by Customer
    A:
    To dismantle the components, turn and plug the fuel inlet line at the fuel pump, also the fuel line at the carburetor and remove the fuel feed line from the fuel pump. Next, it is necessary to unbolt the radiator and a water pump. There are bolts and washers securing the crankshaft pulley to the vibration damper, remove the crankshaft pulley and large bolt and washer joining the vibration damper to the crankshaft. Remove the vibration damper with the help of a puller, then, if it is possible, the damper key and the crankshaft pulley spacer if it exists. Go ahead and take out the oil pan-to-front cover bolts and the timing cover retaining bolts. Trim the oil pan seal to be level with the engine block mating surface and remove the timing cover. Inspect the condition of the timing chain; measure the deflection, if found to be beyond the manufacturers requirement, replace the timing chain and sprockets. If removal is required, position the timing marks, then take out the camshaft sprocket retaining bolt together with the washer, and the eccentric of the fuel pump if there is, as well as the front oil slinger if there is any. You have to slide the timing chain and sprockets in one piece out of the way and the timing gasket cover and the oil pan seal should be removed at this time in order to clean all the gasket material. For installation, it is advisable that at the outer circumference of the additional crankshaft oil seal, coil of engine oil before the seal fits into the cover until it snaps in fully. Reconnect the timing chain and sprockets so that the timing marks match with one another, then fit the chain and sprockets on the camshaft and crankshaft to have the timing marks aligned. In the case of car with this feature, fit the oil slinger and the fuel pump eccentric, camshaft sprocket retaining bolt and washer then tighten the bolt to the required torque. Place the pan gasket on the surface of the oil pan, apply RTV sealant on the gasket surface of the oil pan, install new front cover to oil pan seal and lastly apply the RTV sealant on the four corners of the mating surfaces of the two parts. Paint the gasket surfaces of the cover and fit the new gasket; paint the surface of the block that mates with the cover with sealant. Set the timing cover on the block correctly, without rubbing front seal or misplacing any of the gasket. The cover alignment tool/harmonic balancer is used to align; it's alternatively advisable to coat the bolts' threads with RTV sealant. While holding the cover in alignment tighten the cover bolts and the oil pan-to-front cover retaining bolts to the specified torque then remove the alignment tool or punch. Put some thin oil on the crank shaft contact area of the seal, fit the crank shaft spacer if used, then fit the vibration damper. Specify the damper and its retaining bolt and washer, tightening to the amount of torque required as appropriate. Fit the crankshaft anti-vibration pulley, tighten the crankshaft anti-vibration pulley bolts. The rest of the installation is the exact opposite of removal; it means that all bolts need to be tightened to the right standard. If coolant has leaked into the oil pan during the process, then discharge the crankcase oil, remove the oil filter, replace it with the new one and then add the correct grade and quantity of oil. Lastly, crank the engine at a fast idle speed, check for any anti freeze leaks and oil leaks and ensure the engine idle speed is correct and the ignition timing is right.
    Posted by FordPartsGiant Specialist
    Q:
    How to remove and install Timing Chain on Ford Bronco II? Posted by Customer
    A:
    To service the 2.2L Diesel Engine, first bring the engine to No. 1 piston at TDC on the compression stroke, then disconnect the ground cables from the batteries and drain the cooling system, ensuring to use a sealable container for the coolant to prevent harm to pets. Next, remove the radiator fan shroud and cooling fan, and drain the engine oil from the crankcase while wearing protective gloves to minimize exposure to used oil. Loosen the idler pulley to remove the NC compressor belt and the power steering belt, then take out the power steering pump and mounting bracket. Continue by loosening and removing the alternator and vacuum pump drive belts, followed by the water pump and crankshaft pulley using a suitable puller. Remove the timing case cover by taking out the retaining nuts and bolts, and installation is the reverse of removal. For the 2.8L and 2.9L engines, start by removing the oil pan and draining the coolant, again using a sealable container. Remove the radiator, NC compressor, and power steering bracket without disconnecting the refrigerant lines, then take out the alternator, Thermactor pump, and drive belts, followed by the fan, water pump, and hoses. Remove the drive pulley from the crankshaft and the front cover retaining bolts, tapping lightly if necessary to break the gasket seal. If the front cover oil seal needs replacement, support the cover while driving out the old seal and install a new one coated with Lubriplate®. Clean the mating surfaces, apply sealer, and install the front cover with the gasket, ensuring proper alignment and torque specifications. Finally, reinstall the oil pan, water pump, hoses, NC compressor, alternator, and drive belts, adjusting tension as needed, then fill and bleed the cooling system, operating the engine to check for leaks. For the 4.0L engine, disconnect the negative battery cable, remove the oil pan, and drain the cooling system while following the same precautions for coolant disposal. Remove the air conditioning compressor and power steering pump without disconnecting the lines, then take out the alternator, fan, water pump, drive pulley/damper, and crankshaft timing sensor. After removing the front cover, reinstall it along with the timing sensor, drive pulley/damper, water pump, fan, alternator, and power steering pump. Fill the cooling system, install the oil pan, fill the crankcase, reconnect the battery, start the engine, and check for leaks while road testing the vehicle for proper operation.
    Posted by FordPartsGiant Specialist
    Q:
    What should be done with the fuel pump shield, if equipped for the 1992 Ford F-250? Posted by Customer
    A:
    Remove the fuel pump shield.
    Posted by FordPartsGiant Specialist
    Q:
    How do you check the timing gear backlash for the 1986 Ford F-250? Posted by Customer
    A:
    Install a dial indicator on the cylinder block and position the stem against the timing gear. Zero the pointer on the dial indicator, hold the crankshaft still, and move the camshaft timing gear until all slack is taken up. Read the dial indicator to obtain the gear backlash.
    Posted by FordPartsGiant Specialist
    Q:
    How do you check the timing gear runout for the 1990 Ford Bronco? Posted by Customer
    A:
    Install a dial indicator on the engine block with the stem touching the face of the timing gear. Hold the camshaft gear against the camshaft thrust plate and zero the indicator. Rotate the crankshaft to turn the camshaft while holding the camshaft gear against the thrust plate. Rotate the gear through one complete revolution of the camshaft and observe the reading on the dial indicator during this revolution.
    Posted by FordPartsGiant Specialist
    Q:
    What should be removed after the drivebelt for the 1992 Ford Bronco? Posted by Customer
    A:
    Remove the water pump pulley.
    Posted by FordPartsGiant Specialist
    Q:
    What should be checked after removing the tensioner clip for the 1988 Ford Bronco II? Posted by Customer
    A:
    Check camshaft end-play.
    Posted by FordPartsGiant Specialist
    If you have any questions about this product, please don't hesitate to ask us. We will be happy to help you!

Genuine Ford Part C8SZ-6268-A, the Right Choice

To ensure reliability, purchase Ford part # C8SZ-6268-A Chain - Timing. It is sometimes referred to as Ford Timing Chain. In terms of quality and longevity, OEM parts are top-tier. This is because they are made according to Ford's demanding factory specifications and go through strict quality control. This part fits specific Ford Bronco, F-150, Ranger models.

FordPartsGiant.com is a leading supplier of genuine Ford parts and accessories such as Ford C8SZ6268A Chain - Timing. On our platform, we provide genuine Ford parts at incredible prices while ensuring top-tier quality. Feel at ease shopping with us, knowing our parts have a hassle-free return policy and rapid delivery service. For detailed Ford parts information, click here.

Why choose Ford Parts Giant

  • Dedicated Service

    Your complete satisfaction is our #1 goal

  • Lowest Prices

    Best deals on genuine OE parts from dealerships

  • Fast Delivery

    Orders are processed and delivered promptly