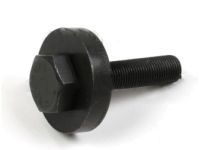
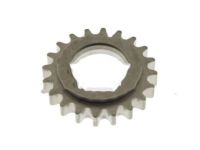
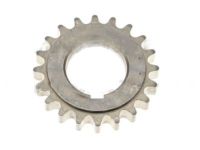
Make sure this part fits

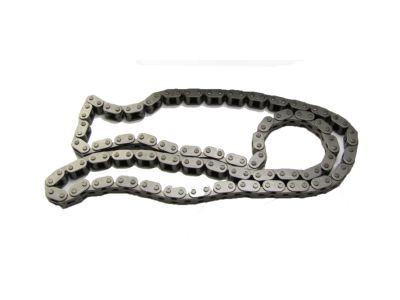
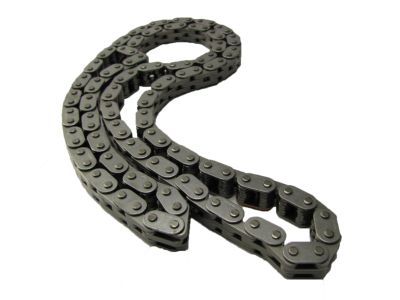
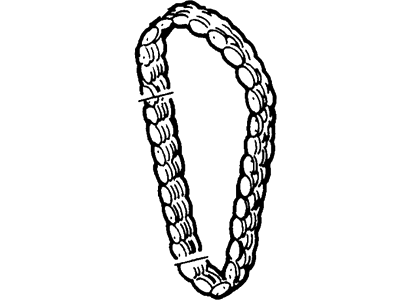
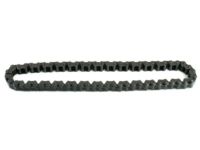
Ford F3LY-6268-A Chain - Timing

1993-2005 Ford F3LY6268A

Customer Questions & Expert Answers (15)
Ford F3LY-6268-A Chain - Timing
  • Part Description
    Chain - Timing
  • Replaced By
    5W7Z-6268-AA
  • Manufacturer
    Ford
Make sure this part fits
$49.36 MSRP: $72.17
You Save: $22.81 (32%)
Ships in 1 Business Day
1
ADD TO CART
  • Related Parts
  • Product Specifications
  • Vehicle Fitment
  • Customer Questions & Expert Answers
  • Product Specifications

    BrandGenuine Ford
    Manufacturer Part NumberF3LY-6268-A, F3LY6268A
    Part DescriptionChain - Timing
    Item Dimensions5.2 x 4.5 x 2.9 inches
    Item Weight1.90 Pounds
    ConditionNew
    Fitment TypeDirect Replacement
    ManufacturerFord
    SKUF3LY-6268-A
    WarrantyThis genuine Ford part is guaranteed by Ford's factory warranty.
    Shipping & ReturnShipping Policy Return Policy
    Warning: California’s Proposition 65
  • Vehicle Fitment

    Year Make Model Engine Important vehicle option details
    1994-2004 Ford Crown Victoria8 Cyl 4.6L4AT 4R70W, 4AT 4R75W, 4AT AOD-E
    1997-2005 Ford E-1508 Cyl 4.6L, 8 Cyl 4.6L Romeo SOHC EFI4AT 4R100, 4AT 4R70W, 4AT E4OD, 4-Speed Automatic Transmission 4R70W (AODE), 4-Speed Automatic Transmission 4R75E Livonia, 4-Speed Automatic Transmission AODEW/4R70E W/TSS, 4-Speed Automatic Transmission AODEW/4R75E W/TSS, 5-Speed Automatic Transmission 5R110W - HI/Torque, 5-Speed Automatic Transmission 5R110W NAAO
    2003-2005 Ford E-2508 Cyl 4.6L, 8 Cyl 4.6L Romeo SOHC EFI4AT 4R100, 4AT 4R70W, 4-Speed Automatic Transmission 4R70W (AODE), 4-Speed Automatic Transmission 4R75E Livonia, 4-Speed Automatic Transmission AODEW/4R70E W/TSS, 4-Speed Automatic Transmission AODEW/4R75E W/TSS, 5-Speed Automatic Transmission 5R110W - HI/Torque, 5-Speed Automatic Transmission 5R110W NAAO
    2005 Ford E-350/E-350 Super Duty8 Cyl 4.6L Romeo SOHC EFI4-Speed Automatic Transmission 4R70W (AODE), 4-Speed Automatic Transmission 4R75E Livonia, 4-Speed Automatic Transmission AODEW/4R70E W/TSS, 4-Speed Automatic Transmission AODEW/4R75E W/TSS, 5-Speed Automatic Transmission 5R110W - HI/Torque, 5-Speed Automatic Transmission 5R110W NAAO
    2005 Ford E-450 Super Duty8 Cyl 4.6L Romeo SOHC EFI4-Speed Automatic Transmission 4R70W (AODE), 4-Speed Automatic Transmission 4R75E Livonia, 4-Speed Automatic Transmission AODEW/4R70E W/TSS, 4-Speed Automatic Transmission AODEW/4R75E W/TSS, 5-Speed Automatic Transmission 5R110W - HI/Torque, 5-Speed Automatic Transmission 5R110W NAAO
    1997-2004 Ford Expedition8 Cyl 4.6L, 8 Cyl 4.6L Romeo SOHC EFI4AT 4R100, 4AT 4R70W, 4AT 4R75W, 4AT E4OD, 4-Speed Automatic Transmission 4R70W (AODE), 4-Speed Automatic Transmission 4R75E Livonia, 4-Speed Automatic Transmission AODEW/4R75E W/TSS, 6-Speed Automatic Transmission (6R75), 6-Speed Automatic Transmission (6R80), Four-Wheel Drive (Part Time) (Left Hand Drive), Left Hand Drive, Rear-Wheel Drive (Left Hand Drive)
    2002-2005 Ford Explorer8 Cyl 4.6L Romeo SOHC EFI5-Speed Automatic Transmission 5R55S, 5-Speed Automatic Transmission 5R55W, 5-Speed Manual Transmission (M5R4), 6-Speed Automatic Transmission (6R80), 6-Speed Automatic Transmission 6R60, Four-Wheel Drive (Full Time) (Left Hand Drive), Four-Wheel Drive (Part Time) (Left Hand Drive), Four-Wheel Drive (Part Time) (Right Hand Drive), Left Hand Drive, Rear-Wheel Drive (Left Hand Drive)
    1997-2005 Ford F-1508 Cyl 4.6L, 8 Cyl 4.6L Romeo SOHC EFI, 8 Cyl 4.6L Windsor SOHC EFI4AT, 4AT 4R100, 4AT 4R70W, 4AT E4OD, 4-Speed Automatic Transmission 4R75E Livonia, 4-Speed Automatic Transmission AODEW/4R70E W/TSS, 4-Speed Automatic Transmission AODEW/4R75E W/TSS, 5MT, 5-Speed Manual Transmission - Mazda M5R2-C, Four-Wheel Drive (Part Time) (Left Hand Drive), Left Hand Drive, Rear-Wheel Drive (Left Hand Drive)
    1997-1999 Ford F-2508 Cyl 4.6L4AT 4R100, 4AT 4R70W, 4AT E4OD, 5MT
    1996-2005 Ford Mustang8 Cyl 4.6L, 8 Cyl 4.6L SOHC EFI, 8 Cyl 5.8L DOHC SC4AT 4R70W, 4AT 4R75W, 4-Speed Automatic Transmission 4R70W (AODE), 5MT, 5-Speed Automatic Transmission 5R55S, 5-Speed Manual Transmission (T450D), 5-Speed Manual Transmission T5OD, 5-Speed Manual Transmission TR3650, 6-Speed Manual Transmission Tremec T56, Left Hand Drive, Rear-Wheel Drive (Left Hand Drive)
    View More
  • Customer Questions & Expert Answers

    Q:
    Is the the correct part for the attached VIN? Posted by FordPartsGiant Specialist
    A:
    You can Select Your Vehicle to check if F3LY-6268-A fits your vehicle.
    Posted by FordPartsGiant Specialist
    Q:
    How to remove and install the timing chain,Timing Chain Tensioner and Timing Sprocket in V8 engine on Ford F-150? Posted by Customer
    A:
    Engines are intricate, especially during their servicing, and especially timing chains and camshaft servicing or if there is a cylinder head change. It would he wise to do a lot of research before undertaking the repairs and if at any one time you are in doubt, perhaps it is wise to seek professional help. The removal process starts with the removal of the negative battery terminal and the spark plugs with cylinder number one positioned at the top dead centre. Valve covers and timing chain covers must be removed, after which the crankshaft position sensor toothed wheel must also be removed, while taking note of its installed direction. The crankshaft has to be rotated such that it aligns to certain timing marks and various tools have to be used to lock the camshaft from rotating. Timing chain tensioners and chains are then released and pulled out together with the stationary guides and if required the camshaft sprockets can also be interchanged. Different procedures to do with the removal of rocker arms, the inspection of sprocket teeth as well as the examination of the condition of chains are provided for different engine types, and there is a strong recommendation that worn out parts be replaced. Among them are timing chain guides and sprockets that require proper installation and positioning; and tensioners that have to be compressed prior to any lock to keep the engines well functioning. Following these procedures the rocker arms are fitted and with the crankshaft turned an increase in friction is detected showing problems. The final step of the installation process is the reversal of the removal process with due focus being paid on replacement of all Timing marks and other related parts.
    Posted by FordPartsGiant Specialist
    Q:
    How to remove and install the timing chain and sprockets in 4.0L engine on Ford Mustang? Posted by Customer
    A:
    This process is elaborate and involves the use of special tools and implies the withdrawal of the engine from the vehicle mostly on the timing chain, cassettes and sprockets. In the first step, it is advised to retract the rocker arms and the tools of the valve lash adjusters before working on the cylinder heads, timing chains and the jackshaft chains. Once the engine was dismantled and placed on the engine stand, most of the accessories such as the lower oil pan cover, the oil pump pickup tube and the crankcase reinforcement section had to be removed. Remove the front cover from the engine block, with the reservation that the water pump might be still connected. The engine employs a jackshaft to turn the camshaft timing chains as well as oil pump; the left cylinder bank camshaft is driven by a chain at front while the right one is driven by a chain from the rear of the jackshaft. Unbolt the jackshaft chain tensioner, and guide then unbolt the middle bolt of the sprocket of the jackshaft chain. If it is not already done, then remove the upper bolt of the left-side casket and the lower casket bolt and, in addition to that, take out the cassette along with the chain and then the jackshaft with the camshaft sprockets. If choosing the right camshaft chain, then it is necessary to remove the camshaft sprocket bolt and the upper cassette bolt. The large plug at the rear of the jackshaft must be unplugged and it is necessary to order a new one before reassembly, also unbolt the Torx at the spacer, and the lower cassette bolt, and remove the right-side cassette and chain. When the crankshaft has been turned, make sure the number one piston is at the top of its lift with the crankshaft keyway placed upright: counter clockwise rotation can result in improper engine timing. Place the appropriate camshaft timing chain cassette and bolt on the rear jack shaft sprocket; fit the left camshaft timing chain cassette; tighten all the bolts to the recommended torque. Place the jackshaft chain over the jackshaft sprocket, fit into the crankshaft sprocket and fasten the jackshaft sprocket with the help of the bolt. Mount the jackshaft chain guide and tensioner, while removing the upper timing cover and cleaning the front surface of the engine block and front cover so that a new gasket can be fitted and the front cover bolts tightened. Adjust the camshaft timing for both camshaft sprockets using the above tools and then proceed to reverse the process that was followed in removal. Last but not the least, pour the oil into the crankcase, replace the filter, add coolants to the engine and start the engine in order to check for any signs of leakage.
    Posted by FordPartsGiant Specialist
    Q:
    How do you remove the timing chain(s) and Timing Chain Tensioner on Lincoln Town Car Overhead cam (OHC) engine? Posted by Customer
    A:
    To take off the timing chain(s), just disconnect the negative battery cable, and place the number one cylinder at TDC. Remove parts to access the timing chain cover then, detach the cover together with camshaft roller followers. Use camshaft holding tools to prevent movement. Then remove the right side timing chain tensioner, followed by the right timing chain and stationary guide. Repeat for the left side teeth, guides, chains keys wear or damage replace any defective parts. After that, you should inspect the tensioner operation and oil feed too as well tooth condition of the sprocket. However, this is only applicable when installing install stationary chain guides during installation and aligning crankshaft sprockets properly. The left time chain should be installed on the camshaft sprocket while aligning the bright link with the dimple then loop it under the crankshaft sprocket. Also, you should line up timing marks and repeat for the right side of the engine vehicle.
    Posted by FordPartsGiant Specialist
    Q:
    How to timing chain inspection and removal with the cover on Lincoln Town Car Overhead valve (OHV)engines? Posted by Customer
    A:
    To check the timing chain with the cover on, remove the battery cable and position the number one cylinder at TDC. Turn the crankshaft 360 degrees, place the timing indication before TDC, and remove the valve cover on the right side. Affix a dial indicator to measure chain slackening then rotate the crankshaft to TDC. If it shifted by more than 10 degrees, one must replace both sprockets and chains. While inspecting without a cover, get rid of all obstacles barring access to its top surface by pulling away accessories; then move this top part of the engine block with the number one piston on it towards TDC. Measure chain deflection after taking off the balancer and cover; if it is greater than 1/2 inch replace it with a new chain. Replace gears in case they are broken or damaged. Remove it when the number one piston is at TDC, open up the top part of the engine, align sprocket marks, and slide out this device together with all its parts including chains as well as sprockets.
    Posted by FordPartsGiant Specialist
    Q:
    How to inspect and replace a timing chain and sprockets on Mercury Grand Marquis? Posted by Customer
    A:
    Remove the negative terminal of the battery and turn the engine to the interface of the piston travel in the number one cylinder. The crankshaft should be rotated 360 degrees and the number one piston should be several degrees before the TDC. Take of the right valve cover and install the dial indicator to the cylinder head so that the plunger part of the instrument touches the number one rocker arm. To do this turn the crankshaft in clockwise direction until the number one piston is on TDC for the second time then read the dial indicator on right side of the timing chain near the pulley and set it to zero. Then rotate the crankshaft anti-clockwise slowly until the pointer of the dial indicator rests on the upward movement, so identify the number of piston stroke it has traveled from the TDC point. In the event that the mark has shifted greater than 10 degrees, replace the timing chain and the sprockets. For timing chain inspection, once again, remove the negative battery cable and remove any parts that will limit the access to the timing chain cover but retain the hoses and wires. Remove the bolts from the accessory brackets and turn the number one piston to TDC on the compression stroke and do not turn the crankshaft until the chain and sprockets are replaced. Unbolt the vibration damper and unbolt the timing chain cover from the block and the oil pan being careful not to mar the cover. Turn the crankshaft in an anti-clockwise direction in order to tire the chain loosely on the left side then compare the degree of chain deflection from a fixed point on the block. If the deflection measurement is found to be more than ½ inch then fitting of a new timing chain and sprockets should be done as a set. Check the condition of the camshaft gear; original ones are aluminum with a nylon surface; they tend to chip, and these small particles may cause restrictions in the oil pump pick-up screen. Also, it is recommended to examine the crankshaft gear for such problems. For timing chain and sprocket removal ensure that the number one piston is at TDC to temporarily avoid crank shaft movement, then remove timing chain cover. Set the timing marks of the crankshaft and the camshaft sprockets before you remove them, if necessary. Take off the three camshaft sprocket mounting bolts and unbolt the chain from both the sprockets. As an installation procedure, always clean the cover and the engine block surfaces so that there is no trace of the old gasket material. Even check the cover flange for some distortion and locate the keyway in the crankshaft sprocket engaging on the Woodruff key while fitting the crank, sprocket to the crankshaft without hammering the sprocket. Rotate the crankshaft until the key is at the top dead center, lay the chain over the camshaft pulley and rotate it until the timing indicator is down. Make sure that there is straight line drawn from the center of the camshaft, the camshaft timing mark, the crankshaft timing mark to the center of the crankshaft before applying Loctite on the camshaft sprocket bolt and tightening it. Replace the timing chain, apply oil to the oil seal contact surface of the Vibration damper hub and fit the damper in the correct orientation and in alignment with the Woodruff key. Replace the rest of the parts in the reverse manner mentioned, pour more coolant, check the oil level and start the engine to check more leakage.
    Posted by FordPartsGiant Specialist
    Q:
    How to inspect and replace a timing chain and sprockets on Ford Crown Victoria? Posted by Customer
    A:
    Remove the negative terminal of the battery and turn the engine to the interface of the piston travel in the number one cylinder. The crankshaft should be rotated 360 degrees and the number one piston should be several degrees before the TDC. Take of the right valve cover and install the dial indicator to the cylinder head so that the plunger part of the instrument touches the number one rocker arm. To do this turn the crankshaft in clockwise direction until the number one piston is on TDC for the second time then read the dial indicator on right side of the timing chain near the pulley and set it to zero. Then rotate the crankshaft anti-clockwise slowly until the pointer of the dial indicator rests on the upward movement, so identify the number of piston stroke it has traveled from the TDC point. In the event that the mark has shifted greater than 10 degrees, replace the timing chain and the sprockets. For timing chain inspection, once again, remove the negative battery cable and remove any parts that will limit the access to the timing chain cover but retain the hoses and wires. Remove the bolts from the accessory brackets and turn the number one piston to TDC on the compression stroke and do not turn the crankshaft until the chain and sprockets are replaced. Unbolt the vibration damper and unbolt the timing chain cover from the block and the oil pan being careful not to mar the cover. Turn the crankshaft in an anti-clockwise direction in order to tire the chain loosely on the left side then compare the degree of chain deflection from a fixed point on the block. If the deflection measurement is found to be more than ½ inch then fitting of a new timing chain and sprockets should be done as a set. Check the condition of the camshaft gear; original ones are aluminum with a nylon surface; they tend to chip, and these small particles may cause restrictions in the oil pump pick-up screen. Also, it is recommended to examine the crankshaft gear for such problems. For timing chain and sprocket removal ensure that the number one piston is at TDC to temporarily avoid crank shaft movement, then remove timing chain cover. Set the timing marks of the crankshaft and the camshaft sprockets before you remove them, if necessary. Take off the three camshaft sprocket mounting bolts and unbolt the chain from both the sprockets. As an installation procedure, always clean the cover and the engine block surfaces so that there is no trace of the old gasket material. Even check the cover flange for some distortion and locate the keyway in the crankshaft sprocket engaging on the Woodruff key while fitting the crank, sprocket to the crankshaft without hammering the sprocket. Rotate the crankshaft until the key is at the top dead center, lay the chain over the camshaft pulley and rotate it until the timing indicator is down. Make sure that there is straight line drawn from the center of the camshaft, the camshaft timing mark, the crankshaft timing mark to the center of the crankshaft before applying Loctite on the camshaft sprocket bolt and tightening it. Replace the timing chain, apply oil to the oil seal contact surface of the Vibration damper hub and fit the damper in the correct orientation and in alignment with the Woodruff key. Replace the rest of the parts in the reverse manner mentioned, pour more coolant, check the oil level and start the engine to check more leakage.
    Posted by FordPartsGiant Specialist
    Q:
    What special tools are required for the removal procedure for the 2014 Ford Mustang? Posted by Customer
    A:
    Two special camshaft holding tools (manufacturer tool no. 303-1248 and 303-1530) are required.
    Posted by FordPartsGiant Specialist
    Q:
    What should be done after all components are installed for the 2007 Ford Mustang? Posted by Customer
    A:
    Slowly rotate the crankshaft in the normal direction of rotation at least two revolutions and bring the engine back to TDC. If any resistance is felt, stop and investigate the cause.
    Posted by FordPartsGiant Specialist
    Q:
    What is the final step in the installation process for the 2010 Mercury Grand Marquis? Posted by Customer
    A:
    The remainder of installation is the reverse of removal.
    Posted by FordPartsGiant Specialist
    Q:
    What must be removed before the timing chains and camshafts are removed for the 2010 Ford Crown Victoria? Posted by Customer
    A:
    The rocker arms must be removed before the timing chains and camshafts are removed.
    Posted by FordPartsGiant Specialist
    Q:
    What caution should be taken while removing the camshaft sprocket bolt for the 2002 Ford Expedition? Posted by Customer
    A:
    Do not allow the crankshaft to be turned from TDC while removing the camshaft sprocket bolt.
    Posted by FordPartsGiant Specialist
    Q:
    What tools are required for securing the camshaft and crankshaft during removal for the 1997 Ford Expedition? Posted by Customer
    A:
    Install the camshaft and crankshaft retaining tools to lock the camshafts in position and prevent any movement due to valve spring pressure.
    Posted by FordPartsGiant Specialist
    See expert answers on similar Timing Chain
    Q:
    What should be done after rotating the crankshaft for the 2004 Ford F-150? Posted by Customer
    A:
    Install a new oil filter, then add engine oil and coolant.
    Posted by FordPartsGiant Specialist
    Q:
    What should be done to avoid turning the crankshaft during vibration damper removal for the 2011 Ford F-150? Posted by Customer
    A:
    Remove the timing chain cover and try to avoid turning the crankshaft.
    Posted by FordPartsGiant Specialist
    If you have any questions about this product, please don't hesitate to ask us. We will be happy to help you!

Genuine Ford Part F3LY-6268-A, the Right Choice

To ensure reliability, purchase Ford part # F3LY-6268-A Chain - Timing. It is sometimes referred to as Ford Timing Chain. In terms of quality and longevity, OEM parts are top-tier. This is because they are made according to Ford's demanding factory specifications and go through strict quality control. This part fits specific Ford Crown Victoria, E-350/E-350 Super Duty, F-150 models. It fits Lincoln Aviator, Continental, Mark VIII. It also fits Mercury Cougar, Grand Marquis, Mountaineer.

FordPartsGiant.com is a leading supplier of genuine Ford parts and accessories such as Ford F3LY6268A Chain - Timing. On our platform, we provide genuine Ford parts at incredible prices while ensuring top-tier quality. Feel at ease shopping with us, knowing our parts have a hassle-free return policy and rapid delivery service. For detailed Ford parts information, click here.

Why choose Ford Parts Giant

  • Dedicated Service

    Your complete satisfaction is our #1 goal

  • Lowest Prices

    Best deals on genuine OE parts from dealerships

  • Fast Delivery

    Orders are processed and delivered promptly