Make sure this part fits

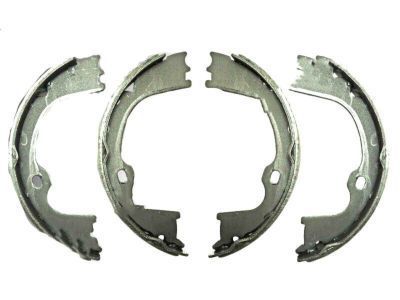
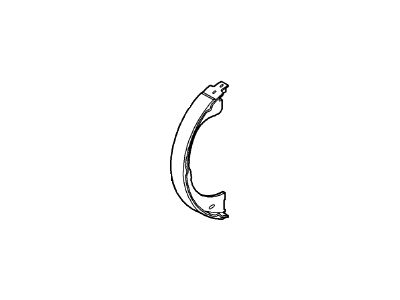
Ford 2L1Z-2648-AB Kit - Brake Shoe And Lining

2003-2005 Ford 2L1Z2648AB

Customer Questions & Expert Answers (5)
Ford 2L1Z-2648-AB Kit - Brake Shoe And Lining
  • Part Description
    Kit - Brake Shoe And Lining
  • Base No.
    2648
  • Replaced By
    6L1Z-2A225-A
  • Manufacturer
    Ford
Make sure this part fits
$15.62 MSRP: $24.91
You Save: $9.29 (38%)
Ships in 1-2 Business Days
1
ADD TO CART
  • Related Parts
  • Product Specifications
  • Vehicle Fitment
  • Customer Questions & Expert Answers
  • Product Specifications

    BrandGenuine Ford
    Base No.2648
    Manufacturer Part Number2L1Z-2648-AB, 2L1Z2648AB
    Part DescriptionKit - Brake Shoe And Lining
    Item Dimensions9.4 x 7.2 x 3.4 inches
    Item Weight0.20 Pounds
    ConditionNew
    Fitment TypeDirect Replacement
    ManufacturerFord
    SKU2L1Z-2648-AB
    WarrantyThis genuine Ford part is guaranteed by Ford's factory warranty.
    Shipping & ReturnShipping Policy Return Policy
    Warning: California’s Proposition 65
  • Vehicle Fitment

    Year Make Model Engine Important vehicle option details
    2003-2005 Ford Expedition8 Cyl 4.6L Romeo SOHC EFI, 8 Cyl 5.4L, 8 Cyl 5.4L Modular SOHC4AT 4R75W, 4-Speed Automatic Transmission 4R70W (AODE), 4-Speed Automatic Transmission 4R75E Livonia, 4-Speed Automatic Transmission AODEW/4R75E W/TSS, 6-Speed Automatic Transmission (6R75), 6-Speed Automatic Transmission (6R80), Four-Wheel Drive (Part Time) (Left Hand Drive), Left Hand Drive, Rear-Wheel Drive (Left Hand Drive)
    2003-2005 Lincoln Navigator8 Cyl 5.4L, 8 Cyl 5.4L DOHC EFI4-Speed Automatic Transmission E4OD(4R100), 6-Speed Automatic Transmission (6R80), 6-Speed Automatic Transmission ZF 6HP26 Steptronic, Four-Wheel Drive (Part Time) (Left Hand Drive), Left Hand Drive, Rear-Wheel Drive (Left Hand Drive)
  • Customer Questions & Expert Answers

    Q:
    I am wondering if this is the exact part that fits in Posted by FordPartsGiant Specialist
    A:
    You can Select Your Vehicle to check if 2L1Z-2648-AB fits your vehicle.
    Posted by FordPartsGiant Specialist
    Q:
    How to inspect and replace the parking brake shoes on a Ford Expedition equipped with air suspension? Posted by Customer
    A:
    If the vehicle is equipped with air suspension, turn off the air suspension system. The switch is located in the area of the right kick panel. Release the parking brake. Loosen the rear wheel lug nuts. Raise the vehicle and place it securely on jackstands. Remove the wheels. Remove the brake calipers and the brake discs. Clean the parking brake assembly with brake system cleaner before beginning work. Follow the instructions for the inspection and replacement of the parking brake shoes. Be sure to stay in order. Clean the brake disc/parking brake drum and check it for score marks, deep grooves, hard spots (which will appear as small discolored areas) and cracks. If the disc/drum is worn, scored or out-of-round, it can be resurfaced by an automotive machine shop. Repeat this procedure for the other rear brake assembly. Install the brake discs and the brake calipers. Install the rear wheels, install the lug nuts, lower the vehicle and lighten the wheel lug nuts. Reactivate the air suspension, if equipped.
    Posted by FordPartsGiant Specialist
    Q:
    How to replace the shoe on Ford Expedition? Posted by Customer
    A:
    Disable the air suspension system if vehicle had it. Loosen lug nuts, then lift back of vehicle and secure on jackstands. The front wheels must be blocked to keep the vehicle from rolling off the stands. Take away the rear wheels, then remove brake drum. If the drum sticks because of corrosion between axle flange and wheel studs or brake drum, apply penetrating oil around flange and studs and let it soak in. Strike around studs with hammer and flange to free drum, then strike around back edge of drum to remove it. If excessive drum wear locks drum onto shoes, knock out plug in access hole in backing plate; insert screwdriver through hole, push actuator lever off star adjuster and back off adjuster wheel with another screwdriver or brake adjuster tool to retract shoes. Clean brake assembly with brake system cleaner before starting work. Remove secondary brake shoe retracting spring; then remove primary shoe retracing spring. Disconnect brake shoe adjusting lever cable from brake shoe adjusting lever; remove them both along with spring, upper end of cable from anchor pin, anchor pin guide plate from anchor pin, cable guide, parking brake link and spring. Use hold-down spring tool to take off front hold-down spring assembly which includes upper washer-spring-lower washer-pin; disengage brake shoe adjusting screw spring from shoes; remove rear hold-down spring assembly; pry E-clip retainer off with small screwdriver; disengage parking brake lever pin from rear shoe and take out parking brake lever. Lubricate backing plate's shoe contact points with high-temperature brake grease.Put washer on parking brake lever pin ,insert pin through new rear shoe & put E- clip retainer by squeezing its end together.Install hold-down pin through holes in backing plate& rear shoe putting rear hold-down spring assembly so that by giving it a 90-degree twist with a hold-down tool would lock into place.Put guide plate on anchor pin,install brake shoe adjusting lever cable on anchor pin; mount brake shoe adjusting lever cable guide on rear shoe. Hook short-end of secondary (long) shoe retracting spring into hole in cable guide and into rear shoe and long end over anchor pin.Thread brake shoe adjusting lever cable over guide.Place parking brake link & spring ensuring that link is correctly engaged with parking brake lever & secondary shoe.Put primary(front) brake shoe assembly in position ensuring that it is properly engaged with parking brake lever link.Insert hold-down pin through holes in backing plate and front brake shoe then install hold-down spring assembly giving the hold-down spring assembly a 90-degree twist with hold-down tool to lock it into place.Hook short-end of primary(shorter)brake shoe retracing spring into this hole in front shoe and hook other end over anchor pin.Install Brake Shoe Adjusting Lever Spring such that straight end points towards rear brake shoe but hooked end faces forward.Install Brake Shoe Adjuster Lever.Hook end of adjusting lever spring over adjusting lever .Hook lower end of brake shoe adjusting lever cable over adjusting lever .Hook short-end of lower shoe retracting spring into front shoe; hook long-end of the same spring into rear one. Engage rear part adjuster assembly with its notch in rear shoe ; pull front one slightly forward and engage its front end adjuster assembly with notch in front one.Clean check drum for score marks, deep grooves, hard spots(which will appear as small discolored areas), cracks; if worn, scored or out-of-round it can be resurfaced by automotive machine shop.Repeat this procedure for the other rear brake assemblys.Install drums. Pump brakes several times ,then turn adjuster star wheels using screwdriver inserted through hole in backing plate until shoes slightly drag on drums as they are turned.Back off adjuster now until shoes don't drag on drums.Install rear wheels,install lug nuts ,lower vehicle and tighten wheel lug nuts. Check brake pedal position. If brake pedal goes too close to floor, further adjustment of brakes is required. Back vehicle up making repeated stops to actuate self adjusters which work only when vehicle is in reverse.Test brakes for proper operation before driving in traffic.
    Posted by FordPartsGiant Specialist
    Q:
    How to replace the shoe on Lincoln Navigator? Posted by Customer
    A:
    Disable the air suspension system if vehicle had it. Loosen lug nuts, then lift back of vehicle and secure on jackstands. The front wheels must be blocked to keep the vehicle from rolling off the stands. Take away the rear wheels, then remove brake drum. If the drum sticks because of corrosion between axle flange and wheel studs or brake drum, apply penetrating oil around flange and studs and let it soak in. Strike around studs with hammer and flange to free drum, then strike around back edge of drum to remove it. If excessive drum wear locks drum onto shoes, knock out plug in access hole in backing plate; insert screwdriver through hole, push actuator lever off star adjuster and back off adjuster wheel with another screwdriver or brake adjuster tool to retract shoes. Clean brake assembly with brake system cleaner before starting work. Remove secondary brake shoe retracting spring; then remove primary shoe retracing spring. Disconnect brake shoe adjusting lever cable from brake shoe adjusting lever; remove them both along with spring, upper end of cable from anchor pin, anchor pin guide plate from anchor pin, cable guide, parking brake link and spring. Use hold-down spring tool to take off front hold-down spring assembly which includes upper washer-spring-lower washer-pin; disengage brake shoe adjusting screw spring from shoes; remove rear hold-down spring assembly; pry E-clip retainer off with small screwdriver; disengage parking brake lever pin from rear shoe and take out parking brake lever. Lubricate backing plate's shoe contact points with high-temperature brake grease.Put washer on parking brake lever pin ,insert pin through new rear shoe & put E- clip retainer by squeezing its end together.Install hold-down pin through holes in backing plate& rear shoe putting rear hold-down spring assembly so that by giving it a 90-degree twist with a hold-down tool would lock into place.Put guide plate on anchor pin,install brake shoe adjusting lever cable on anchor pin; mount brake shoe adjusting lever cable guide on rear shoe. Hook short-end of secondary (long) shoe retracting spring into hole in cable guide and into rear shoe and long end over anchor pin.Thread brake shoe adjusting lever cable over guide.Place parking brake link & spring ensuring that link is correctly engaged with parking brake lever & secondary shoe.Put primary(front) brake shoe assembly in position ensuring that it is properly engaged with parking brake lever link.Insert hold-down pin through holes in backing plate and front brake shoe then install hold-down spring assembly giving the hold-down spring assembly a 90-degree twist with hold-down tool to lock it into place.Hook short-end of primary(shorter)brake shoe retracing spring into this hole in front shoe and hook other end over anchor pin.Install Brake Shoe Adjusting Lever Spring such that straight end points towards rear brake shoe but hooked end faces forward.Install Brake Shoe Adjuster Lever.Hook end of adjusting lever spring over adjusting lever .Hook lower end of brake shoe adjusting lever cable over adjusting lever .Hook short-end of lower shoe retracting spring into front shoe; hook long-end of the same spring into rear one. Engage rear part adjuster assembly with its notch in rear shoe ; pull front one slightly forward and engage its front end adjuster assembly with notch in front one.Clean check drum for score marks, deep grooves, hard spots(which will appear as small discolored areas), cracks; if worn, scored or out-of-round it can be resurfaced by automotive machine shop.Repeat this procedure for the other rear brake assemblys.Install drums. Pump brakes several times ,then turn adjuster star wheels using screwdriver inserted through hole in backing plate until shoes slightly drag on drums as they are turned.Back off adjuster now until shoes don't drag on drums.Install rear wheels,install lug nuts ,lower vehicle and tighten wheel lug nuts. Check brake pedal position. If brake pedal goes too close to floor, further adjustment of brakes is required. Back vehicle up making repeated stops to actuate self adjusters which work only when vehicle is in reverse.Test brakes for proper operation before driving in traffic.
    Posted by FordPartsGiant Specialist
    Q:
    How to inspect and replace the parking brake shoes on a Lincoln Navigator equipped with air suspension? Posted by Customer
    A:
    If the vehicle is equipped with air suspension, turn off the air suspension system. The switch is located in the area of the right kick panel. Release the parking brake. Loosen the rear wheel lug nuts. Raise the vehicle and place it securely on jackstands. Remove the wheels. Remove the brake calipers and the brake discs. Clean the parking brake assembly with brake system cleaner before beginning work. Follow the instructions for the inspection and replacement of the parking brake shoes. Be sure to stay in order. Clean the brake disc/parking brake drum and check it for score marks, deep grooves, hard spots (which will appear as small discolored areas) and cracks. If the disc/drum is worn, scored or out-of-round, it can be resurfaced by an automotive machine shop. Repeat this procedure for the other rear brake assembly. Install the brake discs and the brake calipers. Install the rear wheels, install the lug nuts, lower the vehicle and lighten the wheel lug nuts. Reactivate the air suspension, if equipped.
    Posted by FordPartsGiant Specialist
    If you have any questions about this product, please don't hesitate to ask us. We will be happy to help you!

Genuine Ford Part 2L1Z-2648-AB, the Right Choice

Your vehicle deserves only genuine OEM Ford parts and accessories. To ensure reliability, purchase Ford part # 2L1Z-2648-AB Kit - Brake Shoe And Lining with base parts number 2648. It is sometimes referred to as Ford Brake Shoe, Ford Parking Brake Shoe. Our Ford parts and accessories are expedited directly from authorized Ford dealers strategically located all across the U.S. and are backed by the manufacturer's 12 month, 12,000 mile warranty. OEM Ford parts are the best for restoring your vehicle to factory condition performance. This part fits specific Ford Expedition models. It fits Lincoln Navigator.

Affordable, reliable and built to last, Ford part # 2L1Z2648AB Kit - Brake Shoe And Lining stands out as the smart option. FordPartsGiant.com is your prime online source with the biggest and best selection of genuine Ford parts and accessories at giant discounted prices. We have the OEM Ford parts and accessories you need at the wholesale prices. FordPartsGiant.com has you covered no matter what type of Ford vehicle you drive. For detailed Ford parts information, click here.

Why choose Ford Parts Giant

  • Dedicated Service

    Your complete satisfaction is our #1 goal

  • Lowest Prices

    Best deals on genuine OE parts from dealerships

  • Fast Delivery

    Orders are processed and delivered promptly