Make sure this part fits

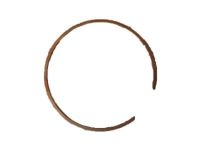
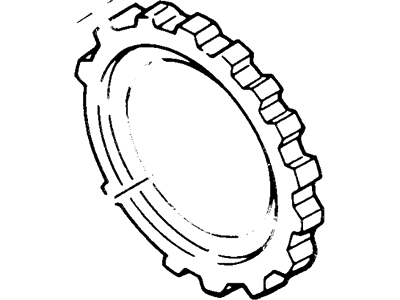
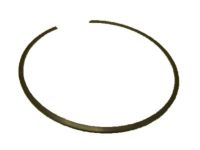
Ford C6AZ-7B066-A Plate - Clutch Pressure

1980-2005 Ford C6AZ7B066A

Customer Questions & Expert Answers (9)
Ford C6AZ-7B066-A Plate - Clutch Pressure
  • Part Description
    Plate - Clutch Pressure
  • Base No.
    7B066A
  • Position
    Front
  • Manufacturer
    Ford
Make sure this part fits
$14.71 MSRP: $21.50
You Save: $6.79 (32%)
Ships in 1-3 Business Days
1
ADD TO CART
  • Related Parts
  • Product Specifications
  • Vehicle Fitment
  • Customer Questions & Expert Answers
  • Product Specifications

    BrandGenuine Ford
    Base No.7B066A
    Manufacturer Part NumberC6AZ-7B066-A, C6AZ7B066A
    Part DescriptionPlate - Clutch Pressure
    Item Weight1.00 Pounds
    PositionFront
    ConditionNew
    Fitment TypeDirect Replacement
    ManufacturerFord
    SKUC6AZ-7B066-A
    WarrantyThis genuine Ford part is guaranteed by Ford's factory warranty.
    Shipping & ReturnShipping Policy Return Policy
    Warning: California’s Proposition 65
  • Vehicle Fitment

    Year Make Model Engine Important vehicle option details
    1990-1997 Ford Aerostar6 Cyl 3.0L, 6 Cyl 4.0L4AT 4R44E, 4AT A4LD, 5AT 5R55E, 5MT
    1990-1996 Ford Bronco6 Cyl 4.9L, 8 Cyl 5.0L, 8 Cyl 5.8L3AT C6, 4AT A4LD, 4AT AOD, 4AT E4OD
    1990 Ford Bronco II6 Cyl 2.9L4AT A4LD, 5MT
    1990-1998 Ford E-1506 Cyl 4.2L, 6 Cyl 4.9L, 8 Cyl 4.6L, 8 Cyl 5.0L, 8 Cyl 5.4L, 8 Cyl 5.8L3AT C6, 4AT 4R70W, 4AT 4R75W, 4AT AOD, 4AT E4OD
    1990-2004 Ford E-2506 Cyl 4.2L, 6 Cyl 4.9L, 8 Cyl 4.6L, 8 Cyl 5.0L, 8 Cyl 5.4L, 8 Cyl 5.8L, 8 Cyl 7.3L Diesel, 8 Cyl 7.5L3AT C6, 4AT 4R100, 4AT 4R70W, 4AT AOD, 4AT E4OD
    1990-2004 Ford E-350/E-350 Super Duty10 Cyl 6.8L, 6 Cyl 4.9L, 8 Cyl 5.4L, 8 Cyl 5.8L, 8 Cyl 6.0L Diesel Turbocharged, 8 Cyl 7.3L Diesel, 8 Cyl 7.3L Diesel Turbocharged, 8 Cyl 7.5L3AT C6, 4AT 4R100, 4AT 4R70W, 4AT 4R75W, 4AT AOD, 4AT E4OD, 5AT
    2002-2004 Ford E-450 Super Duty10 Cyl 6.8L, 8 Cyl 5.4L4AT 4R100
    1999 Ford Econoline Super Duty(1996-1999)10 Cyl 6.8L, 8 Cyl 5.4L, 8 Cyl 7.3L Diesel Turbocharged4AT 4R100
    2000-2005 Ford Excursion10 Cyl 6.8L, 8 Cyl 5.4L, 8 Cyl 6.0L, 8 Cyl 7.3L4AT 4R100, 5AT
    1997-2002 Ford Expedition8 Cyl 4.6L, 8 Cyl 5.4L4AT 4R100, 4AT 4R70W, 4AT E4OD
    View More
  • Customer Questions & Expert Answers

    Q:
    Does the PN fit my vehicle? Posted by FordPartsGiant Specialist
    A:
    You can Select Your Vehicle to check if C6AZ-7B066-A fits your vehicle.
    Posted by FordPartsGiant Specialist
    Q:
    How to remove Clutch Disc and Pressure Plate on Ford F-250? Posted by Customer
    A:
    To remove the dust, use brake system cleaner to flush it into a drain pan, and after wiping the clutch components clean with a rag, dispose of the contaminated materials in a covered, marked container. Disconnecting the battery on later models with a Powertrain Control Unit (PCM) may cause the PCM to lose its memory, leading to abnormal driving symptoms for the first 10 miles until it relearns its adaptive strategy. Accessing the clutch components typically requires removing the transmission (and transfer case on 4WD models) while leaving the engine in place; however, if the engine is being overhauled, check the clutch for wear and replace any worn components. On early models with mechanical linkages, remove the clutch rod and equalizer bar from the transmission. For models with an external slave cylinder, remove and tie it up out of the way without disconnecting the hydraulic line; for those with a concentric slave cylinder, detach the clutch line at the inlet port. For 4WD models, remove the transfer case, followed by the transmission. On 3 and 4-speed models with a separate clutch housing, disconnect the negative battery cable, remove the starter motor bolts, and the bolts retaining the clutch housing to the engine block, noting the presence of shims. To support the clutch disc during removal, install a clutch alignment tool through the hub, and inspect the flywheel and pressure plate for indexing marks, making your own if necessary. Loosen the pressure plate-to-flywheel bolts in a criss-cross pattern until all spring pressure is relieved, then remove the bolts, pressure plate, and clutch disc. Inspect the clutch driven plate assembly, flywheel for defects, pilot bearing, clutch disc lining, release bearing, and pressure plate for wear or damage, replacing components as necessary. If the pilot bearing was removed, install a new one, and before installation, clean the flywheel and pressure plate surfaces thoroughly. Position the clutch disc and pressure plate against the flywheel using the alignment tool, ensuring proper installation, and tighten the pressure plate-to-flywheel bolts lightly in a criss-cross pattern. Center the clutch disc and tighten the bolts gradually, then remove the alignment tool. If applicable, install the clutch release bearing and lever or concentric slave cylinder, followed by the clutch housing, ensuring shims are reinstalled if present. Finally, install the transmission and transfer case, reconnect the slave cylinder or clutch line as needed, and bleed the clutch hydraulics if required, then reinstall the clutch rod and equalizer bar on early model mechanical linkages and adjust the linkage.
    Posted by FordPartsGiant Specialist
    Q:
    How to remove and inspect Clutch Disc,Pressure Plate,Release Bearing on Lincoln Navigator? Posted by Customer
    A:
    The transmission must be removed and engine supported properly to take out and evaluate clutch components. Toward the flywheel, on the pressure plate, locating marks should be looked for. Including clutch disc and pressure plate, undo the pressure plate-to-flywheel bolts. Inspect all clutch parts including pilot bearing and flywheel. If needed, replace the release bearing as well as the clutch disc. Additionally, inspect the surfaces of the pressure plate and fingers of the diaphragm spring. Finally, the clutch disc should be aligned with the flywheel and its bolts tightened to assemble it back together then reinstall the transmission then lower vehicle.
    Posted by FordPartsGiant Specialist
    Q:
    How to Remove and Install Clutch Disc and Pressure Plate on Ford Bronco II? Posted by Customer
    A:
    It should be pointed out that the clutch driven disc contains asbestos that is known to cause cancer, therefore it is most unadvisable to clean clutch surfaces with compressed air and should not inhale any dust off such surfaces; as an option; a commercially available brake cleaning fluid may be used. To replace clutch parts on 1983-84 2.0L and 2.3L models first turn off the ignition, and remove the clutch master cylinder from the clutch pedal, then jack up the car and safely support it. Take off the dust shield from the clutch housing, disconnect the hydraulic clutch linkage and taken out the starter as well as the transmission. Locate the assembled position of the pressure plate and the cover on the flywheel and then slacken the bolts of the pressure plate in equal ratio so as to expand the clutch springs and then remove the pressure plate along with its cover and the clutch disc but you may have to replace the pilot bearing also in case it is required. For installation, set the clutch disc on the flywheel with the help of alignment tool, insert the pressure plate and cover and tighten the retaining bolts to 15-24 ft. lbs. Before that, a tentative alignment must be present but before the alignment tool is removed. Replace the transmission, bolt the hydraulic clutch linkage, dust shield, and starter in place, lower the car, connect the clutch hydraulic system master cylinder to the clutch pedal, check for proper function of the clutch hydraulic distribution system, at last reconnect the ground terminal of the battery. The process resembles that of with the 1982-84 models starting from disconnecting the negative battery cable and the clutch hydraulic system master cylinder, lifting the car, removing the starter and disconnecting the hydraulic coupling at the transmission for the 1985-90 models. To dismantle the assembly, first it is essential to clean the surrounding of the hose and slave cylinder to avoid the entrance of fluids; then locate the position of the pressure plate and cover and free and loosen the bolts connecting the pressure plate cover assembly and clutch disc and take out the pressure plate, cover assembly clutch disc and replace the pilot bearing if required. When installing, place the clutch disc on the flywheel by using the correct alignment tool, the pressure plate and cover assembly must be aligned on the previous marks, and finally, screw the bolts in with the force of 15-25 ft. lbs. in the correct fashion and then withdraw the pilot tool. Last, fit the transmission, join the coupling to the slave cylinder and finally fix the hydraulic clutch master cylinder push rod to the clutch pedal.
    Posted by FordPartsGiant Specialist
    Q:
    How to remove Clutch Disc and Pressure Plate on Ford Bronco? Posted by Customer
    A:
    To remove the dust, use brake system cleaner to flush it into a drain pan, and after wiping the clutch components clean with a rag, dispose of the contaminated materials in a covered, marked container. Disconnecting the battery on later models with a Powertrain Control Unit (PCM) may cause the PCM to lose its memory, leading to abnormal driving symptoms for the first 10 miles until it relearns its adaptive strategy. Accessing the clutch components typically requires removing the transmission (and transfer case on 4WD models) while leaving the engine in place; however, if the engine is being overhauled, check the clutch for wear and replace any worn components. On early models with mechanical linkages, remove the clutch rod and equalizer bar from the transmission. For models with an external slave cylinder, remove and tie it up out of the way without disconnecting the hydraulic line; for those with a concentric slave cylinder, detach the clutch line at the inlet port. For 4WD models, remove the transfer case, followed by the transmission. On 3 and 4-speed models with a separate clutch housing, disconnect the negative battery cable, remove the starter motor bolts, and the bolts retaining the clutch housing to the engine block, noting the presence of shims. To support the clutch disc during removal, install a clutch alignment tool through the hub, and inspect the flywheel and pressure plate for indexing marks, making your own if necessary. Loosen the pressure plate-to-flywheel bolts in a criss-cross pattern until all spring pressure is relieved, then remove the bolts, pressure plate, and clutch disc. Inspect the clutch driven plate assembly, flywheel for defects, pilot bearing, clutch disc lining, release bearing, and pressure plate for wear or damage, replacing components as necessary. If the pilot bearing was removed, install a new one, and before installation, clean the flywheel and pressure plate surfaces thoroughly. Position the clutch disc and pressure plate against the flywheel using the alignment tool, ensuring proper installation, and tighten the pressure plate-to-flywheel bolts lightly in a criss-cross pattern. Center the clutch disc and tighten the bolts gradually, then remove the alignment tool. If applicable, install the clutch release bearing and lever or concentric slave cylinder, followed by the clutch housing, ensuring shims are reinstalled if present. Finally, install the transmission and transfer case, reconnect the slave cylinder or clutch line as needed, and bleed the clutch hydraulics if required, then reinstall the clutch rod and equalizer bar on early model mechanical linkages and adjust the linkage.
    Posted by FordPartsGiant Specialist
    Q:
    How to remove, inspect, adjustment, and install Clutch Disc and Pressure Plate on Ford Excursion? Posted by Customer
    A:
    In particular, it is necessary to use gloves when performing work on clutch components, for example, protection against sharp ring gear teeth and keep away from the dust, wearing first rubber or latex gloves and then cloth or leather gloves. Some clutch elements are mounted where the transmission is fitted, and thus, could only be reached after the transmission has been detached Clutch components are relatively cheap, and thus, it is recommended that they be inspected for wear and replaced whenever the engine is being removed. Start with the removal of the transmission, follow by loosening the negative battery terminal cables and raising the vehicle by safe jack points. In order to gain additional support for the clutch disc place an alignment tool through the clutch disc hub and note the alignment of the flywheel and pressure plate for reassembly. Loose the pressure plate to the Flywheel bolts by turning them in a crossed fashion until they can be turned out with bare hands and then remove the pressure plate and clutch disk. To all parts of the assembly, look for signs of wear, possible oil contamination, cracks, and the like, and be sure that the thickness of the clutch disc lining is at least 1/16 inch higher than the rivet heads. Likewise, the release bearing should likewise be changed with the clutch disc; the pressure plate, as well, should be checked for damages. In the case where the original pressure plate is being 'recycled' the final adjustment has to be made on a hydraulic press. All machined surfaces should be cleaned for installation; the clutch disc and pressure plate have to be lined up with the flywheel. After that, fasten the pressure plate-to-flywheel bolts equally in a diagonal sequence in order to minimize distortion, lubricate the bearings of the release, and set back the whole transmission and all other parts which were previously removed and then finally lower the car.
    Posted by FordPartsGiant Specialist
    Q:
    What should be inspected on the flywheel and pressure plate before removal for the 1999 Ford Ranger? Posted by Customer
    A:
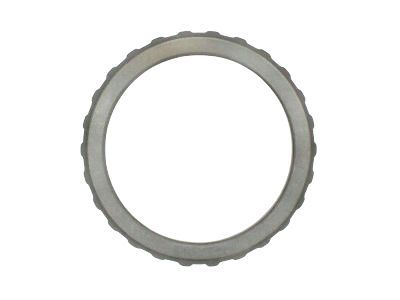
    Carefully inspect the flywheel and pressure plate for indexing marks. If they cannot be found, scribe marks yourself so the pressure plate and the flywheel will be in the same alignment during installation.
    Posted by FordPartsGiant Specialist
    Q:
    What are the final steps to complete the clutch inspection and replacement process for the 2003 Ford Expedition? Posted by Customer
    A:
    Reinstall the transmission and all previously removed components. Lower the vehicle, reactivate the air suspension system if applicable, and you're done with the installation.
    Posted by FordPartsGiant Specialist
    See expert answers on similar Pressure Plate
    Q:
    How is the clutch disc and pressure plate positioned and tightened during installation for the 1998 Ford Explorer? Posted by Customer
    A:
    The clutch disc and pressure plate are positioned against the flywheel, aligned with an alignment tool, and tightened in a criss-cross pattern.
    Posted by FordPartsGiant Specialist
    See expert answers on similar Pressure Plate
    If you have any questions about this product, please don't hesitate to ask us. We will be happy to help you!

Genuine Ford Part C6AZ-7B066-A, the Right Choice

To ensure reliability, purchase Ford part # C6AZ-7B066-A Plate - Clutch Pressure. It is sometimes referred to as Ford Pressure Plate. In terms of quality and longevity, OEM parts are top-tier. This is because they are made according to Ford's demanding factory specifications and go through strict quality control. This part fits specific Ford Bronco, F-150, Ranger models. It fits Lincoln Blackwood, Navigator. It also fits Mercury Grand Marquis, Mountaineer, Villager.

FordPartsGiant.com is a leading supplier of genuine Ford parts and accessories such as Ford C6AZ7B066A Plate - Clutch Pressure. On our platform, we provide genuine Ford parts at incredible prices while ensuring top-tier quality. Feel at ease shopping with us, knowing our parts have a hassle-free return policy and rapid delivery service. For detailed Ford parts information, click here.

Why choose Ford Parts Giant

  • Dedicated Service

    Your complete satisfaction is our #1 goal

  • Lowest Prices

    Best deals on genuine OE parts from dealerships

  • Fast Delivery

    Orders are processed and delivered promptly