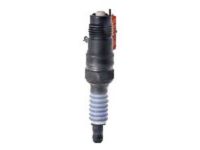
Make sure this part fits

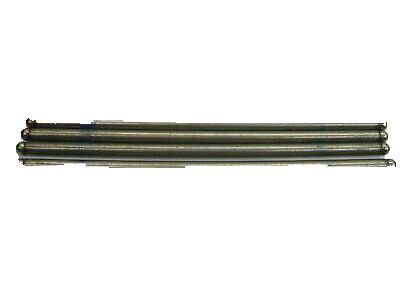
Ford E5AZ-6565-A Rod - Valve Push

1985-2001 Ford E5AZ6565A

Customer Questions & Expert Answers (17)
Ford E5AZ-6565-A Rod - Valve Push
  • Part Description
    Rod - Valve Push
  • Base No.
    6565
  • Manufacturer
    Ford
Make sure this part fits
$2.96 MSRP: $4.59
You Save: $1.63 (36%)
Ships in 1-3 Business Days
4
ADD TO CART
  • Related Parts
  • Product Specifications
  • Vehicle Fitment
  • Customer Questions & Expert Answers
  • Product Specifications

    BrandGenuine Ford
    Base No.6565
    Manufacturer Part NumberE5AZ-6565-A, E5AZ6565A
    Part DescriptionRod - Valve Push
    Other NamesPush Rod
    Item Weight0.60 Pounds
    ConditionNew
    Fitment TypeDirect Replacement
    Require Quantity16
    ManufacturerFord
    SKUE5AZ-6565-A
    WarrantyThis genuine Ford part is guaranteed by Ford's factory warranty.
    Shipping & ReturnShipping Policy Return Policy
    Warning: California’s Proposition 65
  • Vehicle Fitment

    Year Make Model Engine Important vehicle option details
    1992-1996 Ford Bronco8 Cyl 5.0L3AT C6, 4AT A4LD, 4AT AOD, 4AT E4OD, 4MT, 5MT
    1992-1996 Ford E-1508 Cyl 5.0L3AT C6, 4AT 4R70W, 4AT 4R75W, 4AT AOD, 4AT E4OD
    1996-2001 Ford Explorer8 Cyl 5.0L4AT 4R55E, 4AT 4R70W, 5AT 5R55E, 5MT
    1992-1996 Ford F-1508 Cyl 5.0L3AT C6, 4AT 4R70W, 4AT 4R75W, 4AT AOD, 4AT E4OD, 4MT, 5MT
    1992-1996 Ford F-2508 Cyl 5.0L3AT C6, 4AT AOD, 4AT E4OD, 4MT, 5MT
    1985-1995 Ford Mustang4 Cyl 2.3L, 6 Cyl 3.8L, 8 Cyl 5.0L3AT C3, 3AT C5, 4AT A4LD, 4AT AOD, 4AT AOD-E, 4MT, 5MT
    1991-1993, 1986-1989 Ford Thunderbird4 Cyl 2.3L, 6 Cyl 3.8L, 8 Cyl 5.0L3AT C3, 3AT C5, 4AT A4LD, 4AT AOD, 5MT
    1985-1987 Lincoln Continental8 Cyl 5.0L4AT, 4AT AOD
    1985-1992 Lincoln Mark VII8 Cyl 5.0L4AT, 4AT AOD
    1986-1990 Lincoln Town Car8 Cyl 5.0L4AT AOD
    View More
  • Customer Questions & Expert Answers

    Q:
    I would like to know is this part gonna fit with my car Posted by FordPartsGiant Specialist
    A:
    You can Select Your Vehicle to check if E5AZ-6565-A fits your vehicle.
    Posted by FordPartsGiant Specialist
    Q:
    How to remove, inspect, install Pushrod and Rocker Arm on Ford Thunderbird? Posted by Customer
    A:
    Detach the valve cover(s) from the cylinder head(s). Starting at the front of one cylinder head, remove the rocker arm fulcrum bolts, which may not need to be completely removed; loosen them several turns and check if the rocker arms can be pivoted out of the way for pushrod removal. Store the bolts separately in marked containers to ensure they are reinstalled in their original locations. If only the pushrods are being removed, loosen each bolt just enough to allow the rocker arms to be rotated aside for pushrod extraction. Lift off the rocker arms, fulcrums, and fulcrum guides if used, and store them in marked containers with the bolts. Remove the pushrods and store them separately to avoid mixing during installation, using a perforated cardboard box to ensure they are reinstalled in their original locations, noting the label indicating the front of the engine. Check each rocker arm for wear, cracks, and other damage, especially where the pushrods and valve stems contact the rocker arm faces, ensuring the hole at the pushrod end of each rocker arm is open. Inspect the rocker arm pivot area and fulcrum for wear, cracks, and galling; replace worn or damaged rocker arms and fulcrums with new ones. Inspect the pushrods for cracks and excessive wear at the ends, rolling each across a piece of plate glass to check for bending. Before tightening the rocker arm bolts, ensure both lifters for each cylinder are on the base circle of the cam lobe with both valves closed. Lubricate the lower end of each pushrod with clean engine oil or moly-base grease and install them in their original locations, ensuring each pushrod seats completely in the lifter. Apply moly-base grease to the ends of the valve stems and the upper ends of the pushrods before positioning the rocker arms, fulcrums, and guides, and also to the fulcrums to prevent damage to the mating surfaces before engine oil pressure builds up. Set the rocker arms and guides in place, then install the fulcrums and bolts. Adjustment is typically needed only when valve train components have been replaced or valves have been ground significantly. Set the number one piston at Top Dead Center (TDC) on the compression stroke, which is position 1 for checking and adjusting valve clearances. In this position, check the intake valves 1, 3, and 6, and the exhaust valves 1, 2, and 4, with the arrangement of intake and exhaust valves being left side - E-I-E-1-E-I and right side - 1-E-1-E+E. Using a Ford lifter bleed-down tool or equivalent, press on each rocker arm until the lifter leaks down completely, then check the clearance between the valve stem and rocker arm with a feeler gauge, comparing it to the specifications and recording the results. Rotate the crankshaft to position 2 and check the intake valves 2, 4, and 5, and the exhaust valves 3, 5, and 6. If the clearances are within specification, install the rocker arm covers. The clearance can be adjusted by using different length pushrods available from your dealer; if there isn't enough clearance, use a shorter pushrod, and if there is too much clearance, use a longer one.
    Posted by FordPartsGiant Specialist
    Q:
    How to remove rocker arms, fulcrums, and pushrods on Lincoln Continental? Posted by Customer
    A:
    Start by removing the valve cover(s) from the cylinder head(s) to take off rocker arms, fulcrums, and pushrods. To detach the pushrods, remove the rocker arm fulcrum bolts or stud nut and rotate the rocker arms to the side. Make sure that you store these separately. In case they are available, lift off your rocker arms, fulcrums, and guide plate. Keep them in separate containers for correct storage during reassembly. Remove and save pushrods alone. Examine each rocker arm for wear, cracks or other damage. Assess whether there is wear or damage in each of these areas like the rocker arm pivot areas and fulcrums. Anything that is worn out or damaged can be replaced at this stage. Grease the lower ends of push rods and install them back into their former places.
    Posted by FordPartsGiant Specialist
    Q:
    How to remove rocker arms, fulcrums, and pushrods on Lincoln Town Car? Posted by Customer
    A:
    Start by removing the valve cover(s) from the cylinder head(s) to take off rocker arms, fulcrums, and pushrods. To detach the pushrods, remove the rocker arm fulcrum bolts or stud nut and rotate the rocker arms to the side. Make sure that you store these separately. In case they are available, lift off your rocker arms, fulcrums, and guide plate. Keep them in separate containers for correct storage during reassembly. Remove and save pushrods alone. Examine each rocker arm for wear, cracks or other damage. Assess whether there is wear or damage in each of these areas like the rocker arm pivot areas and fulcrums. Anything that is worn out or damaged can be replaced at this stage. Grease the lower ends of push rods and install them back into their former places.
    Posted by FordPartsGiant Specialist
    Q:
    What are the steps involved in the removal, inspection, and installation of the rocker arm and Pushrod in 2.8L V6 engine on Mercury Capri? Posted by Customer
    A:
    To remove the rocker arm cover(s) from the cylinder head(s), detach them and then loosen the rocker arm shaft support bolts two turns at a time, working from the center out until they can be removed by hand. Lift the rocker assembly and oil baffle off the cylinder head, ensuring the pins hold the components together, and then lift the pushrods out of the engine, placing them in a rack in order for reinstallation. Remove the pins and disassemble the rocker arm assembly, placing the parts in order on a clean workbench. Inspect each rocker arm for wear, cracks, and damage, particularly where the pushrods and valve stems contact the faces. Ensure the hole at the pushrod end of each rocker arm is clear, using a piece of wire if necessary. Check the rocker arm bore and its corresponding position on the rocker shaft for wear, cracks, and galling, replacing any damaged components. Inspect the pushrods for cracks and excessive wear, rolling each across a piece of plate glass to check for bending. If needed, remove the plugs from each end of the rocker shaft, using a long steel rod to knock them out, and tap in new plugs if they were removed. Assemble the rocker assembly, lubricating all friction points with engine oil or assembly lube, and install new cotter pins in the ends of the rocker shaft, ensuring the notches face down. Coat each end of the pushrods with assembly lube before installing them in the engine, returning original pushrods to their original positions. Coat the rocker arm pads with Lubriplate or an equivalent product, loosen the valve adjusting screws several turns, and install the oil baffle and rocker assembly on the engine with the notch on the shaft facing down. Position the rocker arm ball ends in the pushrods, tighten the rocker shaft support bolts two turns at a time from the center out to the specified torque, and complete the installation in reverse order of removal. Finally, adjust the valve clearances and run the engine to check for leaks.
    Posted by FordPartsGiant Specialist
    Q:
    How to remove rocker arms, fulcrums, and pushrods on Lincoln Mark VII? Posted by Customer
    A:
    Start by removing the valve cover(s) from the cylinder head(s) to take off rocker arms, fulcrums, and pushrods. To detach the pushrods, remove the rocker arm fulcrum bolts or stud nut and rotate the rocker arms to the side. Make sure that you store these separately. In case they are available, lift off your rocker arms, fulcrums, and guide plate. Keep them in separate containers for correct storage during reassembly. Remove and save pushrods alone. Examine each rocker arm for wear, cracks or other damage. Assess whether there is wear or damage in each of these areas like the rocker arm pivot areas and fulcrums. Anything that is worn out or damaged can be replaced at this stage. Grease the lower ends of push rods and install them back into their former places.
    Posted by FordPartsGiant Specialist
    Q:
    How to remove, inspect, install Pushrod and Rocker Arm on Mercury Cougar? Posted by Customer
    A:
    Detach the valve cover(s) from the cylinder head(s). Starting at the front of one cylinder head, remove the rocker arm fulcrum bolts, which may not need to be completely removed; loosen them several turns and check if the rocker arms can be pivoted out of the way for pushrod removal. Store the bolts separately in marked containers to ensure they are reinstalled in their original locations. If only the pushrods are being removed, loosen each bolt just enough to allow the rocker arms to be rotated aside for pushrod extraction. Lift off the rocker arms, fulcrums, and fulcrum guides if used, and store them in marked containers with the bolts. Remove the pushrods and store them separately to avoid mixing during installation, using a perforated cardboard box to ensure they are reinstalled in their original locations, noting the label indicating the front of the engine. Check each rocker arm for wear, cracks, and other damage, especially where the pushrods and valve stems contact the rocker arm faces, ensuring the hole at the pushrod end of each rocker arm is open. Inspect the rocker arm pivot area and fulcrum for wear, cracks, and galling; replace worn or damaged rocker arms and fulcrums with new ones. Inspect the pushrods for cracks and excessive wear at the ends, rolling each across a piece of plate glass to check for bending. Before tightening the rocker arm bolts, ensure both lifters for each cylinder are on the base circle of the cam lobe with both valves closed. Lubricate the lower end of each pushrod with clean engine oil or moly-base grease and install them in their original locations, ensuring each pushrod seats completely in the lifter. Apply moly-base grease to the ends of the valve stems and the upper ends of the pushrods before positioning the rocker arms, fulcrums, and guides, and also to the fulcrums to prevent damage to the mating surfaces before engine oil pressure builds up. Set the rocker arms and guides in place, then install the fulcrums and bolts. Adjustment is typically needed only when valve train components have been replaced or valves have been ground significantly. Set the number one piston at Top Dead Center (TDC) on the compression stroke, which is position 1 for checking and adjusting valve clearances. In this position, check the intake valves 1, 3, and 6, and the exhaust valves 1, 2, and 4, with the arrangement of intake and exhaust valves being left side - E-I-E-1-E-I and right side - 1-E-1-E+E. Using a Ford lifter bleed-down tool or equivalent, press on each rocker arm until the lifter leaks down completely, then check the clearance between the valve stem and rocker arm with a feeler gauge, comparing it to the specifications and recording the results. Rotate the crankshaft to position 2 and check the intake valves 2, 4, and 5, and the exhaust valves 3, 5, and 6. If the clearances are within specification, install the rocker arm covers. The clearance can be adjusted by using different length pushrods available from your dealer; if there isn't enough clearance, use a shorter pushrod, and if there is too much clearance, use a longer one.
    Posted by FordPartsGiant Specialist
    Q:
    How do you remove, inspect, and install rocker arms and pushrods, and adjust valve clearance on Mercury Grand Marquis? Posted by Customer
    A:
    Remove the valve cover(s) from the cylinder head(s). Beginning at the front of one cylinder head, remove the rocker arm fulcrum bolts and store them separately in marked containers to ensure they will be reinstalled in their original locations. If the pushrods are the only items being removed, loosen each bolt just enough to allow the rocker arms to be rotated to the side for pushrod removal. Lift off the rocker arms, fulcrums, and fulcrum guides if used, and store them in marked containers with the bolts. Remove the pushrods and store them separately to avoid mixing during installation; a perforated cardboard box is ideal for pushrod storage. Check each rocker arm for wear, cracks, and damage, especially where the pushrods and valve stems contact the rocker arm faces, ensuring the hole at the pushrod end of each rocker arm is open. Inspect the pivot area and fulcrum for wear, cracks, and galling, replacing worn or damaged rocker arms and fulcrums as necessary. Inspect the pushrods for cracks and excessive wear at the ends, rolling each across a piece of plate glass to check for bending. Before tightening the rocker arm bolts, ensure both lifters for each cylinder are on the base circle of the cam lobe with both valves closed. Lubricate the lower end of each pushrod with clean engine oil or moly-base grease and install them in their original locations, ensuring each pushrod seats completely in the lifter. Apply moly-base grease to the ends of the valve stems and the upper ends of the pushrods before positioning the rocker arms, fulcrums, and guides, and also to the fulcrums to prevent damage to mating surfaces before engine oil pressure builds up. Set the rocker arms and guides in place, then install the fulcrums and bolts. Adjustment is typically needed after replacing valve train components or significant grinding of the valves or seats. Using a lifter bleed-down tool, press on the rocker arm until the lifter leaks down, then check the clearance between the valve stem and rocker arm with a feeler gauge, comparing the results to the specifications and recording them for future reference. Repeat the procedure for each valve in the specified order, checking the intake and exhaust valves with the crankshaft in position 1, then rotating the crankshaft one complete revolution to position 2 and checking the specified valves, followed by a 1/4-turn to position 3 for the remaining valves. Clearance can be adjusted using different length pushrods available from the dealer; use a shorter pushrod for insufficient clearance and a longer one for excessive clearance.
    Posted by FordPartsGiant Specialist
    Q:
    How to inspect and maintain lifters and pushrods on Ford Bronco? Posted by Customer
    A:
    To service non-roller lifters, first remove them and clean thoroughly with solvent, ensuring they are dried without mixing them up, as they must be reinstalled in their original bores. Inspect each lifter wall, pushrod seat, and foot for scuffing, score marks, and uneven wear; lifters that are pitted or rough should not be reused. The foot of each lifter should be slightly convex, and if it appears flat or the bottom is worn concave, scratched, or galled, replace the entire set. Additionally, check the pushrod seat for wear. When installing new lifters, a new camshaft must also be used, and never install used lifters unless the original camshaft is being reused. For roller lifters, check each lifter wall and pushrod seat for scuffing and wear, and ensure the rollers turn freely without excessive play. If excessive wear is present, inspect the camshaft; if the cam lobes are acceptable, the camshaft can be reused. Used roller lifters can be installed with a new camshaft if they are in good condition and must be placed in their original bores. Lastly, inspect pushrod ends for scuffing, cracks, and excessive wear, rolling each pushrod on a flat surface to check for bends, and replace any that are bent. Also, check the pushrod oil passage for blockages and clean as necessary.
    Posted by FordPartsGiant Specialist
    Q:
    How to remove and install Pushrod and Rocker Arm in V8 engine on Ford F-250? Posted by Customer
    A:
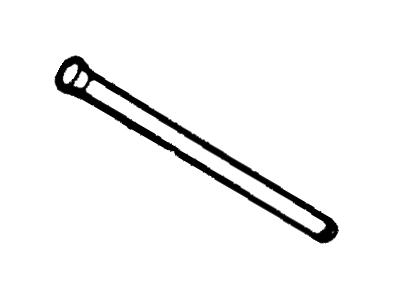
    To do so, simply take off the valve covers; if any/ all rocker arms are being changed, then the rocker arm fulcrum bolts are also unbolted here. Subsequently, remove the oil deflectors if they exist, the fulcrums, the fulcrum guides if any, and the rocker arms having always made sure that they are arranged in a manner that will allow for installation in their correct order again. If only the pushrods are removed, remove the fulcrum retaining bolts and raise the rocker arms to pull out the pushrods from the cylinder head; make sure that the pushrods are arranged for use later. Check out the rocker arms and the pushrods once they have been removed. During install use the engine oil or assembly lube on the top of the valve stem, the pushrod guide in the cylinder head, rocker arm fulcrum seat as well as fulcrum seat socket in the rocker arm. With the lubricant applied to both ends, fit the pushrods in their correct position and if necessary the fulcrum guides then the rocker arms, fulcrums oil deflectors if existent and finally the fulcrum bolts. Loosen the two bolts that secure the fulcrum and then tighten in to the required torque. If any of these were changed, set the valve clearances and if necessary, install an extra or a shorter pushrod. Last of all, refit the valve covers, and proceed to ignite the engine and check whether there are any signs of oil leakage.
    Posted by FordPartsGiant Specialist
    Q:
    What should you apply to the top of the valve stem before installation for the 1984 Ford F-250? Posted by Customer
    A:
    Apply engine oil or assembly lube to the top of the valve stem.
    Posted by FordPartsGiant Specialist
    Q:
    What should be done if the lifters show signs of excessive wear for the 1984 Ford F-250? Posted by Customer
    A:
    Check the camshaft carefully. If the cam lobes aren't worn excessively, the camshaft can be re-used. If the lifter walls are damaged or worn, inspect the lifter bores in the engine block as well. If the pushrod seats are worn, check the pushrod ends.
    Posted by FordPartsGiant Specialist
    Q:
    What should be applied to the ends of the valve stems and the upper ends of the pushrods before positioning the rocker arms, fulcrums, and guides for the 1981 Mercury Capri? Posted by Customer
    A:
    Apply moly-base grease.
    Posted by FordPartsGiant Specialist
    Q:
    What is the final step in the installation process for the 1983 Ford Bronco? Posted by Customer
    A:
    Install the valve covers.
    Posted by FordPartsGiant Specialist
    Q:
    What should you do if components were replaced for the 1985 Ford Bronco? Posted by Customer
    A:
    If components were replaced, check the valve clearance. If necessary, install a longer or shorter pushrod.
    Posted by FordPartsGiant Specialist
    Q:
    What should be applied to the ends of the valve stems and the upper ends of the push rods before positioning the rocker arms, fulcrums, and guides for the 1994 Ford Explorer? Posted by Customer
    A:
    Apply moly-based engine assembly lubricant to the ends of the valve stems and the upper ends of the push rods before positioning the rocker arms, fulcrums, and guides.
    Posted by FordPartsGiant Specialist
    Q:
    How should the rocker arm pads be prepared for the 2000 Ford Explorer? Posted by Customer
    A:
    Coat the rocker arm pads with engine assembly lube.
    Posted by FordPartsGiant Specialist
    See expert answers on similar Pushrod
    If you have any questions about this product, please don't hesitate to ask us. We will be happy to help you!

Genuine Ford Part E5AZ-6565-A, the Right Choice

To ensure reliability, purchase Ford part # E5AZ-6565-A Rod - Valve Push. It is sometimes referred to as Ford Pushrod. In terms of quality and longevity, OEM parts are top-tier. This is because they are made according to Ford's demanding factory specifications and go through strict quality control. This part fits specific Ford Bronco, E-150, F-150 models. It fits Lincoln Continental, Mark VII, Town Car. It also fits Mercury Capri, Cougar, Mountaineer.

FordPartsGiant.com is a leading supplier of genuine Ford parts and accessories such as Ford E5AZ6565A Rod - Valve Push. On our platform, we provide genuine Ford parts at incredible prices while ensuring top-tier quality. Feel at ease shopping with us, knowing our parts have a hassle-free return policy and rapid delivery service. For detailed Ford parts information, click here.

Why choose Ford Parts Giant

  • Dedicated Service

    Your complete satisfaction is our #1 goal

  • Lowest Prices

    Best deals on genuine OE parts from dealerships

  • Fast Delivery

    Orders are processed and delivered promptly