Make sure this part fits

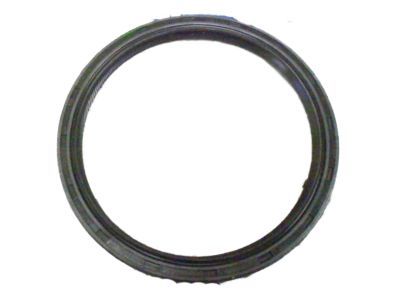
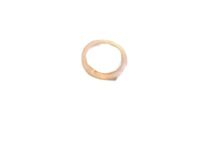
Ford F1SZ-6701-A Seal Assy - Crankshaft Oil

1987-2008 Ford F1SZ6701A

Customer Questions & Expert Answers (26)
Ford F1SZ-6701-A Seal Assy - Crankshaft Oil
  • Part Description
    Seal Assy - Crankshaft Oil
  • Base No.
    6701
  • Manufacturer
    Ford
Make sure this part fits
$31.81 MSRP: $46.50
You Save: $14.69 (32%)
Ships in 1-2 Business Days
1
ADD TO CART
  • Related Parts
  • Product Specifications
  • Vehicle Fitment
  • Customer Questions & Expert Answers
  • Product Specifications

    BrandGenuine Ford
    Base No.6701
    Manufacturer Part NumberF1SZ-6701-A, F1SZ6701A
    Part DescriptionSeal Assy - Crankshaft Oil
    Item Weight0.30 Pounds
    ConditionNew
    Fitment TypeDirect Replacement
    ManufacturerFord
    SKUF1SZ-6701-A
    WarrantyThis genuine Ford part is guaranteed by Ford's factory warranty.
    Shipping & ReturnShipping Policy Return Policy
    Warning: California’s Proposition 65
  • Vehicle Fitment

    Year Make Model Engine Important vehicle option details
    1992-1996 Ford Bronco8 Cyl 5.0L3AT C6, 4AT A4LD, 4AT AOD, 4AT E4OD, 4MT, 5MT
    1992-2003 Ford E-1506 Cyl 4.2L, 8 Cyl 5.0L3AT C6, 4AT 4R100, 4AT 4R70W, 4AT 4R75W, 4AT AOD, 4AT E4OD
    1997-2003 Ford E-2506 Cyl 4.2L4AT 4R100, 4AT 4R70W, 4AT E4OD
    1987-1989 Ford Escort4 Cyl 1.9L, 4 Cyl 2.0L3AT ATX, 4MT, 5MT
    1996-2001 Ford Explorer8 Cyl 5.0L4AT 4R55E, 4AT 4R70W, 5AT 5R55E, 5MT
    1992-2008 Ford F-1506 Cyl 4.2L, 6 Cyl 4.2L OHV EFI, 8 Cyl 5.0L3AT C6, 4AT, 4AT 4R100, 4AT 4R70W, 4AT 4R75W, 4AT AOD, 4AT E4OD, 4MT, 4-Speed Automatic Transmission 4R75E Livonia, 4-Speed Automatic Transmission AODEW/4R70E W/TSS, 4-Speed Automatic Transmission AODEW/4R75E W/TSS, 5MT, 5-Speed Manual Transmission - Mazda M5R2-C, Four-Wheel Drive (Part Time) (Left Hand Drive), Left Hand Drive, Rear-Wheel Drive (Left Hand Drive)
    1992-1996 Ford F-2508 Cyl 5.0L3AT C6, 4AT AOD, 4AT E4OD, 4MT, 5MT
    1988-1989 Ford Festiva4 Cyl 1.3L3AT ATX, 4MT, 5MT
    2004-2007 Ford Freestar6 Cyl 3.9L OHV EFI NA, 6 Cyl 4.2L OHV EFI4AT AX4N, Front-Wheel Drive (Left Hand Drive), Left Hand Drive
    1987-2004 Ford Mustang4 Cyl 2.3L, 6 Cyl 3.8L, 6 Cyl 3.8L OHV EFI, 6 Cyl 3.9L OHV EFI NA, 8 Cyl 5.0L4AT 4R70W, 4AT 4R75W, 4AT A4LD, 4AT AOD, 4AT AOD-E, 4-Speed Automatic Transmission 4R70W (AODE), 5MT, 5-Speed Manual Transmission (T450D), 5-Speed Manual Transmission T5OD, 5-Speed Manual Transmission TR3650, 6-Speed Manual Transmission Tremec T56, Left Hand Drive, Rear-Wheel Drive (Left Hand Drive)
    View More
  • Customer Questions & Expert Answers

    Q:
    Is the the correct part for the attached VIN? Posted by FordPartsGiant Specialist
    A:
    You can Select Your Vehicle to check if F1SZ-6701-A fits your vehicle.
    Posted by FordPartsGiant Specialist
    Q:
    How to replace the crankshaft oil seals in V8 engine on Ford F-250? Posted by Customer
    A:
    Before replacement of the front oil seal, you should drain the cooling system and then also remove the fan shroud, the radiator, the fan as well as the pulley. On 7.5L engines, remove the final drive belt. Next, unscrew the big nut and washer from the crankshaft nose but make sure that the crankshaft will not turns. Using a good puller, remove the vibration damper, then by the use of chisel and hammer, remove the old seal from the timing cover and from the crank shaft as well. Sweep the groove in the cover, apply motor oil in the circumference of the new sealing ring, and then insert it in place together with a seal driver or a large socket, making sure the spring is rightly placed. Engine oil should be applied on the crankshaft nose, the inner part of the vibration damper, including the seal seat, and keyway of the damper hub should be coated with RTV sealant. Position the damper keyway in line with the crankshaft key; engage the damper and bolt and washer and tighten to the specified torque rating. After removal, the operations are in the opposite sequence of installation; the next steps for the engine are refilling with oil and coolant and running through of the leak test whereby the engine is started immediately after installation. Regarding the rear main oil seal, all the VB engines up to 1983 used a two part seal while starting from 1984 the engines used a one part seal, apart from the 7.5L engine which remained using the two part seal. To change the two-piece seal, one will have to drop the oil pan to have access, loosen the main bearing cap screws by about ¼ turn, and then pull the rear main bearing cap to pull out the oil seal. To remove the part of the seal in the block, one will require a small sheet metal screw and it should not be used with force considering the delicate crank shaft surfaces. Remove carbon deposits and dirt from the grooves in the cap and block, coat the new seal halves with clean engine oil and fit the upper seal with the lip at the front of the engine and it should project as per the standard. Torque the main bearing cap bolts, fit the lower seal in the cap, use some RTV sealant on the surfaces that touch each other and put back the rear main bearing cap in such a way that the seals will align well. Closely torque the cap bolts, fit the oil pan and the oil pump and then carry on with the reverse procedure. Last but not the least, add the oil and coolant in the engine and look for any sign of leakage once the engine has been started.
    Posted by FordPartsGiant Specialist
    Q:
    How do you replace the front and rear seals on an engine on Lincoln Mark VII Overhead cam (OHC) engine? Posted by Customer
    A:
    To change the front seal, you'll have to take out the fan/clutch assembly; the fan shroud and drivebelt; the crankshaft pulley/vibration damper, and finally remove the old front Crankshaft Seal with care. Inspect for damage. It comes in with the open side facing in, lubricate it with engine oil, and drive it into the bore. Lubricate the lip of the seal, and install the damper onto the crankshaft paying attention to its alignment with the Woodruff key. Tighten up this bolt on a damper, put back the fan/clutch assembly and shroud, and restore a drive belt. To replace the rear seal, disconnect the battery cable, remove the drain plate then the back cover plate or backup housing. Remove the retaining ring or snap ring and discard the gasket material or old sealer.
    Posted by FordPartsGiant Specialist
    Q:
    How do you replace the front and rear seals on an engine on Lincoln Continental Overhead cam (OHC) engine? Posted by Customer
    A:
    To change the front seal, you'll have to take out the fan/clutch assembly; the fan shroud and drivebelt; the crankshaft pulley/vibration damper, and finally remove the old front Crankshaft Seal with care. Inspect for damage. It comes in with the open side facing in, lubricate it with engine oil, and drive it into the bore. Lubricate the lip of the seal, and install the damper onto the crankshaft paying attention to its alignment with the Woodruff key. Tighten up this bolt on a damper, put back the fan/clutch assembly and shroud, and restore a drive belt. To replace the rear seal, disconnect the battery cable, remove the drain plate then the back cover plate or backup housing. Remove the retaining ring or snap ring and discard the gasket material or old sealer.
    Posted by FordPartsGiant Specialist
    Q:
    How to replace the front crankshaft oil seal with the timing chain cover in place on Lincoln Continental Overhead valve (OHV)engines? Posted by Customer
    A:
    First of all, to replace the front Crankshaft Seal with the timing chain cover in place, remove the fan shroud, fan/clutch assembly, and drive belts. Extract the crankshaft bolt, and use a puller to detach the vibration damper. Care should be taken not to damage the cover or seal bore as you remove it using a special tool or a chisel and hammer. Inspect for any damage. Use a special tool or a socket and hammer to install the new seal. For engines with the timing chain cover removed, drive out the seal, clean the bore, and install the new seal with a socket and hammer. The procedure for rear main oil seals differs depending on whether one-piece or two-piece seals are used. To replace a one-piece seal, you need to take out the transmission, drive plate, and rear cover plate first. Remove this old one by prying off carefully then clean up back in there before applying both oil and grease on a new one that is pressed in place.
    Posted by FordPartsGiant Specialist
    Q:
    How to replace the front crankshaft oil seal with the timing chain cover in place on Lincoln Mark VII Overhead valve (OHV)engines? Posted by Customer
    A:
    First of all, to replace the front Crankshaft Seal with the timing chain cover in place, remove the fan shroud, fan/clutch assembly, and drive belts. Extract the crankshaft bolt, and use a puller to detach the vibration damper. Care should be taken not to damage the cover or seal bore as you remove it using a special tool or a chisel and hammer. Inspect for any damage. Use a special tool or a socket and hammer to install the new seal. For engines with the timing chain cover removed, drive out the seal, clean the bore, and install the new seal with a socket and hammer. The procedure for rear main oil seals differs depending on whether one-piece or two-piece seals are used. To replace a one-piece seal, you need to take out the transmission, drive plate, and rear cover plate first. Remove this old one by prying off carefully then clean up back in there before applying both oil and grease on a new one that is pressed in place.
    Posted by FordPartsGiant Specialist
    Q:
    How to replace the Crankshaft seals on Ford Thunderbird? Posted by Customer
    A:
    To replace the front seal, there is need to first remove the negative terminal of the battery, then follow the removal of the; fan assembly and shroud, the drivebelt and if equipped upper and lower shields. Place a mark on the crankshaft pulley and on the vibration damper so as to guide it when it will be reassembled, unscrew and take out the pulley and remove the vibration with a puller in order not to damage it. Scrub the crankshaft nose and the seal contact face and slightly pry out the worn out seal with the bore and crankshaft being checked for any signs of damage. If necessary, fit or rivet a special sleeve over any grooves in the balancer to obviate leakage. Smooth some oil to the lip of new seal and push it in to the bore until it fits tightly and you may use a socket or pipe of equal diameter. This is where balance pins are normally situated and if placing a new vibration damper, then balance pins should be well placed and the contact surface greased or oiled. Calling face the damper with the Woodruff key and set it with a soft-face hammer; then replace all other parts + and start the motor and check for leaks. For the rear seal, just drop the transmission and the flywheel/Drive plate, then just gently pry out the old seal without having to scratch the Crank shaft. Scrub the internal cylinder and the crankshaft and look for more damage, lubricate the edge of the new seal and than put it in the cylinder nicely and if possible use the tool. Last and before anything else, replace the rear cover plate, the flywheel or drive plate, as well as the transmission.
    Posted by FordPartsGiant Specialist
    Q:
    How do you replace the front and rear seals on an engine on Lincoln Town Car Overhead cam (OHC) engine? Posted by Customer
    A:
    To change the front seal, you'll have to take out the fan/clutch assembly; the fan shroud and drivebelt; the crankshaft pulley/vibration damper, and finally remove the old front Crankshaft Seal with care. Inspect for damage. It comes in with the open side facing in, lubricate it with engine oil, and drive it into the bore. Lubricate the lip of the seal, and install the damper onto the crankshaft paying attention to its alignment with the Woodruff key. Tighten up this bolt on a damper, put back the fan/clutch assembly and shroud, and restore a drive belt. To replace the rear seal, disconnect the battery cable, remove the drain plate then the back cover plate or backup housing. Remove the retaining ring or snap ring and discard the gasket material or old sealer.
    Posted by FordPartsGiant Specialist
    Q:
    How to replace the Crankshaft seals on Mercury Cougar? Posted by Customer
    A:
    To replace the front seal, there is need to first remove the negative terminal of the battery, then follow the removal of the; fan assembly and shroud, the drivebelt and if equipped upper and lower shields. Place a mark on the crankshaft pulley and on the vibration damper so as to guide it when it will be reassembled, unscrew and take out the pulley and remove the vibration with a puller in order not to damage it. Scrub the crankshaft nose and the seal contact face and slightly pry out the worn out seal with the bore and crankshaft being checked for any signs of damage. If necessary, fit or rivet a special sleeve over any grooves in the balancer to obviate leakage. Smooth some oil to the lip of new seal and push it in to the bore until it fits tightly and you may use a socket or pipe of equal diameter. This is where balance pins are normally situated and if placing a new vibration damper, then balance pins should be well placed and the contact surface greased or oiled. Calling face the damper with the Woodruff key and set it with a soft-face hammer; then replace all other parts + and start the motor and check for leaks. For the rear seal, just drop the transmission and the flywheel/Drive plate, then just gently pry out the old seal without having to scratch the Crank shaft. Scrub the internal cylinder and the crankshaft and look for more damage, lubricate the edge of the new seal and than put it in the cylinder nicely and if possible use the tool. Last and before anything else, replace the rear cover plate, the flywheel or drive plate, as well as the transmission.
    Posted by FordPartsGiant Specialist
    Q:
    How to replace the crankshaft oil seals in V8 engine on Ford Bronco? Posted by Customer
    A:
    Before replacement of the front oil seal, you should drain the cooling system and then also remove the fan shroud, the radiator, the fan as well as the pulley. On 7.5L engines, remove the final drive belt. Next, unscrew the big nut and washer from the crankshaft nose but make sure that the crankshaft will not turns. Using a good puller, remove the vibration damper, then by the use of chisel and hammer, remove the old seal from the timing cover and from the crank shaft as well. Sweep the groove in the cover, apply motor oil in the circumference of the new sealing ring, and then insert it in place together with a seal driver or a large socket, making sure the spring is rightly placed. Engine oil should be applied on the crankshaft nose, the inner part of the vibration damper, including the seal seat, and keyway of the damper hub should be coated with RTV sealant. Position the damper keyway in line with the crankshaft key; engage the damper and bolt and washer and tighten to the specified torque rating. After removal, the operations are in the opposite sequence of installation; the next steps for the engine are refilling with oil and coolant and running through of the leak test whereby the engine is started immediately after installation. Regarding the rear main oil seal, all the VB engines up to 1983 used a two part seal while starting from 1984 the engines used a one part seal, apart from the 7.5L engine which remained using the two part seal. To change the two-piece seal, one will have to drop the oil pan to have access, loosen the main bearing cap screws by about ¼ turn, and then pull the rear main bearing cap to pull out the oil seal. To remove the part of the seal in the block, one will require a small sheet metal screw and it should not be used with force considering the delicate crank shaft surfaces. Remove carbon deposits and dirt from the grooves in the cap and block, coat the new seal halves with clean engine oil and fit the upper seal with the lip at the front of the engine and it should project as per the standard. Torque the main bearing cap bolts, fit the lower seal in the cap, use some RTV sealant on the surfaces that touch each other and put back the rear main bearing cap in such a way that the seals will align well. Closely torque the cap bolts, fit the oil pan and the oil pump and then carry on with the reverse procedure. Last but not the least, add the oil and coolant in the engine and look for any sign of leakage once the engine has been started.
    Posted by FordPartsGiant Specialist
    Q:
    How do you replace the Crankshaft seals on Mercury Grand Marquis? Posted by Customer
    A:
    When the front seal is wanting of replacement, there's a necessity to start with the fan/clutch assembly and shroud, the drive belt and then the crankshaft pulley/ vibration damper. Remove the seal from the cover gently using a seal removal tool or a screw driver without causing any scratch on the crankshaft. If the timing cover is removed, the seal can be knocked into the housing from the back side with chisel or a small punch while and covering the end of the housing with wooden blocks in order not to harm the cover. The seal bore and the crankshaft are wear prone and should therefore be checked for nicks and burrs before a new seal is fitted with the open end facing inwards and smeared lightly with oil or grease for easy fitting. Tighten the seal in the bore with a large socket and hammer till it bottoms out and the socket is at least the diameter of the seal. It is recommended to lubricate the seal lip by clean engine oil after which orient the damper key way and the Woodruff key is fitted accordingly. If required, give the damper a tap with a soft-face hammer into position or use the bolt to lock it into place. Replace the drivebelt and also the fan/clutch, if any, that may have been removed to access the timing chain, then engage the engine among other parts that were removed to ensure that there are no leaks. Of the two, the rear one requires having the negative battery terminal disconnected together with the transmission, the driveplate, and the rear cover plate. Remove the bolts and unfasten the seal retainer and remove the old gasket or sealant as well. Place the seal and retainer assembly on wooden blocks and drive the old seal out from the back side. Place the new seal into the retainer but do not cock it in the bore then tap it in using a wooden block. Crankshaft and seal bore should be cleaned and the contact surface of the seal checked for any signs of abuse. Before installing the new crankshaft seal, the crankshaft seal journal and the new seal lip have to be coated with the engine oil and on the engine block or seal retainer, a small amount of RTV sealant must be applied. The oil seal retainer should be fit carefully and the seal should be placed on the crankshaft of the engine with the help of a suitable instrument. Check the retainer bolts, replace new rear cover plate, drive plate and the transmission the steps of removal must be done in reverse. Last but not the least, one should inspect the level of the oil and if it requires it should add the oil and check the engine for any signs of leakage of the same.
    Posted by FordPartsGiant Specialist
    Q:
    How do you remove and install the crankshaft pulley,front Crankshaft Seal and Timing Cover in 4.0L pushrod V6 engine on Ford Explorer? Posted by Customer
    A:
    Among the tasks connected with the crankshaft is to remove and install the crankshaft pulley which means that one should first remove the drive belt and then the crankshaft pulley bolt though according to the manufacturer's advice, one should replace the bolt every time it is loosed. If necessary, a longer, smaller diameter bolt should be threaded into the crankshaft to give anchor point for the puller, and the puller which bolts onto the pulley hub must be used, since damaged crankshaft damper can be caused by jaw-type pullers. On the surface of the pulley where the front seal rides, apply clean engine oil and then fit the crankshaft pulley with the aid of an installation tool, do not hammer on it, then tighten the pulley bolt to the specified torque. For front oil seal replacement remove the crankshaft pulley and gently push out the oil seal clean the bore of the seal and check for nick or gauges. Wipe a drop of clean engine oil on the lip of the new seal before pushing it into the corresponding bore by use of a suitable tool, ensure the open side is towards the engine then fit the crankshaft pulley. To have access to the Timing Cover, there are many other components that you need to take off, and these include the crankshaft pulley and timing sensor, the cooling system have to be drained, and the engine cooling fan and the radiator has to be taken off. Remove the air conditioning compressor and bracket, not severing any refrigerant lines, also, take out the oil pan and water pump, and any hoses that would be required for their removal. You have to take off brackets, studs, and cover bolts during your work, which have to be marked so that they might be fastened in their proper positions again. Remove carefully the cover, check if all the bolts or studs have been removed and if they are seized / rusted, gently apply a knock gently or pry to break the gasket seal. For service, assemble and check the parts removing gasket material and oil film on all surfaces, on TC applications, remove and reinstall the guide sleeves, install the front cover with a new gasket and tighten the bolts by hand. Finally, adjust the cover bolts equally and done in an opposite sequence to a manner in which the above components were removed. Last but not the least let the engine be on and observe if there is any oil and coolant leakage.
    Posted by FordPartsGiant Specialist
    Q:
    What is the first step to ensure a proper fit for the seal for the 1990 Ford Thunderbird? Posted by Customer
    A:
    Make sure the engine block is clean to ensure a proper fit.
    Posted by FordPartsGiant Specialist
    Q:
    What are the initial steps for replacing the front crankshaft oil seal with the timing chain cover in place for the 1992 Lincoln Town Car? Posted by Customer
    A:
    Start by removing the fan shroud, fan/clutch assembly, and drivebelts. Extract the bolt from the front of the crankshaft and use a puller to detach the vibration damper.
    Posted by FordPartsGiant Specialist
    See expert answers on similar Crankshaft Seal
    Q:
    How should the seal be started in the recess and installed for the 1989 Mercury Cougar? Posted by Customer
    A:
    Start the seal in the recess and install it with tool T82L-6701-A. Alternatively, use a hammer and socket the same diameter as the seal to drive the seal into the bore.
    Posted by FordPartsGiant Specialist
    Q:
    What should be checked before installing the new seal for the 1998 Mercury Grand Marquis? Posted by Customer
    A:
    Check the seal bore and crankshaft, as well as the seal contact surface on the vibration damper for nicks and burrs. Position the new seal in the bore with the open end of the seal facing IN. A small amount of oil applied to the outer edge of the new seal will make installation easier.
    Posted by FordPartsGiant Specialist
    Q:
    What is the next step after removing the fan and shroud assembly for the 2011 Ford F-150? Posted by Customer
    A:
    Raise the vehicle and support it securely on jackstands.
    Posted by FordPartsGiant Specialist
    See expert answers on similar Crankshaft Seal
    Q:
    What should be done to the crankshaft nose and seal contact surface before installing a new seal for the 2006 Ford F-150? Posted by Customer
    A:
    Clean the crankshaft nose and the seal contact surface on the pulley with lacquer thinner or acetone, and leave the Woodruff key in place in the crankshaft keyway.
    Posted by FordPartsGiant Specialist
    Q:
    How do you install the new seal for the 1996 Ford Bronco? Posted by Customer
    A:
    Coat the outer edge of the new seal with engine oil and install it using a seal driver (available at most auto parts stores). Alternatively, a large socket or piece of pipe can be used to push the new seal in, but use extreme caution to avoid damaging the seal.
    Posted by FordPartsGiant Specialist
    Q:
    What is the first step in the procedure for the 1991 Ford Explorer? Posted by Customer
    A:
    Disconnect the negative battery cable.
    Posted by FordPartsGiant Specialist
    Q:
    What is the first step in the process for the 2012 Ford F-150? Posted by Customer
    A:
    The first step is to remove the transmission.
    Posted by FordPartsGiant Specialist
    Q:
    What is the note regarding the rear main oil seal replacement for the 2007 Ford F-150? Posted by Customer
    A:
    The rear main oil seal replacement is a time-consuming job that requires several special tools. It is advised to read through the procedure and obtain the necessary tools before beginning.
    Posted by FordPartsGiant Specialist
    Q:
    What should be checked in the timing chain cover after removing the seal for the 1999 Ford Explorer? Posted by Customer
    A:
    Check the seal bore in the timing chain cover for nicks or burrs.
    Posted by FordPartsGiant Specialist
    Q:
    What is the final step in the installation process for the 1993 Ford Explorer? Posted by Customer
    A:
    The remainder of the installation is the reverse of the removal procedure.
    Posted by FordPartsGiant Specialist
    Q:
    How do you align and install the damper for the 1996 Ford F-250? Posted by Customer
    A:
    Align the damper keyway with the key on the crankshaft and install the damper using an installation tool (available at most auto parts stores).
    Posted by FordPartsGiant Specialist
    Q:
    What should be removed after disconnecting the battery for the 2009 Ford F-150? Posted by Customer
    A:
    Remove the drive belt.
    Posted by FordPartsGiant Specialist
    If you have any questions about this product, please don't hesitate to ask us. We will be happy to help you!

Genuine Ford Part F1SZ-6701-A, the Right Choice

To ensure reliability, purchase Ford part # F1SZ-6701-A Seal Assy - Crankshaft Oil. It is sometimes referred to as Ford Crankshaft Seal. In terms of quality and longevity, OEM parts are top-tier. This is because they are made according to Ford's demanding factory specifications and go through strict quality control. This part fits specific Ford Bronco, E-150, F-150 models. It fits Lincoln Continental, Mark LT, Mark VII. It also fits Mercury Cougar, Mountaineer, Tracer.

FordPartsGiant.com is a leading supplier of genuine Ford parts and accessories such as Ford F1SZ6701A Seal Assy - Crankshaft Oil. On our platform, we provide genuine Ford parts at incredible prices while ensuring top-tier quality. Feel at ease shopping with us, knowing our parts have a hassle-free return policy and rapid delivery service. For detailed Ford parts information, click here.

Why choose Ford Parts Giant

  • Dedicated Service

    Your complete satisfaction is our #1 goal

  • Lowest Prices

    Best deals on genuine OE parts from dealerships

  • Fast Delivery

    Orders are processed and delivered promptly