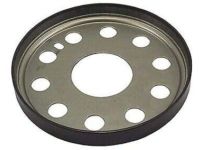
Make sure this part fits

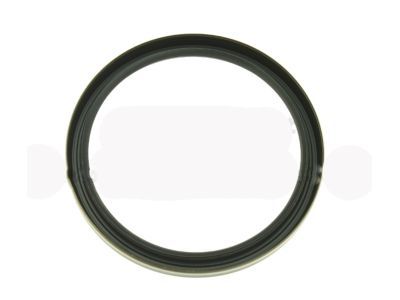
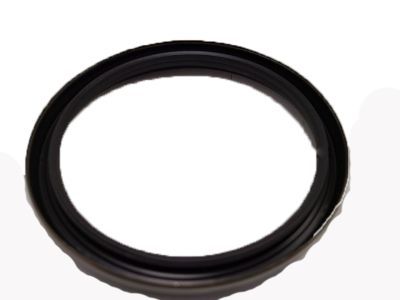
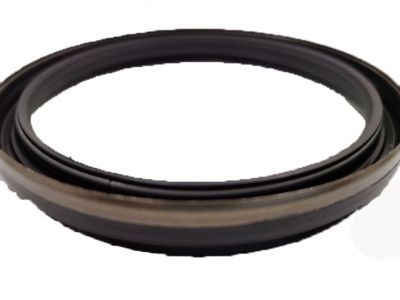
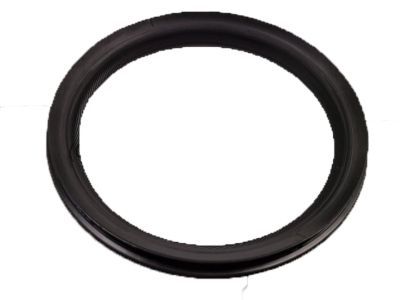
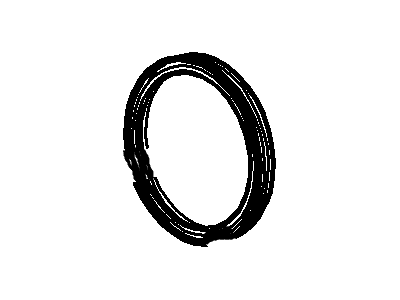
Ford AT4Z-6701-A Seal Assy - Crankshaft Oil

2007-2023 Ford AT4Z6701A

Customer Questions & Expert Answers (26)
Ford AT4Z-6701-A Seal Assy - Crankshaft Oil
  • Part Description
    Seal Assy - Crankshaft Oil
  • Base No.
    6701
  • Replaces
    7T4Z-6701-AA
  • Manufacturer
    Ford
Make sure this part fits
$41.53 MSRP: $59.67
You Save: $18.14 (31%)
Ships in 1 Business Day
1
ADD TO CART
  • Related Parts
  • Product Specifications
  • Vehicle Fitment
  • Customer Questions & Expert Answers
  • Product Specifications

    BrandGenuine Ford
    Base No.6701
    Manufacturer Part NumberAT4Z-6701-A, AT4Z6701A
    Part DescriptionSeal Assy - Crankshaft Oil
    Other NamesCrankshaft Seal, Rear Main Seal, Rear Seal
    Item Dimensions6.2 x 4.0 x 2.1 inches
    Item Weight0.40 Pounds
    ConditionNew
    Fitment TypeDirect Replacement
    Replaces7T4Z-6701-AA
    ManufacturerFord
    SKUAT4Z-6701-A
    WarrantyThis genuine Ford part is guaranteed by Ford's factory warranty.
    Shipping & ReturnShipping Policy Return Policy
    Warning: California’s Proposition 65
  • Vehicle Fitment

    Year Make Model Engine Important vehicle option details
    2017-2019 Ford E-1508 Cyl 6.2L OHC NA4-Speed Automatic Transmission 4R70W (AODE), 4-Speed Automatic Transmission 4R75E Livonia, 4-Speed Automatic Transmission AODEW/4R70E W/TSS, 4-Speed Automatic Transmission AODEW/4R75E W/TSS, 5-Speed Automatic Transmission 5R110W - HI/Torque, 5-Speed Automatic Transmission 5R110W NAAO, 6-Speed Automatic Transmission (6R140)
    2017-2019 Ford E-2508 Cyl 6.2L OHC NA4-Speed Automatic Transmission 4R70W (AODE), 4-Speed Automatic Transmission 4R75E Livonia, 4-Speed Automatic Transmission AODEW/4R70E W/TSS, 4-Speed Automatic Transmission AODEW/4R75E W/TSS, 5-Speed Automatic Transmission 5R110W - HI/Torque, 5-Speed Automatic Transmission 5R110W NAAO, 6-Speed Automatic Transmission (6R140)
    2017-2019 Ford E-350/E-350 Super Duty8 Cyl 6.2L OHC NA4-Speed Automatic Transmission 4R70W (AODE), 4-Speed Automatic Transmission 4R75E Livonia, 4-Speed Automatic Transmission AODEW/4R70E W/TSS, 4-Speed Automatic Transmission AODEW/4R75E W/TSS, 5-Speed Automatic Transmission 5R110W - HI/Torque, 5-Speed Automatic Transmission 5R110W NAAO, 6-Speed Automatic Transmission (6R140)
    2017-2019 Ford E-450 Super Duty8 Cyl 6.2L OHC NA4-Speed Automatic Transmission 4R70W (AODE), 4-Speed Automatic Transmission 4R75E Livonia, 4-Speed Automatic Transmission AODEW/4R70E W/TSS, 4-Speed Automatic Transmission AODEW/4R75E W/TSS, 5-Speed Automatic Transmission 5R110W - HI/Torque, 5-Speed Automatic Transmission 5R110W NAAO, 6-Speed Automatic Transmission (6R140)
    2015-2023, 2007-2013 Ford Edge6 Cyl 2.7L, 6 Cyl 3.5L DOHC VCT SMPI, 6 Cyl 3.7L DOHC6-Speed Automatic Transmission 6DCT450 - MPS6, 6-Speed Automatic Transmission 6F Mid-Range, 6-Speed Automatic Transmission 6F50, 6-Speed Automatic Transmission 6F55, 6-Speed Manual Transaxle - MMT6, 8-Speed Automatic Transmission 8F57, Four-Wheel Drive (Full Time) (Left Hand Drive), Four-Wheel Drive (Part Time) (Left Hand Drive), Front-Wheel Drive (Left Hand Drive), Front-Wheel Drive (Right Hand Drive), Left Hand Drive, RHD 4WD (FTD)
    2020-2023 Ford Explorer6 Cyl 3.3 L FLEX, 6 Cyl 3.3 L FULL HYBRID EV-GAS (FHEV)
    2010-2023 Ford F-1506 Cyl 2.7L, 6 Cyl 3.3L Duratec, 6 Cyl 3.5L DOHC TIVCT, 6 Cyl 3.7L PFI NA, 8 Cyl 5.0L MOD DOHC SEFI NA, 8 Cyl 6.2L OHC NA10-Speed Automatic Transmission (10R80), 4-Speed Automatic Transmission 4R75E Livonia, 4-Speed Automatic Transmission AODEW/4R70E W/TSS, 4-Speed Automatic Transmission AODEW/4R75E W/TSS, 5-Speed Manual Transmission - Mazda M5R2-C, 6-Speed Automatic Transmission (6R80), Four-Wheel Drive (Part Time) (Left Hand Drive), Left Hand Drive, Rear-Wheel Drive (Left Hand Drive)
    2011-2019 Ford F-250 Super Duty8 Cyl 6.2L OHC NA5-Speed Automatic Transmission 5R110W NAAO, 5-Speed Manual Transmission-Tremec TR4050, 6-Speed Automatic Transmission (6R100), 6-Speed Automatic Transmission (6R140), Four-Wheel Drive (Part Time) (Left Hand Drive), Left Hand Drive, Rear-Wheel Drive (Left Hand Drive)
    2011-2019 Ford F-350 Super Duty8 Cyl 6.2L OHC NA5-Speed Automatic Transmission 5R110W NAAO, 5-Speed Manual Transmission-Tremec TR4050, 6-Speed Automatic Transmission (6R100), 6-Speed Automatic Transmission (6R140), Four-Wheel Drive (Part Time) (Left Hand Drive), Left Hand Drive, Rear-Wheel Drive (Left Hand Drive)
    2011-2019 Ford F-450 Super Duty8 Cyl 6.2L OHC NA5-Speed Automatic Transmission 5R110W NAAO, 5-Speed Manual Transmission-Tremec TR4050, 6-Speed Automatic Transmission (6R100), 6-Speed Automatic Transmission (6R140), Four-Wheel Drive (Part Time) (Left Hand Drive), Left Hand Drive, Rear-Wheel Drive (Left Hand Drive)
    View More
  • Customer Questions & Expert Answers

    Q:
    Will these fit my car and if not which part will? Thank you. Posted by FordPartsGiant Specialist
    A:
    You can Select Your Vehicle to check if AT4Z-6701-A fits your vehicle.
    Posted by FordPartsGiant Specialist
    Q:
    How do you remove and install a front crankshaft seal in four cylinder engine on Lincoln MKX? Posted by Customer
    A:
    Remove the crankshaft pulley. The seal can then be removed by using a screwdriver or hook tool with caution not to harm the timing chain cover bore or the nose and sealing surface of the crankshaft. Another way of achieving this is making a hole along the seal on each side and fastening the screws to 'pop' the seal. It is required to clean the sealing areas on the engine lid and on the crankshaft, then to clean and oil with the fresh engine oil. I was initially worse off: I was installing the new seal by pressing it into the timing chain cover, making certain it stays square as it goes into the bore. After starting use a seal driver or a suitable socket of the right size then carefully drive the seal in until it is flush with the timing chain cover. Clean the outer lip of the seal where it abuts with the crankshaft then apply clean engine oil on that lip before tightening the crankshaft pulley.
    Posted by FordPartsGiant Specialist
    Q:
    How is the rear main oil seal installed in V6 engine on Ford Taurus? Posted by Customer
    A:
    The one-piece rear Crankshaft Seal is pressed into a rear Crankshaft Seal carrier mounted at the rear of the block, and for 3.0L models, the transaxle must be removed, while for 3.5L engines, the engine needs to be lifted out and supported on an engine hoist. In 3.5L V6 engines, two rear seal retaining plates are utilized, with an aluminum plate on early models and a steel plate on later ones; if a steel plate is present, both the plate and seal must be replaced as an assembly. The oil pan should be removed, and for 3.0L engines, a seal removal tool is used to take out the rear seal. For 3.5L engines with aluminum seal retainer plates, the CKP sensor and sensor ring must be removed, followed by the removal of eight bolts securing the Crankshaft Seal carrier to the block, and the two oil pan-to-carrier bolts should be inserted into the threaded holes in the carrier and tightened evenly to force the carrier off the engine. For 3.0L V6 models, clean the Crankshaft Seal carrier mating surfaces on the cylinder block and crankshaft, removing any burrs or raised edges that may have caused seal failure. Lightly coat the inside lip of the new seal with clean engine oil and use a two-inch wide plastic strip or a cut plastic beverage bottle as a liner for installation. With the liner in place, carefully slide the new seal onto the crankshaft's contact surface, using a special seal installer or a large socket with a hammer to tap the seal into place. After removing the plastic liner, tighten the Crankshaft Seal carrier bolts to the specified torque, alternating from left to right, and check for oil leakage when the engine is operable. For 3.5L V6 models, the installation is easier by removing the seal retainer plate, using two of the retainer-to-oil pan bolts to push the retainer from the engine, and ensuring all traces of RTV sealant are removed. A 3/16-inch bead of RTV should be applied where the block and oil pan flanges meet, and the Crankshaft Seal carrier bolts should be finger-tightened while aligning the bottom of the carrier with the engine block to ensure flush surfaces, as improper alignment may lead to leaks. After installing the retainer and all bolts within 10 minutes of applying sealant, clean the bore and apply a film of clean engine oil to the outer edge and lips of the new seal, pressing it squarely into the bore with a special installation tool, avoiding hammering. Finally, install the CKP sensor ring and sensor, and check for oil leakage when the engine is operable.
    Posted by FordPartsGiant Specialist
    Q:
    How do you remove and install a front crankshaft seal in four cylinder engine on Ford Edge? Posted by Customer
    A:
    Remove the crankshaft pulley. The seal can then be removed by using a screwdriver or hook tool with caution not to harm the timing chain cover bore or the nose and sealing surface of the crankshaft. Another way of achieving this is making a hole along the seal on each side and fastening the screws to 'pop' the seal. It is required to clean the sealing areas on the engine lid and on the crankshaft, then to clean and oil with the fresh engine oil. I was initially worse off: I was installing the new seal by pressing it into the timing chain cover, making certain it stays square as it goes into the bore. After starting use a seal driver or a suitable socket of the right size then carefully drive the seal in until it is flush with the timing chain cover. Clean the outer lip of the seal where it abuts with the crankshaft then apply clean engine oil on that lip before tightening the crankshaft pulley.
    Posted by FordPartsGiant Specialist
    Q:
    How do you remove the oil seal and carrier for the 2012 Ford Fusion? Posted by Customer
    A:
    Unbolt the oil seal and carrier to remove them.
    Posted by FordPartsGiant Specialist
    Q:
    What should be inspected before installing the new seal for the 2016 Ford Fusion? Posted by Customer
    A:
    Inspect the front cover and the pulley seal surface for nicks, burrs, or other roughness that could damage the new seal. Correct as necessary.
    Posted by FordPartsGiant Specialist
    Q:
    What is the next step after installing the new seal for the 2007 Ford Mustang? Posted by Customer
    A:
    Install the CKP sensor.
    Posted by FordPartsGiant Specialist
    Q:
    What is an alternative method for removing the seal for the 2009 Ford Fusion? Posted by Customer
    A:
    Another procedure for removing the seal is to drill a small hole on each side of the seal and place a self-tapping screw in each hole. Use these screws as a means of pulling the seal out without having to pry on it.
    Posted by FordPartsGiant Specialist
    See expert answers on similar Crankshaft Seal
    Q:
    How can the seal installation be made easier for the 2011 Ford F-150? Posted by Customer
    A:
    The seal installation can be made easier by unbolting and removing the seal retainer plate. After removing all the mounting bolts, use two of the retainer-to-oil pan bolts and start them into the two threaded holes in the retainer plate. Tightening these two bolts alternately will push the retainer from the engine.
    Posted by FordPartsGiant Specialist
    Q:
    How do you remove the crankshaft rear oil slinger for the 2010 Ford Mustang? Posted by Customer
    A:
    A special tool should be used to remove the crankshaft rear oil slinger.
    Posted by FordPartsGiant Specialist
    Q:
    How should the new seal be moved into position for the 2017 Ford Fusion? Posted by Customer
    A:
    With the plastic seal liner in place, carefully move the new seal into position by sliding it onto the contact surface of the crankshaft. A special seal installer (manufacturer tool #303-178) or a large socket or piece of pipe the correct size can be used with a small hammer to tap the seal in place on the block.
    Posted by FordPartsGiant Specialist
    Q:
    What should be done if there are signs of abnormal wear on the sealing surface for the 2011 Ford Mustang? Posted by Customer
    A:
    Check with your auto parts store for the availability of a repair sleeve to restore a smooth finish to the sealing surface.
    Posted by FordPartsGiant Specialist
    See expert answers on similar Crankshaft Seal
    Q:
    What is the first step in the installation process for the 2006 Ford Mustang? Posted by Customer
    A:
    Coat the lip of the new seal with clean engine oil and drive it into the bore with a seal driver or a large socket.
    Posted by FordPartsGiant Specialist
    Q:
    What caution should be taken during the installation of the oil seal carrier for the 2010 Ford Taurus? Posted by Customer
    A:
    The oil pan may leak if the two surfaces are not perfectly flush.
    Posted by FordPartsGiant Specialist
    Q:
    What should be done after removing the fender splash shield and skid plate for the 2013 Ford Taurus? Posted by Customer
    A:
    Remove the drivebelt.
    Posted by FordPartsGiant Specialist
    Q:
    How should the seal be positioned once installed for the 2009 Ford Taurus? Posted by Customer
    A:
    The seal should be flush with the timing chain cover and remain square when installed.
    Posted by FordPartsGiant Specialist
    Q:
    How should the oil seal carrier be tightened for the 2012 Lincoln MKX? Posted by Customer
    A:
    Tighten the oil seal carrier to the torque using the proper sequence.
    Posted by FordPartsGiant Specialist
    Q:
    How should the new seal be prepared and installed for the 2007 Lincoln MKX? Posted by Customer
    A:
    Lubricate the new seal with clean engine oil and install it in the timing chain cover with a suitable seal driver which draws the seal in slowly. Be sure that the lip of the seal faces inward. If a seal driver is unavailable, carefully tap the seal into place with a large socket and hammer until it's flush with the timing chain cover surface.
    Posted by FordPartsGiant Specialist
    Q:
    What should be ensured before installing the new seal on the 2014 Lincoln MKX? Posted by Customer
    A:
    Make sure the bore is clean, then apply a film of clean engine oil to the outer edge and the lips of the new seal. The seal must be pressed squarely into the bore; a special seal installation tool (#303-1250 and 205-153) should be used. Hammering it into place is not recommended.
    Posted by FordPartsGiant Specialist
    Q:
    How should the new carrier with the factory-installed seal be positioned for the 2007 Ford Edge? Posted by Customer
    A:
    With the plastic seal liner or tool in place, carefully move the new carrier (with seal factory-installed) into position by sliding it onto the contact surface of the crankshaft.
    Posted by FordPartsGiant Specialist
    Q:
    How can the old seal be removed on the 2018 Ford Edge? Posted by Customer
    A:
    On 2014 and earlier models, the old seal can be removed by prying it out with a screwdriver or by making one or two small holes in the seal flange with a sharp pick, then using a screw-in type slide-hammer puller. Note how far the seal is recessed into the bore before removing it.
    Posted by FordPartsGiant Specialist
    Q:
    What should be done after removing the fender splash shield for the 2018 Ford Edge? Posted by Customer
    A:
    Remove the drivebelt.
    Posted by FordPartsGiant Specialist
    Q:
    What are the steps for replacement with the engine front cover removed for the 2007 Ford F-150? Posted by Customer
    A:
    1. Remove the engine front cover. 2. Use a punch or screwdriver and hammer to drive the seal out of the cover from the back side, supporting the cover with blocks of wood. 3. Clean the bore to remove any old seal material and corrosion, then position the new seal in the bore with the open end facing IN. 4. Drive the new seal into the bore until it's completely seated. 5. Reinstall the engine front cover and crankshaft pulley. 6. Start the engine and check for leaks.
    Posted by FordPartsGiant Specialist
    Q:
    How should the new seal be positioned on the crankshaft for the 2008 Ford F-150? Posted by Customer
    A:
    Position the new seal onto the crankshaft, ensuring that if marked, the words "THIS SIDE OUT" on the seal face out, toward the rear of the engine.
    Posted by FordPartsGiant Specialist
    Q:
    How should the new seal be positioned in the bore for the 2012 Ford F-150? Posted by Customer
    A:
    Position the new seal in the bore with the open end of the seal facing IN.
    Posted by FordPartsGiant Specialist
    Q:
    What should be done to the crankshaft pulley hub before installation for the 2007 Ford F-150? Posted by Customer
    A:
    Lubricate the oil seal contact surface with multi-purpose grease or clean engine oil and apply a dab of RTV sealant to the front end of the keyway.
    Posted by FordPartsGiant Specialist
    See expert answers on similar Crankshaft Seal
    If you have any questions about this product, please don't hesitate to ask us. We will be happy to help you!

Genuine Ford Part AT4Z-6701-A, the Right Choice

To ensure reliability, purchase Ford part # AT4Z-6701-A Seal Assy - Crankshaft Oil. It is sometimes referred to as Ford Crankshaft Seal. In terms of quality and longevity, OEM parts are top-tier. This is because they are made according to Ford's demanding factory specifications and go through strict quality control. This part fits specific Ford E-150, E-350/E-350 Super Duty, F-150 models. It fits Lincoln Continental, MKS, MKX. It also fits Mercury Milan, Sable.

FordPartsGiant.com is a leading supplier of genuine Ford parts and accessories such as Ford AT4Z6701A Seal Assy - Crankshaft Oil. On our platform, we provide genuine Ford parts at incredible prices while ensuring top-tier quality. Feel at ease shopping with us, knowing our parts have a hassle-free return policy and rapid delivery service. For detailed Ford parts information, click here.

Why choose Ford Parts Giant

  • Dedicated Service

    Your complete satisfaction is our #1 goal

  • Lowest Prices

    Best deals on genuine OE parts from dealerships

  • Fast Delivery

    Orders are processed and delivered promptly