Make sure this part fits

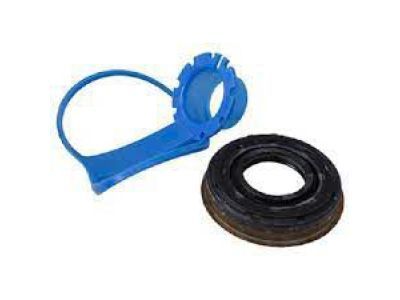
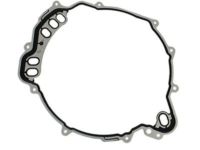
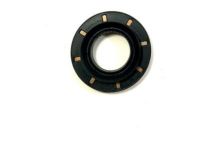
Ford 7T4Z-1177-A Seal

2007-2015 Ford 7T4Z1177A

Customer Questions & Expert Answers (4)
Ford 7T4Z-1177-A Seal
  • Part Description
    Seal
  • Position
    Driver Side
  • Replaced By
    7T4Z-1177-D
  • Manufacturer
    Ford
Make sure this part fits
$17.67 MSRP: $25.83
You Save: $8.16 (32%)
Ships in 1 Business Day
1
ADD TO CART
  • Related Parts
  • Product Specifications
  • Vehicle Fitment
  • Customer Questions & Expert Answers
  • Product Specifications

    BrandGenuine Ford
    Manufacturer Part Number7T4Z-1177-A, 7T4Z1177A
    Part DescriptionSeal
    Item Dimensions8.5 x 8.8 x 4.6 inches
    Item Weight0.30 Pounds
    PositionDriver Side
    ConditionNew
    Fitment TypeDirect Replacement
    ManufacturerFord
    SKU7T4Z-1177-A
    WarrantyThis genuine Ford part is guaranteed by Ford's factory warranty.
    Shipping & ReturnShipping Policy Return Policy
    Warning: California’s Proposition 65
  • Vehicle Fitment

    Year Make Model Engine Important vehicle option details
    2007-2014 Ford Edge4 Cyl 2.0L EcoBoost (240PS) , 6 Cyl 3.5L DOHC VCT SMPI, 6 Cyl 3.7L DOHC6-Speed Automatic Transmission 6F50, Four-Wheel Drive (Full Time) (Left Hand Drive), Four-Wheel Drive (Part Time) (Left Hand Drive), Front-Wheel Drive (Left Hand Drive), Left Hand Drive
    2008-2009 Ford Taurus6 Cyl 3.5L DOHC VCT SMPI6-Speed Automatic Transmission 6F50, Four-Wheel Drive (Part Time) (Left Hand Drive), Front-Wheel Drive (Left Hand Drive), Left Hand Drive
    2008-2009 Ford Taurus X6 Cyl 3.5L DOHC VCT SMPI6-Speed Automatic Transmission 6F50, Four-Wheel Drive (Part Time) (Left Hand Drive), Front-Wheel Drive (Left Hand Drive), Left Hand Drive
    2009 Lincoln MKS6 Cyl 3.7L DOHC, 6 Cyl 3.7L PFI NA6-Speed Automatic Transmission 6F50, 6-Speed Automatic Transmission 6F55, Four-Wheel Drive (Full Time) (Left Hand Drive), Four-Wheel Drive (Part Time) (Left Hand Drive), Front-Wheel Drive (Left Hand Drive), Left Hand Drive
    2007-2015 Lincoln MKX4 Cyl 2.0L EcoBoost (240PS) , 6 Cyl 3.5L DOHC VCT SMPI, 6 Cyl 3.7L DOHC6-Speed Automatic Transmission 6F50, Four-Wheel Drive (Full Time) (Left Hand Drive), Four-Wheel Drive (Part Time) (Left Hand Drive), Front-Wheel Drive (Left Hand Drive), Left Hand Drive
    2008-2009 Mercury Sable6 Cyl 3.5L DOHC VCT SMPI6-Speed Automatic Transmission 6F50, Four-Wheel Drive (Part Time) (Left Hand Drive), Front-Wheel Drive (Left Hand Drive), Left Hand Drive
  • Customer Questions & Expert Answers

    Q:
    Does the PN fit my vehicle? Posted by FordPartsGiant Specialist
    A:
    You can Select Your Vehicle to check if 7T4Z-1177-A fits your vehicle.
    Posted by FordPartsGiant Specialist
    Q:
    How do you replace the oil seal and companion flange on Ford Taurus? Posted by Customer
    A:
    Get the car up on four jackstands and run cables from the battery to the front end. The driveshaft has to be detached, its relative position in relation to the pinion, nut and flange has to be marked before both the nut and a companion flange can be removed using puller 2007 and older models. Remove the seal without harm to the seal bore, apply multi-purpose grease on the lips of the new seal and give it a gentle blow so that it sets squarely on the seat. Match the marks placed before disassembly and slot the corresponding flange and bolt it by making use nut on the pinion if necessary is tightening and finally tighten the nut of the output flange to the required torque. Align the mating marks on the flange and put the driveshaft in place and refill the transfer case fluid when needed. For the 2008 up models, remove the muffler to "Y" exhaust pipe and support the resonator, then locate the position of the output shaft and the flange of the driveshaft before finally removing it. Attach the torque wrench to the pinion and rotate it till you read the total torque on the gauge. Measure that by counting the number of threads which are visible between the end of the nut and the end of the pinion shaft. Loosen the flange mounting nut and hold the pinion flange with a two-pin spanner, then take off the companion flange using a puller if needed, so as to remove the lock nut. Disengage the seal and take off the seal deflector after which, you also remove the collapsible bearing spacer and put on a new collapsible spacer. Place the seal deflector; lubricate the new seal lips and gently push it into proper position with the fingers until it bottoms. Match the mating marks and fit the flange on the output shaft with a new nut, the torque it slowly till the initial number of threads are seen. A word of caution is that one must not torque the nut beyond the recorded RT by more than a total of 3 in lbs, as this will demand dismantling of the bushing adaptor to fit a new collapsible spacer. Last but not the least, the mating marks on the flange must be lined up to install the driveshaft and also check the levels of transfer case fluid in case required, and also make sure all the driveshaft flange and support bolts are switched to new ones.
    Posted by FordPartsGiant Specialist
    Q:
    How do you remove and install the oil seal on Lincoln MKX? Posted by Customer
    A:
    Raise the vehicle and support it securely on jackstands, then drain the transfer case lubricant. Remove the driveshaft and mark the relative positions of the pinion, nut, and flange. Use a beam- or dial-type inch-pound torque wrench to determine the torque required to rotate the pinion while the vehicle is in Neutral, and record it for later use. Count the number of threads visible between the end of the nut and the end of the pinion shaft, recording that as well. Remove the flange mounting nut using a two-pin spanner to hold the pinion flange while loosening the locknut, then take off the companion flange with a puller that can attach to the flange's driveshaft bolt holes. Pry out the seal carefully with a screwdriver or seal removal tool, ensuring not to damage the seal bore, and then remove the seal deflector and the pinion seal using a seal-puller. After removing the seal, take out the collapsible bearing spacer and install a new one. Lubricate the lips of the new seal with multi-purpose grease and tap it evenly into position with a seal installation tool or a large socket, ensuring it enters the housing squarely and is fully seated. Align the mating marks made before disassembly and install the companion flange, tightening the pinion nut if necessary to draw the flange into place. Carefully tighten the new nut until the original number of threads are exposed and the marks are aligned, then measure the torque required to rotate the pinion, tightening the nut in small increments until it matches the previously recorded figure. If the original torque reading is exceeded by more than 3 in-lbs, the assembly will need to be disassembled again to install a new collapsible spacer. Finally, connect the driveshaft, add the specified lubricant to the transfer case, and lower the vehicle, ensuring that all driveshaft flange and support bearing bolts are replaced with new fasteners.
    Posted by FordPartsGiant Specialist
    Q:
    How do you remove and install the oil seal on Ford Edge? Posted by Customer
    A:
    Raise the vehicle and support it securely on jackstands, then drain the transfer case lubricant. Remove the driveshaft and mark the relative positions of the pinion, nut, and flange. Use a beam- or dial-type inch-pound torque wrench to determine the torque required to rotate the pinion while the vehicle is in Neutral, and record it for later use. Count the number of threads visible between the end of the nut and the end of the pinion shaft, recording that as well. Remove the flange mounting nut using a two-pin spanner to hold the pinion flange while loosening the locknut, then take off the companion flange with a puller that can attach to the flange's driveshaft bolt holes. Pry out the seal carefully with a screwdriver or seal removal tool, ensuring not to damage the seal bore, and then remove the seal deflector and the pinion seal using a seal-puller. After removing the seal, take out the collapsible bearing spacer and install a new one. Lubricate the lips of the new seal with multi-purpose grease and tap it evenly into position with a seal installation tool or a large socket, ensuring it enters the housing squarely and is fully seated. Align the mating marks made before disassembly and install the companion flange, tightening the pinion nut if necessary to draw the flange into place. Carefully tighten the new nut until the original number of threads are exposed and the marks are aligned, then measure the torque required to rotate the pinion, tightening the nut in small increments until it matches the previously recorded figure. If the original torque reading is exceeded by more than 3 in-lbs, the assembly will need to be disassembled again to install a new collapsible spacer. Finally, connect the driveshaft, add the specified lubricant to the transfer case, and lower the vehicle, ensuring that all driveshaft flange and support bearing bolts are replaced with new fasteners.
    Posted by FordPartsGiant Specialist
    If you have any questions about this product, please don't hesitate to ask us. We will be happy to help you!

Genuine Ford Part 7T4Z-1177-A, the Right Choice

To ensure reliability, purchase Ford part # 7T4Z-1177-A Seal. It is sometimes referred to as Ford Transfer Case Seal. In terms of quality and longevity, OEM parts are top-tier. This is because they are made according to Ford's demanding factory specifications and go through strict quality control. This part fits specific Ford Edge, Taurus, Taurus X models. It fits Lincoln MKS, MKX. It also fits Mercury Sable.

FordPartsGiant.com is a leading supplier of genuine Ford parts and accessories such as Ford 7T4Z1177A Seal. On our platform, we provide genuine Ford parts at incredible prices while ensuring top-tier quality. Feel at ease shopping with us, knowing our parts have a hassle-free return policy and rapid delivery service. For detailed Ford parts information, click here.

Why choose Ford Parts Giant

  • Dedicated Service

    Your complete satisfaction is our #1 goal

  • Lowest Prices

    Best deals on genuine OE parts from dealerships

  • Fast Delivery

    Orders are processed and delivered promptly