Make sure this part fits

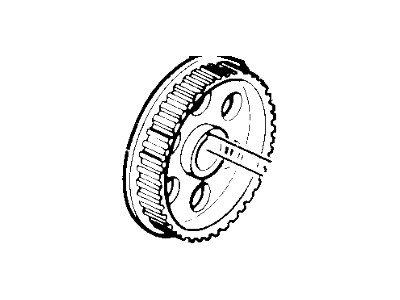
Ford E4AZ-6256-A Sprocket - Camshaft

1984-2001 Ford E4AZ6256A

Customer Questions & Expert Answers (11)
Ford E4AZ-6256-A Sprocket - Camshaft
  • Part Description
    Sprocket - Camshaft
  • Base No.
    6256
  • Manufacturer
    Ford
  • Manufacturer's Notes
    This part is discontinued.
Make sure this part fits
  • Related Parts
  • Product Specifications
  • Vehicle Fitment
  • Customer Questions & Expert Answers
  • Product Specifications

    BrandGenuine Ford
    Base No.6256
    Manufacturer Part NumberE4AZ-6256-A, E4AZ6256A
    Part DescriptionSprocket - Camshaft
    Other NamesCamshaft Gear
    Item Dimensions6.7 x 6.7 x 1.8 inches
    Item Weight2.00 Pounds
    ConditionNew
    Fitment TypeDirect Replacement
    ManufacturerFord
    SKUE4AZ-6256-A
    WarrantyThis genuine Ford part is guaranteed by Ford's factory warranty.
    Shipping & ReturnShipping Policy Return Policy
    Warning: California’s Proposition 65
  • Vehicle Fitment

    Year Make Model Engine Important vehicle option details
    1986-1989 Ford Aerostar4 Cyl 2.3L, 6 Cyl 2.8L, 6 Cyl 3.0L4AT A4LD, 5MT
    1985-1996 Ford Bronco6 Cyl 4.9L, 8 Cyl 5.0L, 8 Cyl 5.8L3AT C6, 4AT A4LD, 4AT AOD, 4AT E4OD, 4MT, 5MT
    1985-1989 Ford Bronco II4 Cyl 2.3L, 6 Cyl 2.8L, 6 Cyl 2.9L4AT A4LD, 4MT, 5MT
    1985-1996 Ford E-1506 Cyl 4.9L, 8 Cyl 5.0L, 8 Cyl 5.8L3AT C6, 3MT, 4AT 4R70W, 4AT 4R75W, 4AT AOD, 4AT E4OD, 4MT, 5MT
    1985-1996 Ford E-2506 Cyl 4.9L, 8 Cyl 5.0L, 8 Cyl 5.8L, 8 Cyl 6.9L Diesel, 8 Cyl 7.3L Diesel, 8 Cyl 7.5L3AT C6, 4AT AOD, 4AT E4OD
    1985-1996 Ford E-350/E-350 Super Duty6 Cyl 4.9L, 8 Cyl 5.8L, 8 Cyl 6.9L Diesel, 8 Cyl 7.3L Diesel, 8 Cyl 7.5L3AT C6, 4AT AOD, 4AT E4OD, 4MT, 5MT
    1996-2001 Ford Explorer8 Cyl 5.0L4AT 4R55E, 4AT 4R70W, 5AT 5R55E, 5MT
    1985-1989 Ford F Super Duty8 Cyl 7.3L Diesel Turbocharged4AT 4R100, 5AT, 5MT, 6MT
    1985-1996 Ford F-1506 Cyl 3.8L, 6 Cyl 4.9L, 8 Cyl 5.0L, 8 Cyl 5.8L3AT C5, 3AT C6, 3MT, 4AT 4R70W, 4AT 4R75W, 4AT AOD, 4AT E4OD, 4MT, 5MT
    1985-1997 Ford F-2506 Cyl 4.9L, 8 Cyl 5.0L, 8 Cyl 5.8L, 8 Cyl 6.9L, 8 Cyl 7.3L, 8 Cyl 7.5L3AT C6, 3MT, 4AT 4R70W, 4AT AOD, 4AT E4OD, 4MT, 5MT
    View More
  • Customer Questions & Expert Answers

    Q:
    I would like to know is this part gonna fit with my car Posted by FordPartsGiant Specialist
    A:
    You can Select Your Vehicle to check if E4AZ-6256-A fits your vehicle.
    Posted by FordPartsGiant Specialist
    Q:
    How to inspect timing chain and Timing Sprocket on Ford Thunderbird? Posted by Customer
    A:
    To perform the above procedure for checking the timing chain, first remove the negative cable from the battery and turn the number one piston several degrees before the TDC on the compression stroke. Lift right valve cover and, on the number three cylinder, take out the exhaust rocker arm bolt and rocker arm and fulcrum too, and mount a dial indicator on the head with the plunger on the pushrod. Thirdly, the timing chain cover should be unbolted and the timing chain and sprockets are to be unhooked a little to get a view of the chain tensioner. Remove the timing chain and sprockets together with the tensioner ; insert the timing chain cover and the vibration damper in order to have timing marks. Rotate the crankshaft clock wise to bring number one piston to what you believe is TDC, bring the dial indicator to zero and rotate the crankshaft counter clock wise in order to bring the piston from the TDC but till the time you feel some movement on the dial indicator, note how far the number one piston has moved to the bottom FROM TDC. Where the mark has shifted 6 degrees or more, timing chain and sprockets should be replaced. For removal, the number one piston should be on TDC, then, remove the timing chain cover without rotating the crankshaft and the crankshaft and camshaft sprocket should have matching timing marks. Taken off the camshaft sprocket mounting bolt and distributor drive in addition to the sprocket/chain away from the camshaft and crankshaft sprocket. In order to remove the camshaft, the spacer has to be slid off the camshaft, the pin punch can be used to cage the chain tensioner spring, as well as leverage the crankshaft sprocket. For installation, the Woodruff key should be in line with the key way of the crankshaft sprocket, then the sprocket can be pressed on to the crankshaft with the key facing upwards. Replace the spacer back to the camshaft, place the chain over the camshaft sprocket, rotate the sprocket until the timing mark is on the lower side of the sprocket engaging the crankshaft sprocket. Before installing the distributor drive gear, always align a vertical line that passes through the centre of the camshaft, camshaft timing mark, the crankshaft timing mark, and the centre of the crankshaft. Place a drop of Loctite on the threads and engage the camshaft sprocket bolt in the hole in the crankshaft sprocket, and torque to the specifications stated earlier; withdraw the pin punch from the tensioner and replace the remaining parts in the reverse manner.
    Posted by FordPartsGiant Specialist
    Q:
    How to inspect timing chain and Timing Sprocket on Mercury Cougar? Posted by Customer
    A:
    To perform the above procedure for checking the timing chain, first remove the negative cable from the battery and turn the number one piston several degrees before the TDC on the compression stroke. Lift right valve cover and, on the number three cylinder, take out the exhaust rocker arm bolt and rocker arm and fulcrum too, and mount a dial indicator on the head with the plunger on the pushrod. Thirdly, the timing chain cover should be unbolted and the timing chain and sprockets are to be unhooked a little to get a view of the chain tensioner. Remove the timing chain and sprockets together with the tensioner ; insert the timing chain cover and the vibration damper in order to have timing marks. Rotate the crankshaft clock wise to bring number one piston to what you believe is TDC, bring the dial indicator to zero and rotate the crankshaft counter clock wise in order to bring the piston from the TDC but till the time you feel some movement on the dial indicator, note how far the number one piston has moved to the bottom FROM TDC. Where the mark has shifted 6 degrees or more, timing chain and sprockets should be replaced. For removal, the number one piston should be on TDC, then, remove the timing chain cover without rotating the crankshaft and the crankshaft and camshaft sprocket should have matching timing marks. Taken off the camshaft sprocket mounting bolt and distributor drive in addition to the sprocket/chain away from the camshaft and crankshaft sprocket. In order to remove the camshaft, the spacer has to be slid off the camshaft, the pin punch can be used to cage the chain tensioner spring, as well as leverage the crankshaft sprocket. For installation, the Woodruff key should be in line with the key way of the crankshaft sprocket, then the sprocket can be pressed on to the crankshaft with the key facing upwards. Replace the spacer back to the camshaft, place the chain over the camshaft sprocket, rotate the sprocket until the timing mark is on the lower side of the sprocket engaging the crankshaft sprocket. Before installing the distributor drive gear, always align a vertical line that passes through the centre of the camshaft, camshaft timing mark, the crankshaft timing mark, and the centre of the crankshaft. Place a drop of Loctite on the threads and engage the camshaft sprocket bolt in the hole in the crankshaft sprocket, and torque to the specifications stated earlier; withdraw the pin punch from the tensioner and replace the remaining parts in the reverse manner.
    Posted by FordPartsGiant Specialist
    Q:
    How to remove and install timing chain and Timing Sprocket on Mercury Capri? Posted by Customer
    A:
    To inspect the timing chain, one has to first remove the negative battery cable. To assess a V6 engine, sneak the number one piston about several degrees prior TDC on the compression stroke and then twist the right side rocker arm cover. Then remove the cylinder number three exhaust rocker arm bolt and rocker arm with its fulcrum and fix the dial indicator on the head with its plunger on the push-rod. Before tightening the chain tension turn the crankshaft clockwise until the number one piston is in the TDC position to reduce the size of the TDC dial gauge reading then zero the dial indicator. Now loosen the crankshaft slowly in anti-clockwise direction till dial indicator shows movement and see to which extent piston is away from TDC. If the temperature goes beyond 6 degrees, it is time to fit new timing chain and sprockets. If that is the V8 engine, turn the crankshaft to the left, or clockwise until the motion of the timing chain is fully tight on the left side of it, then the timing chain cover need to be removed. Set a reference mark on the block and from the chain sprocket reinsert the vibration damper bolt to rotate the crankshaft anti-clockwise until some tension is created on the right side. To measure the distance between the reference point and the chain; if the deflection is more than 1/2 inch, one needs to change the timing chain along with sprockets. For removal, be particular the number one piston is at TDC and then remove the timing chain cover without causing any crankshaft rotation. Ensure that the crankshaft and camshaft sprocket timing mark is in the standard orientation, if not, rotate the crankshaft employing the vibration damper bolt until it matches the camshaft one. There are also the camshaft sprocket mounting bolts that has to be removed as well as the fuel pump eccentric and after that you must separate the sprocket/chain assembly from the camshaft and the crankshaft sprocket. The crankshaft sprocket can be unbolted using large headed screws, otherwise, it can be pried off using a screwdrivers or a pry bar. For installing, ensure that the Woodruff key fits into the keyway of the crankshaft sprocket and place the crankshaft onto the engine with the bolt of the vibration damper and a big socket and do not hammer it. Rotate the crankshaft until the key points UP, run the timing chain over the sprocket camshaft and rotate the latter until the 'timing' marking is down. Interlock the chain with the crankshaft sprocket then place the camshaft sprocket on the cam right positioning. If mounted properly, one can draw a straight line from the middle of the camshaft to the camshaft timing mark, the crankshaft timing mark and to the middle of the crankshaft. Place the fuel pump eccentric and apply the Loc-Tite to the thread on it then other few parts to be fitted include camshaft sprocket bolts and it should be tightened at the respective torque.
    Posted by FordPartsGiant Specialist
    Q:
    How do you establish the initial measurement of the chain deflection for the 1980 Ford F-250? Posted by Customer
    A:
    At the approximate mid-point of the right side chain run, force the chain out with your finger while holding a graduated scale against the chain to establish the initial measurement. The centerline of one link pin makes a good reference point.
    Posted by FordPartsGiant Specialist
    See expert answers on similar Variable Timing Sprocket
    Q:
    How do you measure the timing chain slack for the 2002 Mercury Grand Marquis? Posted by Customer
    A:
    Slowly turn the crankshaft counter-clockwise until the slightest movement is seen on the dial indicator, then note how far the number one piston has moved away from the TDC mark by looking at the ignition marks.
    Posted by FordPartsGiant Specialist
    See expert answers on similar Variable Timing Sprocket
    Q:
    What should you do in Stage 2 of the removal process for the 2007 Mercury Grand Marquis? Posted by Customer
    A:
    Rotate the engine 360-degrees CLOCKWISE, remove the rocker arms from the remaining cylinders using the special valve spring compressing tool, and rotate the engine 360 degrees CLOCKWISE back to the TDC number 1 position.
    Posted by FordPartsGiant Specialist
    Q:
    How do you check the timing gear backlash for the 1995 Ford Bronco? Posted by Customer
    A:
    Install a dial indicator on the cylinder block and position the stem against the timing gear. Zero the pointer on the dial indicator, hold the crankshaft still, and move the camshaft timing gear until all slack is taken up. Read the dial indicator to obtain the gear backlash.
    Posted by FordPartsGiant Specialist
    See expert answers on similar Variable Timing Sprocket
    Q:
    What should be done if necessary after removing the sprockets and chain for the 1999 Ford Explorer? Posted by Customer
    A:
    Remove the bolts that secure the chain guide and remove it from the block.
    Posted by FordPartsGiant Specialist
    See expert answers on similar Variable Timing Sprocket
    Q:
    What caution should be taken before starting the engine for the 2001 Ford Explorer? Posted by Customer
    A:
    Carefully rotate the crankshaft by hand through at least two full revolutions. If you feel any resistance, STOP! There is something wrong, most likely valves are contacting the pistons. You must find the problem before proceeding. Check your work and see if any updated repair information is available.
    Posted by FordPartsGiant Specialist
    Q:
    What should be done before measuring the deflection of the timing chain for the 1995 Ford Explorer? Posted by Customer
    A:
    Remove the timing chain cover and position the number one piston at TDC on the compression stroke.
    Posted by FordPartsGiant Specialist
    If you have any questions about this product, please don't hesitate to ask us. We will be happy to help you!

Genuine Ford Part E4AZ-6256-A, the Right Choice

To ensure reliability, purchase Ford part # E4AZ-6256-A Sprocket - Camshaft. It is sometimes referred to as Ford Cam Gear, Ford Variable Timing Sprocket. In terms of quality and longevity, OEM parts are top-tier. This is because they are made according to Ford's demanding factory specifications and go through strict quality control. This part fits specific Ford Bronco, F-150, Ranger models. It fits Lincoln Mark VII, Town Car. It also fits Mercury Capri, Cougar, Mountaineer.

FordPartsGiant.com is a leading supplier of genuine Ford parts and accessories such as Ford E4AZ6256A Sprocket - Camshaft. On our platform, we provide genuine Ford parts at incredible prices while ensuring top-tier quality. Feel at ease shopping with us, knowing our parts have a hassle-free return policy and rapid delivery service. For detailed Ford parts information, click here.

Why choose Ford Parts Giant

  • Dedicated Service

    Your complete satisfaction is our #1 goal

  • Lowest Prices

    Best deals on genuine OE parts from dealerships

  • Fast Delivery

    Orders are processed and delivered promptly