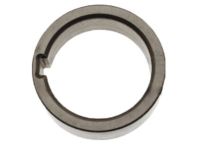
Make sure this part fits

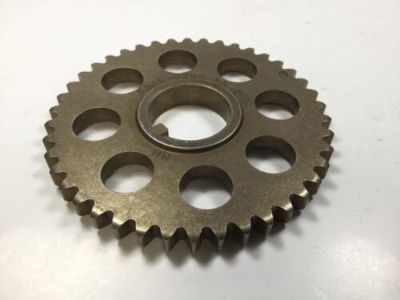
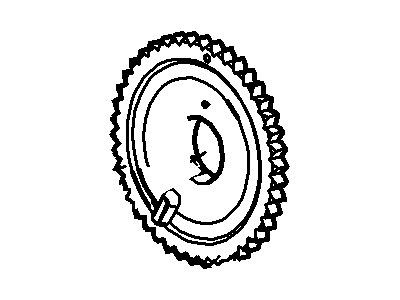
Ford F8AZ-6256-AA Sprocket - Camshaft

1996-2019 Ford F8AZ6256AA

Customer Questions & Expert Answers (13)
Ford F8AZ-6256-AA Sprocket - Camshaft
  • Part Description
    Sprocket - Camshaft
  • Base No.
    6256
  • Position
    Passenger Side
  • Replaces
    F7LZ-6256-AA
  • Manufacturer
    Ford
Make sure this part fits
$20.06 MSRP: $29.33
You Save: $9.27 (32%)
Ships in 1 Business Day
1
ADD TO CART
  • Related Parts
  • Product Specifications
  • Vehicle Fitment
  • Customer Questions & Expert Answers
  • Product Specifications

    BrandGenuine Ford
    Base No.6256
    Manufacturer Part NumberF8AZ-6256-AA, F8AZ6256AA
    Part DescriptionSprocket - Camshaft
    Other NamesCamshaft Gear, Sprocket
    Item Dimensions6.3 x 6.1 x 2.2 inches
    Item Weight1.40 Pounds
    PositionPassenger Side
    ConditionNew
    Fitment TypeDirect Replacement
    ReplacesF7LZ-6256-AA
    ManufacturerFord
    SKUF8AZ-6256-AA
    WarrantyThis genuine Ford part is guaranteed by Ford's factory warranty.
    Shipping & ReturnShipping Policy Return Policy
    Warning: California’s Proposition 65
  • Vehicle Fitment

    Year Make Model Engine Important vehicle option details
    1996-2011 Ford Crown Victoria8 Cyl 4.6L, 8 Cyl 4.6L Romeo SOHC EFI4-Speed Automatic Transmission 4R75E Livonia, 4AT, 4AT 4R70W, 4AT 4R75W, Left Hand Drive, Rear-Wheel Drive (Left Hand Drive)
    1997-2019 Ford E-15010 Cyl 6.8L SOHC EFI NA, 8 Cyl 4.6L, 8 Cyl 4.6L Romeo SOHC EFI, 8 Cyl 5.4L, 8 Cyl 5.4L Modular SOHC4AT 4R100, 4AT 4R70W, 4AT E4OD, 4-Speed Automatic Transmission 4R70W (AODE), 4-Speed Automatic Transmission 4R75E Livonia, 4-Speed Automatic Transmission AODEW/4R70E W/TSS, 4-Speed Automatic Transmission AODEW/4R75E W/TSS, 5-Speed Automatic Transmission 5R110W - HI/Torque, 5-Speed Automatic Transmission 5R110W NAAO, 6-Speed Automatic Transmission (6R140)
    1997-2019 Ford E-25010 Cyl 6.8L SOHC EFI NA, 8 Cyl 4.6L, 8 Cyl 4.6L Romeo SOHC EFI, 8 Cyl 5.4L, 8 Cyl 5.4L Modular SOHC4AT 4R100, 4AT 4R70W, 4AT E4OD, 4-Speed Automatic Transmission 4R70W (AODE), 4-Speed Automatic Transmission 4R75E Livonia, 4-Speed Automatic Transmission AODEW/4R70E W/TSS, 4-Speed Automatic Transmission AODEW/4R75E W/TSS, 5-Speed Automatic Transmission 5R110W - HI/Torque, 5-Speed Automatic Transmission 5R110W NAAO, 6-Speed Automatic Transmission (6R140)
    1997-2019 Ford E-350/E-350 Super Duty10 Cyl 6.8L, 10 Cyl 6.8L SOHC EFI NA, 8 Cyl 4.6L Romeo SOHC EFI, 8 Cyl 5.4L, 8 Cyl 5.4L Modular SOHC4AT 4R100, 4AT 4R70W, 4AT 4R75W, 4AT E4OD, 4-Speed Automatic Transmission 4R70W (AODE), 4-Speed Automatic Transmission 4R75E Livonia, 4-Speed Automatic Transmission AODEW/4R70E W/TSS, 4-Speed Automatic Transmission AODEW/4R75E W/TSS, 5AT, 5-Speed Automatic Transmission 5R110W - HI/Torque, 5-Speed Automatic Transmission 5R110W NAAO, 6-Speed Automatic Transmission (6R140)
    2002-2019 Ford E-450 Super Duty10 Cyl 6.8L, 10 Cyl 6.8L SOHC EFI NA, 8 Cyl 4.6L Romeo SOHC EFI, 8 Cyl 5.4L, 8 Cyl 5.4L Modular SOHC4AT 4R100, 4AT 4R70W, 4-Speed Automatic Transmission 4R70W (AODE), 4-Speed Automatic Transmission 4R75E Livonia, 4-Speed Automatic Transmission AODEW/4R70E W/TSS, 4-Speed Automatic Transmission AODEW/4R75E W/TSS, 5-Speed Automatic Transmission 5R110W - HI/Torque, 5-Speed Automatic Transmission 5R110W NAAO, 6-Speed Automatic Transmission (6R140)
    1997-1999 Ford Econoline Super Duty(1996-1999)10 Cyl 6.8L4AT 4R100, 4AT 4R70W, 4AT E4OD
    2000-2005 Ford Excursion10 Cyl 6.8L, 8 Cyl 5.4L4AT 4R100, 5AT
    1997-2004 Ford Expedition8 Cyl 4.6L, 8 Cyl 4.6L Romeo SOHC EFI, 8 Cyl 5.4L, 8 Cyl 5.4L Modular SOHC4-Speed Automatic Transmission 4R70W (AODE), 4-Speed Automatic Transmission 4R75E Livonia, 4-Speed Automatic Transmission AODEW/4R75E W/TSS, 4AT 4R100, 4AT 4R70W, 4AT 4R75W, 4AT E4OD, 6-Speed Automatic Transmission (6R75), 6-Speed Automatic Transmission (6R80), Four-Wheel Drive (Part Time) (Left Hand Drive), Left Hand Drive, Rear-Wheel Drive (Left Hand Drive)
    2002-2005 Ford Explorer8 Cyl 4.6L Romeo SOHC EFI5-Speed Automatic Transmission 5R55S, 5-Speed Automatic Transmission 5R55W, 5-Speed Manual Transmission (M5R4), 6-Speed Automatic Transmission (6R80), 6-Speed Automatic Transmission 6R60, Four-Wheel Drive (Full Time) (Left Hand Drive), Four-Wheel Drive (Part Time) (Left Hand Drive), Four-Wheel Drive (Part Time) (Right Hand Drive), Left Hand Drive, Rear-Wheel Drive (Left Hand Drive)
    1997-2010 Ford F-1508 Cyl 4.6L, 8 Cyl 4.6L Romeo SOHC EFI, 8 Cyl 5.4L4-Speed Automatic Transmission 4R75E Livonia, 4-Speed Automatic Transmission AODEW/4R70E W/TSS, 4-Speed Automatic Transmission AODEW/4R75E W/TSS, 4AT, 4AT 4R100, 4AT 4R70W, 4AT E4OD, 5-Speed Manual Transmission - Mazda M5R2-C, 5MT, 6-Speed Automatic Transmission (6R80), Four-Wheel Drive (Part Time) (Left Hand Drive), Left Hand Drive, Rear-Wheel Drive (Left Hand Drive)
    View More
  • Customer Questions & Expert Answers

    Q:
    Is the the correct part for the attached VIN? Posted by FordPartsGiant Specialist
    A:
    You can Select Your Vehicle to check if F8AZ-6256-AA fits your vehicle.
    Posted by FordPartsGiant Specialist
    Q:
    How to inspect, remove, and install the timing chain and sprockets in V6 engine on Lincoln Navigator? Posted by Customer
    A:
    Disconnect the negative battery cable from the battery and position the number one piston several degrees before TDC on the compression stroke. Remove the right valve cover and attach a dial indicator to the cylinder head with the plunger inline with and resting on the pushrod side of the rocker arm. Remove the timing chain cover and temporarily remove the timing chain and sprockets to access the chain tensioner. Temporarily install the timing chain and sprockets without the tensioner, then slip the timing chain cover and vibration damper in place to provide timing marks. Turn the crankshaft clockwise until the number one piston is at TDC to take up the slack on the right side of the chain, then zero the dial indicator. Slowly turn the crankshaft counterclockwise until the slightest movement is seen on the dial indicator, noting how far the number one piston has moved away from TDC by looking at the ignition timing marks; if the mark has moved more than 6 degrees, install a new timing chain and sprockets. Position the number one piston at TDC on the compression stroke and remove the timing chain cover, avoiding turning the crankshaft during vibration damper removal. Ensure the crankshaft, camshaft, and balance shaft sprocket timing marks are aligned; if not, use the vibration damper bolt to turn the crankshaft clockwise until all marks are aligned. Remove the camshaft sprocket mounting bolt and camshaft position sensor drive gear without turning the engine, taking care not to allow the crankshaft to turn from TDC. Compress the timing chain tensioner with a screwdriver and insert a drill or Allen wrench as a retaining pin to hold it in the retracted position, then pull the camshaft sprocket/chain off the camshaft. If intending to remove the tensioner assembly, remove the two bolts holding it to the block. Turn the crankshaft until the key is facing up, drape the chain over the camshaft sprocket, and turn the sprocket until the timing mark faces down, ensuring the chain is positioned over the camshaft and crankshaft sprockets with their timing marks aligned before slipping both sprockets onto the camshaft and crankshaft. When correctly installed, a straight line should pass through the center of the balance shaft gear, the camshaft, the camshaft timing mark, the crankshaft timing mark, and the center of the crankshaft; do not proceed until the valve timing is correct. Install the camshaft position sensor drive gear, aligning the keyway with the Woodruff key on the camshaft, then apply a non-hardening thread locking compound to the threads and install the camshaft sprocket bolt, tightening it to the specified torque. Finally, remove the retaining pin from the timing chain tensioner and reinstall the remaining parts in the reverse order of removal.
    Posted by FordPartsGiant Specialist
    Q:
    How to remove the timing chain,Timing Chain Tensioner,Timing Cover and Timing Sprocket on Ford Excursion? Posted by Customer
    A:
    It is very important not to rotate the crankshaft or camshafts after the timing chain(s) have been removed due to the possibility of harming the valves or pistons - special tools are required to lock the camshafts during removal. Start by using the number one cylinder with Top Dead Center and then pulling the spark plug and also taking out the negative cable from the battery. Next, the engine cooling fan should be removed as well as in certain models, the radiator should be taken off as well. Move on and remove the valve covers, drain the engine oil as well as take off the crankshaft pulley. Some models require also the removal of the water pump and its pulley, power steering pump, drivebelt tensioner, and idler pulleys. Remove camshaft and crankshaft position sensor connectors if necessary, and remove the air conditioning compressor without disconnecting refrigerant connections. Check all the connectors and brackets on the harnesses, and then undo the nuts and bolts that hold the timing cover and the cover away making sure that you do not use over torque. Take off the timing cover gasket and dowel pins, then timing chains between the crankshaft and the camshafts. For 1999 through 2004 two-valve engines, fit the camshaft and crankshaft retaining tools, to lock the camshafts at the TDC and protect them from being damaged. Take off the right and left timing chain tensioners and stationary guides, and if it is necessary - the camshaft sprockets. In 2005 and later three-valve models, the engine needs to be rotated to its proper position and the camshaft rocker arms should be removed in addition to making certain that the timing chain marks are easily seen before installing the timing chain guides and sprockets. For confirmation of its position, turn the crankshaft; next, remove dirt and grease on the joint surfaces; spread RTV sealant on the cover surfaces; grease the timing chains; bolt on the timing cover. Lastly replace the crankshaft front oil seal and continue with reversing the process put the right quantity of the engine oil and the coolant then start the engine to check for any possibilities of leaking.
    Posted by FordPartsGiant Specialist
    Q:
    How to inspect, remove, and install the timing chain,Timing Chain Tensioner and sprockets in V8 engine on Ford Expedition? Posted by Customer
    A:
    The crankshaft or the camshafts cannot be rotated at any one time once the timing chain(s) have been removed as this will lead to serious damages to the valves and or the piston; there are special tools used to immobilize the camshafts during the removal of timing chains and it is always advisable to read through the entire procedure and ensure that all the required tools have been acquired. Due to it being an interference engine design, when a chain breaks, valves or pistons will be damaged and the cylinder head will have to be taken off. The timing system is quite intricate and mistakes made are can lead to heavey losses to the engine thus only professionals should attempt this process and all the work done should be cross--checked before starting the engine. It is done by pulling out the negative cable of the battery, setting the number one cylinder to TDC and then, the spark plugs are pulled out. Secondly, the valve covers, as well as the timing chain cover should be detached, and attention should be paid to the fact that there are two lengthy timing chains between the crankshaft and the camshafts. Crankshaft position sensor toothed-wheel must be unclamped and then retrieved gently to avoid damage otherwise when replacing the spur, it must be ensured that it is placed in the correct orientation. Fit in the camshaft and crankshaft retaining tools such that the camshafts cannot move as a result of pressures from the valve springs. When positioning the engine at TDC, lock the keyways on the camshaft sprockets to be at right angles with the valve cover mounting surface. For specific engine types camshaft retaining tools must be fitted and the camshaft(s) must only be retained at exactly TDC as any error can lead to severe engine damage. Rotate the crankshaft groove to 12:00 for 5.4L 3V engines and also there is a valve spring depressor tool been used to take off the rocker arms into their corresponding camshaft lobe positions. The tensioners should be removed and the chains lifted off the camshaft sprockets with the timing marks observed with the intention of being realigned in the correct manner. Remove crankshaft sprockets at both ends, and if necessary, lock crankshaft in position before removal; also both chain guides should be unbolted and removed if required too. Check sprocket teeth, chain and guide for wears and tears and replace them with new ones if they are badly worn. Early-style tensioners should be tested for operation and the presence of the oil feed hole should be ascertained, whereas later-style tensioners should have their seals intact and the plungers should move freely. In installation perform a manual rotation of the crankshaft up to two full turns to evaluate the resistance in the crankshaft which is suggestive of a problem. Place fixed chain guides, crankshaft sprockets and timing chains: the bright faces of the links engaged with the marks on the sprockets. To individual types of engines, it is necessary to complete such procedures as the installation of camshaft sprockets, timing chains, and tensioners with attention to the relative positioning of the timing marks. Last of all, take out any retaining tool, replace rocker arm if any before fully engaging the crankshaft to ensure the right assembly so as to end the process of the installation.
    Posted by FordPartsGiant Specialist
    Q:
    What should be done if excessive plastic material is missing from the chain guides for the 2012 Ford F-150? Posted by Customer
    A:
    The oil pan should be removed and cleaned of all debris, and the oil pick-up tube screen should be checked.
    Posted by FordPartsGiant Specialist
    See expert answers on similar Variable Timing Sprocket
    Q:
    How do you position the engine for timing chain removal for the 1998 Lincoln Navigator? Posted by Customer
    A:
    Position the number one cylinder at TDC (Top Dead Center) and remove the spark plugs.
    Posted by FordPartsGiant Specialist
    Q:
    How should the timing chain be installed on the camshaft sprocket for the 1993 Mercury Grand Marquis? Posted by Customer
    A:
    Align the bright link with the dimple on the camshaft, loop the timing chain under the crankshaft sprocket, and align the bright link with the alignment mark on the crankshaft sprocket.
    Posted by FordPartsGiant Specialist
    Q:
    How do you take up the slack in the timing chain for the 2005 Mercury Grand Marquis? Posted by Customer
    A:
    Rotate the crankshaft in a counter-clockwise direction to take up the slack in the left side of the chain.
    Posted by FordPartsGiant Specialist
    See expert answers on similar Variable Timing Sprocket
    Q:
    What should you do in Stage 2 of the removal process for the 1995 Ford Crown Victoria? Posted by Customer
    A:
    Rotate the engine 360-degrees CLOCKWISE, remove the rocker arms from the remaining cylinders using the special valve spring compressing tool, and rotate the engine 360 degrees CLOCKWISE back to the TDC number 1 position.
    Posted by FordPartsGiant Specialist
    Q:
    What should you check after reassembly for the 2001 Ford Crown Victoria? Posted by Customer
    A:
    Add coolant, check the oil level, run the engine, and check for oil and coolant leaks.
    Posted by FordPartsGiant Specialist
    See expert answers on similar Variable Timing Sprocket
    Q:
    What is the final step in the installation process for the 2005 Ford Expedition? Posted by Customer
    A:
    Remove the retaining pin from the timing chain tensioner and reinstall the remaining parts in the reverse order of removal.
    Posted by FordPartsGiant Specialist
    Q:
    What should be done before proceeding with the installation for the 2007 Ford F-150? Posted by Customer
    A:
    DO NOT proceed until the valve timing is correct.
    Posted by FordPartsGiant Specialist
    Q:
    What is the next component to remove after the valve covers for the 2008 Ford F-150? Posted by Customer
    A:
    Remove the engine front cover.
    Posted by FordPartsGiant Specialist
    If you have any questions about this product, please don't hesitate to ask us. We will be happy to help you!

Genuine Ford Part F8AZ-6256-AA, the Right Choice

To ensure reliability, purchase Ford part # F8AZ-6256-AA Sprocket - Camshaft. It is sometimes referred to as Ford Cam Gear, Ford Variable Timing Sprocket. In terms of quality and longevity, OEM parts are top-tier. This is because they are made according to Ford's demanding factory specifications and go through strict quality control. This part fits specific Ford Crown Victoria, E-350/E-350 Super Duty, F-150 models. It fits Lincoln Aviator, Mark VIII, Navigator. It also fits Mercury Cougar, Grand Marquis, Mountaineer.

FordPartsGiant.com is a leading supplier of genuine Ford parts and accessories such as Ford F8AZ6256AA Sprocket - Camshaft. On our platform, we provide genuine Ford parts at incredible prices while ensuring top-tier quality. Feel at ease shopping with us, knowing our parts have a hassle-free return policy and rapid delivery service. For detailed Ford parts information, click here.

Why choose Ford Parts Giant

  • Dedicated Service

    Your complete satisfaction is our #1 goal

  • Lowest Prices

    Best deals on genuine OE parts from dealerships

  • Fast Delivery

    Orders are processed and delivered promptly