Make sure this part fits

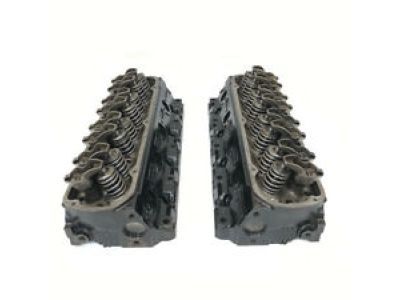
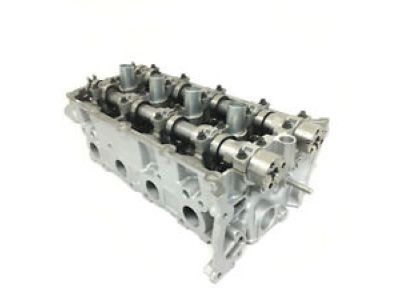
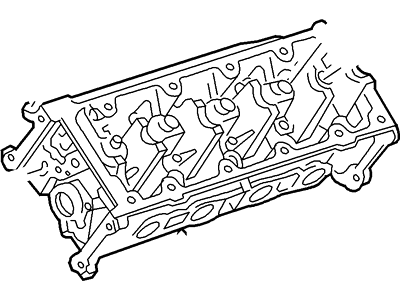
Lincoln 4L3Z-6049-AA Cylinder Head Assembly

2004-2011 Lincoln 4L3Z6049AA

Customer Questions & Expert Answers (19)
Ford 4L3Z-6049-AA Cylinder Head Assembly
  • Part Description
    Cylinder Head Assy
  • Position
    Passenger Side
  • Replaced By
    6W7Z-6049-A
  • Manufacturer
    Ford
Make sure this part fits
$505.23 MSRP: $986.15
You Save: $480.92 (49%)
Core Charge: $250.00
Out of Stock
  • Related Parts
  • Product Specifications
  • Vehicle Fitment
  • Customer Questions & Expert Answers
  • Product Specifications

    BrandGenuine Lincoln
    Manufacturer Part Number4L3Z-6049-AA, 4L3Z6049AA
    Part DescriptionCylinder Head Assy
    Item Dimensions25.1 x 13.8 x 11.4 inches
    Item Weight53.80 Pounds
    PositionPassenger Side
    ConditionNew
    Fitment TypeDirect Replacement
    ManufacturerFord
    SKU4L3Z-6049-AA
    WarrantyThis genuine Ford part is guaranteed by Ford's factory warranty.
    Shipping & ReturnShipping Policy Return Policy
    Warning: California’s Proposition 65
  • Vehicle Fitment

    Year Make Model Engine Important vehicle option details
    2006-2008 Lincoln Mark LT8 Cyl 4.6L Romeo SOHC EFI4-Speed Automatic Transmission 4R75E Livonia, 4-Speed Automatic Transmission AODEW/4R70E W/TSS, 4-Speed Automatic Transmission AODEW/4R75E W/TSS, 5-Speed Manual Transmission - Mazda M5R2-C, Four-Wheel Drive (Part Time) (Left Hand Drive), Left Hand Drive, Rear-Wheel Drive (Left Hand Drive)
    2004-2011 Lincoln Town Car8 Cyl 4.6L Romeo SOHC EFI4-Speed Automatic Transmission 4R70W (AODE), 4-Speed Automatic Transmission 4R75E Livonia, 4-Speed Automatic Transmission AODEW/4R70E W/TSS, 4-Speed Automatic Transmission AODEW/4R70E W/TSS*S/V, 4-Speed Automatic Transmission AODEW/4R75E W/TSS S/V, 4-Speed Automatic Transmission NAAO AODEW/4R70W*S/VIL, Left Hand Drive, Rear-Wheel Drive (Left Hand Drive)
  • Customer Questions & Expert Answers

    Q:
    Is the the correct part for the attached VIN? Posted by FordPartsGiant Specialist
    A:
    You can Select Your Vehicle to check if 4L3Z-6049-AA fits your vehicle.
    Posted by FordPartsGiant Specialist
    Q:
    How to remove and install cylinder heads in 4.6L V8 engine on Mercury Grand Marquis? Posted by Customer
    A:
    Bend back the clamp on the cable and disconnect it from the negative battery terminal, take off the valve cover(s) as well. Next, set the intake manifold and the timing chain cover aside, and then take out the timing chains, make sure to make use of the camshaft holding fixture so as to lock the camshafts during the entire procedure of reassembly. Disconnect the exhaust manifold from the exhaust pipe(s) and remove the positive battery cable bracket mounted at the rear of the cylinder head and remove the bolt at the back of the right cylinder head. unscrew the positive battery cable and remove the bracket from the stud at the top right of the cylinder head so as to retrieve it when removing the cylinder head. At the rear of the right cylinder head, remove the ground strap and disconnect the heater hose at the pipe which is fixed at the rear of the right side cylinder head but retained at the head during removal. If necessary one can remove the exhaust manifold(s) although it may be easier to leave the manifold connected to the head during removal due to restricted access. To remove the head bolts, turn them back by a quarter turn at a time with a breaker bar and a deep socket if necessary and use the reverse of the tightening pattern which should be easily done by hand. The lower rear head bolt on the right cylinder head cannot be reached because of the position of the heater/air conditioning case, and the bolt is to be held in place with a rubber band during cylinder head removal, and must be discarded as the new bolts have to be used when reinstalling both the heads. Take off the head(s) above the engine, if it is necessary tear gasket, put a wood between the head and put a hammer to drive it, do not pry between a head and the cylinder block, it can be damaged. Place the heads in wood blocks to protect the gasket sealing areas and then remove the old head gasket(s); there are right hand and left hand heads and the gaskets are different and should not be interchanged. It is necessary to clean the mating surfaces of the cylinder heads and block before their installation and, for this, a gasket scraper should be used, and the cleaned areas should be washed with lacquer thinner or acetone in order to remove oil that weakens the seal. Examine the block and head mating surfaces for flaws, using file for minor roughness and if it is severe, then it might require machining. The taps should be used to clean the threads in the head bolt holes because they cause variation in torque readings due to presence of dirt and corrosion. Place the new gaskets upon the appropriate cylinder banks over the alignment dowels with attention to their interchangeability. Finally before replacing the cylinder heads back on the block rotate the crankshaft counter clockwise about 9 O'clock in order to prevent such damages like the pistons rods or the valve train parts. Place the head(s) on the block without interfering with the gaskets as a new head bolt will be needed and follow the recommended torque sequence tightened with three steps where each bolt to be given additional turns have to be marked with stripe. Tightening procedure to 90 degrees, then to 2 extra turns using specified angle so as to be in the range of the bolt stretch to obtain the right load on the head gasket. The other installation procedures are the opposite of the removal processes and upon completion of the installation change the engine oil and filter, start the engine and look for any oil and coolant leaks respectively.
    Posted by FordPartsGiant Specialist
    Q:
    How to remove and install cylinder heads in 5.0L V8 engine on Ford Crown Victoria? Posted by Customer
    A:
    The valve cover(s), pushrods, intake manifold have to be removed, together with the drivebelts and idler pulley bracket. Remove the thermactor diverter valve, pump and crossover tube from the rear of the head if necessary. Remove the bolts that stands in the power steering pump while retaining its hoses connected and then setting them upright. Disconnect the air conditioning compressor but do not remove the hoses; also, remove the exhaust manifold(s). To locate the right cylinder head, if available unscrew the fuel line from clip at the front of the head and in case of alloy heads remove the exhaust manifold(s). Taking a new head gasket, draw a rough cylinder and bolt pattern on a cardboard to thread the sequences, and always indicate the front side of the engine. Tighten the head bolts by rotating them 1/4 turn and then take out the bolts in the reverse order used earlier; keep the bolts in the cardboard holder. If there is any resistance, take the help of a block of wood, and a hammer and lift up the head(s) from the engine and place the heads on some blocks of wood. There can be used the corresponding tap to chase the threads in the head bolt holes and to run a die along the threads of each bolt to eliminate the corrosion. Put the new gasket or gasket(s) on the locating dowels in the block so that the shaped holes are properly aligned with each other. Lay the head(s) down gently on the block so as not to shift the gasket(s), lubricate the thread of all the bolts lightly and screw them into their respective locations, only tightening them enough to be able to do so using only your fingers. Due to the variation in torque values, it is advised that bolts be tightened up to the described torque but in two or three steps to prevent over-tightening; it is not necessary to re-tighten after long-time operation; however, it can be done if needed. Proceed and finish the other steps of the installation process in the opposite order that you with which you started; you also should replace the engine oil and filter, after which turn on the engine and check for any oil or coolant leaking.
    Posted by FordPartsGiant Specialist
    Q:
    What precautions should be taken when removing cylinder heads in V8 engine on Ford Expedition? Posted by Customer
    A:
    It is imperative that the engine be cold when removing the cylinder heads, in a bid not to have them warped. Cylinder head removal is one of the most complex procedures, which calls for several special tools, so, one has to prepare the tools in advance. Hence for models from 2003 and onward, it is advised that the engine be detached from the car during this operation. First of all, connect the negative battery terminal and remove its cable, and then drain the cooling system of the vehicle. After that, the valve covers and intake manifold should be taken off, next the exhaust manifolds and the cover of timing chain. The cylinder heads can be removed still with the camshafts, the rocker arms as well as the lash adjusters in place but you have to clear the timing chains, and their respective tensioners and guides. Camshaft retaining fixtures should be used to secure the camshafts in position as the engine block is assembled. In case a cylinder head rebuild is to be performed, it is necessary to take off the rocker arms and camshafts. Tighten the cylinder head bolts a specified number of torques in reverse order with a breaker bar, and pry the gasket joint using a pry bar at the corners of the mating surface. Remove the cylinder head(s) of the engine by slightly lifting them up using a wood block and a hammer at the same time and place the head(s) on wood blocks so as not to dent. Lift off the cylinder head gaskets and pay attention to the fact that some of them are unique to their positions. During installation a new set of cylinder head bolts are required to avoid leakages in addition to damage on the car. The mating surfaces must be clean; they may be scraped lightly with a gasket scraper and wiped with a solvent; other parts of the engine should be covered to shield them from dirt. Inspect the access faces of the parts to be joined in order to look for any signs of damage that may be present after the previous process; complete the holes with a thread, turning them with a tap. SupPOSE that camshafts remain in the engine: place the new gaskets strictly over the alignment dowels and make sure that the camshafts are in the original TDC. Place the cylinder heads as not to damage the gaskets and put new cylinder head bolts then tighten the nuts in the right sequence by use of a torque wrench and a breaker bar coupled with a torque-angle shade. Lastly, perform the other remaining steps in the reverse order, replace the engine oil and filter, crank the engine and check for any sign of leakage.
    Posted by FordPartsGiant Specialist
    Q:
    What precautions should be taken when working and How to remove and install the cylinder heads in V8 engine on Ford F-150? Posted by Customer
    A:
    Engines are unforgiving as many procedures need at least some special tools, this is more pronounced in the timing chains where one has to be very careful not to damage the engine. Cylinder heads should be removed when the engine is cold to avoid warpage but one can take advantage of this by ensuring that the engine is sufficiently cool in this respect. To start the procedure you must purge fuel system pressure, remove the negative terminal of battery, and drain the cooling system. Depend the valve covers, intake manifold and the exhaust manifold and then proceed to pull out the timing chains, tensioners, sprockets and the camshafts. With the aid of a breaker bar, unscrew the cylinder head bolts in the correct procedure, lifting the cylinder head(s) from the engine and, if there is a problem, use wood and a hammer. Tin the aluminum cylinder head gasket sealing surfaces before installing the heads, and to remove a stuck head, you pry at the corners using a pry bar and this will not damage the sealing surface. The cylinder head gaskets should be pulled off the engines and the original positions should be taken into consideration as the gaskets are not to be interchanged. On reassembly, new cylinder head bolts have to be used to avoid leaks and damage, that are likely to occur in future. Make sure the mating surfaces of the cylinder heads and engine block are clean, and use only a gasket scraper or silicone gasket remover; do not use anything abrasive that could cause future leakages. Look for crack or any other defects on the mating surfaces and bottoms of the bolt holes; run a tap along the threads of bolt holes. Fit the new gaskets in place over the alignment dowels, fit the cylinder heads without disturbing the gaskets, and fit a new cylinder head bolts and tighten in a stage manner starting with the torque-angle technique. Last but not the least, reverse, do the final tightening, change the engine oil and filter, and fill the cooling system and start the engine and check for the leaks.
    Posted by FordPartsGiant Specialist
    Q:
    What is the next step after removing the camshafts and tappets for the 2010 Ford F-150? Posted by Customer
    A:
    Remove the drivebelt and the drivebelt tensioner.
    Posted by FordPartsGiant Specialist
    Q:
    What should be done for the remaining valves for the 1993 Mercury Grand Marquis? Posted by Customer
    A:
    Repeat the procedure for the remaining valves, ensuring that the components are returned to their original locations and not mixed up.
    Posted by FordPartsGiant Specialist
    Q:
    What should be inspected on the spring retainers (or rotators) and keepers for the 1991 Mercury Grand Marquis? Posted by Customer
    A:
    Check the spring retainers (or rotators) and keepers for obvious wear and cracks. Any questionable parts should be replaced with new ones, as extensive damage will occur if they fail during engine operation. Make sure the rotators operate smoothly with no binding or excessive play.
    Posted by FordPartsGiant Specialist
    Q:
    Why might it be more practical and economical for a home mechanic to purchase replacement heads rather than reconditioning the originals for the 2001 Mercury Grand Marquis? Posted by Customer
    A:
    It may be more practical and economical because some specialized tools are necessary for the disassembly and inspection procedures, and replacement parts may not be readily available.
    Posted by FordPartsGiant Specialist
    Q:
    What is the next step after handling the air conditioning compressor for the 2005 Mercury Grand Marquis? Posted by Customer
    A:
    Remove the exhaust manifold(s).
    Posted by FordPartsGiant Specialist
    Q:
    What tool is used to compress the springs on the first valve for the 2004 Ford Crown Victoria? Posted by Customer
    A:
    A valve spring compressor is used to compress the springs on the first valve.
    Posted by FordPartsGiant Specialist
    Q:
    What should be done before beginning reassembly, regardless of whether the head was sent to an automotive repair shop for valve servicing for the 2000 Ford Crown Victoria? Posted by Customer
    A:
    Make sure the head is clean before beginning reassembly.
    Posted by FordPartsGiant Specialist
    Q:
    What method is used for the head bolt tightening procedure for the 2003 Ford Crown Victoria? Posted by Customer
    A:
    The "torque-angle" or "torque-to-yield" method, which involves an initial specified torque followed by additional turns to achieve the correct bolt "stretch".
    Posted by FordPartsGiant Specialist
    Q:
    What should be noted about the installation of seals on the 2004 Ford Expedition? Posted by Customer
    A:
    On V6 engines, the spring seat must be in place before installing the seal. On V8 engines, the seal and spring seat are one-piece. Ensure that replacement parts are the same as the ones removed earlier.
    Posted by FordPartsGiant Specialist
    Q:
    What should be done to remove heavy deposits from the valves for the 2009 Ford Crown Victoria? Posted by Customer
    A:
    Scrape off any heavy deposits that may have formed on the valves, then use a motorized wire brush to remove deposits from the valve heads and stems. Again, make sure the valves don't get mixed up.
    Posted by FordPartsGiant Specialist
    Q:
    What should be done before removing the cylinder heads for the 1998 Ford Expedition? Posted by Customer
    A:
    The engine must be completely cool to prevent cylinder head warpage.
    Posted by FordPartsGiant Specialist
    Q:
    What should be inspected on each valve face for the 2008 Ford Expedition? Posted by Customer
    A:
    Inspect each valve face for uneven wear, deformation, cracks, pits, and burned areas, as well as checking the valve stem for scuffing and galling.
    Posted by FordPartsGiant Specialist
    Q:
    What tool is used to compress the springs on the valves for the 1999 Ford Expedition? Posted by Customer
    A:
    A valve spring compressor is used to compress the springs.
    Posted by FordPartsGiant Specialist
    Q:
    What is the first step in the removal process for the 2005 Ford F-150? Posted by Customer
    A:
    Relieve the fuel pressure, then disconnect the cable from the negative battery terminal.
    Posted by FordPartsGiant Specialist
    If you have any questions about this product, please don't hesitate to ask us. We will be happy to help you!

Genuine Ford Part 4L3Z-6049-AA, the Right Choice

To ensure reliability, purchase Ford part # 4L3Z-6049-AA Cylinder Head Assembly. It is sometimes referred to as Lincoln Cylinder Head. In terms of quality and longevity, OEM parts are top-tier. This is because they are made according to Ford's demanding factory specifications and go through strict quality control. This part fits specific Lincoln Mark LT, Town Car models.

FordPartsGiant.com is a leading supplier of genuine Ford parts and accessories such as Ford 4L3Z6049AA Cylinder Head Assembly. On our platform, we provide genuine Ford parts at incredible prices while ensuring top-tier quality. Feel at ease shopping with us, knowing our parts have a hassle-free return policy and rapid delivery service. For detailed Lincoln parts information, click here.

Why choose Ford Parts Giant

  • Dedicated Service

    Your complete satisfaction is our #1 goal

  • Lowest Prices

    Best deals on genuine OE parts from dealerships

  • Fast Delivery

    Orders are processed and delivered promptly