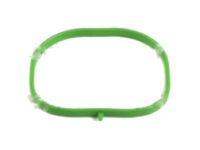
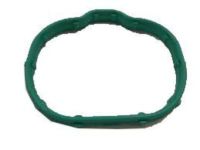
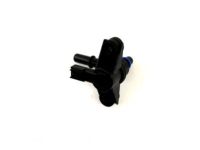
Make sure this part fits

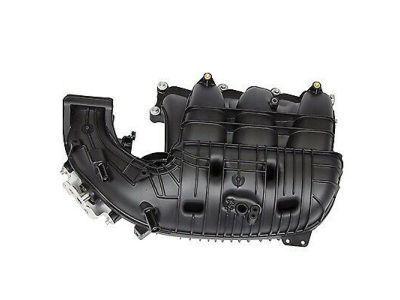
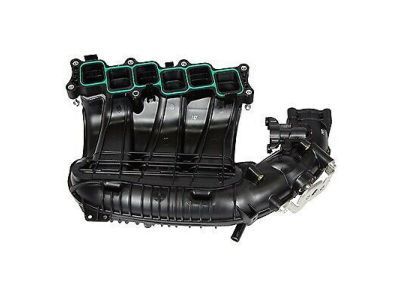
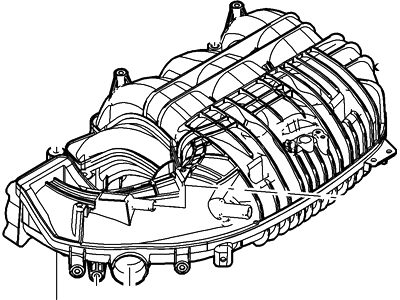
Lincoln 9L8Z-9424-A Manifold Assembly - Inlet

2010-2012 Lincoln MKZ 9L8Z9424A

Customer Questions & Expert Answers (7)
Ford 9L8Z-9424-A Manifold Assembly - Inlet
  • Part Description
    Manifold Assy - Inlet
  • Base No.
    9424A
  • Manufacturer
    Ford
Make sure this part fits
$104.65 MSRP: $153.00
You Save: $48.35 (32%)
1
ADD TO CART
  • Related Parts
  • Product Specifications
  • Vehicle Fitment
  • Customer Questions & Expert Answers
  • Product Specifications

    BrandGenuine Lincoln
    Base No.9424A
    Manufacturer Part Number9L8Z-9424-A, 9L8Z9424A
    Part DescriptionManifold Assy - Inlet
    Other NamesIntake Manifold
    Item Weight9.50 Pounds
    ConditionNew
    Fitment TypeDirect Replacement
    ManufacturerFord
    SKU9L8Z-9424-A
    WarrantyThis genuine Ford part is guaranteed by Ford's factory warranty.
    Shipping & ReturnShipping Policy Return Policy
    Warning: California’s Proposition 65
  • Vehicle Fitment

    Year Make Model Engine Important vehicle option details
    2010-2012 Lincoln MKZ6 Cyl 3.0L OHC Duratec5-Speed Automatic Transmission Mazda FNR5, 5-Speed Manual Transmission (G5M), 6-Speed Automatic Transaxle - AWF21, 6-Speed Automatic Transmission 6F Mid-Range, 6-Speed Manual Transmission Mazda G6M, CVT Auto Trans Powersplit Elec, Four-Wheel Drive (Full Time) (Left Hand Drive), Front-Wheel Drive (Left Hand Drive), Left Hand Drive
  • Customer Questions & Expert Answers

    Q:
    I would like to know is this part gonna fit with my car Posted by FordPartsGiant Specialist
    A:
    You can Select Your Vehicle to check if 9L8Z-9424-A fits your vehicle.
    Posted by FordPartsGiant Specialist
    Q:
    How to remove and install Intake Manifold in four cylinder engine on Ford Fusion? Posted by Customer
    A:
    To remove the intake manifold, first relieve the fuel system pressure. If equipped, lift the engine cover off the ballstuds and remove it. Disconnect the cable from the negative battery terminal. Remove the air cleaner outlet hose and, for 1.5L models, take out the air filter housing. For 1.5L, 1.6L, and 2.3L engines, remove the alternator. Disconnect the electrical connectors for the swirl control, throttle body, MAP sensor, and oil pressure sender, then remove the air intake duct from the throttle body. On turbocharged models, remove the Charge Air Cooler (CAC) inlet and outlet tubes, and for 1.5L models, take out the CAC from the intake manifold. For 2.0L models, disconnect the electrical connectors for the throttle body, Fuel Rail Pressure (FRP) sensor, and the Manifold Absolute Pressure (MAP) sensor. Disengage the EVAP line and heater hose retainers underneath the manifold, then remove the EVAP canister purge valve. On later models, release the vacuum hoses from the intake manifold by depressing the red quick-connect lock ring while pulling the hose upward. For 2013 and later 2.5L models, squeeze the two crankcase vent oil separator tube tabs and disconnect the tube from the back side of the intake manifold. If equipped, disconnect the AIR pump connector and remove the pump. Release the harness clips and set aside the wiring harness at the top of the intake manifold. For 1.5L engines, remove the turbocharger outlet pipe. For 2.0L, 2.3L, and 2.5L engines, remove the fuel rail heat shield if equipped. Remove the intake manifold fasteners and pull the intake manifold away from the engine enough to access and disconnect the EGR pipe if equipped, and the crankcase vent hose from the oil separator, squeezing the two clips on the vent hose to release it. Note that there are two sizes of bolts, so make note of their original installation locations. For installation, 2.0L, 2.3L, and 2.5L engines require individual gaskets for each of the four ports of the intake manifold, while 1.5L and 1.6L engines use one gasket for all ports. Using new manifold gasket(s), install the intake manifold, tightening the bolts in sequence for 1.5L engines, and for other models, tighten the bolts and nuts in several stages, working from the center out. Installation is otherwise the reverse of removal.
    Posted by FordPartsGiant Specialist
    Q:
    How to remove and install the intake manifold in four cylinder engine on Mercury Mariner? Posted by Customer
    A:
    For 2008 and earlier models, begin by relieving the fuel system pressure and disconnecting the cable from the negative battery terminal. Remove the air intake hose, then disconnect the accelerator cable and cruise control cable from the throttle lever arm. Next, remove the fuel rail, fuel pressure regulator, and fuel injectors as a single assembly, followed by the breather hose and PCV valve from the intake manifold. Disconnect the ignition wires and the ignition coil harness connector, then disconnect the vacuum lines from the intake manifold, labeling them for reassembly. Proceed to disconnect the PCM harness connector and the cylinder head temperature sensor connector, detaching the harness from the clip. Remove the alternator and the EGR valve, and if replacing or servicing the intake manifold, remove the throttle body; otherwise, it can remain attached if only servicing the cylinder head. Remove the intake manifold support bracket, fasteners, and washers, then take out the intake manifold and gasket. Inspect the intake manifold mating surface for warpage using a straightedge and feeler gauge, and resurface or replace as necessary. For installation, use a new manifold gasket, install the intake manifold, and tighten the bolts and nuts in stages from the center out. Reconnect the battery, allowing the Powertrain Control Module to relearn its idle and fuel trim strategy. For 2009 and later models, start by relieving the fuel system pressure and disconnecting the negative battery terminal. Remove the fuel rail, disconnect the vacuum line and vapor return hose from the intake manifold, and move aside any interfering wiring harnesses. Detach the pin retainer from the heater hose, disconnect the air intake duct from the throttle body, and remove the bottom bolt from the intake manifold before taking out the six main intake manifold bolts. Move the manifold aside to access and detach the PCV vent tube and EGR tube, then remove the intake manifold and its gaskets. Inspect the intake manifold gaskets and replace any that are damaged, then reinstall by reversing the removal steps and tightening all fasteners to the specified torque values.
    Posted by FordPartsGiant Specialist
    Q:
    How to remove and install the intake manifold in four cylinder engine on Ford Escape? Posted by Customer
    A:
    For 2008 and earlier models, begin by relieving the fuel system pressure and disconnecting the cable from the negative battery terminal. Remove the air intake hose, then disconnect the accelerator cable and cruise control cable from the throttle lever arm. Next, remove the fuel rail, fuel pressure regulator, and fuel injectors as a single assembly, followed by the breather hose and PCV valve from the intake manifold. Disconnect the ignition wires and the ignition coil harness connector, then disconnect the vacuum lines from the intake manifold, labeling them for reassembly. Proceed to disconnect the PCM harness connector and the cylinder head temperature sensor connector, detaching the harness from the clip. Remove the alternator and the EGR valve, and if replacing or servicing the intake manifold, remove the throttle body; otherwise, it can remain attached if only servicing the cylinder head. Remove the intake manifold support bracket, fasteners, and washers, then take out the intake manifold and gasket. Inspect the intake manifold mating surface for warpage using a straightedge and feeler gauge, and resurface or replace as necessary. For installation, use a new manifold gasket, install the intake manifold, and tighten the bolts and nuts in stages from the center out. Reconnect the battery, allowing the Powertrain Control Module to relearn its idle and fuel trim strategy. For 2009 and later models, start by relieving the fuel system pressure and disconnecting the negative battery terminal. Remove the fuel rail, disconnect the vacuum line and vapor return hose from the intake manifold, and move aside any interfering wiring harnesses. Detach the pin retainer from the heater hose, disconnect the air intake duct from the throttle body, and remove the bottom bolt from the intake manifold before taking out the six main intake manifold bolts. Move the manifold aside to access and detach the PCV vent tube and EGR tube, then remove the intake manifold and its gaskets. Inspect the intake manifold gaskets and replace any that are damaged, then reinstall by reversing the removal steps and tightening all fasteners to the specified torque values.
    Posted by FordPartsGiant Specialist
    Q:
    What should be done with the rear air filter housing outlet pipe for the 2014 Ford Fusion? Posted by Customer
    A:
    Loosen the clamps, then remove the rear air filter housing outlet pipe.
    Posted by FordPartsGiant Specialist
    Q:
    What should be done before installing new gaskets for the 2011 Mercury Mariner? Posted by Customer
    A:
    Ensure the mating surfaces are clean and flat.
    Posted by FordPartsGiant Specialist
    Q:
    What is the first step in removing the upper intake manifold for the 2001 Ford Escape? Posted by Customer
    A:
    Disconnect the cable from the negative battery terminal.
    Posted by FordPartsGiant Specialist
    If you have any questions about this product, please don't hesitate to ask us. We will be happy to help you!

Genuine Ford Part 9L8Z-9424-A, the Right Choice

To ensure reliability, purchase Ford part # 9L8Z-9424-A Manifold Assembly - Inlet. It is sometimes referred to as Lincoln Intake Manifold. In terms of quality and longevity, OEM parts are top-tier. This is because they are made according to Ford's demanding factory specifications and go through strict quality control. This part fits specific Lincoln MKZ models.

FordPartsGiant.com is a leading supplier of genuine Ford parts and accessories such as Ford 9L8Z9424A Manifold Assembly - Inlet. On our platform, we provide genuine Ford parts at incredible prices while ensuring top-tier quality. Feel at ease shopping with us, knowing our parts have a hassle-free return policy and rapid delivery service. For detailed Lincoln parts information, click here.

Why choose Ford Parts Giant

  • Dedicated Service

    Your complete satisfaction is our #1 goal

  • Lowest Prices

    Best deals on genuine OE parts from dealerships

  • Fast Delivery

    Orders are processed and delivered promptly