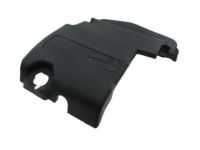
Make sure this part fits

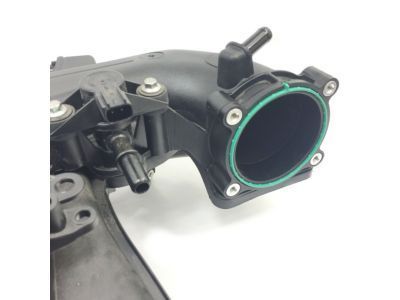
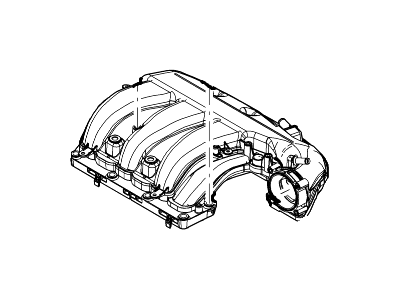
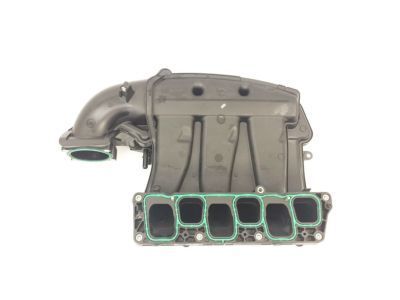
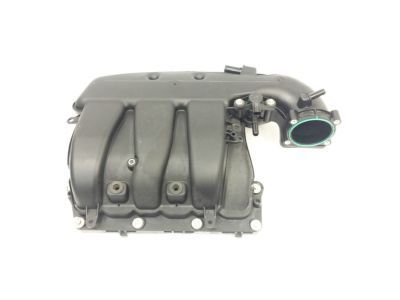
Lincoln AT4Z-9424-A Manifold Assembly - Inlet

2011-2015 Lincoln AT4Z9424A

Customer Questions & Expert Answers (7)
Ford AT4Z-9424-A Manifold Assembly - Inlet
  • Part Description
    Manifold Assy - Inlet
  • Base No.
    9424
  • Position
    Upper
  • Manufacturer
    Ford
  • Manufacturer's Notes
    This part is discontinued.
Make sure this part fits
  • Related Parts
  • Product Specifications
  • Vehicle Fitment
  • Customer Questions & Expert Answers
  • Product Specifications

    BrandGenuine Lincoln
    Base No.9424
    Manufacturer Part NumberAT4Z-9424-A, AT4Z9424A
    Part DescriptionManifold Assy - Inlet
    Other NamesIntake Manifold
    Item Dimensions18.2 x 15.7 x 13.1 inches
    Item Weight9.30 Pounds
    PositionUpper
    ConditionNew
    Fitment TypeDirect Replacement
    ManufacturerFord
    SKUAT4Z-9424-A
    WarrantyThis genuine Ford part is guaranteed by Ford's factory warranty.
    Shipping & ReturnShipping Policy Return Policy
    Warning: California’s Proposition 65
  • Vehicle Fitment

    Year Make Model Engine Important vehicle option details
    2013 Lincoln MKT6 Cyl 3.7L DOHC, 6 Cyl 3.7L PFI NA6-Speed Automatic Transmission 6F Mid-Range, 6-Speed Automatic Transmission 6F50, 6-Speed Automatic Transmission 6F55, Four-Wheel Drive (Full Time) (Left Hand Drive), Front-Wheel Drive (Left Hand Drive), Left Hand Drive
    2011-2015 Lincoln MKX6 Cyl 3.5L DOHC VCT SMPI, 6 Cyl 3.7L DOHC6-Speed Automatic Transmission 6F Mid-Range, 6-Speed Automatic Transmission 6F50, Four-Wheel Drive (Full Time) (Left Hand Drive), Four-Wheel Drive (Part Time) (Left Hand Drive), Front-Wheel Drive (Left Hand Drive), Left Hand Drive
  • Customer Questions & Expert Answers

    Q:
    Will these fit my car and if not which part will? Thank you. Posted by FordPartsGiant Specialist
    A:
    You can Select Your Vehicle to check if AT4Z-9424-A fits your vehicle.
    Posted by FordPartsGiant Specialist
    Q:
    How to remove and install the intake manifold in four cylinder engine on Lincoln MKX? Posted by Customer
    A:
    To remove the intake manifold, first disconnect the cable from the negative battery terminal, then raise the vehicle and support it securely on jackstands. Next, remove the engine splash shield fasteners and the shield, followed by disconnecting the electrical connectors from the throttle body, Fuel Rail Pressure sensor, and Manifold Absolute Pressure sensor. Disengage the EVAP line and heater hose retainers located underneath the manifold, and remove the EVAP canister purge valve. For 2019 models, disconnect the electrical connectors from the EGR valve, then remove the EGR valve, EGR transducer, EGR bracket, and EGR tube. Also, for 2019 models, remove the air conditioning compressor without disconnecting the lines and move it aside, then take off the crash support bracket nuts from the thermostat housing and remove the bracket from the left side of the intake manifold. Disconnect the EVAP tube from the Charge Air Cooler outlet tube, loosen the outlet tube clamp, and pull the tube off the throttle body. Release the power brake booster vacuum hose from the intake manifold by depressing the red quick-connect lock ring while pulling the hose outward. Release the harness clips and set aside the wiring harness at the top of the intake manifold, then remove the mounting bolts and pull the intake manifold away from the engine enough to access and disconnect the crankcase vent hose from the oil separator by squeezing the two clips on the vent hose. For installation, use new manifold gaskets for each of the four ports, install the intake manifold, and tighten the bolts gradually from the center out to the specified torque, with installation otherwise being the reverse of removal.
    Posted by FordPartsGiant Specialist
    Q:
    How to remove and install the intake manifold in four cylinder engine on Ford Taurus? Posted by Customer
    A:
    To remove the intake manifold, first disconnect the cable from the negative battery terminal. Raise the vehicle and support it securely on jackstands. Remove the engine splash shield fasteners and the shield. Disconnect the EVAP tube from the Charge Air Cooler outlet tube, then loosen the outlet tube clamp and pull the tube off the throttle body. Disconnect the electrical connectors from the throttle body, Fuel Rail Pressure sensor, and Manifold Absolute Pressure sensor. Disengage the EVAP line and heater hose retainers below the manifold. Remove the EVAP canister purge valve. Release the power brake booster vacuum hose from the intake manifold by depressing the red quick-connect lock ring while pulling the hose outward. Release the harness clips and set aside the wiring harness at the top of the intake manifold. Disconnect the fuel line clips from the top of the manifold. Remove the mounting bolts and pull the intake manifold away from the engine enough to access and disconnect the crankcase vent hose from the oil separator by squeezing the two clips on the vent hose. For installation, use new manifold gaskets for each of the four ports and install the intake manifold, tightening the bolts gradually from the center out in a circular pattern to the specified torque. Installation follows the reverse order of removal.
    Posted by FordPartsGiant Specialist
    Q:
    How to remove and install the intake manifold in V6 engine on Ford Edge? Posted by Customer
    A:
    Pull out the KL25Z board from the engine compartment and unscrew the engine cover, then disconnect the black cable from the battery. Then, remove air filter housing and hoses and now loose the clamps for the removal of right-hand air filter housing outlet pipe and Charge Air Cooler intake pipe. Disconnect the quick connect fittings external to the crankcase at both ends of the PCV tubes, unscrew the electrical connector of the crankcase pressure sensor on the left side of the PCV tube and then pull out both the tubes. Disconnect the purge valve hoses and the valve while the harness must be relocated aside, then disconnect the vacuum pressure sensor mounting bolt and the sensor along with the intake manifold. Those electrical/vacuum harness retainers/connectors that interfere with the access must be moved out of the way if required and then the manifold has to be disconnected by the removal of manifold mounting bolts. For removal, first remove the manifold bolts and then use a screwdriver or a pick to remove the gaskets from the manifold; to install use the precise sequence of removal, clean the surfaces of the manifold to remove the gasket residues, place fresh gaskets and bolt the manifold in place by tightening the bolts in the sequence stated. The process of installation is carried out based on the inverted sequence of the removal process. For the upper intake manifold on 3.5L and 3.7L engines remove the PCM electrical connectors and relocate the harnesses aside, the EVAP canister vent solenoid, the throttle body electric connectors and unplugging the line from the EVAP canster vent solenoid, brake booster vacuum hose and crankcase vent hose. Insert the small allen head bolts loosely to hold the lower intake in place then unplug the crankcase ventilation, purged fuel rail vacuum lines, unplug the IAC valve connector and remove some of the alternate fuel injector bolts and lower the intake carefully at a time and the manifold has to be separated from the engine without using a hammer, the intake ports must be covered by clean shop rags. For service, the gaskets must be removed, the mating surfaces blanked off, new gaskets secured, and the manifold and bolts must be remounted and tightened in a specific pattern. Disassembly, on the other hand, is carried out in a sequence that is exactly the opposite of how ProRE installer works. For the lower intake manifold it is necessary to: first to remove the upper intake manifold, next to drain the cooling system, to cover the drivebelt with a plastic wrap, then to remove the thermostat housing while disconnecting the heater hose from the manifold. To remove the fuel injectors you also need to remove the fuel line from the fuel rail and the electrical connectors from the injectors. When it has been tightened in the sequence 3,1,2,3 release the intake manifold mounting bolts in one quarter turn each in the sequence 3,1,2,3 until they are easily removable. For service dismantle the gaskets that are placed in the grooves in the manifold, clean the mating surfaces to fit the new gaskets snugly, put the manifold in place and tighten the bolts to specified torque in the advised order. The rest of the procedure is conducted in the reverse manner to the removal and the cooling system is refilled and the engine started, looking for any oil or coolant leaks at the intake manifold gasket joints.
    Posted by FordPartsGiant Specialist
    Q:
    What should be disconnected from the fuel rail for the 2013 Ford Taurus? Posted by Customer
    A:
    Disconnect the fuel line from the fuel rail.
    Posted by FordPartsGiant Specialist
    Q:
    What is the first step in the process for the 2015 Lincoln MKX? Posted by Customer
    A:
    Disconnect the cable from the negative battery terminal.
    Posted by FordPartsGiant Specialist
    Q:
    What should be used for the intake manifold installation for the 2011 Ford Edge? Posted by Customer
    A:
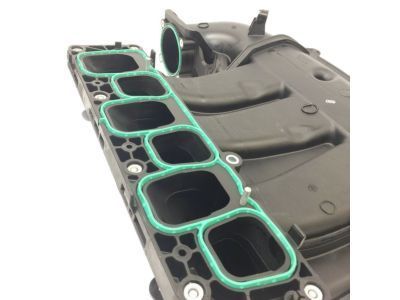
    Using new manifold gaskets, install the intake manifold. There are individual gaskets for each of the four ports of the intake manifold.
    Posted by FordPartsGiant Specialist
    If you have any questions about this product, please don't hesitate to ask us. We will be happy to help you!

Genuine Ford Part AT4Z-9424-A, the Right Choice

To ensure reliability, purchase Ford part # AT4Z-9424-A Manifold Assembly - Inlet. It is sometimes referred to as Lincoln Intake Manifold. In terms of quality and longevity, OEM parts are top-tier. This is because they are made according to Ford's demanding factory specifications and go through strict quality control. This part fits specific Lincoln MKT, MKX models.

FordPartsGiant.com is a leading supplier of genuine Ford parts and accessories such as Ford AT4Z9424A Manifold Assembly - Inlet. On our platform, we provide genuine Ford parts at incredible prices while ensuring top-tier quality. Feel at ease shopping with us, knowing our parts have a hassle-free return policy and rapid delivery service. For detailed Lincoln parts information, click here.

Why choose Ford Parts Giant

  • Dedicated Service

    Your complete satisfaction is our #1 goal

  • Lowest Prices

    Best deals on genuine OE parts from dealerships

  • Fast Delivery

    Orders are processed and delivered promptly