Make sure this part fits

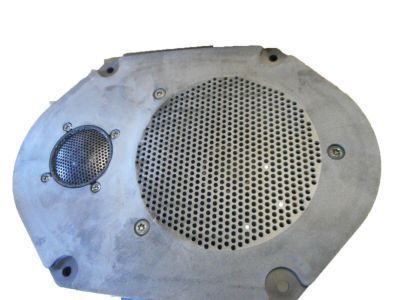
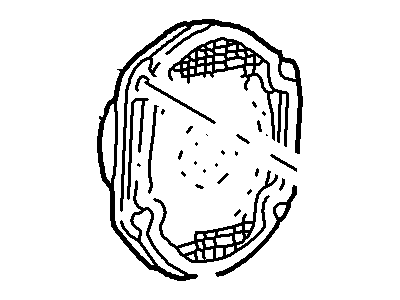
Lincoln XW7Z-18808-CA Speaker Assembly

1999-2003 Lincoln XW7Z18808CA

Customer Questions & Expert Answers (8)
Ford XW7Z-18808-CA Speaker Assembly
  • Part Description
    Speaker Assy
  • Position
    Front
  • Replaced By
    6U5Z-18808-EA
  • Manufacturer
    Ford
Make sure this part fits
$37.80 MSRP: $54.32
You Save: $16.52 (31%)
Ships in 1-2 Business Days
1
ADD TO CART
  • Related Parts
  • Product Specifications
  • Vehicle Fitment
  • Customer Questions & Expert Answers
  • Product Specifications

    BrandGenuine Lincoln
    Manufacturer Part NumberXW7Z-18808-CA, XW7Z18808CA
    Part DescriptionSpeaker Assy
    Item Dimensions10.2 x 7.0 x 5.0 inches
    Item Weight3.40 Pounds
    PositionFront
    ConditionNew
    Fitment TypeDirect Replacement
    ManufacturerFord
    SKUXW7Z-18808-CA
    WarrantyThis genuine Ford part is guaranteed by Ford's factory warranty.
    Shipping & ReturnShipping Policy Return Policy
    Warning: California’s Proposition 65
  • Vehicle Fitment

    Year Make Model Engine Important vehicle option details
    2002-2003 Lincoln Blackwood8 Cyl 5.4L DOHC EFI4-Speed Automatic Transmission E4OD(4R100), Left Hand Drive, Rear-Wheel Drive (Left Hand Drive)
    1999-2002 Lincoln Navigator8 Cyl 5.4L4AT 4R100
    1999-2003 Lincoln Town Car8 Cyl 4.6L4AT 4R70W
  • Customer Questions & Expert Answers

    Q:
    Is the the correct part for the attached VIN? Posted by FordPartsGiant Specialist
    A:
    You can Select Your Vehicle to check if XW7Z-18808-CA fits your vehicle.
    Posted by FordPartsGiant Specialist
    Q:
    How do you disconnect and remove the radio and speakers on Ford Expedition? Posted by Customer
    A:
    Disconnect the negative battery cable, then the positive battery cable, and wait two minutes before proceeding. Remove the radio trim bezel from the center of the instrument panel. For 2002 and earlier models, the radio receiver is retained in the instrument panel by special clips, which can be released using two sets of removal tools or two short lengths of coat hanger wire bent into U-shapes. Insert the tools into the holes at the corners of the radio assembly until the internal clips release, then push outward simultaneously on both tools while pulling the assembly out of the instrument panel. Disconnect the antenna and electrical connectors to remove the unit from the vehicle. To install the radio, plug in the electrical connectors, slide the radio along the track into the instrument panel, and ensure the clips snap into place. For 2003 and later models, remove the screws securing the radio, slide the radio assembly out far enough to disengage any electrical connectors, and then slide the radio all the way out, with installation being the reverse of removal. To access the speakers, remove the door trim panel, then take out the mounting screws, withdraw the speaker, unplug the electrical connector, and remove the speaker from the vehicle. Installation is the reverse of removal.
    Posted by FordPartsGiant Specialist
    Q:
    How do you disconnect and remove the radio and speakers on Lincoln Navigator? Posted by Customer
    A:
    Disconnect the negative battery cable, then the positive battery cable, and wait two minutes before proceeding. Remove the radio trim bezel from the center of the instrument panel. For 2002 and earlier models, the radio receiver is retained in the instrument panel by special clips, which can be released using two sets of removal tools or two short lengths of coat hanger wire bent into U-shapes. Insert the tools into the holes at the corners of the radio assembly until the internal clips release, then push outward simultaneously on both tools while pulling the assembly out of the instrument panel. Disconnect the antenna and electrical connectors to remove the unit from the vehicle. To install the radio, plug in the electrical connectors, slide the radio along the track into the instrument panel, and ensure the clips snap into place. For 2003 and later models, remove the screws securing the radio, slide the radio assembly out far enough to disengage any electrical connectors, and then slide the radio all the way out, with installation being the reverse of removal. To access the speakers, remove the door trim panel, then take out the mounting screws, withdraw the speaker, unplug the electrical connector, and remove the speaker from the vehicle. Installation is the reverse of removal.
    Posted by FordPartsGiant Specialist
    Q:
    How do I remove and install a radio/CD player and speakers in a Lincoln Town Car? Posted by Customer
    A:
    Disconnect the cable from the negative battery terminal. For earlier models of the radio/CD player, remove the screws and detach the bezel. Then, remove the mounting screws. Slide the radio/CD unit out and support it, disconnect the ground cable, antenna and electrical connectors, then remove the assembly from the instrument panel. Installation is the reverse of removal. For later models, the radio receiver and CD player assemblies are retained in the instrument panel by special clips. Releasing these clips requires the use of two sets of special removal tools, available at most auto parts stores, or two short lengths of coathanger wire bent into U-shapes. With the clips released, flex out simultaneously on both tools and pull the assembly out of the instrument panel, disconnect the antenna and electrical connectors and remove the unit from the vehicle. Install by connecting the electrical connectors, then sliding the radio or CD player along the track and into the instrument panel until the clips can be felt snapping in place. For door mounted speakers, remove the door trim panel. Remove the mounting screws, withdraw the speaker, disconnect the electrical connector and remove the speaker from the vehicle. Installation is the reverse of removal. For rear quarter panel mounted speakers, remove the screws and pry off the speaker grille. Remove the retaining screws, withdraw the speaker, disconnect the electrical connector and remove the speaker from the vehicle. Installation is the reverse of removal. For package shelf mounted speakers, open the trunk lid. Working under the package tray, disconnect electrical connector, remove the retaining screws/nuts or detach the clips, then lower the speaker and remove it from the vehicle. Installation is the reverse of removal.
    Posted by FordPartsGiant Specialist
    Q:
    How do you disconnect and remove the radio/CD player and speakers on Mercury Grand Marquis? Posted by Customer
    A:
    Disconnect the cable from the negative battery terminal. For 1991 and earlier models, remove the screws and detach the bezel, then take out the mounting screws. Slide the radio/CD unit out, support it, disconnect the ground cable, antenna, and electrical connectors, and remove the assembly from the instrument panel, with installation being the reverse of removal. For 1992 and later models, the radio receiver and CD player assemblies are secured by special clips that require radio removal tools or U-shaped coathanger wire to release. Insert the tools into the holes at the corners of the assembly until the internal clips release, then flex out on both tools while pulling the assembly out, disconnecting the antenna and electrical connectors before removing the unit from the vehicle. To install, plug in the electrical connectors, slide the radio or CD player into the instrument panel until the clips snap in place. For door-mounted speakers, remove the door trim panel, take out the mounting screws, withdraw the speaker, unplug the electrical connector, and remove the speaker from the vehicle, with installation being the reverse of removal. For rear quarter panel mounted speakers, remove the screws and pry off the speaker grille, then take out the retaining screws, withdraw the speaker, unplug the electrical connector, and remove the speaker from the vehicle, with installation being the reverse of removal. For package shelf mounted speakers, open the trunk lid, work under the package tray to unplug the electrical connector, remove the retaining screws/nuts or detach the clips, then lower the speaker and remove it from the vehicle, with installation being the reverse of removal.
    Posted by FordPartsGiant Specialist
    Q:
    How do you disconnect and remove the radio/CD player and speakers on Ford Crown Victoria? Posted by Customer
    A:
    Disconnect the cable from the negative battery terminal. For 1991 and earlier models, remove the screws and detach the bezel, then take out the mounting screws. Slide the radio/CD unit out, support it, disconnect the ground cable, antenna, and electrical connectors, and remove the assembly from the instrument panel, with installation being the reverse of removal. For 1992 and later models, the radio receiver and CD player assemblies are secured by special clips that require radio removal tools or U-shaped coathanger wire to release. Insert the tools into the holes at the corners of the assembly until the internal clips release, then flex out on both tools while pulling the assembly out, disconnecting the antenna and electrical connectors before removing the unit from the vehicle. To install, plug in the electrical connectors, slide the radio or CD player into the instrument panel until the clips snap in place. For door-mounted speakers, remove the door trim panel, take out the mounting screws, withdraw the speaker, unplug the electrical connector, and remove the speaker from the vehicle, with installation being the reverse of removal. For rear quarter panel mounted speakers, remove the screws and pry off the speaker grille, then take out the retaining screws, withdraw the speaker, unplug the electrical connector, and remove the speaker from the vehicle, with installation being the reverse of removal. For package shelf mounted speakers, open the trunk lid, work under the package tray to unplug the electrical connector, remove the retaining screws/nuts or detach the clips, then lower the speaker and remove it from the vehicle, with installation being the reverse of removal.
    Posted by FordPartsGiant Specialist
    Q:
    How to remove and install a speaker from the door trim panel or rear quarter panel on Ford Explorer Sport Trac? Posted by Customer
    A:
    Remove the door trim panel or rear quarter panel. Remove the screws securing the speaker to the trim panel or speaker bracket. Lift out the speaker and disconnect the electrical connector at the speaker, taking care not to operate the radio with the speakers disconnected. Installation is the reverse of the removal steps.
    Posted by FordPartsGiant Specialist
    Q:
    How to remove and install a speaker from the door trim panel or rear quarter panel on Ford Explorer? Posted by Customer
    A:
    Remove the door trim panel or rear quarter panel. Remove the screws securing the speaker to the trim panel or speaker bracket. Lift out the speaker and disconnect the electrical connector at the speaker, taking care not to operate the radio with the speakers disconnected. Installation is the reverse of the removal steps.
    Posted by FordPartsGiant Specialist
    If you have any questions about this product, please don't hesitate to ask us. We will be happy to help you!

Genuine Ford Part XW7Z-18808-CA, the Right Choice

To ensure reliability, purchase Ford part # XW7Z-18808-CA Speaker Assembly. It is sometimes referred to as Lincoln Car Speakers. In terms of quality and longevity, OEM parts are top-tier. This is because they are made according to Ford's demanding factory specifications and go through strict quality control. This part fits specific Lincoln Blackwood, Navigator, Town Car models.

FordPartsGiant.com is a leading supplier of genuine Ford parts and accessories such as Ford XW7Z18808CA Speaker Assembly. On our platform, we provide genuine Ford parts at incredible prices while ensuring top-tier quality. Feel at ease shopping with us, knowing our parts have a hassle-free return policy and rapid delivery service. For detailed Lincoln parts information, click here.

Why choose Ford Parts Giant

  • Dedicated Service

    Your complete satisfaction is our #1 goal

  • Lowest Prices

    Best deals on genuine OE parts from dealerships

  • Fast Delivery

    Orders are processed and delivered promptly