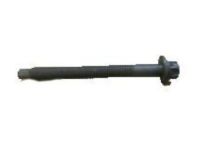
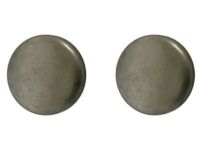
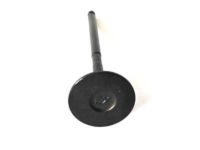
Make sure this part fits

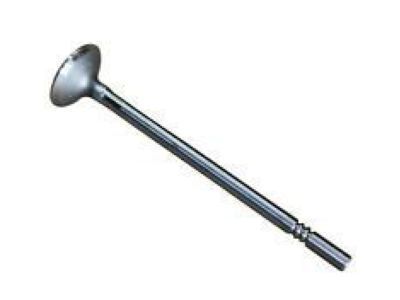
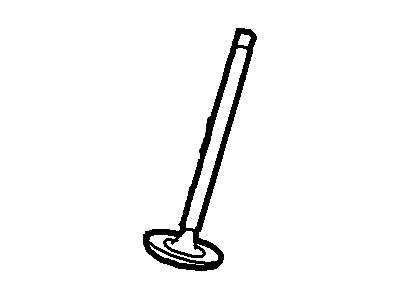
Lincoln 1S7Z-6505-AA Valve - Exhaust

2006-2009 Lincoln 1S7Z6505AA

Customer Questions & Expert Answers (11)
Ford 1S7Z-6505-AA Valve - Exhaust
  • Part Description
    Valve - Exhaust
  • Base No.
    6505
  • Replaced By
    9S4Z-6505-A
  • Manufacturer
    Ford
Make sure this part fits
$11.40 MSRP: $16.23
You Save: $4.83 (30%)
Ships in 1-3 Business Days
1
ADD TO CART
  • Related Parts
  • Product Specifications
  • Vehicle Fitment
  • Customer Questions & Expert Answers
  • Product Specifications

    BrandGenuine Lincoln
    Base No.6505
    Manufacturer Part Number1S7Z-6505-AA, 1S7Z6505AA
    Part DescriptionValve - Exhaust
    Item Weight0.30 Pounds
    ConditionNew
    Fitment TypeDirect Replacement
    Require Quantity8
    ManufacturerFord
    SKU1S7Z-6505-AA
    WarrantyThis genuine Ford part is guaranteed by Ford's factory warranty.
    Shipping & ReturnShipping Policy Return Policy
    Warning: California’s Proposition 65
  • Vehicle Fitment

    Year Make Model Engine Important vehicle option details
    2007-2009 Lincoln MKZ4 Cyl 2.3L5-Speed Automatic Transmission Mazda FNR5, 5-Speed Manual Transmission (G5M), 6-Speed Automatic Transaxle - AWF21, 6-Speed Automatic Transmission 6F Mid-Range, 6-Speed Manual Transmission Mazda G6M, CVT Auto Trans Powersplit Elec, Four-Wheel Drive (Full Time) (Left Hand Drive), Front-Wheel Drive (Left Hand Drive), Left Hand Drive
    2006 Lincoln Zephyr4 Cyl 2.3L5-Speed Automatic Transmission Mazda FNR5, 5-Speed Manual Transmission (G5M), 6-Speed Automatic Transaxle - AWF21, Four-Wheel Drive (Full Time) (Left Hand Drive), Front-Wheel Drive (Left Hand Drive), Left Hand Drive
  • Customer Questions & Expert Answers

    Q:
    Does the PN fit my vehicle? Posted by FordPartsGiant Specialist
    A:
    You can Select Your Vehicle to check if 1S7Z-6505-AA fits your vehicle.
    Posted by FordPartsGiant Specialist
    Q:
    How do you check and adjust valve clearances in 2.0L zetec-e engine on Ford Focus? Posted by Customer
    A:
    For DIV purposes, the checking of the valve clearances is easy but the replacement of the shims requires a special tool from the manufacturer and owners may want to have their vehicle checked by the dealer. To measure the clearances, firstly, unbolt the valve cover and position the Number 1 cylinder at the TDC of the compression stroke so that the intake and exhaust cam lobes are lifted upwards. Check the clearance between the cam lobe base and the shim employing the feeler gauges: Record the shim thickness required to give a tight fit on all the four valves of the Number 1 cylinder. After that, turn the crankshaft in the clockwise direction to the angle of 180 degrees and take the clearance measurements for cylinder Number 3; likewise, for the cylinder Number 4 and Number 2, repeat the 180 degrees crankshaft turning. When any clearances are outside this range, corrections are required. For adjustments, it is suggested that the manufacturer special tool should be used as is due to the special design of the camshafts and cylinder head. If necessary, shim thicknesses can be changed-for this, it is necessary to press the cam follower and then extract the old shim before installing a new one. Chock the wheels, start the engine and do not allow the piston to reach TDC again as this will bend the valve, rather, lower the piston from TDC by rotating the crankshaft about 90 degrees clockwise. The service tool 303-563A used by dealer technicians is bolted or screwed into the cylinder head above each camshaft and one has to be very careful not to damage the cam follower while using this tool. When measuring the thickness, if the clearance turns out to be small put on a thinner shim, if it is large use a thicker shim. Subtract the measured shim thickness from the required shim thickness if the clearance obtained is lesser than the required clearance or add the required shim thickness from the measured shim thickness, if the clearance is lesser than the required clearance. Bolt he correct shim into place and then turn the crankshaft two full turns before again returning to TDC and rechecking the clearances and again adjusting the shims as required. This should be done on all cylinders, with records kept of the shim thicknesses for future adjustments, while shims can be swapped for others, attempt not to turn the camshaft with shims off for risk of damage. After ensuring that all the clearances are proper, get rid of the tool and replace the valve cover as it was earlier.
    Posted by FordPartsGiant Specialist
    Q:
    How to check and adjust valve clearances on Ford Fusion? Posted by Customer
    A:
    First, pull the battery cable away from the negative terminal; remove all of the spark plugs and the valve cover. Some of the challenges are Loosen the right front wheel lug nuts-lift the front of the vehicle-support the vehicle secured on jack stands-remove the right front wheel and the fender splash shield. On another engine, with a wrench or socket on the crankshaft pulley bolt, turn the crankshaft clockwise and check each lifter when its camshaft lobe is directly vertical, it's preferred that the distance is between cam base circle and top of the lifter. The correct clearances are obtained by the use of feeler gauges with a very slight drag being felt when sliding the gauge between the lifter and camshaft. A measurement check should be carried between the clearance of each of the camshaft lobe with the appropriate lifter and document all the readings. In the event that any of the anterior mentioned clearances prove to be out of standard, both the camshafts and lifters that are out of spec must be withdrawn. New lifters are available in various thicknesses, it is stamped with a thickness number; only the numbers after the decimal point are important. To decide the lifters' thickness for a new set, sum together the thickness of an original lifter and the measured clearance, and then subtract the midrange figure for the ideal clearance to arrive at the proper thickness of the lifter to order, choosing the closest available thickness. After the camshafts and timing chain have been fitted, it is essential to again inspect the valve clearances; after that, the work is done in reverse order. Last but not least of the oil change procedures is to start the engine and inspect it for oil loss.
    Posted by FordPartsGiant Specialist
    Q:
    How to check and adjust valve clearances on 2000-2011 Ford Ranger? Posted by Customer
    A:
    In this type of engine there is no manufacturer set service schedule for checking on the valve clearance, although high mileage or even a noisy valve train may might call for it. Before testing the valve clearances on the hydraulic lifters, the valve cover has to be removed and set the Number 1 cylinder on top dead center of the intake stroke while the exhaust and intake cam lobes face upward. Insert a feeler gauge below the cam lobe of the Number 1 cylinder and measure the thickness of the clearance between the cam lobe and the tappet and record the thickness of the four valves of the cylinder. Then, rotate the crankshaft further to 180 degrees to check clearances of the cylinder Number 3, check the cylinders Number 4 and 2, also. If any is seen to be outside the required range, then it should be corrected and a record of which valves have to be adjusted should be taken on a chart. Examining valve clearances is relatively easy, but adjusting them is quite a problem and this should be done with a micrometer. Should there be changes necessary, other camshaft tappets of different thickness will require to be used and precise measurement has to be done in order to choose the right tappet. If the clearance is to be small, a thin tappet should be installed; while if the clearance is to be large, a thick tappet will do. Once you have established the needful tappets, get them at a local dealership. Place the engine at Top Dead Center, torque the valve cover and front engine cover, take off the timing chain and both camshaft gears and both camshafts. When having to remove and replace tappets, and there are many, it is advised that they should be done one at a time to avoid mixing them because their faces may be of different thickness. Apply oil on the new tappets that you are going to fit and having fitted them, reverse the process of removing the tappets and before tightening any bolt or nut, oil the cam lover and journals, check and recheck the valve clearances, tighten tappets in the correct sequence followed by torquing every bolt that you tightened, and check all electrical and hose connections for proper connectivity and tightness. To start with, you should take your time and reinstall the engine so as to result to a precise automobile so as to cover up for a leak should there be one.
    Posted by FordPartsGiant Specialist
    Q:
    How do you check and adjust valve clearances on Mercury Mariner? Posted by Customer
    A:
    For the 2.0L engine, start by unscrewing of the valve cover while positioning the number 1 cylinder on TDC on the compression stroke while the intake and exhaust cam lobes are facing upwards. The thickness of shims that fits tightly should be noted by measuring the clearance between the cam lobe base and the shim using feeler gauge for each valve. Turn the crankshaft again by 180 degrees clockwise to take the clearances for the cylinder No. 3, and also for the cylinder No. 4 and No. 2. If they are clearances are beyond the set range, some changes will be required. Because of the restricted installation space of the camshafts and cylinder head special tools are used for adjustments. To change a shim, you need to lower the piston from TDC by merely turning the crankshaft roughly 90 degrees clockwise in order to prevent the bending of the valve. Refer to the manufacturer service tool to proceed and lower the cam follower while taking off the shim and measuring its thickness. In the vicinity of small clearance, use a thinner shim; at large clearance, use a thicker shim. Once you have adjusted the clearances on the first cylinder, turn the crankshaft two full turns in order to set all installed shims, bring the crankshaft back to TDC and check all the clearances once again adjusting them if necessary. As for the 2.3L/2.5L engines, the procedure to check the valve clearances is quite the same as with the 2.0L, but due to the use of hydraulic tappets and cam followers with heads of various thickness to obtain the required clearance, the camshafts have to be removed to change followers.
    Posted by FordPartsGiant Specialist
    Q:
    What is the next step after checking the clearances for cylinder No 1 for the 2011 Ford Focus? Posted by Customer
    A:
    Turn the crankshaft clockwise through 180° so that the valves of cylinder No 3 are pointing upwards, then check and record the four valve clearances for cylinder No 3.
    Posted by FordPartsGiant Specialist
    Q:
    What should be done during the inspection of the cylinder head for the 2001 Ford Focus? Posted by Customer
    A:
    1. Inspect the head very carefully for cracks, evidence of coolant leakage, and other damage. If cracks are found, a new cylinder head should be obtained. 2. If warpage of the cylinder head gasket surface is suspected, use a straight-edge to check it for distortion. If feeler gauges are used, the degree of distortion can be assessed more accurately. 3. Examine the valve seats in each of the combustion chambers. If they are severely pitted, cracked, or burned, they will need to be replaced or re-cut by an engine overhaul specialist. 4. If the valve guides are worn, indicated by a side-to-side motion of the valve, new guides must be installed. 5. The replacement of valve guides is best carried out by an engine overhaul specialist. 6. If the valve seats are to be re-cut, this must be done only after the guides have been replaced.
    Posted by FordPartsGiant Specialist
    Q:
    How do you set the Number 1 cylinder to TDC on the compression stroke for the 1996 Ford Ranger? Posted by Customer
    A:
    Set the Number 1 cylinder to TDC on the compression stroke by ensuring the intake and exhaust cam lobes of the Number 1 cylinder are pointing upwards (though not vertical) so that the valve clearances can be checked.
    Posted by FordPartsGiant Specialist
    Q:
    What should be done after the valve job has been performed by a professional for the 2010 Ford Ranger? Posted by Customer
    A:
    After the valve job, the head will be in like-new condition. Before installation on the engine, it is important to clean the head again to remove any metal particles and abrasive grit that may still be present from the valve service or head resurfacing operations. Using compressed air, if available, is recommended to blow out all the oil holes and passages.
    Posted by FordPartsGiant Specialist
    Q:
    Why should a valve job be done by a professional for the 2011 Ford Ranger? Posted by Customer
    A:
    Because of the complex nature of the job and the special tools and equipment needed, servicing of the valves, the valve seats, and the valve guides, commonly known as a valve job, should be done by a professional.
    Posted by FordPartsGiant Specialist
    Q:
    How do you determine the required thickness of the new shim for the 2002 Ford Escape? Posted by Customer
    A:
    The required thickness of the new shim can be calculated based on the desired clearance, measured clearance, and the shim thickness found.
    Posted by FordPartsGiant Specialist
    See expert answers on similar Exhaust Valve
    If you have any questions about this product, please don't hesitate to ask us. We will be happy to help you!

Genuine Ford Part 1S7Z-6505-AA, the Right Choice

To ensure reliability, purchase Ford part # 1S7Z-6505-AA Valve - Exhaust. It is sometimes referred to as Lincoln Exhaust Valve. In terms of quality and longevity, OEM parts are top-tier. This is because they are made according to Ford's demanding factory specifications and go through strict quality control. This part fits specific Lincoln MKZ, Zephyr models.

FordPartsGiant.com is a leading supplier of genuine Ford parts and accessories such as Ford 1S7Z6505AA Valve - Exhaust. On our platform, we provide genuine Ford parts at incredible prices while ensuring top-tier quality. Feel at ease shopping with us, knowing our parts have a hassle-free return policy and rapid delivery service. For detailed Lincoln parts information, click here.

Why choose Ford Parts Giant

  • Dedicated Service

    Your complete satisfaction is our #1 goal

  • Lowest Prices

    Best deals on genuine OE parts from dealerships

  • Fast Delivery

    Orders are processed and delivered promptly