Make sure this part fits

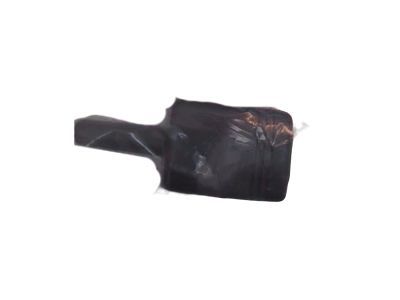
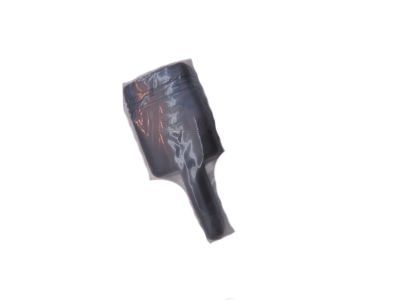
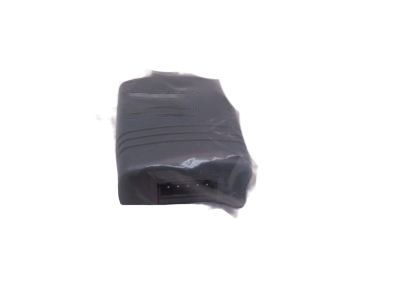
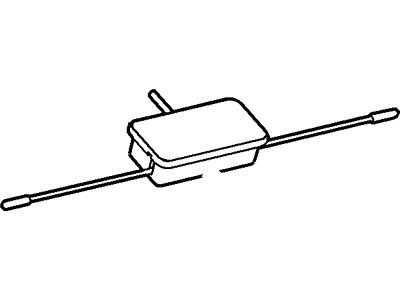
Mercury 9G1Z-15603-A Aerial Assembly

2008-2011 Mercury 9G1Z15603A

Customer Questions & Expert Answers (16)
Ford 9G1Z-15603-A Aerial Assembly
  • Part Description
    Aerial Assy
  • Replaced By
    DL3Z-15603-C
  • Manufacturer
    Ford
Make sure this part fits
$61.60 MSRP: $80.00
You Save: $18.40 (23%)
Ships in 1-3 Business Days
1
ADD TO CART
  • Related Parts
  • Product Specifications
  • Vehicle Fitment
  • Customer Questions & Expert Answers
  • Product Specifications

    BrandGenuine Mercury
    Manufacturer Part Number9G1Z-15603-A, 9G1Z15603A
    Part DescriptionAerial Assy
    Item Weight0.70 Pounds
    ConditionNew
    Fitment TypeDirect Replacement
    ManufacturerFord
    SKU9G1Z-15603-A
    WarrantyThis genuine Ford part is guaranteed by Ford's factory warranty.
    Shipping & ReturnShipping Policy Return Policy
    Warning: California’s Proposition 65
  • Vehicle Fitment

    Year Make Model Engine Important vehicle option details
    2008-2011 Mercury Grand Marquis8 Cyl 4.6L Romeo SOHC EFI4-Speed Automatic Transmission 4R75E Livonia, Left Hand Drive, Rear-Wheel Drive (Left Hand Drive)
    2008-2011 Mercury Mariner4 Cyl 2.3L, 4 Cyl 2.3L Hybrid Gas/Electric DOHC, 4 Cyl 2.5L Duratec (110kW/150PS), 4 Cyl 2.5L PFI Gas/Electric, 6 Cyl 3.0L DOHC EFI Modular, 6 Cyl 3.0L OHC Duratec4AT CD4E, 5-Speed Manual Transmission - AK, 6-Speed Automatic Transmission 6F Mid-Range, CVT Auto Trans Powersplit Elec, Four-Wheel Drive (Full Time) (Left Hand Drive), Front-Wheel Drive (Left Hand Drive), Left Hand Drive
    2008-2011 Mercury Milan4 Cyl 2.3L, 4 Cyl 2.5L Duratec HE PFI, 4 Cyl 2.5L PFI Gas/Electric, 6 Cyl 3.0L DOHC EFI, 6 Cyl 3.0L OHC Duratec, 6 Cyl 3.5L DOHC VCT SMPI5-Speed Automatic Transmission Mazda FNR5, 6-Speed Automatic Transaxle - AWF21, 6-Speed Automatic Transmission 6F Mid-Range, CVT Auto Trans Powersplit Elec, Four-Wheel Drive (Full Time) (Left Hand Drive), Front-Wheel Drive (Left Hand Drive), Left Hand Drive
    2008-2010 Mercury Mountaineer6 Cyl 4.0L SOHC EFI, 8 Cyl 4.6L5-Speed Automatic Transmission 5R55S, 5-Speed Automatic Transmission 5R55W, 6-Speed Automatic Transmission (6R80), 6-Speed Automatic Transmission 6R60, Four-Wheel Drive (Full Time) (Left Hand Drive), Four-Wheel Drive (Part Time) (Left Hand Drive), Four-Wheel Drive (Part Time) (Right Hand Drive), Left Hand Drive, Rear-Wheel Drive (Left Hand Drive)
    2008-2009 Mercury Sable6 Cyl 3.5L DOHC VCT SMPI6-Speed Automatic Transaxle - AWF21, 6-Speed Automatic Transmission 6F50, CVT Select Shift Transmission, Four-Wheel Drive (Part Time) (Left Hand Drive), Front-Wheel Drive (Left Hand Drive), Left Hand Drive
  • Customer Questions & Expert Answers

    Q:
    I would like to know is this part gonna fit with my car Posted by FordPartsGiant Specialist
    A:
    You can Select Your Vehicle to check if 9G1Z-15603-A fits your vehicle.
    Posted by FordPartsGiant Specialist
    Q:
    Is the fender-mounted antenna serviceable by itself on Ford Taurus? Posted by Customer
    A:
    If you do not have a fender mounted antenna, the AM/FM antenna is integrated into the windshield and is not serviceable on its own. The fender mounted antenna is specifically for AM and FM reception. To remove it, first take off the right front inner fender splash shield, then remove the antenna mast, boot, and bolt, followed by disconnecting the cable and removing the antenna. Installation follows the reverse order of removal. For the satellite antenna, the antenna cable runs from the radio up through the passenger-side windshield pillar under the headliner. To access it, lower the headliner, disconnect the antenna cable, remove the bolt securing the antenna to the roof, and then take the antenna off the roof, with installation also following the reverse order of removal.
    Posted by FordPartsGiant Specialist
    Q:
    How do you remove and replace the antenna and antenna cable on Lincoln Navigator? Posted by Customer
    A:
    2003 and later Expedition/Navigator models feature an antenna grid on the left-rear quarter-glass, eliminating the need for a mechanical antenna. To begin, remove the right front tire and the right front inner fenderwell. In the inner fenderwell opening, detach the antenna cable from the antenna base. If replacing the antenna, use a small wrench to remove the mast, pry off the antenna trim cap, and take out the screws securing the antenna to the body, ensuring to cover the fender with a rag or tape to prevent paint damage. For replacing the antenna cable, remove the cable retaining clip and push the cable and grommet assembly into the passenger compartment. Detach the radio and disconnect the antenna lead from the rear side of the radio. Remove any remaining cable retaining clips and pull the antenna cable out from under the dash. Installation follows the reverse order of removal.
    Posted by FordPartsGiant Specialist
    Q:
    How to remove and install an antenna and cable on Mercury Mariner? Posted by Customer
    A:
    Remove the antenna mast with a 10 mm wrench from its mounting base. Remove The Right scuff plate and right lower A-pillar trim panel. Working Under the right end of the dash, detach the two antenna cable clips and disconnect the antenna cable connector. Loosen The right front wheel lug nuts. Raise the vehicle and place it securely on jackstands. Remove the right front wheel. Remove the right inner fender splash shield. Working inside the fender area, remove the antenna cable grommet, pull the antenna cable into the fender area, remove the antenna support bracket nut, then pull the antenna mounting base down through its hole in the fender and remove the mounting base, support bracket and antenna as a single assembly. Remove The Electrical tape securing the antenna cable to the support bracket and discard the old antenna base and cable. Installation Is the reverse of removal. Remove the radio. Remove the right scuff plate and kick panel, then disconnect the inside part of the antenna cable from the outside cable. Remove the glove box. Detach the three pin-type retainers that secure the cable to the horizontal support brace located on the lower edge of the glove box recess. There are two more pin-type retainers securing the antenna cable to the vertical support brace that's located on the right side of the radio recess. Detach both of them. Remove the inside antenna cable. Installation is the reverse of removal.
    Posted by FordPartsGiant Specialist
    Q:
    How do you remove and replace the antenna and antenna cable on Ford Expedition? Posted by Customer
    A:
    2003 and later Expedition/Navigator models feature an antenna grid on the left-rear quarter-glass, eliminating the need for a mechanical antenna. To begin, remove the right front tire and the right front inner fenderwell. In the inner fenderwell opening, detach the antenna cable from the antenna base. If replacing the antenna, use a small wrench to remove the mast, pry off the antenna trim cap, and take out the screws securing the antenna to the body, ensuring to cover the fender with a rag or tape to prevent paint damage. For replacing the antenna cable, remove the cable retaining clip and push the cable and grommet assembly into the passenger compartment. Detach the radio and disconnect the antenna lead from the rear side of the radio. Remove any remaining cable retaining clips and pull the antenna cable out from under the dash. Installation follows the reverse order of removal.
    Posted by FordPartsGiant Specialist
    Q:
    What is the installation procedure for the antenna for the 2009 Ford Focus? Posted by Customer
    A:
    Installation is a reversal of the removal procedure.
    Posted by FordPartsGiant Specialist
    See expert answers on similar Antenna
    Q:
    How do you access the front antenna cable for the 2017 Ford Fusion? Posted by Customer
    A:
    Remove the following components: Right kick panel Glove box Radio.
    Posted by FordPartsGiant Specialist
    See expert answers on similar Antenna
    Q:
    What is the next step after tying the string or wire in the 2003 Ford Ranger? Posted by Customer
    A:
    Remove the screws securing the antenna base to the body and slowly pull the antenna cable out through the body opening. Remove the antenna base and gasket.
    Posted by FordPartsGiant Specialist
    Q:
    What should you do to access the back of the radio unit for the 1996 Ford Ranger? Posted by Customer
    A:
    Remove the radio. Disconnect the antenna cable from the back of the radio unit.
    Posted by FordPartsGiant Specialist
    See expert answers on similar Antenna
    Q:
    What should you do after prying out the cable grommet for the 2006 Ford Mustang? Posted by Customer
    A:
    Pull the cable through the grommet hole into the wheel well.
    Posted by FordPartsGiant Specialist
    See expert answers on similar Antenna
    Q:
    How can the antenna be removed if it is damaged for the 2007 Lincoln MKX? Posted by Customer
    A:
    If the antenna is damaged, it can be removed by turning it counterclockwise.
    Posted by FordPartsGiant Specialist
    See expert answers on similar Antenna
    Q:
    What is the first step in removing a manual antenna for the 1998 Mercury Grand Marquis? Posted by Customer
    A:
    Detach the antenna lead retaining clips in the engine compartment.
    Posted by FordPartsGiant Specialist
    See expert answers on similar Antenna
    Q:
    Where does the antenna cable run for the 2011 Ford Edge? Posted by Customer
    A:
    The antenna cable runs from the radio up through the passenger-side windshield pillar under the headliner.
    Posted by FordPartsGiant Specialist
    See expert answers on similar Antenna
    Q:
    How do you detach the antenna cable for the 2009 Ford Escape? Posted by Customer
    A:
    Working under the right end of the dash, detach the two antenna cable clips and disconnect the antenna cable connector.
    Posted by FordPartsGiant Specialist
    See expert answers on similar Antenna
    Q:
    What should you do after removing the right cowl side trim panel for the 2002 Ford Crown Victoria? Posted by Customer
    A:
    Remove the radio and unplug the antenna lead cable.
    Posted by FordPartsGiant Specialist
    See expert answers on similar Antenna
    Q:
    What steps are involved in removing the inner antenna cable for the 2007 Ford F-150? Posted by Customer
    A:
    1. Remove the glove box. 2. Disconnect the inner antenna cable from the outer antenna cable. 3. Detach the two inner antenna cable locator clips from the trim piece right below the glove box opening by carefully prying them loose with a trim removal tool. 4. Remove the radio and disconnect the inner antenna cable from the backside of the radio. 5. Installation is the reverse of removal.
    Posted by FordPartsGiant Specialist
    See expert answers on similar Antenna
    If you have any questions about this product, please don't hesitate to ask us. We will be happy to help you!

Genuine Ford Part 9G1Z-15603-A, the Right Choice

To ensure reliability, purchase Ford part # 9G1Z-15603-A Aerial Assembly. It is sometimes referred to as Mercury Antenna. In terms of quality and longevity, OEM parts are top-tier. This is because they are made according to Ford's demanding factory specifications and go through strict quality control. This part fits specific Mercury Mariner, Mountaineer, Sable models.

FordPartsGiant.com is a leading supplier of genuine Ford parts and accessories such as Ford 9G1Z15603A Aerial Assembly. On our platform, we provide genuine Ford parts at incredible prices while ensuring top-tier quality. Feel at ease shopping with us, knowing our parts have a hassle-free return policy and rapid delivery service. For detailed Mercury parts information, click here.

Why choose Ford Parts Giant

  • Dedicated Service

    Your complete satisfaction is our #1 goal

  • Lowest Prices

    Best deals on genuine OE parts from dealerships

  • Fast Delivery

    Orders are processed and delivered promptly