Make sure this part fits

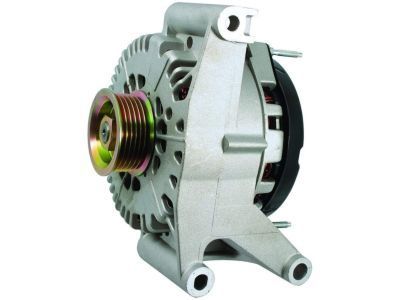
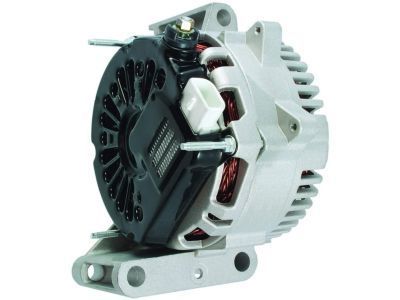
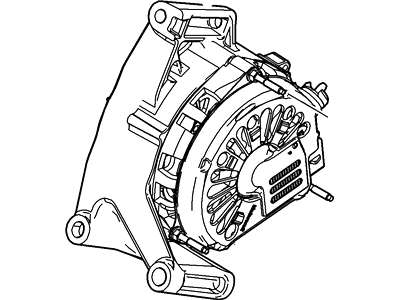
Mercury 6L8Z-10346-ABRM2 Alternator Assembly

2005-2007 Mercury Mariner 6L8Z10346ABRM2

Customer Questions & Expert Answers (3)
Ford 6L8Z-10346-ABRM2 Alternator Assembly
  • Part Description
    Alternator Assy
  • Replaced By
    4U2Z-10V346-DERM
  • Manufacturer
    Ford
Make sure this part fits
$153.39 MSRP: $243.64
You Save: $90.25 (38%)
Core Charge: $30.00
Ships in 1-3 Business Days
1
ADD TO CART
  • Related Parts
  • Product Specifications
  • Vehicle Fitment
  • Customer Questions & Expert Answers
  • Product Specifications

    BrandGenuine Mercury
    Manufacturer Part Number6L8Z-10346-ABRM2, 6L8Z10346ABRM2
    Part DescriptionAlternator Assy
    Item Dimensions15.2 x 9.4 x 7.7 inches
    Item Weight16.20 Pounds
    ConditionNew
    Fitment TypeDirect Replacement
    ManufacturerFord
    SKU6L8Z-10346-ABRM2
    WarrantyThis genuine Ford part is guaranteed by Ford's factory warranty.
    Shipping & ReturnShipping Policy Return Policy
    Warning: California’s Proposition 65
  • Vehicle Fitment

    Year Make Model Engine Important vehicle option details
    2005-2007 Mercury Mariner6 Cyl 3.0L DOHC EFI Modular4AT CD4E, 5-Speed Manual Transmission, 5-Speed Manual Transmission - AK, 6-Speed Automatic Transmission 6F Mid-Range, CVT Auto Trans Powersplit Elec, Four-Wheel Drive (Full Time) (Left Hand Drive), Four-Wheel Drive (Right Hand Drive), Front-Wheel Drive (Left Hand Drive), Left Hand Drive, Two-Wheel Drive (Left Hand Drive), Two-Wheel Drive (Right Hand Drive)
  • Customer Questions & Expert Answers

    Q:
    Can you tell me if this part is correct for my car? Posted by FordPartsGiant Specialist
    A:
    You can Select Your Vehicle to check if 6L8Z-10346-ABRM2 fits your vehicle.
    Posted by FordPartsGiant Specialist
    Q:
    How do you remove and install the alternator on Mercury Mariner? Posted by Customer
    A:
    With reference to the 2007 and earlier models the following should be done, Begin by removing the cable from the negative terminal of the battery, then the alternator belt followed by the removal of the electrical connectors of the alternator. Lift the front of the vehicle with jack stands, remove the lower bolts of the alternator and loose the upper bolt of the alternator since it will be remove along with the alternator because of lack of space. Swing the alternator to the rear heading position, raise it up and pull out of it out of the engine bay. Before fitting the new alternator attach the upper alternator bolt into the hole in the mounting boss. Removal is the opposite of installation and after reconnecting the battery, the Powertrain Control Module has to learn its idle and fuel trim strategy all over again. The process for V6 models is actually quite close to the V4 models, the first steps include removing the negative terminal of the battery, loosening the driveaxle hub nut, the wheel lug nuts, lifting the vehicle and removing the wheel in question. Remove the right lower engine splash shield, and the right driveaxle, and finally the drivebelt. First of all, physically, unfixed the wiring harness clips, then, unbolt the upper and the lower alternator mounting bolts and then unbolt the splasher shield of the alternator. Unbolt the electrical connections to the top of the alternator, unbolt the driveaxle intermediate shaft after laying a rag in anticipation of the grease leakage, then unclamp the alternator and hoist it upward through the passage that's normally occupied by the right side's driveaxle. Examine the level of transaxle fluid and add more if needed and this is done by reversing the process above. In the case of the 2008 models, the negative terminal of the battery has to be detached and the car should be lifted to a certain height to remove the right lower splash shield and also the drivebelt. In the four-cylinder models, one must first tilt the lower air duct located at the alternator and unplug the wirings and then take off the alternator shield and parts and then pull out the alternator. For V6 models, you therefore need to pull of the electrical connectors and battery wire, fold out of harm's way the air conditioning compressor and remove the alternator. Starting with 2009 and later models, the procedure is as follows, lift the vehicle and take off the negative battery terminal; remove the right lower splash shield and the drivebelt. For the four-cylinder models, you have to a remove wiring harness guide as well as the mounting parts followed by the removal of wires together with the alternatical. For V6 models, the wiring should be disconnected in the same manner as the V4 models; the air conditioning compressor should be fastened before the alternator is unbolted. After reconnection of the battery it will be necessary that the Powertrain Control Module relearns it is idle and fuel trim strategy.
    Posted by FordPartsGiant Specialist
    Q:
    How do you remove and install the alternator on Ford Escape? Posted by Customer
    A:
    With reference to the 2007 and earlier models the following should be done, Begin by removing the cable from the negative terminal of the battery, then the alternator belt followed by the removal of the electrical connectors of the alternator. Lift the front of the vehicle with jack stands, remove the lower bolts of the alternator and loose the upper bolt of the alternator since it will be remove along with the alternator because of lack of space. Swing the alternator to the rear heading position, raise it up and pull out of it out of the engine bay. Before fitting the new alternator attach the upper alternator bolt into the hole in the mounting boss. Removal is the opposite of installation and after reconnecting the battery, the Powertrain Control Module has to learn its idle and fuel trim strategy all over again. The process for V6 models is actually quite close to the V4 models, the first steps include removing the negative terminal of the battery, loosening the driveaxle hub nut, the wheel lug nuts, lifting the vehicle and removing the wheel in question. Remove the right lower engine splash shield, and the right driveaxle, and finally the drivebelt. First of all, physically, unfixed the wiring harness clips, then, unbolt the upper and the lower alternator mounting bolts and then unbolt the splasher shield of the alternator. Unbolt the electrical connections to the top of the alternator, unbolt the driveaxle intermediate shaft after laying a rag in anticipation of the grease leakage, then unclamp the alternator and hoist it upward through the passage that's normally occupied by the right side's driveaxle. Examine the level of transaxle fluid and add more if needed and this is done by reversing the process above. In the case of the 2008 models, the negative terminal of the battery has to be detached and the car should be lifted to a certain height to remove the right lower splash shield and also the drivebelt. In the four-cylinder models, one must first tilt the lower air duct located at the alternator and unplug the wirings and then take off the alternator shield and parts and then pull out the alternator. For V6 models, you therefore need to pull of the electrical connectors and battery wire, fold out of harm's way the air conditioning compressor and remove the alternator. Starting with 2009 and later models, the procedure is as follows, lift the vehicle and take off the negative battery terminal; remove the right lower splash shield and the drivebelt. For the four-cylinder models, you have to a remove wiring harness guide as well as the mounting parts followed by the removal of wires together with the alternatical. For V6 models, the wiring should be disconnected in the same manner as the V4 models; the air conditioning compressor should be fastened before the alternator is unbolted. After reconnection of the battery it will be necessary that the Powertrain Control Module relearns it is idle and fuel trim strategy.
    Posted by FordPartsGiant Specialist
    If you have any questions about this product, please don't hesitate to ask us. We will be happy to help you!

Genuine Ford Part 6L8Z-10346-ABRM2, the Right Choice

To ensure reliability, purchase Ford part # 6L8Z-10346-ABRM2 Alternator Assembly. It is sometimes referred to as Mercury Alternator. In terms of quality and longevity, OEM parts are top-tier. This is because they are made according to Ford's demanding factory specifications and go through strict quality control. This part fits specific Mercury Mariner models.

FordPartsGiant.com is a leading supplier of genuine Ford parts and accessories such as Ford 6L8Z10346ABRM2 Alternator Assembly. On our platform, we provide genuine Ford parts at incredible prices while ensuring top-tier quality. Feel at ease shopping with us, knowing our parts have a hassle-free return policy and rapid delivery service. For detailed Mercury parts information, click here.

Why choose Ford Parts Giant

  • Dedicated Service

    Your complete satisfaction is our #1 goal

  • Lowest Prices

    Best deals on genuine OE parts from dealerships

  • Fast Delivery

    Orders are processed and delivered promptly