Make sure this part fits

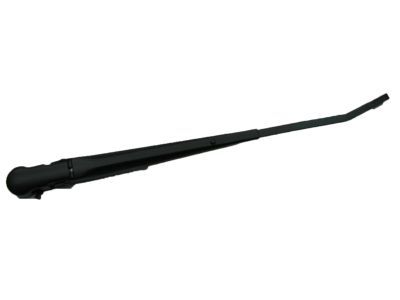
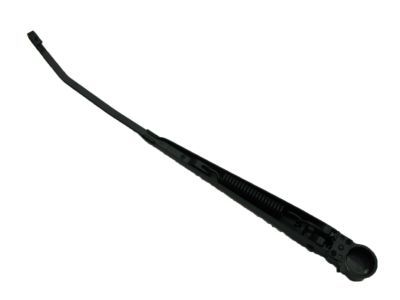
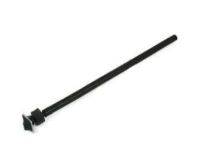
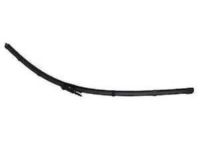
Mercury F77Z-17526-BA Wiper Arm Assembly

1997-2001 Mercury Mountaineer F77Z17526BA

Customer Questions & Expert Answers (5)
Ford F77Z-17526-BA Wiper Arm Assembly
  • Part Description
    Arm Assembly - Wiper
  • Position
    Passenger Side And Driver Side
  • Replaced By
    1L2Z-17526-DA
  • Manufacturer
    Ford
Make sure this part fits
$38.51 MSRP: $55.33
You Save: $16.82 (31%)
Ships in 1-3 Business Days
1
ADD TO CART
  • Related Parts
  • Product Specifications
  • Vehicle Fitment
  • Customer Questions & Expert Answers
  • Product Specifications

    BrandGenuine Mercury
    Manufacturer Part NumberF77Z-17526-BA, F77Z17526BA
    Part DescriptionArm Assembly - Wiper
    Item Dimensions4.1 x 36.5 x 0.3 inches
    Item Weight1.20 Pounds
    PositionPassenger Side And Driver Side
    ConditionNew
    Fitment TypeDirect Replacement
    ManufacturerFord
    SKUF77Z-17526-BA
    WarrantyThis genuine Ford part is guaranteed by Ford's factory warranty.
    Shipping & ReturnShipping Policy Return Policy
    Warning: California’s Proposition 65
  • Vehicle Fitment

    Year Make Model Engine Important vehicle option details
    1997-2001 Mercury Mountaineer6 Cyl 4.0L, 8 Cyl 5.0L4AT 4R70W, 5AT 5R55E
  • Customer Questions & Expert Answers

    Q:
    Is the the correct part for the attached VIN? Posted by FordPartsGiant Specialist
    A:
    You can Select Your Vehicle to check if F77Z-17526-BA fits your vehicle.
    Posted by FordPartsGiant Specialist
    Q:
    How to remove and install wiper arms on 1993-2011 Ford Ranger? Posted by Customer
    A:
    For models from 2010 and earlier, to prevent damage to the windshield and ensure normal wiper operation, keep the windshield wet during the initial step. Begin by turning the windshield wiper switch On, allowing the wipers to cycle several times before turning it Off, which positions the wiper arm parallel to the base of the windshield. Lift the wiper arm and blade assembly away from the windshield, pull out the small latch near the spindle, and lower the arm to rest on the latch, keeping the blade several inches away from the windshield. Wiggle the arm back-and-forth to remove it from the spindle. For installation, position the arm back onto the post in the parked position, ensuring it is not too low to avoid hitting the base of the windshield during operation, and confirm that the latch is seated correctly in the groove of the wiper spindle. For 2011 models, pull up on each wiper pivot arm, remove the retaining tab, and take off the arms. Next, remove the PCM mounting fasteners and set the PCM and harness aside, followed by removing the right wiper arm access cover screws and the cover itself. Then, take out the Power Distribution Box mounting fasteners and set the PDB aside, followed by the left wiper arm access cover screws and the cover. Reach through the access opening to unsnap the wiper motor clip from the mounting bracket and pivot shaft, then remove the right and left wiper arms from the pivot shafts and disconnect them from the wiper motor. Remove the pivot nuts from each side, and through the right access opening, take out the left and right mounting brackets and pivot shafts. For installation, reverse the removal steps, starting with the left wiper arm followed by the right arm, ensuring the wiper motor clip is fully seated on the pivot shaft to prevent damage, and tighten the fasteners securely.
    Posted by FordPartsGiant Specialist
    Q:
    How do you properly remove and install the front and rear wiper arms on Ford Explorer? Posted by Customer
    A:
    The method of doing this is to keep the windshield wet in the course of the process for the purpose of avoiding harm to the windshield or extreme bending of the wipers. Start by activate the switch for the windshield wiper, give the wiper blades an assortment of few cycles by turning the switch on and off this places the wiper arm in the resting position in parallel to the base of the windscreen. Third, you should move the wiper arm out of the windshield, pull the latch besides the wiper spindle, and then retract the wiper arm downwards leaving it a certain distance from the glass. Take the wiper arm by its base to get an easy grip, exert a slight and then twist it off. For installation, where the arm is located back at the post in the parked position make sure it is not too low to crash the lower part of the windshield during operation and ensure the latch fits rightly in the groove of wiper spindle. The parked position is to be used for the rear wiper as well. On the models up to 1997, to remove the wiper arm, you need to pull it upwards in the service position and then 'pop' it off the motor spindle. For the models of 1998 and the following years, pull the regulating cover to unscrew the mounting nut and then the arm. Installation happens in reverse order to guarantee the arm sits right on the motor spindle.
    Posted by FordPartsGiant Specialist
    Q:
    How do you properly remove and install the front and rear wiper arms on Ford Explorer Sport Trac? Posted by Customer
    A:
    The method of doing this is to keep the windshield wet in the course of the process for the purpose of avoiding harm to the windshield or extreme bending of the wipers. Start by activate the switch for the windshield wiper, give the wiper blades an assortment of few cycles by turning the switch on and off this places the wiper arm in the resting position in parallel to the base of the windscreen. Third, you should move the wiper arm out of the windshield, pull the latch besides the wiper spindle, and then retract the wiper arm downwards leaving it a certain distance from the glass. Take the wiper arm by its base to get an easy grip, exert a slight and then twist it off. For installation, where the arm is located back at the post in the parked position make sure it is not too low to crash the lower part of the windshield during operation and ensure the latch fits rightly in the groove of wiper spindle. The parked position is to be used for the rear wiper as well. On the models up to 1997, to remove the wiper arm, you need to pull it upwards in the service position and then 'pop' it off the motor spindle. For the models of 1998 and the following years, pull the regulating cover to unscrew the mounting nut and then the arm. Installation happens in reverse order to guarantee the arm sits right on the motor spindle.
    Posted by FordPartsGiant Specialist
    Q:
    What is the installation process for the wiper arms on the 2001 Ford Ranger? Posted by Customer
    A:
    Installation is the reverse of removal, noting the following: a) Install the left wiper arm first, then the right arm. b) Make sure the wiper motor clip is fully seated on the pivot shaft to prevent damage. c) Tighten the fasteners securely.
    Posted by FordPartsGiant Specialist
    If you have any questions about this product, please don't hesitate to ask us. We will be happy to help you!

Genuine Ford Part F77Z-17526-BA, the Right Choice

To ensure reliability, purchase Ford part # F77Z-17526-BA Wiper Arm Assembly. It is sometimes referred to as Mercury Windshield Wiper, Mercury Wiper Arm. In terms of quality and longevity, OEM parts are top-tier. This is because they are made according to Ford's demanding factory specifications and go through strict quality control. This part fits specific Mercury Mountaineer models.

FordPartsGiant.com is a leading supplier of genuine Ford parts and accessories such as Ford F77Z17526BA Wiper Arm Assembly. On our platform, we provide genuine Ford parts at incredible prices while ensuring top-tier quality. Feel at ease shopping with us, knowing our parts have a hassle-free return policy and rapid delivery service. For detailed Mercury parts information, click here.

Why choose Ford Parts Giant

  • Dedicated Service

    Your complete satisfaction is our #1 goal

  • Lowest Prices

    Best deals on genuine OE parts from dealerships

  • Fast Delivery

    Orders are processed and delivered promptly