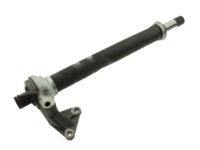
Make sure this part fits

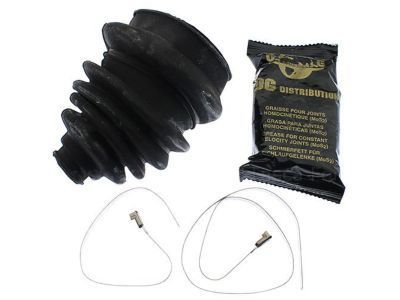
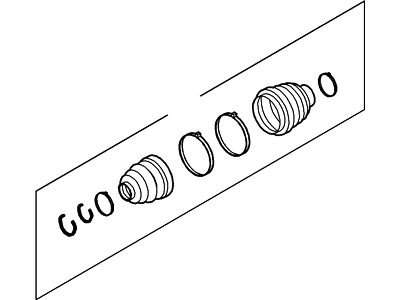
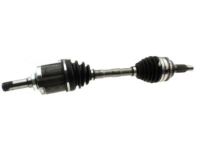
Mercury 7T4Z-3A331-B Boot

2010-2011 Mercury Milan 7T4Z3A331B

Customer Questions & Expert Answers (9)
Ford 7T4Z-3A331-B Boot
  • Part Description
    Boot
  • Base No.
    3A331
  • Position
    Passenger Side
  • Replaces
    7T4Z-3A331-A
  • Manufacturer
    Ford
Make sure this part fits
$55.99 MSRP: $92.55
You Save: $36.56 (40%)
Ships in 1-2 Business Days
1
ADD TO CART
  • Related Parts
  • Product Specifications
  • Vehicle Fitment
  • Customer Questions & Expert Answers
  • Product Specifications

    BrandGenuine Mercury
    Base No.3A331
    Manufacturer Part Number7T4Z-3A331-B, 7T4Z3A331B
    Part DescriptionBoot
    Other NamesBoot Kit
    Item Dimensions8.3 x 4.6 x 9.3 inches
    Item Weight2.60 Pounds
    PositionPassenger Side
    ConditionNew
    Fitment TypeDirect Replacement
    Replaces7T4Z-3A331-A
    ManufacturerFord
    SKU7T4Z-3A331-B
    WarrantyThis genuine Ford part is guaranteed by Ford's factory warranty.
    Shipping & ReturnShipping Policy Return Policy
    Warning: California’s Proposition 65
  • Vehicle Fitment

    Year Make Model Engine Important vehicle option details
    2010-2011 Mercury Milan6 Cyl 3.5L DOHC VCT SMPI5-Speed Automatic Transmission Mazda FNR5, 5-Speed Manual Transmission (G5M), 6-Speed Automatic Transaxle - AWF21, 6-Speed Automatic Transmission 6F Mid-Range, 6-Speed Manual Transmission Mazda G6M, CVT Auto Trans Powersplit Elec, Four-Wheel Drive (Full Time) (Left Hand Drive), Front-Wheel Drive (Left Hand Drive), Left Hand Drive
  • Customer Questions & Expert Answers

    Q:
    Does the PN fit my vehicle? Posted by FordPartsGiant Specialist
    A:
    You can Select Your Vehicle to check if 7T4Z-3A331-B fits your vehicle.
    Posted by FordPartsGiant Specialist
    Q:
    How do I check the shock absorber and CV Boot on Ford Taurus? Posted by Customer
    A:
    To check the shock absorber, the vehicle must be parked on an even ground and then engine turned off; parking brake should also be set while tire pressures are checked. Push down on each corner of the vehicle and release; watch its movement for it to settle back after one or two bounces then rest in a level position; if it keeps moving more than that, old or weak shock absorbers might be responsible. This test is repeated for every corner of the car. Raise and safely support the vehicle with jack stands before examining all shocks for fluid leakage so as to see if the fluid is from there or some other source. If there is a leak you can replace them. Also, confirm that they are solidly mounted and without damage by checking wear or damage in their upper mounts and if necessary, change them as a group. Start by looking at tire wear patterns and inflation pressure to get an overall picture of steering and suspension health. Check for oil seepage between steering shaft universal joint and steering gear housing, confirming intact dust boots and secure boot clamps. Play in tie-rod ends needs to be checked while all suspension parts have their bolts secured alongside any broken connectors or dislodged parts as well as spoilt rubber bushes throughout both systems where needed. Check all steering components during an assistant's turn of the steering wheel for smoothness, rubbing, binding; mark areas with considerable slackness here. To check balljoint wear attempt prying up control arms alternatively followed by replacing any worn-out ball joints found this way. Test such boots for damages plus loss of grease therein as well as worn-out ball-joints which ought to be replaced any time they are detected here using a prybar moving up & down each control arm; inspect balljoint boots for damage particularly cracks & leaking grease inside cv-joint covers at rear end suspension arm bushings inspection cv-boot check know that these boots protect cv-joints thus they should be washed with water & soap, so that they can resist oil and grease attack. Ensure you inspect them for tears, cracks and loose clamps more especially the outer CV boot, anything wrong or leaking lubricant calls for an immediate replacement.
    Posted by FordPartsGiant Specialist
    Q:
    How to replace CV joint boots on drive axles on Lincoln MKX? Posted by Customer
    A:
    First, you will have to remove the axle from the car and secure it in a bench vise. Remove the CV Boot clamps, and retainer clip, and then pull the CV Boot back off of the inner CV joint. Separate the joint housing from the axle and remove the tripod and old inboard CV Boot. The outer boot can be slid off by removing two boot clamps. Inspect components for wear and clean them. Next slide a new boot over the shaft, pack grease into the outboard CV joint, and spread the remaining in the sealing boot. For rear-drive axles on AWD models, proceed similarly as for front-drive models above.
    Posted by FordPartsGiant Specialist
    Q:
    How to replace CV joint boots on drive axles on Ford Edge? Posted by Customer
    A:
    First, you will have to remove the axle from the car and secure it in a bench vise. Remove the CV Boot clamps, and retainer clip, and then pull the CV Boot back off of the inner CV joint. Separate the joint housing from the axle and remove the tripod and old inboard CV Boot. The outer boot can be slid off by removing two boot clamps. Inspect components for wear and clean them. Next slide a new boot over the shaft, pack grease into the outboard CV joint, and spread the remaining in the sealing boot. For rear-drive axles on AWD models, proceed similarly as for front-drive models above.
    Posted by FordPartsGiant Specialist
    Q:
    How do you check and maintain the CV boots and Shock Absorber on a Ford Edge? Posted by Customer
    A:
    When carrying out a shock absorber check, ensure that the car is parked on a smooth ground with its engine switched off and parking brakes kept in place while checking tire pressures. Press down at each quarter of the vehicle noting its body movement in anticipation for straightening after one or two rebounds; continuous bouncing back or unequal positions might mean eroded shock absorbers. Even though if considerable leakage is present we should replace them, they can be retained as long as there are no leaks when performing this test on the rest of the corners and examining for shocks' fluid leakage. The upper mounts should also be checked for wear or damage, confirming their firm attachment and subsequently replacing them where necessary. For steering and suspension examination, monitor tyre wear patterns, inflation rates as well as inspect universal joint, dust boots, steering gear housing, boot clamps, tie rod ends and any damage to all components of suspension and steering mechanism plus worn out bolts or rubber bushings. While an assistant turns the steering wheel check for easy movement without causing wear down or sticking during these findings. Move each control arm up and down to assess play in ball joints; remove those with play by replacing worn out ones. Walk around feeling the boot grease along with cracks which may have occurred therein. Behind look at suspension arm bushings for signs of decayed leaves. Still perform a CV Boot Check by washing them before closely examining them for signs of tear off/peelings/cracks and flimsy fasteners particularly concerning outer CV boot due to its regular movement in accordance with steering activity; if more than one crack is visible then it needs replacement because lubricant has leaked through outer CV boot hole.
    Posted by FordPartsGiant Specialist
    Q:
    How do you apply CV joint grease for the 2010 Ford Fusion? Posted by Customer
    A:
    Apply CV joint grease to the tri-pod assembly, the inside of the joint housing, and the inside of the boot.
    Posted by FordPartsGiant Specialist
    Q:
    What should you look for when inspecting the tie-rod ends and other suspension and steering parts for the 2011 Ford Fusion? Posted by Customer
    A:
    Look for excessive play, loose bolts, broken or disconnected components, and deteriorated rubber bushings on all suspension and steering parts.
    Posted by FordPartsGiant Specialist
    See expert answers on similar CV Boot
    Q:
    What should you inspect in the rear of the 2012 Lincoln MKX during a suspension check? Posted by Customer
    A:
    Scrutinize suspension arm bushings for deterioration.
    Posted by FordPartsGiant Specialist
    See expert answers on similar CV Boot
    Q:
    What are the steps for reassembling the CV joint for the 2014 Ford Taurus? Posted by Customer
    A:
    1. If replacing the outboard CV joint boot, slide a new boot onto the shaft. Pack half the grease provided in the sealing boot kit into the outboard CV joint and spread the remaining grease in the sealing boot. 2. Seat the outboard boot into the groove in the outboard CV joint housing and tighten the boot clamps. 3. Slide a new inboard boot clamp (small end), then the inboard sealing boot onto the axleshaft. 4. Slide the inner race onto the axle shaft and install a new snap-ring. 5. Place the bearing cage and the eight balls onto the inner race. 6. Pack the bearing with half the grease provided in the kit and spread the remaining grease inside the boot. 7. Slide the outer housing over the bearing assembly and install the outer bearing retaining ring. 8. Seat the large end of the boot into the groove in the outer housing. 9. Place the two boot clamps in position on the boot but do not tighten them yet. 10. Position the CV joint mid-way through its travel, then equalize the air pressure in the boot by inserting a small, dull screwdriver between the boot and the outer race. 11. Tighten the boot clamps. For fold-over type clamps, bend the tang down and flatten the tabs to hold it in place. For band-type clamps, use a special tool to install the band with its end pointing in the direction of axle rotation, tighten it securely, pivot the tool up 90-degrees, tap the center of the clip with a center punch, bend the end of the clamp back over the clip, and cut off the excess. For crimp-type boot clamps, use special crimping pliers available at most auto parts stores. 12. Replace the retaining clip on the inboard end of the assembly where it engages the transaxle gear. 13. Install the driveaxle as outlined in Section 2.
    Posted by FordPartsGiant Specialist
    If you have any questions about this product, please don't hesitate to ask us. We will be happy to help you!

Genuine Ford Part 7T4Z-3A331-B, the Right Choice

To ensure reliability, purchase Ford part # 7T4Z-3A331-B Boot. It is sometimes referred to as Mercury CV Boot. In terms of quality and longevity, OEM parts are top-tier. This is because they are made according to Ford's demanding factory specifications and go through strict quality control. This part fits specific Mercury Milan models.

FordPartsGiant.com is a leading supplier of genuine Ford parts and accessories such as Ford 7T4Z3A331B Boot. On our platform, we provide genuine Ford parts at incredible prices while ensuring top-tier quality. Feel at ease shopping with us, knowing our parts have a hassle-free return policy and rapid delivery service. For detailed Mercury parts information, click here.

Why choose Ford Parts Giant

  • Dedicated Service

    Your complete satisfaction is our #1 goal

  • Lowest Prices

    Best deals on genuine OE parts from dealerships

  • Fast Delivery

    Orders are processed and delivered promptly