Make sure this part fits

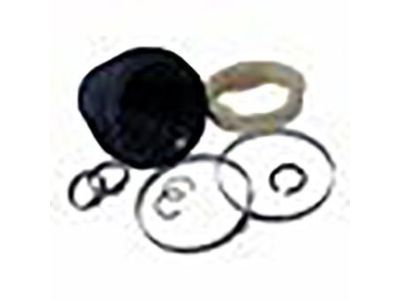
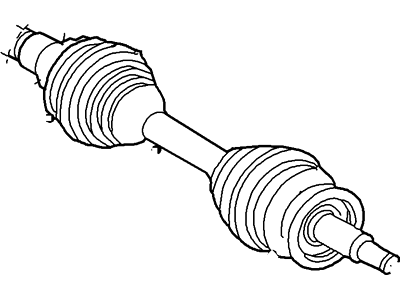
Mercury F5TZ-3A331-A Boot

1997-2005 Mercury Mountaineer F5TZ3A331A

Customer Questions & Expert Answers (5)
Ford F5TZ-3A331-A Boot
  • Part Description
    Boot
  • Base No.
    3A331
  • Position
    Passenger Side And Driver Side,Inner And Outer
  • Manufacturer
    Ford
  • Manufacturer's Notes
    This part is discontinued.
Make sure this part fits
  • Related Parts
  • Product Specifications
  • Vehicle Fitment
  • Customer Questions & Expert Answers
  • Product Specifications

    BrandGenuine Mercury
    Base No.3A331
    Manufacturer Part NumberF5TZ-3A331-A, F5TZ3A331A
    Part DescriptionBoot
    Other NamesBoot Kit
    Item Dimensions7.0 x 5.0 x 6.4 inches
    Item Weight0.80 Pounds
    PositionPassenger Side And Driver Side,Inner And Outer
    ConditionNew
    Fitment TypeDirect Replacement
    ManufacturerFord
    SKUF5TZ-3A331-A
    WarrantyThis genuine Ford part is guaranteed by Ford's factory warranty.
    Shipping & ReturnShipping Policy Return Policy
    Warning: California’s Proposition 65
  • Vehicle Fitment

    Year Make Model Engine Important vehicle option details
    1997-2005 Mercury Mountaineer6 Cyl 4.0L, 6 Cyl 4.0L SOHC EFI, 8 Cyl 4.6L Romeo SOHC EFI, 8 Cyl 5.0L4AT 4R70W, 5AT 5R55E, 5-Speed Automatic Transmission 5R55S, 5-Speed Automatic Transmission 5R55W, 5-Speed Manual Transmission (M5R4), 6-Speed Automatic Transmission (6R80), 6-Speed Automatic Transmission 6R60, Four-Wheel Drive (Full Time) (Left Hand Drive), Four-Wheel Drive (Part Time) (Left Hand Drive), Four-Wheel Drive (Part Time) (Right Hand Drive), Left Hand Drive, Rear-Wheel Drive (Left Hand Drive)
  • Customer Questions & Expert Answers

    Q:
    Is the the correct part for the attached VIN? Posted by FordPartsGiant Specialist
    A:
    You can Select Your Vehicle to check if F5TZ-3A331-A fits your vehicle.
    Posted by FordPartsGiant Specialist
    Q:
    How to check CV Boot and Shock Absorber on Ford Explorer Sport Trac? Posted by Customer
    A:
    The steering linkage and the suspension parts should also be inspected after certain periods as damaged or rusty parts usually cause odd wearage of tires, poor comfort of the ride and low fuel efficiency. To inspect the shock absorbers one ought to park the car on a level surface, switch off the engine, apply the handbrake. Ensure the tyres are well inflated and then compress a corner of the car and release and it should not rebound more than once or twice. If it's still in motion and does not assume its natural position or if it remains so, it may be so worn out that it requires replacement of its shock absorber. Perform this check on all corners and then lift the vehicle on jack stands with the air suspension switch off if equipped with the Automatic Ride Control. Check the fluids on the shock absorbers stating that any noted on them is from the shocks. Look for proper installation, and security as well as signs of abuse, if any, replace them in pairs. When it comes to the behavioral checks of the steering and suspension, look out for signs of damage, leakage or distortion of the components. Wipe the steering knuckle and have a partner articulate the tyre by wiggling the tyre to check at the ball joints; once the ball joints move, then they need replacement. Pick one of front tires and take hold in front tires and check the play in the steering linkage tight the mounts if necessary, check the ball joints for wear and tear. For front, refer to play or noise for wheel bearings, louder and more obvious on the 95 and later 4wd models which contain sealed hubs. Finally, examine the drive axle boots in 2001 and later 4WD vehicles for tears, cracks or even loose clamps and to check for leaks try to flex it; any single damage among them requires the checking of joints or boots.
    Posted by FordPartsGiant Specialist
    Q:
    How to check CV Boot and Shock Absorber on Ford Explorer? Posted by Customer
    A:
    The steering linkage and the suspension parts should also be inspected after certain periods as damaged or rusty parts usually cause odd wearage of tires, poor comfort of the ride and low fuel efficiency. To inspect the shock absorbers one ought to park the car on a level surface, switch off the engine, apply the handbrake. Ensure the tyres are well inflated and then compress a corner of the car and release and it should not rebound more than once or twice. If it's still in motion and does not assume its natural position or if it remains so, it may be so worn out that it requires replacement of its shock absorber. Perform this check on all corners and then lift the vehicle on jack stands with the air suspension switch off if equipped with the Automatic Ride Control. Check the fluids on the shock absorbers stating that any noted on them is from the shocks. Look for proper installation, and security as well as signs of abuse, if any, replace them in pairs. When it comes to the behavioral checks of the steering and suspension, look out for signs of damage, leakage or distortion of the components. Wipe the steering knuckle and have a partner articulate the tyre by wiggling the tyre to check at the ball joints; once the ball joints move, then they need replacement. Pick one of front tires and take hold in front tires and check the play in the steering linkage tight the mounts if necessary, check the ball joints for wear and tear. For front, refer to play or noise for wheel bearings, louder and more obvious on the 95 and later 4wd models which contain sealed hubs. Finally, examine the drive axle boots in 2001 and later 4WD vehicles for tears, cracks or even loose clamps and to check for leaks try to flex it; any single damage among them requires the checking of joints or boots.
    Posted by FordPartsGiant Specialist
    Q:
    How to replace CV joint and boot on 2000-2011 Ford Ranger? Posted by Customer
    A:
    For 4WD models equipped with Constant Velocity (CV) joint type driveaxle assemblies, the inboard tripod design CV joint and CV Boot are serviceable units, while the outer CV joint must be replaced as an assembly. To begin disassembly, remove the driveaxle from the vehicle and mount it in a vise, ensuring the jaws are lined with wood or rags to prevent damage. Cut and discard the boot clamps from the inner boot, then move the boot toward the center of the shaft. Bend the retaining tabs slightly to facilitate tripod removal, then detach the tripod assembly from the outer race. Move the inner stop ring down the shaft about 1/2-inch, then slide the tripod down until the circlip is visible, remove the circlip, and pull the tripod assembly off the axleshaft. Inspect the tripod rollers, roller bearings, and races for damage, as worn tripods cannot be rebuilt. Remove the inner stop ring and the old CV Boot, then slide a new clamp and inner CV joint boot onto the axleshaft. Install a new inner stop ring, followed by the tripod assembly with the chamfered side inward. Push the tripod assembly down far enough to install the new circlip, then secure the tripod assembly with the inner stop ring. Fill the outer race with CV joint grease, applying some inside the CV Boot, and push the tripod assembly into the outer race, bending the retaining tabs back to their original shape. Wipe excess grease from the axle CV Boot groove, seat the CV Boot, and install the clamp. Equalize the pressure in the CV Boot by inserting a dull screwdriver between the CV Boot and outer race, then install the CV Boot clamp using special pliers. Install a new clip on the stub axle and the driveaxle. For the outer CV joint, which is non-serviceable, if damage or excessive wear occurs, the driveaxle and outer CV joint assembly must be replaced. If the CV joint is deemed serviceable after inspection, remove the inner CV joint and CV Boot, cut the CV Boot clamps, and detach the CV Boot from the CV joint. Check the grease for contamination; if gritty, the CV joint must be replaced. If not contaminated, remove all grease using solvent and a soft bristle brush, then dry the CV joint thoroughly. Inspect the cage, balls, and races for wear or damage, replacing the driveaxle shaft and outer joint assembly if necessary. Install the new outer CV Boot and clamps, packing the CV joint with approximately 6.0 ounces of grease, then position the outer CV Boot on the CV joint and secure it with clamps. Finally, assemble the inner CV joint and CV Boot and install the driveaxle.
    Posted by FordPartsGiant Specialist
    Q:
    What should be inspected on the CV joint for the 1999 Ford Ranger? Posted by Customer
    A:
    Inspect the cage, balls, and races for pitting, score marks, cracks, and other signs of wear or damage. Shiny, polished spots are normal and will not adversely affect CV joint performance.
    Posted by FordPartsGiant Specialist
    If you have any questions about this product, please don't hesitate to ask us. We will be happy to help you!

Genuine Ford Part F5TZ-3A331-A, the Right Choice

To ensure reliability, purchase Ford part # F5TZ-3A331-A Boot. It is sometimes referred to as Mercury CV Boot. In terms of quality and longevity, OEM parts are top-tier. This is because they are made according to Ford's demanding factory specifications and go through strict quality control. This part fits specific Mercury Mountaineer models.

FordPartsGiant.com is a leading supplier of genuine Ford parts and accessories such as Ford F5TZ3A331A Boot. On our platform, we provide genuine Ford parts at incredible prices while ensuring top-tier quality. Feel at ease shopping with us, knowing our parts have a hassle-free return policy and rapid delivery service. For detailed Mercury parts information, click here.

Why choose Ford Parts Giant

  • Dedicated Service

    Your complete satisfaction is our #1 goal

  • Lowest Prices

    Best deals on genuine OE parts from dealerships

  • Fast Delivery

    Orders are processed and delivered promptly