Make sure this part fits your vehicle

Mercury F5LY-12029-A Coil Assembly - Ignition

1994-2001 Mercury F5LY12029A

Ford F5LY-12029-A Coil Assembly - Ignition
  • Part Description
    Coil Assy - Ignition
  • Replaced By
    7U2Z-12029-B
  • Manufacturer
    Ford
Customer Questions & Answers
$71.28 MSRP: $117.82
You Save: $46.54 (40%)
1
ADD TO CART
Ships in 1-2 Business Days
  • Product Specifications

    BrandGenuine Mercury
    Manufacturer Part NumberF5LY-12029-A, F5LY12029A
    Part DescriptionCoil Assy - Ignition
    Manufacturer NoteEDIS coil
    Item Dimensions5.6 x 4.5 x 4.9 inches
    Item Weight2.60 Pounds
    ConditionNew
    Fitment TypeDirect Replacement
    Require Quantity2
    ManufacturerFord
    SKUF5LY-12029-A
    WarrantyThis genuine Ford part is guaranteed by Ford's factory warranty.
    Shipping & ReturnShipping Policy Return Policy
    Warning: California’s Proposition 65
  • Vehicle Fitment

    Year Make Model Engine Important vehicle option details
    1994-1997 Mercury Cougar8 Cyl 4.6L4AT, 4AT 4R70W, 4AT AODE
    1994-1997 Mercury Grand Marquis8 Cyl 4.6L4AT, 4AT 4R70W, 4AT AODE
    1997-2001 Mercury Mountaineer8 Cyl 5.0L4AT 4R70W, 5AT 5R55E

Customer Questions & Answers

Q:
Is the the correct part for the attached VIN? Posted by FordPartsGiant Specialist
A:
You can Select Your Vehicle to check if F5LY-12029-A fits your vehicle.
Posted by FordPartsGiant Specialist
Q:
How to check and replace ignition coils in different types of ignition systems for the Ford Crown Victoria? Posted by Customer
A:
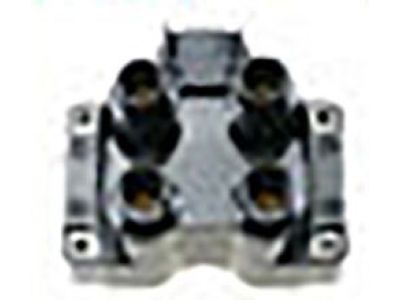
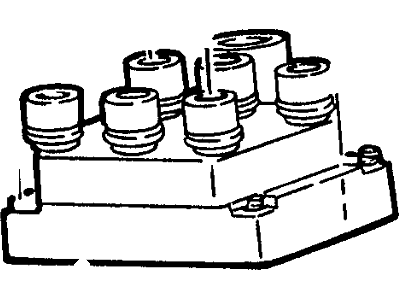
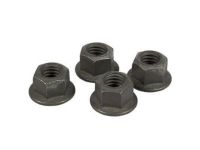
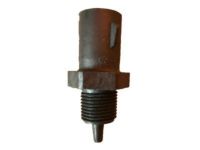
For the distributor type ignition system (Duraspark II and TFI-IV), start by checking the primary and secondary coil resistance. With the ignition off, disconnect the wires from the coil and connect an ohmmeter across the coil primary terminals. If the resistance is not within the specified range, replace the coil. Next, measure the resistance from the positive primary terminal to the case of the ignition coil. If the resistance is less or more than the specified range, replace the coil. To replace the coil, disconnect the battery cable, detach the wires from the primary terminals, unplug the coil secondary lead, remove the bracket bolts, and detach the coil. Installation is the reverse of removal. For the electronic distributorless ignition (EDIS) system, start by checking the primary and secondary coil resistance. With the ignition off, disconnect the electrical connector(s) from the coil and connect an ohmmeter across the coil primary terminals. If the resistance is not the same for all four tests, replace the coil. Next, connect an ohmmeter between the secondary terminals of each coil pack. If the resistance is not within the specified range, replace the coil. To replace the coil, disconnect the negative cable from the battery, disconnect the ignition coil electrical connectors from each individual coil pack, disconnect the ignition wires, remove the bolts securing the ignition coil, and install the new coil following the reverse of the removal procedure. For the integrated electronic ignition system (COP), follow the diagnosis outlined in section 6. When it has been determined that a coil needs replacement, unplug the coil, remove the retaining bolt, remove the coil, inspect the spark plug, check the coil harness connector terminals, and then replace the coil and reconnect the harness.
Posted by FordPartsGiant Specialist
Q:
How should the spark plug wires be inspected for the 1999 Ford Expedition? Posted by Customer
A:
The spark plug wires should be inspected one at a time, beginning with the spark plug for the number one cylinder, to prevent confusion.
Posted by FordPartsGiant Specialist
See expert answers on similar Ignition Coil
Q:
How do you replace the ignition coil in the El ignition system for the 2001 Ford Expedition? Posted by Customer
A:
To replace the ignition coil, first disconnect the negative cable from the battery. Then, disconnect the ignition coil electrical connector(s) from each individual coil pack and remove the spark plug wires. Remove the bolts securing the ignition coil to the engine mounting bracket and lift it from the engine. During installation, coat the interior of the rubber boot with silicone dielectric compound before inserting each spark plug wire into the proper terminal of the ignition coil. Ensure the boots are fully seated and both locking tabs are engaged properly.
Posted by FordPartsGiant Specialist
See expert answers on similar Ignition Coil
Q:
How to check and replace the ignition coil pack on Ford Explorer? Posted by Customer
A:
Check the ignition coil by first turning off the ignition and disconnecting the electrical connector(s) from the coil. Connect an ohmmeter across the coil positive (+) terminal and each negative (-) terminal to check the primary resistance of the ignition coil. The resistance should be the same for each check. Then, connect an ohmmeter between the secondary terminals of each coil pack. If continuity does not exist, replace the coil. The ignition coil pack(s) contains three separate coils on V6 models and four separate coils on VB models. Each coil is paired with its companion cylinder. Be sure to check resistance across the appropriate secondary terminals for each coil. To replace the ignition coil pack, disconnect the cable from the negative terminal of the battery. Check to see if all the spark plug wires are numbered. If not, clearly label each plug wire with a piece of tape marked to match the numbers listed on the coil terminals. Then disconnect all the spark plug wires by squeezing the locking tabs and twisting while pulling upward. Do not pull on the wires. Disconnect the ignition coil pack electrical connector. Remove the screws that secure the coil pack to the coil mounting bracket. Installation is the reverse of the removal procedure with the following additions: Before installing the spark plug wire connector into the ignition coil, coat the entire interior of the rubber boot with silicone dielectric compound. Insert each spark plug wire into the proper terminal of the ignition coil. Push the wire into the terminal and make sure the boots are fully seated and both locking tabs are engaged properly.To replace the ignition coil and mounting bracket, detach the radio interference capacitor (if equipped) from the coil mounting bracket. On 4.0L pushrod engines, detach the plastic clip that secures the fuel injection wiring harness to the coil mounting bracket. Then remove the bolt holding the air conditioning hose to the intake manifold plenum. Move the air conditioning tube enough to provide working access to the upper coil mounting bracket bolts. Remove the bolts securing the ignition coil mounting bracket to the engine. On 4.0L SOHC engines, the ignition coil mounting bracket is welded to the valve cover, and therefore unnecessary to remove for access to other components. On 5.0L engines, disconnect the hoses and wiring from the EGR vacuum solenoid, then remove the bolts securing the ignition coil mounting bracket to the engine. Installation is the reverse of the removal.
Posted by FordPartsGiant Specialist
Q:
How can you check the coil primary and secondary resistance in breaker points type ignition systems for the 1983 Lincoln Town Car? Posted by Customer
A:
Use an ohmmeter to check the coil primary resistance and compare it to the specifications. Do the same for the coil secondary resistance. If the resistances are not as specified, replace the coil. Keep all coil terminals and wire leads clean, tight, and dry.
Posted by FordPartsGiant Specialist
See expert answers on similar Ignition Coil
Q:
How do you replace the coil in the electronic distributorless ignition (EDIS) system for the 1990 Mercury Grand Marquis? Posted by Customer
A:
To replace the coil in the EDIS system, start by disconnecting the negative cable from the battery. Then, disconnect the ignition coil electrical connectors from each individual coil pack and disconnect the ignition wires. Remove the bolts securing the ignition coil and install the new coil following the reverse of the removal procedure.
Posted by FordPartsGiant Specialist
See expert answers on similar Ignition Coil
If you have any questions about this product, please don't hesitate to ask us. We will be happy to help you!

Genuine Ford Part F5LY-12029-A, the Right Choice

Your vehicle deserves only genuine OEM Ford parts and accessories. To ensure reliability, purchase Ford part # F5LY-12029-A Coil Assembly - Ignition. It is sometimes referred to as Mercury Ignition Coil. Our Ford parts and accessories are expedited directly from authorized Ford dealers strategically located all across the U.S. and are backed by the manufacturer's 12 month, 12,000 mile warranty. OEM Ford parts are the best for restoring your vehicle to factory condition performance. This part fits specific Mercury Cougar, Grand Marquis, Mountaineer models.

Affordable, reliable and built to last, Ford part # F5LY12029A Coil Assembly - Ignition stands out as the smart option. FordPartsGiant.com is your prime online source with the biggest and best selection of genuine Ford parts and accessories at giant discounted prices. We have the OEM Ford parts and accessories you need at the wholesale prices. FordPartsGiant.com has you covered no matter what type of Ford vehicle you drive. For detailed Mercury parts information, click here.

Why choose Ford Parts Giant

  • Dedicated Service

    Your complete satisfaction is our #1 goal

  • Lowest Prices

    Best deals on genuine OE parts from dealerships

  • Fast Delivery

    Orders are processed and delivered promptly