Make sure this part fits

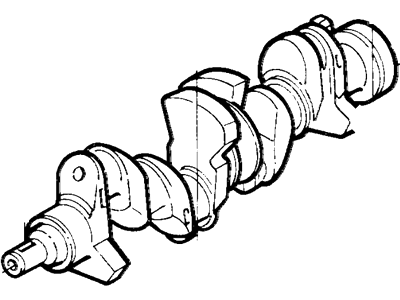
Mercury E3AZ-6303-B Crankshaft Assembly

1983-1989 Mercury E3AZ6303B

Customer Questions & Expert Answers (10)
Ford E3AZ-6303-B Crankshaft Assembly
  • Part Description
    CRANKSHAFT ASY
  • Manufacturer
    Ford
  • Manufacturer's Notes
    This part is discontinued.
Make sure this part fits
  • Related Parts
  • Product Specifications
  • Vehicle Fitment
  • Customer Questions & Expert Answers
  • Product Specifications

    BrandGenuine Mercury
    Manufacturer Part NumberE3AZ-6303-B, E3AZ6303B
    Part DescriptionCRANKSHAFT ASY
    Item Dimensions7.9 x 7.8 x 22.7 inches
    ConditionNew
    Fitment TypeDirect Replacement
    ManufacturerFord
    SKUE3AZ-6303-B
    WarrantyThis genuine Ford part is guaranteed by Ford's factory warranty.
    Shipping & ReturnShipping Policy Return Policy
    Warning: California’s Proposition 65
  • Vehicle Fitment

    Year Make Model Engine Important vehicle option details
    1983-1989 Mercury Grand Marquis8 Cyl 5.0L, 8 Cyl 5.8L4AT AOD
    1983-1986 Mercury Marquis4 Cyl 2.3L, 6 Cyl 3.3L, 6 Cyl 3.8L3AT C3, 3AT C5, 4MT
  • Customer Questions & Expert Answers

    Q:
    I would like to know is this part gonna fit with my car Posted by FordPartsGiant Specialist
    A:
    You can Select Your Vehicle to check if E3AZ-6303-B fits your vehicle.
    Posted by FordPartsGiant Specialist
    Q:
    How should the crankshaft be removed on Ford F-250? Posted by Customer
    A:
    The crankshaft can only be removed after the engine has been taken out of the vehicle, assuming that the flywheel or driveplate, front crankshaft pulley, timing chain and sprockets, oil pan, oil pump, and piston/connecting rod assemblies have already been detached. First, check the endplay by mounting a dial indicator with the stem aligned and just touching one of the crank throws. Push the crankshaft to the rear and zero the dial indicator, then pry it to the front and note the reading; the movement indicates the endplay. If it exceeds specifications, inspect the crankshaft thrust surfaces for wear, and if no wear is found, a new thrust bearing may resolve the issue. For endplay less than the minimum, examine the thrust bearing surfaces for scratches, burrs, nicks, and dirt. If a dial indicator is unavailable, feeler gauges can be used by prying or pushing the crankshaft to the front and slipping the gauges between the crankshaft and the thrust main bearing to measure clearance. The thrust bearing is located in the number 5 bearing saddle on 4.9L engines and in the number three bearing saddle on V6 and V8 engines. Check the main bearing caps for markings indicating their locations, which should be numbered consecutively from front to rear; if not, mark them using number stamping dies or a center-punch, ensuring to make the punch marks near one of the bolt heads. Loosen the main bearing cap bolts gradually until they can be removed by hand, then gently tap the caps with a soft-face hammer to separate them from the engine block, using the bolts as levers if necessary while avoiding dropping the bearing inserts. Carefully lift the crankshaft out of the engine, ideally with assistance due to its weight, and with the bearing inserts in place, return the caps to their original locations on the block and tighten the bolts finger tight. Finally, remove the Woodruff key from the crankshaft nose to prevent loss, or leave it in place if difficult to remove.
    Posted by FordPartsGiant Specialist
    Q:
    What additional checks should be performed on the crankshaft for the 1993 Ford F-250? Posted by Customer
    A:
    Check the rest of the crankshaft for cracks and other damage. It should be magnafluxed to reveal hidden cracks, a procedure typically handled by an automotive machine shop.
    Posted by FordPartsGiant Specialist
    Q:
    What should be done if the clearance is not as specified for the 1990 Ford F-250? Posted by Customer
    A:
    If the clearance is not as specified, the bearing inserts may be the wrong size (which means different ones will be required). Before deciding that different inserts are needed, make sure that no dirt or oil was between the bearing inserts and the caps or block when the clearance was measured. If the Plastigage was wider at one end than the other, the journal may be tapered.
    Posted by FordPartsGiant Specialist
    Q:
    What is the first step in removing the main bearing caps on the 2011 Mercury Grand Marquis? Posted by Customer
    A:
    Remove all side bolts.
    Posted by FordPartsGiant Specialist
    See expert answers on similar Crankshaft
    Q:
    What is the purpose of rubbing a penny across each journal for the 2010 Mercury Grand Marquis? Posted by Customer
    A:
    Rubbing a penny lengthwise on each journal will reveal its condition. If copper rubs off and is embedded in the crankshaft, the journals should be reground. If a journal picks up copper from the penny, it's too rough and must be reground.
    Posted by FordPartsGiant Specialist
    Q:
    How should the main bearing cap bolts be tightened in sequence for the 2010 Mercury Grand Marquis? Posted by Customer
    A:
    Tighten the main bearing cap bolts in two steps in the sequence shown and to the torque and angle indicated in the Specifications listed at the beginning of the Chapter.
    Posted by FordPartsGiant Specialist
    Q:
    How should the bearing faces and crankshaft main bearing journals be cleaned for the 1990 Ford Bronco? Posted by Customer
    A:
    Clean the faces of the bearings in the block and the crankshaft main bearing journals with a clean, lint-free cloth. Check or clean the oil holes in the crankshaft, as any dirt here can only go one way - straight through the new bearings!
    Posted by FordPartsGiant Specialist
    Q:
    How do you check the crankshaft endplay with feeler gauges for the 1983 Ford Bronco? Posted by Customer
    A:
    1. Gently pry or push the crankshaft all the way to the front of the engine. 2. Slip feeler gauges between the crankshaft and the front face of the thrust main bearing to determine the clearance. 3. The thrust bearing is the number 5 bearing saddle on 4.9L engines and in the number three bearing saddle on V6 and V8 engines.
    Posted by FordPartsGiant Specialist
    See expert answers on similar Crankshaft
    Q:
    What additional checks should be performed on the crankshaft for the 1983 Ford Bronco? Posted by Customer
    A:
    Check the rest of the crankshaft for cracks and other damage. It should be magnafluxed to reveal hidden cracks, a procedure typically handled by an automotive machine shop.
    Posted by FordPartsGiant Specialist
    If you have any questions about this product, please don't hesitate to ask us. We will be happy to help you!

Genuine Ford Part E3AZ-6303-B, the Right Choice

To ensure reliability, purchase Ford part # E3AZ-6303-B Crankshaft Assembly. It is sometimes referred to as Mercury Crankshaft. In terms of quality and longevity, OEM parts are top-tier. This is because they are made according to Ford's demanding factory specifications and go through strict quality control. This part fits specific Mercury Grand Marquis, Marquis models.

FordPartsGiant.com is a leading supplier of genuine Ford parts and accessories such as Ford E3AZ6303B Crankshaft Assembly. On our platform, we provide genuine Ford parts at incredible prices while ensuring top-tier quality. Feel at ease shopping with us, knowing our parts have a hassle-free return policy and rapid delivery service. For detailed Mercury parts information, click here.

Why choose Ford Parts Giant

  • Dedicated Service

    Your complete satisfaction is our #1 goal

  • Lowest Prices

    Best deals on genuine OE parts from dealerships

  • Fast Delivery

    Orders are processed and delivered promptly