Make sure this part fits

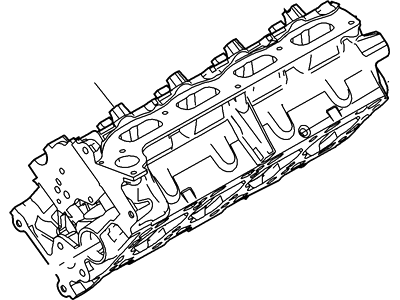
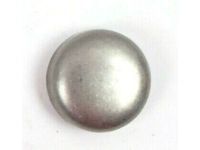
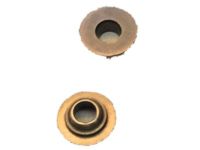
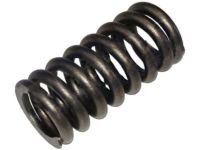
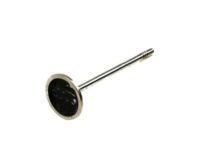
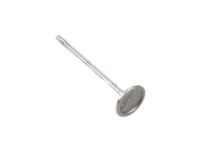
Mercury 8R3Z-6049-A Cylinder Head Assembly

2008 Mercury Mountaineer 8R3Z6049A

Customer Questions & Expert Answers (16)
Ford 8R3Z-6049-A Cylinder Head Assembly
  • Part Description
    Cylinder Head Assy
  • Position
    Driver Side
  • Replaced By
    8R3Z-6049-D
  • Manufacturer
    Ford
  • Manufacturer's Notes
    This part is discontinued.
Make sure this part fits
  • Related Parts
  • Product Specifications
  • Vehicle Fitment
  • Customer Questions & Expert Answers
  • Product Specifications

    BrandGenuine Mercury
    Manufacturer Part Number8R3Z-6049-A, 8R3Z6049A
    Part DescriptionCylinder Head Assy
    Item Dimensions13.0 x 14.1 x 26.3 inches
    Item Weight52.90 Pounds
    PositionDriver Side
    ConditionNew
    Fitment TypeDirect Replacement
    ManufacturerFord
    SKU8R3Z-6049-A
    WarrantyThis genuine Ford part is guaranteed by Ford's factory warranty.
    Shipping & ReturnShipping Policy Return Policy
    Warning: California’s Proposition 65
  • Vehicle Fitment

    Year Make Model Engine Important vehicle option details
    2008 Mercury Mountaineer8 Cyl 4.6L5-Speed Automatic Transmission 5R55S, 5-Speed Automatic Transmission 5R55W, 5-Speed Manual Transmission (M5R4), 6-Speed Automatic Transmission (6R80), 6-Speed Automatic Transmission 6R60, Four-Wheel Drive (Full Time) (Left Hand Drive), Four-Wheel Drive (Part Time) (Left Hand Drive), Four-Wheel Drive (Part Time) (Right Hand Drive), Left Hand Drive, Rear-Wheel Drive (Left Hand Drive)
  • Customer Questions & Expert Answers

    Q:
    I am wondering if this is the exact part that fits in Posted by FordPartsGiant Specialist
    A:
    You can Select Your Vehicle to check if 8R3Z-6049-A fits your vehicle.
    Posted by FordPartsGiant Specialist
    Q:
    What are the first steps for removing the cylinder heads on the 2005 Ford Mustang? Posted by Customer
    A:
    1. Relieve the fuel system pressure and disconnect the cable from the negative battery terminal. 2. Drain the cooling system. 3. Remove the intake manifold and the exhaust manifolds. 4. Remove the valve covers. 5. Remove the drivebelt and the drivebelt tensioner. 6. Remove the camshafts and lifters. 7. Remove the two Camshaft Position (CMP) sensors at the rear of each cylinder head and disconnect any other electrical connectors.
    Posted by FordPartsGiant Specialist
    See expert answers on similar Cylinder Head
    Q:
    What are the cautions and steps for installation for the 2013 Ford Mustang? Posted by Customer
    A:
    New cylinder head bolts must be used for reassembly. Failure to use new bolts may result in cylinder head gasket leakage and engine damage. 15. The mating surfaces of the cylinder heads and engine block must be perfectly clean when the cylinder heads are installed. Use a gasket scraper to remove all traces of carbon and old gasket material, then clean the mating surfaces with lacquer thinner or acetone. If there's oil on the mating surfaces when the cylinder heads are installed, the gaskets may not seal correctly and leaks may develop. Cover the open areas of the engine with shop rags to keep debris out during repair and reassembly. Use a vacuum cleaner to remove any debris that falls into the cylinders. Do not use abrasive wheels or sharp metal scrapers on the heads or block surface; use a plastic scraper and chemical gasket remover, or the head gasket surfaces could develop leaks. 16. Check the engine block and cylinder head mating surfaces for nicks, deep scratches, and other damage. 17. Use a tap of the correct size to chase the threads in the cylinder head bolt holes. Dirt, corrosion, sealant, and damaged threads will affect torque readings. 18. Make sure the new gaskets are installed on the correct cylinder banks (Identify the left and right cylinder head gaskets; the shapes are different and cannot be interchanged). 19. Position the new gasket(s) over the alignment dowels in the engine block. 20. Carefully position the cylinder heads on the engine block without disturbing the gaskets. Install the NEW cylinder head bolts (the cylinder head bolts are torque-to-yield design and they cannot be reused). Following the recommended sequence, tighten the cylinder head bolts in five steps, to the torque and angle of rotation. Note: The method used for the cylinder head bolt tightening procedure is referred to as "torque-angle" or "torque-to-yield" method. Follow the procedure exactly. Tighten the bolts in the first step using a torque wrench, then use a breaker bar and a special torque-angle gauge to tighten the bolts the required angle. If the adapter is not available, mark each bolt with a paint stripe to aid in the torque angle process. 21. The remaining installation steps are the reverse of removal. 22. Install the engine. 23. Change the engine oil and filter and refill the cooling system, then start the engine and check carefully for oil and coolant leaks.
    Posted by FordPartsGiant Specialist
    Q:
    What should be done after all valves and related components have been removed for the 2002 Lincoln Navigator? Posted by Customer
    A:
    The head should be thoroughly cleaned and inspected, and if a complete engine overhaul is being done, finish the engine disassembly procedures before starting the cylinder head cleaning and inspection process.
    Posted by FordPartsGiant Specialist
    Q:
    What should be done if the inspection indicates poor condition of valve components for the 2003 Lincoln Navigator? Posted by Customer
    A:
    If the inspection indicates that the valve components are in generally poor condition and worn beyond specified limits, reassemble the valves in the cylinder head.
    Posted by FordPartsGiant Specialist
    Q:
    How should the cylinder head bolts be loosened for the 2003 Lincoln Navigator? Posted by Customer
    A:
    Loosen the cylinder head bolts in 1/4-turn increments until they can be removed by hand, working in a reverse pattern of the tightening sequence.
    Posted by FordPartsGiant Specialist
    See expert answers on similar Cylinder Head
    Q:
    What should be done after the cylinder heads are installed for the 2000 Lincoln Navigator? Posted by Customer
    A:
    The remaining installation steps are the reverse of removal, and then change the engine oil and filter before starting the engine and checking for leaks.
    Posted by FordPartsGiant Specialist
    Q:
    How should the installed valve spring height be checked for the 2007 Lincoln Navigator? Posted by Customer
    A:
    Check the installed valve spring height with a ruler graduated in 1/32-inch increments or a dial caliper. If the head was sent out for service work, the installed height should be correct, but don't automatically assume that it is. The measurement is taken from the top of each spring seat or shim(s) to the bottom of the retainer.
    Posted by FordPartsGiant Specialist
    Q:
    What should be done after setting the valve spring and retainer in place for the 2003 Ford Expedition? Posted by Customer
    A:
    Apply a small dab of grease to each keeper to hold it in place. Compress the springs with a valve spring compressor and carefully install the keepers in the upper groove, then slowly release the compressor and ensure the keepers seat properly.
    Posted by FordPartsGiant Specialist
    Q:
    How should the new gasket(s) be positioned for the 2002 Ford Expedition? Posted by Customer
    A:
    Position the new gasket(s) over the dowel pins in the engine block, ensuring they are oriented correctly.
    Posted by FordPartsGiant Specialist
    Q:
    What is the procedure for cleaning the valve springs and related components for the 2009 Ford Expedition? Posted by Customer
    A:
    Clean all the valve springs, spring seats, keepers, and retainers with solvent and dry them thoroughly, working on one valve at a time to avoid mixing up the parts.
    Posted by FordPartsGiant Specialist
    Q:
    What caution should be taken when removing the cylinder head bolts for the 1997 Ford Expedition? Posted by Customer
    A:
    Use the required camshaft retaining fixtures to lock the camshafts and leave the tools in place.
    Posted by FordPartsGiant Specialist
    See expert answers on similar Cylinder Head
    Q:
    What should be done after all valves and related components have been removed for the 2004 Ford Expedition? Posted by Customer
    A:
    The head should be thoroughly cleaned and inspected, and if a complete engine overhaul is being done, finish the engine disassembly procedures before starting the cylinder head cleaning and inspection process.
    Posted by FordPartsGiant Specialist
    Q:
    What should be done after the cylinder heads are installed for the 2011 Ford F-150? Posted by Customer
    A:
    The remaining installation steps are the reverse of removal.
    Posted by FordPartsGiant Specialist
    Q:
    What should be removed after the intake manifold(s) for the 2008 Ford F-150? Posted by Customer
    A:
    Remove the exhaust manifold.
    Posted by FordPartsGiant Specialist
    Q:
    What should be done after the installation is complete for the 2008 Ford F-150? Posted by Customer
    A:
    The remainder of the installation is the reverse of removal. Change the engine oil and filter, refill the cooling system, then start the engine and check carefully for oil and coolant leaks.
    Posted by FordPartsGiant Specialist
    See expert answers on similar Cylinder Head
    If you have any questions about this product, please don't hesitate to ask us. We will be happy to help you!

Genuine Ford Part 8R3Z-6049-A, the Right Choice

To ensure reliability, purchase Ford part # 8R3Z-6049-A Cylinder Head Assembly. It is sometimes referred to as Mercury Cylinder Head. In terms of quality and longevity, OEM parts are top-tier. This is because they are made according to Ford's demanding factory specifications and go through strict quality control. This part fits specific Mercury Mountaineer models.

FordPartsGiant.com is a leading supplier of genuine Ford parts and accessories such as Ford 8R3Z6049A Cylinder Head Assembly. On our platform, we provide genuine Ford parts at incredible prices while ensuring top-tier quality. Feel at ease shopping with us, knowing our parts have a hassle-free return policy and rapid delivery service. For detailed Mercury parts information, click here.

Why choose Ford Parts Giant

  • Dedicated Service

    Your complete satisfaction is our #1 goal

  • Lowest Prices

    Best deals on genuine OE parts from dealerships

  • Fast Delivery

    Orders are processed and delivered promptly