Make sure this part fits

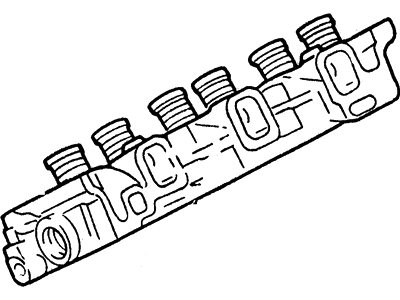
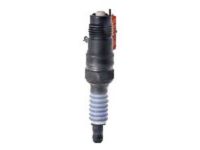
Mercury F13Z-6049-A Kit - Remanufactured

1988-1994 Mercury F13Z6049A

Customer Questions & Expert Answers (24)
Ford F13Z-6049-A Kit - Remanufactured
  • Part Description
    KIT - REMANUFACTURED
  • Manufacturer
    Ford
  • Manufacturer's Notes
    This part is discontinued.
Make sure this part fits
  • Related Parts
  • Product Specifications
  • Vehicle Fitment
  • Customer Questions & Expert Answers
  • Product Specifications

    BrandGenuine Mercury
    Manufacturer Part NumberF13Z-6049-A, F13Z6049A
    Part DescriptionKIT - REMANUFACTURED
    Item Dimensions6.2 x 6.2 x 18.6 inches
    ConditionNew
    Fitment TypeDirect Replacement
    ManufacturerFord
    SKUF13Z-6049-A
    WarrantyThis genuine Ford part is guaranteed by Ford's factory warranty.
    Shipping & ReturnShipping Policy Return Policy
    Warning: California’s Proposition 65
  • Vehicle Fitment

    Year Make Model Engine Important vehicle option details
    1988-1989 Mercury Cougar6 Cyl 3.8L, 8 Cyl 5.0L4AT AOD, 5MT
    1988-1989 Mercury Grand Marquis8 Cyl 5.0L, 8 Cyl 5.8L4AT AOD
    1988-1989 Mercury Sable6 Cyl 3.0L, 6 Cyl 3.8L4AT AXOD
    1988-1994 Mercury Topaz4 Cyl 2.3L3AT ATX, 5MT
    1988-1989 Mercury Tracer4 Cyl 1.6L3AT ATX, 4MT, 5MT
  • Customer Questions & Expert Answers

    Q:
    Is the the correct part for the attached VIN? Posted by FordPartsGiant Specialist
    A:
    You can Select Your Vehicle to check if F13Z-6049-A fits your vehicle.
    Posted by FordPartsGiant Specialist
    Q:
    How to prepare the cylinder head(s) and associated valve train components for an engine overhaul on Lincoln Mark VII? Posted by Customer
    A:
    To embark on an engine overhaul, the first step is to prepare the cylinder heads and valve train parts by cleaning and inspecting them. Take off any old gasket material and sealing compound from the surfaces. Use a solvent, dry it, and clean all parts thoroughly. The crack inspection process of the cylinder head starts with a visual check for cracks or other signs of damage. Check for warpage with a straight edge. Examine the valve seats as well as measure valve stem-to-guide clearance. Inspect valves for wear and imperfections. Check valve margin width. Look at the valve springs for wear and take free lengths measurements. Confirm retainers' condition along with their keepers'. Inspect rocker arm components for wear. Assess pushrods as well as rocker arm studs for damage. Replace any parts that have either worn out or are damaged in any way in this section.
    Posted by FordPartsGiant Specialist
    Q:
    What precautions should be taken when removing and installing cylinder heads on Ford Thunderbird? Posted by Customer
    A:
    When removing the heads, the engine must be cold to minimize on warping of the heads. First, unplug the negative cable of the battery and then the drive belt with belt tensioner, and then drain the cooling system. Then to it, take off the valve cover(s), the pushrods and the rocker arms, and at last the intake manifold. For the left cylinder head, remove the bolts of the power steering pump and set it aside but retaining the hoses connected, do the same to the exhaust manifold. On supercharged models, the intercooler and its tubes should be detached, and the wiring of the alternator should be disconnected, as well as the bolts of the alternator and power steering bracket from the engine should be loosened. To get to the proper side of the cylinder head, first, remove the air conditioning compressor, if fitted, by unbolted and set aside, with the AC hoses still connected, then remove the exhaust manifold. Shake the head bolts counterclockwise in incremental turns of about 90 degrees each until they can be turned out by hand; this should be done in reverse of the turning pattern followed during the tightening sequence. Head bolts are not supposed to be used again; they have to be removed and disposed of, and new bolts used on the machine. They must be raised gently if any force is offering resistance a prybar should be placed under the head(s) against a casting protrusion and the head should be placed on blocks made of wood so as to avoid damaging the gasket sealing surfaces of the head(s). In mating the cylinder heads to the block ensure the two mating surfaces are clean as possible, you can use gasket scraper and clean with thinner or acetone. Look out for nicks or damage on any mating surfaces fit and if the require fitting a file or perhaps reconsider machining. Align the new gasket(s) in right way over the dowel pins in the block and gently place the head(s) on the block on top of the gasket(s). Apply more pipe sealant to the threads of the four short bolts and lightly lubricate the rest of the head bolts, the head bolts are not exchangeable between the supercharged and non-supercharged engines. Screw in the bolts and merely turn them clockwise until they are tight, then the use the correct pattern to turn them a further additional three times to the correct torque level. When the required torque value is achieved, turn all the head bolts by two or three turns counter clockwise and then alternately torque to the final torque value again. The following activities are the exact opposite of removal; All the remaining installation steps are the reverse of removal. Last, renew the engine oil and filter with the right kind of oil compatible with your vehicle, fill the coolant and step on the accelerator, be keen and ensure that you do not see signs of oil or coolant leakage. Once cylinder head bolts have been lightened using the above procedure, it is not imperative that they should be lightened again after long use of the vehicle though it is advisable to check on their tightness if one so wishes to.
    Posted by FordPartsGiant Specialist
    Q:
    How to disassemble and inspect cylinder heads on Lincoln Mark VII? Posted by Customer
    A:
    Dealerships and auto parts shops sell new and rebuilt cylinder heads. One would require some specialized tools for dissembling and inspecting it. Buying replacement heads may be more feasible than trying to find replacement parts. When disassembling the cylinder head, remove valves and rocker arm components then label or store them separately. Use a spring compressor in removing the keepers and other parts.
    Posted by FordPartsGiant Specialist
    Q:
    How to remove and install cylinder heads on Lincoln Mark VII Overhead valve (OHV)engines? Posted by Customer
    A:
    Remove the valve cover(s), pushrods, intake manifold, drive belts, idler pulley bracket, Thermactor valve and pump, and crossover tube first. For the left cylinder head, take out and unbolt the air conditioning compressor and bracket(s). Disconnect the fuel line from the right cylinder head and remove the exhaust manifold(s). Then draw on cardboard around each cylinder and bolt pattern using a new head gasket. Loosen the head bolts in 1/4 turn increments; store them; then lift off the heads. When installing, clean surfaces; check for damage; chase holes for bolts; position new gasket(s). Put heads in place on the block after oiling bolt threads and tighten them according to this sequence. Finally, perform the reverse order of the remaining steps plus change the engine oil & filter before starting the engine.
    Posted by FordPartsGiant Specialist
    Q:
    How to reassemble a clean head after valve service on Lincoln Mark VII? Posted by Customer
    A:
    Regardless of whether or not the head was sent to an automotive repair shop for valve servicing, make sure it's clean before beginning reassembly. If the head was sent out for valve servicing, the valves and related components will already be in place. On all engines, lubricate and install the valves, then install new seals on each of the valve guides. Using a hammer and deep socket, gently tap each seal into place until it's seated on the guide. On OHC engines, reinstall the valve lifters. Beginning at one end of the head, lubricate and install the first valve. Apply moly-base grease or clean engine oil to the valve stem. Drop the spring seat or shim(s) over the valve guide and set the valve spring, retainer (or rotator) and sleeve (if used) in place. Apply a small dab of grease to each keeper to hold it in place. Compress the springs with a valve spring compressor and carefully install the keepers in the upper groove, then slowly release the compressor and make sure the keepers seat properly. Repeat the procedure for the remaining valves. Be sure to return the components to their original locations - don't mix them up! Check the installed valve spring height with a ruler graduated in 1/32-lnch increments or a dial caliper. If the head was sent out for service work, the installed height should be correct. The measurement is taken from the top of each spring seat or shim(s) to the bottom of the retainer. If the height is greater than the figure, shims can be added under the springs to correct it. Caution: Don't, under any circumstances, shim the springs to the point where the installed height is less than specified. Apply moly-base grease to the rocker arm faces and the fulcrums, then install the rocker arms and fulcrums on the cylinder head studs.
    Posted by FordPartsGiant Specialist
    Q:
    How to remove and install cylinder heads on Lincoln Mark VII Overhead cam (OHC) engine? Posted by Customer
    A:
    The engine must be completely cool when the heads are removed. Failure to allow the engine to cool off could result in head warpage. Removal begins with disconnecting the cable from the negative battery terminal and removing the valve cover(s). Next, remove the intake manifold, timing chain cover, and timing chains. Use the required camshaft holding fixture to lock the camshafts in place. Leave the holding fixtures in place until after the reassembly is complete. Separate the exhaust manifold-to- exhaust pipe(s). Detach the positive battery cable bracket at the rear of the cylinder head. Loosen the nut and slide the positive battery cable bracket up and off the stud on the right side of the cylinder head. At the rear of the right cylinder head remove the ground strap. Disconnect the heater hose at the pipe fastened at the rear of the right side cylinder head. The pipe can remain attached to the head during removal. Remove the exhaust manifold(s), if desired. Remove the head bolts by loosening them 1/4 turn at a time. Lift the head(s) off the engine. Remove the old head gasket(s). Before removing, note which gasket goes on which side, they are different and cannot be interchanged. Cylinder head disassembly and inspection procedures are covered in detail. Installation begins with ensuring the mating surfaces of the cylinder heads and block are perfectly clean. Use a gasket scraper to remove all traces of carbon and old gasket material, then clean the mating surfaces with lacquer thinner or acetone. Check the block and head mating surfaces for nicks, deep scratches and other damage. Use a tap of the correct size to chase the threads in the head bolt holes. Make sure the new gaskets are on the correct cylinder banks. Position the new gasket(s) over the alignment dowels in the block. Before placing the cylinder heads back on the block, rotate the crankshaft counterclockwise, as you are facing the engine, so the keyway is in the 9 o'clock position. Carefully position the head(s) on the block without disturbing the gasket(s). Install the NEW head bolts and follow the recommended sequence and tighten the bolts, in three steps. The remaining installation steps are the reverse of removal. Change the engine oil and filter, then start the engine and check carefully for oil and coolant leaks.
    Posted by FordPartsGiant Specialist
    Q:
    How should deposits be removed from the combustion chambers and valve heads for the 1990 Ford Thunderbird? Posted by Customer
    A:
    Deposits should be removed with a scraper and a wire brush before removing the valves. Caution should be taken not to scratch the gasket surfaces.
    Posted by FordPartsGiant Specialist
    Q:
    How should the spring be compressed and the keepers installed for the 1990 Ford Thunderbird? Posted by Customer
    A:
    Compress the spring and install the keepers. Release the compressor, making sure the keepers are seated properly in the valve stem grooves. If necessary, use a small dab of grease to hold the keepers in place until the compressor is released.
    Posted by FordPartsGiant Specialist
    Q:
    What should be done if the valve components are in generally poor condition for the 1989 Ford Thunderbird? Posted by Customer
    A:
    If the inspection process indicates that the valve components are in generally poor condition and worn beyond the limits specified, reassemble the valves in the cylinder head and refer to Section 10 for valve servicing recommendations.
    Posted by FordPartsGiant Specialist
    Q:
    What tools are necessary for the disassembly and inspection procedures of cylinder heads for the 1999 Lincoln Town Car? Posted by Customer
    A:
    Specialized tools are necessary for the disassembly and inspection procedures of cylinder heads.
    Posted by FordPartsGiant Specialist
    See expert answers on similar Cylinder Head
    Q:
    What connection should be disconnected at the rear of the right side cylinder head for the 1992 Lincoln Town Car? Posted by Customer
    A:
    The heater hose should be disconnected at the pipe fastened at the rear of the right side cylinder head.
    Posted by FordPartsGiant Specialist
    See expert answers on similar Cylinder Head
    Q:
    How should the installed valve spring height be checked for the 2004 Mercury Grand Marquis? Posted by Customer
    A:
    Check the installed valve spring height with a ruler graduated in 1/32-inch increments or a dial caliper. The measurement is taken from the top of each spring seat or shim(s) to the bottom of the retainer.
    Posted by FordPartsGiant Specialist
    Q:
    What should you examine regarding rocker arm components for the 1982 Lincoln Town Car? Posted by Customer
    A:
    For OHV engines, examine rocker arm components for wear and damage.
    Posted by FordPartsGiant Specialist
    See expert answers on similar Cylinder Head
    Q:
    What needs to be done with the fuel line for the 1995 Lincoln Town Car? Posted by Customer
    A:
    The fuel line needs to be detached from the clip at the front of the right cylinder head if applicable.
    Posted by FordPartsGiant Specialist
    See expert answers on similar Cylinder Head
    Q:
    What should be done after removing the exhaust manifold(s) on the left cylinder head for the 2004 Mercury Grand Marquis? Posted by Customer
    A:
    Proceed to Step 12.
    Posted by FordPartsGiant Specialist
    Q:
    How should the spring be compressed and the keepers installed for the 1989 Mercury Cougar? Posted by Customer
    A:
    Compress the spring and install the keepers. Release the compressor, making sure the keepers are seated properly in the valve stem grooves. If necessary, use a small dab of grease to hold the keepers in place until the compressor is released.
    Posted by FordPartsGiant Specialist
    Q:
    How should the springs be compressed during installation of the keepers for the 2001 Lincoln Town Car? Posted by Customer
    A:
    Use a valve spring compressor.
    Posted by FordPartsGiant Specialist
    See expert answers on similar Cylinder Head
    Q:
    What should be removed after disconnecting the battery and draining the cooling system for the 1990 Mercury Cougar? Posted by Customer
    A:
    Remove the valve cover(s).
    Posted by FordPartsGiant Specialist
    See expert answers on similar Cylinder Head
    Q:
    What should be done if the valve binds in the guide and will not pull through for the 1989 Mercury Cougar? Posted by Customer
    A:
    If the valve binds in the guide, it should be pushed back into the head and the area around the end of the stem should be deburred with a fine file or whetstone.
    Posted by FordPartsGiant Specialist
    Q:
    How should the valve stem-to-valve guide clearance be checked for the 1990 Mercury Cougar? Posted by Customer
    A:
    Use a dial indicator to measure the lateral movement of each valve stem, parallel to the rocker arm, with the valve in the guide and approximately 1/16-inch off the seat. The valve stem-to-guide clearance is one-half the dial indicator reading. Compare the reading to the desired stem-to-guide clearance in this Chapter's Specifications. If there is still some doubt, the exact clearance and condition of the guides can be checked by an automotive machine shop.
    Posted by FordPartsGiant Specialist
    Q:
    How should the head(s) be positioned on the block for the 2010 Mercury Grand Marquis? Posted by Customer
    A:
    Carefully position the head(s) on the block without disturbing the gasket(s). Install the NEW head bolts and follow the recommended tightening sequence in three steps.
    Posted by FordPartsGiant Specialist
    See expert answers on similar Cylinder Head
    Q:
    How should the valve springs, spring seats, keepers, and retainers (or rotators) be cleaned for the 2009 Mercury Grand Marquis? Posted by Customer
    A:
    Clean all the valve springs, spring seats, keepers, and retainers (or rotators) with solvent and dry them thoroughly. Work the components from one valve at a time to avoid mixing up the parts.
    Posted by FordPartsGiant Specialist
    Q:
    What should be done once the valves and related components have been removed and stored for the 1992 Mercury Grand Marquis? Posted by Customer
    A:
    The head should be thoroughly cleaned and inspected. If a complete engine overhaul is being done, finish the engine disassembly procedures before beginning the cylinder head cleaning and inspection process.
    Posted by FordPartsGiant Specialist
    If you have any questions about this product, please don't hesitate to ask us. We will be happy to help you!

Genuine Ford Part F13Z-6049-A, the Right Choice

To ensure reliability, purchase Ford part # F13Z-6049-A Kit - Remanufactured. It is sometimes referred to as Mercury Cylinder Head. In terms of quality and longevity, OEM parts are top-tier. This is because they are made according to Ford's demanding factory specifications and go through strict quality control. This part fits specific Mercury Cougar, Sable, Tracer models.

FordPartsGiant.com is a leading supplier of genuine Ford parts and accessories such as Ford F13Z6049A Kit - Remanufactured. On our platform, we provide genuine Ford parts at incredible prices while ensuring top-tier quality. Feel at ease shopping with us, knowing our parts have a hassle-free return policy and rapid delivery service. For detailed Mercury parts information, click here.

Why choose Ford Parts Giant

  • Dedicated Service

    Your complete satisfaction is our #1 goal

  • Lowest Prices

    Best deals on genuine OE parts from dealerships

  • Fast Delivery

    Orders are processed and delivered promptly