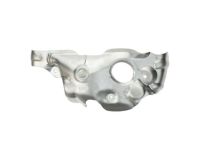
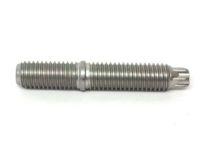
Make sure this part fits

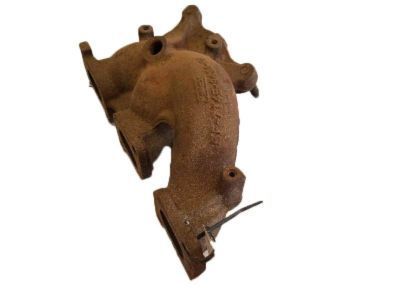
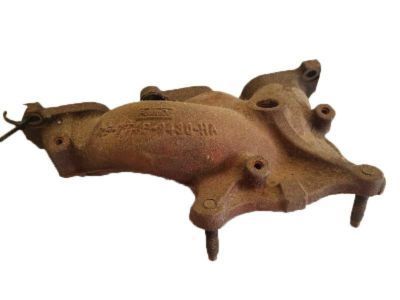
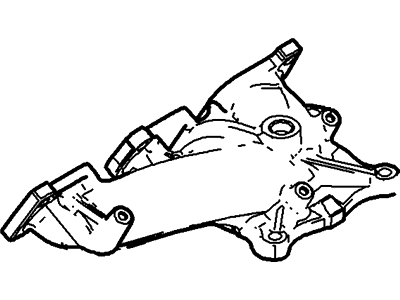
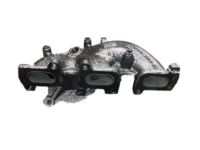
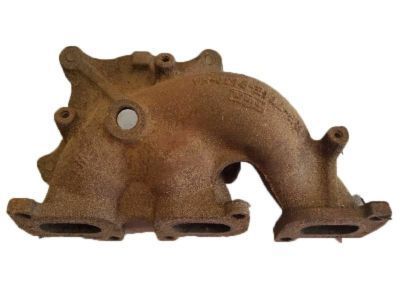
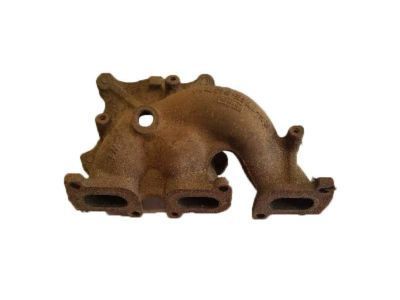
Mercury 7T4Z-9430-C Exhaust Manifold Assembly

2007-2011 Mercury 7T4Z9430C

Customer Questions & Expert Answers (6)
Ford 7T4Z-9430-C Exhaust Manifold Assembly
  • Part Description
    Manifold Assembly - Exhaust
  • Base No.
    9430
  • Position
    Passenger Side
  • Manufacturer
    Ford
Make sure this part fits
$54.95 MSRP: $80.33
You Save: $25.38 (32%)
Ships in 1-3 Business Days
1
ADD TO CART
  • Related Parts
  • Product Specifications
  • Vehicle Fitment
  • Customer Questions & Expert Answers
  • Product Specifications

    BrandGenuine Mercury
    Base No.9430
    Manufacturer Part Number7T4Z-9430-C, 7T4Z9430C
    Part DescriptionManifold Assembly - Exhaust
    Other NamesExhaust Manifold, Manifold
    Item Dimensions16.2 x 8.2 x 4.1 inches
    Item Weight8.80 Pounds
    PositionPassenger Side
    ConditionNew
    Fitment TypeDirect Replacement
    ManufacturerFord
    SKU7T4Z-9430-C
    WarrantyThis genuine Ford part is guaranteed by Ford's factory warranty.
    Shipping & ReturnShipping Policy Return Policy
    Warning: California’s Proposition 65
  • Vehicle Fitment

    Year Make Model Engine Important vehicle option details
    2007-2011 Mercury Milan6 Cyl 3.5L DOHC VCT SMPI5-Speed Automatic Transmission Mazda FNR5, 5-Speed Manual Transmission (G5M), 6-Speed Automatic Transaxle - AWF21, 6-Speed Automatic Transmission 6F Mid-Range, 6-Speed Manual Transmission Mazda G6M, CVT Auto Trans Powersplit Elec, Four-Wheel Drive (Full Time) (Left Hand Drive), Front-Wheel Drive (Left Hand Drive), Left Hand Drive
    2008-2009 Mercury Sable6 Cyl 3.5L DOHC VCT SMPI6-Speed Automatic Transaxle - AWF21, 6-Speed Automatic Transmission 6F50, CVT Select Shift Transmission, Four-Wheel Drive (Part Time) (Left Hand Drive), Front-Wheel Drive (Left Hand Drive), Left Hand Drive
  • Customer Questions & Expert Answers

    Q:
    Does the PN fit my vehicle? Posted by FordPartsGiant Specialist
    A:
    You can Select Your Vehicle to check if 7T4Z-9430-C fits your vehicle.
    Posted by FordPartsGiant Specialist
    Q:
    How do you remove and install the exhaust manifold on Ford Taurus? Posted by Customer
    A:
    Disconnect the cable from the negative battery terminal. Disconnect the electrical connectors from the oxygen sensor and the catalytic converter monitor. Raise the front of the vehicle and support it securely on jackstands; on 2013 and later models, remove the lower engine splash shield and skid plate if equipped. From below, disconnect the crossover pipe. Remove the heat shield over the front exhaust manifold and the six nuts securing the exhaust manifold, then remove and discard the manifold gasket and the six nuts. Remove the exhaust manifold and, using a stud holding tool or a pair of nuts tightened together over a stud, extract the exhaust manifold studs and discard them. Use a scraper to remove all old gasket material and carbon deposits from the manifold and cylinder head mating surfaces, checking the manifold for warpage and resurfacing if necessary, while being cautious not to gouge the aluminum engine parts. Install new exhaust manifold studs with light oil on the threads, then place a new manifold gasket over the studs, followed by the manifold and new self-locking nuts. Tighten the nuts, starting with the center fasteners and working towards the ends, to the specified torque. For the rear exhaust manifold, disconnect the cable from the negative battery terminal, remove the EGR pipe from the exhaust manifold on 3.0L engines, and disconnect the connector to the rear bank oxygen sensor. On 3.5L engines, remove the rear-bank catalytic converter, noting that the converter heat shield on 3.0L AWD models requires the removal of the steering gear heat shield first. Remove the nuts from the exhaust manifold flange and separate the crossover pipe from the manifold, then remove the six exhaust manifold mounting nuts and the manifold from the engine, discarding the manifold gasket. Extract the exhaust manifold studs and discard them, then scrape all gasket material and carbon deposits from the mating surfaces, checking for warpage and resurfacing if necessary. Install new exhaust manifold studs with light oil on the threads, place a new manifold gasket over the studs, install the manifold and new self-locking nuts, and tighten the nuts starting with the center fasteners and working towards the ends to the specified torque. The remainder of the installation follows the reverse order of removal.
    Posted by FordPartsGiant Specialist
    Q:
    How to remove and install the front and rear exhaust manifolds on Lincoln MKX? Posted by Customer
    A:
    Before beginning this procedure, allow the engine to cool completely and apply penetrating oil to the manifold and converter fasteners. On 2.7L engines, the exhaust manifold is integrated into the cylinder head, and the turbochargers bolt directly to the cylinder heads. For 2011 through 2014 3.5L and 3.7L models, the front exhaust manifold and the catalytic converter are integrated into one piece, while in 2015 and later 3.5L models, both exhaust manifolds are integrated with the catalytic converters. To remove the front exhaust manifold, disconnect the cable from the negative battery terminal, disconnect the electrical connector for the oxygen sensor and the catalytic converter monitor, and on 2015 and later models, remove the cooling fan shroud assembly. Raise the front of the vehicle and support it securely on jackstands, then disconnect the exhaust Y-pipe from below. Remove the heat shield over the front exhaust manifold, discard the six nuts securing the exhaust manifold, and remove the manifold and converter. Extract the exhaust manifold studs using a stud holding tool or a pair of nuts tightened together over a stud, and discard them. Use a scraper to remove all old gasket material and carbon deposits from the manifold and cylinder head mating surfaces, being cautious not to gouge the aluminum engine parts. Install new exhaust manifold studs with light oil on the threads, place a new manifold gasket over the studs, and install the manifold with new self-locking nuts. Tighten the nuts, starting with the center fasteners and working towards the ends, to the specified torque, and complete the installation in reverse order. For the rear exhaust manifold, disconnect the cable from the negative battery terminal and the connector to the rear bank oxygen sensor, then raise the vehicle and support it securely on jackstands. Remove the Y-pipe-to-catalytic converter flange nuts and disconnect the Y-pipe, and for 2014 and earlier models, remove the rear-bank catalytic converter. Discard the six exhaust manifold mounting nuts and remove the manifold from the engine, along with the manifold gasket. Extract the exhaust manifold studs and discard them, then scrape off all gasket material and carbon deposits from the mating surfaces, taking care with aluminum parts. Install new exhaust manifold studs with light oil on the threads, place a new manifold gasket over the studs, and install the manifold with new self-locking nuts. Tighten the nuts, starting with the center fasteners and working towards the ends, to the specified torque, and complete the installation in reverse order.
    Posted by FordPartsGiant Specialist
    Q:
    How to remove and install the front and rear exhaust manifolds on Ford Edge? Posted by Customer
    A:
    Before beginning this procedure, allow the engine to cool completely and apply penetrating oil to the manifold and converter fasteners. On 2.7L engines, the exhaust manifold is integrated into the cylinder head, and the turbochargers bolt directly to the cylinder heads. For 2011 through 2014 3.5L and 3.7L models, the front exhaust manifold and the catalytic converter are integrated into one piece, while in 2015 and later 3.5L models, both exhaust manifolds are integrated with the catalytic converters. To remove the front exhaust manifold, disconnect the cable from the negative battery terminal, disconnect the electrical connector for the oxygen sensor and the catalytic converter monitor, and on 2015 and later models, remove the cooling fan shroud assembly. Raise the front of the vehicle and support it securely on jackstands, then disconnect the exhaust Y-pipe from below. Remove the heat shield over the front exhaust manifold, discard the six nuts securing the exhaust manifold, and remove the manifold and converter. Extract the exhaust manifold studs using a stud holding tool or a pair of nuts tightened together over a stud, and discard them. Use a scraper to remove all old gasket material and carbon deposits from the manifold and cylinder head mating surfaces, being cautious not to gouge the aluminum engine parts. Install new exhaust manifold studs with light oil on the threads, place a new manifold gasket over the studs, and install the manifold with new self-locking nuts. Tighten the nuts, starting with the center fasteners and working towards the ends, to the specified torque, and complete the installation in reverse order. For the rear exhaust manifold, disconnect the cable from the negative battery terminal and the connector to the rear bank oxygen sensor, then raise the vehicle and support it securely on jackstands. Remove the Y-pipe-to-catalytic converter flange nuts and disconnect the Y-pipe, and for 2014 and earlier models, remove the rear-bank catalytic converter. Discard the six exhaust manifold mounting nuts and remove the manifold from the engine, along with the manifold gasket. Extract the exhaust manifold studs and discard them, then scrape off all gasket material and carbon deposits from the mating surfaces, taking care with aluminum parts. Install new exhaust manifold studs with light oil on the threads, place a new manifold gasket over the studs, and install the manifold with new self-locking nuts. Tighten the nuts, starting with the center fasteners and working towards the ends, to the specified torque, and complete the installation in reverse order.
    Posted by FordPartsGiant Specialist
    Q:
    How to remove, inspect, and install the exhaust manifold in four cylinder engine on Ford Fusion? Posted by Customer
    A:
    On some models, the catalytic converter is integral with the exhaust manifold, requiring replacement as a unit. The 1.5L and 2.0L models do not utilize a separate exhaust manifold, as it is partially cast into the cylinder head, with the turbocharger mounting directly to it. To begin removal, raise the vehicle and secure it on jackstands. After the engine has cooled, soak the manifold heat-shield retaining nuts with penetrating oil to loosen any rust, then remove the heat shield and apply penetrating oil to the exhaust manifold mounting bolts. For 1.6L engines, remove the turbocharger, while for 2.3L and 2.5L engines, disconnect the exhaust pipe from the exhaust manifold and discard the old flange gasket. Unplug the electrical connector for the oxygen sensor and remove it from the exhaust manifold. Next, remove the exhaust manifold mounting nuts, then take off the exhaust manifold along with the old manifold gasket. Use a stud removal tool or two nuts tightened against each other to extract the old studs from the cylinder head. Inspect the exhaust manifold for cracks or damage, replacing it if necessary. Remove all traces of gasket material from the mating surfaces with care to avoid scratching, and inspect for wear and cracks. Check the exhaust manifold mating surface for warpage using a straightedge and feeler gauge, and determine if replacement or resurfacing is needed. For installation, place new exhaust studs in the cylinder head, install the manifold with a new gasket and self-locking nuts, coating the threads of the exhaust manifold studs with anti-seize compound. Tighten the nuts in several stages, working from the center out, and complete the installation in reverse order of removal. Finally, run the engine and check for exhaust leaks.
    Posted by FordPartsGiant Specialist
    Q:
    What should be removed on the 2016 Ford Fusion? Posted by Customer
    A:
    Remove the rear-bank catalytic converter.
    Posted by FordPartsGiant Specialist
    If you have any questions about this product, please don't hesitate to ask us. We will be happy to help you!

Genuine Ford Part 7T4Z-9430-C, the Right Choice

To ensure reliability, purchase Ford part # 7T4Z-9430-C Exhaust Manifold Assembly. It is sometimes referred to as Mercury Exhaust Manifold. In terms of quality and longevity, OEM parts are top-tier. This is because they are made according to Ford's demanding factory specifications and go through strict quality control. This part fits specific Mercury Milan, Sable models.

FordPartsGiant.com is a leading supplier of genuine Ford parts and accessories such as Ford 7T4Z9430C Exhaust Manifold Assembly. On our platform, we provide genuine Ford parts at incredible prices while ensuring top-tier quality. Feel at ease shopping with us, knowing our parts have a hassle-free return policy and rapid delivery service. For detailed Mercury parts information, click here.

Why choose Ford Parts Giant

  • Dedicated Service

    Your complete satisfaction is our #1 goal

  • Lowest Prices

    Best deals on genuine OE parts from dealerships

  • Fast Delivery

    Orders are processed and delivered promptly