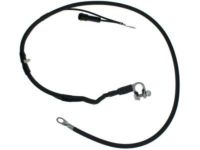
Make sure this part fits

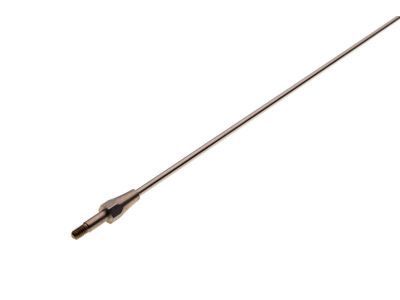
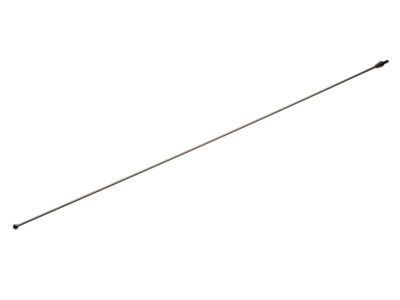
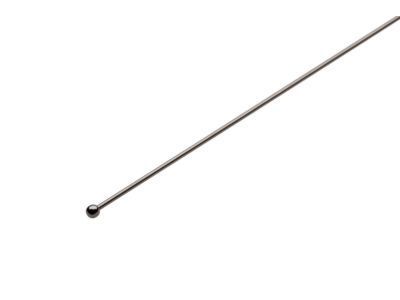
Mercury D3AZ-18A886-A Rod Assembly - Replacement - Aerial

1980-2000 Mercury D3AZ18A886A

Customer Questions & Expert Answers (8)
Ford D3AZ-18A886-A Rod Assembly - Replacement - Aerial
  • Part Description
    Rod Assy - Replacement - Aerial
  • Base No.
    18A886
  • Manufacturer
    Ford
Make sure this part fits
$15.87 MSRP: $22.60
You Save: $6.73 (30%)
Ships in 1-2 Business Days
1
ADD TO CART
  • Related Parts
  • Product Specifications
  • Vehicle Fitment
  • Customer Questions & Expert Answers
  • Product Specifications

    BrandGenuine Mercury
    Base No.18A886
    Manufacturer Part NumberD3AZ-18A886-A, D3AZ18A886A
    Part DescriptionRod Assy - Replacement - Aerial
    Other NamesAntenna Mast, Mast
    Item Dimensions50.4 x 9.5 x 3.2 inches
    Item Weight0.40 Pounds
    ConditionNew
    Fitment TypeDirect Replacement
    ManufacturerFord
    SKUD3AZ-18A886-A
    WarrantyThis genuine Ford part is guaranteed by Ford's factory warranty.
    Shipping & ReturnShipping Policy Return Policy
    Warning: California’s Proposition 65
  • Vehicle Fitment

    Year Make Model Engine Important vehicle option details
    1980-1986 Mercury Capri4 Cyl 2.3L, 6 Cyl 3.3L, 6 Cyl 3.8L, 8 Cyl 4.2L, 8 Cyl 5.0L3AT C3, 3AT C4, 3AT C5, 4AT AOD, 4MT, 5MT
    1980-1993 Mercury Cougar4 Cyl 2.3L, 6 Cyl 3.3L, 6 Cyl 3.8L, 8 Cyl 4.2L, 8 Cyl 5.0L3AT C3, 3AT C4, 3AT C5, 4AT AOD, 4MT, 5MT
    1980-1994 Mercury Grand Marquis8 Cyl 4.2L, 8 Cyl 4.6L, 8 Cyl 5.0L, 8 Cyl 5.8L3AT, 3AT C4, 3AT C6, 4AT, 4AT AOD, 4AT AODE
    1982-1983 Mercury LN74 Cyl 1.6L3AT ATX, 4MT, 5MT
    1981-1987 Mercury Lynx4 Cyl 1.6L, 4 Cyl 1.9L, 4 Cyl 2.0L3AT ATX, 4MT, 5MT
    1983-1986 Mercury Marquis4 Cyl 2.3L, 6 Cyl 3.3L, 6 Cyl 3.8L3AT C3, 3AT C5, 4MT
    1995-2000 Mercury Mystique4 Cyl 2.0L, 6 Cyl 2.5L4AT CD4E, 5MT
    1986-1991 Mercury Sable4 Cyl 2.5L, 6 Cyl 3.0L, 6 Cyl 3.8L3AT ATX, 4AT AX4S, 4AT AXOD, 4AT AXOD-E
    1987-1992, 1984-1985 Mercury Topaz4 Cyl 2.0L, 4 Cyl 2.3L, 6 Cyl 3.0L3AT ATX, 4MT, 5MT
  • Customer Questions & Expert Answers

    Q:
    I am wondering if this is the exact part that fits in Posted by FordPartsGiant Specialist
    A:
    You can Select Your Vehicle to check if D3AZ-18A886-A fits your vehicle.
    Posted by FordPartsGiant Specialist
    Q:
    How do you troubleshoot and replace a worn or broken antenna on Ford F-250? Posted by Customer
    A:
    In case of worn or broken antenna mast, remove the old mast and fix a new mast in place. If there is poor reception even with the antenna looking normal, do the following. The first test is to touch the two ends of the ohmmeter to the end of the antenna cable and to the mast without the cable being plugged into the radio; the reading should be less than five ohms. If the reading is right as per the metre, there is nothing wrong with the antenna; but if it is wrong, then there could be a problem with the cable or the base of the antenna. Then, if the cable is unplugged from both the radio and the antenna, while the radio is on, measure the resistance of the cable, and it must be less than five ohms. There is only one thing that can be done, if the reading is right the cable is fine the reading is off then replace the damn thing. Next, to test the resistance of the antenna, connect the probes of the meter between the mast and middle of the socket of the antenna; the optimum figure is less than five ohms; otherwise, the antenna needs areplacement. To replace the antenna, undo the antenna wire from the radio as well as, if needed, get the radio out of the dashboard to isolate the wire at the back. Most if not all the /CLA/ antenna cable retaining clips are along the base of the instrument panel and can be removed by pulling on the cable; however, pulling on the cable may entail the removal of the glove box. The imperative actions that have to be taken are Unscrew the base of the antenna mast, loosen the cap with a screwdriver and be careful not to scratch the paint, and lastly remove the screws, which are attached to the base. To disconnect the base, pull the antenna cable through the hole in the fender; to disconnect the antenna cable inside the passenger compartment feel behind the back of the rubber grommet inside the inner cowl; if the grommet doesn't pull free, pry it loose from the engine compartment. Last but not least, reinstall by doing the processes that was done to remove the unwanted program.
    Posted by FordPartsGiant Specialist
    Q:
    How to check and replace the antenna and cable assembly on a Mercury Cougar? Posted by Customer
    A:
    With the antenna cable installed on the vehicle and the cable unplugged from the radio, check the antenna with an ohmmeter at the points shown in the accompanying illustration (Antenna resistance check). If any readings are not as specified, replace the antenna and cable assembly. Disconnect the negative battery cable. For a power antenna, lower the antenna, remove the rear screws from the right side front splash shield for access and remove the lower antenna bolt. Remove the nut at the top of the antenna stanchion and remove the antenna through the fender opening. Installation is the reverse of removal. For a manual antenna, detach the holding straps from the instrument panel and lower the glove compartment. Remove the screws and detach the right cowl side trim panel. Unplug the cable from the radio. Disengage the antenna cable from the clips and retainers along the top of the heater/air conditioning assembly. Remove the radio antenna base cap, remove the mounting screws, pull the base and cable assembly out through the holes in the door hinge pillar and remove the assembly from the vehicle. Installation is the reverse of removal.
    Posted by FordPartsGiant Specialist
    Q:
    How to check and replace the antenna and cable assembly on a Ford Thunderbird? Posted by Customer
    A:
    With the antenna cable installed on the vehicle and the cable unplugged from the radio, check the antenna with an ohmmeter at the points shown in the accompanying illustration (Antenna resistance check). If any readings are not as specified, replace the antenna and cable assembly. Disconnect the negative battery cable. For a power antenna, lower the antenna, remove the rear screws from the right side front splash shield for access and remove the lower antenna bolt. Remove the nut at the top of the antenna stanchion and remove the antenna through the fender opening. Installation is the reverse of removal. For a manual antenna, detach the holding straps from the instrument panel and lower the glove compartment. Remove the screws and detach the right cowl side trim panel. Unplug the cable from the radio. Disengage the antenna cable from the clips and retainers along the top of the heater/air conditioning assembly. Remove the radio antenna base cap, remove the mounting screws, pull the base and cable assembly out through the holes in the door hinge pillar and remove the assembly from the vehicle. Installation is the reverse of removal.
    Posted by FordPartsGiant Specialist
    Q:
    How do you perform a resistance check and replace the antenna on Mercury Grand Marquis? Posted by Customer
    A:
    To perform a resistance check, ensure the antenna cable is installed on the vehicle and unplugged from the radio, then use an ohmmeter to check the antenna between the cable and tip, expecting a reading of less than 5 ohms; if the reading is higher, replace the antenna and cable assembly. For replacement, first disconnect the cable from the negative battery terminal. For a power antenna, lower the antenna, remove the rear screws from the right side front splash shield for access, and take out the lower antenna bolt. Next, remove the nut at the top of the antenna stanchion and lower the antenna through the fender opening, using needle nose pliers to unscrew the antenna stanchion nut. Installation follows the reverse order of removal. For a manual antenna, detach the antenna lead retaining clips in the engine compartment, remove the screws, and detach the right cowl side trim panel. Then, remove the radio and unplug the antenna lead cable, take off the radio antenna base cap, remove the mounting screws, and pull the base and cable assembly through the fender opening into the engine compartment, with installation again being the reverse of removal.
    Posted by FordPartsGiant Specialist
    Q:
    How do you troubleshoot and replace a worn or broken antenna on Ford Bronco? Posted by Customer
    A:
    In case of worn or broken antenna mast, remove the old mast and fix a new mast in place. If there is poor reception even with the antenna looking normal, do the following. The first test is to touch the two ends of the ohmmeter to the end of the antenna cable and to the mast without the cable being plugged into the radio; the reading should be less than five ohms. If the reading is right as per the metre, there is nothing wrong with the antenna; but if it is wrong, then there could be a problem with the cable or the base of the antenna. Then, if the cable is unplugged from both the radio and the antenna, while the radio is on, measure the resistance of the cable, and it must be less than five ohms. There is only one thing that can be done, if the reading is right the cable is fine the reading is off then replace the damn thing. Next, to test the resistance of the antenna, connect the probes of the meter between the mast and middle of the socket of the antenna; the optimum figure is less than five ohms; otherwise, the antenna needs areplacement. To replace the antenna, undo the antenna wire from the radio as well as, if needed, get the radio out of the dashboard to isolate the wire at the back. Most if not all the /CLA/ antenna cable retaining clips are along the base of the instrument panel and can be removed by pulling on the cable; however, pulling on the cable may entail the removal of the glove box. The imperative actions that have to be taken are Unscrew the base of the antenna mast, loosen the cap with a screwdriver and be careful not to scratch the paint, and lastly remove the screws, which are attached to the base. To disconnect the base, pull the antenna cable through the hole in the fender; to disconnect the antenna cable inside the passenger compartment feel behind the back of the rubber grommet inside the inner cowl; if the grommet doesn't pull free, pry it loose from the engine compartment. Last but not least, reinstall by doing the processes that was done to remove the unwanted program.
    Posted by FordPartsGiant Specialist
    Q:
    How do you perform a resistance check and replace the antenna on Ford Crown Victoria? Posted by Customer
    A:
    To perform a resistance check, ensure the antenna cable is installed on the vehicle and unplugged from the radio, then use an ohmmeter to check the antenna between the cable and tip, expecting a reading of less than 5 ohms; if the reading is higher, replace the antenna and cable assembly. For replacement, first disconnect the cable from the negative battery terminal. For a power antenna, lower the antenna, remove the rear screws from the right side front splash shield for access, and take out the lower antenna bolt. Next, remove the nut at the top of the antenna stanchion and lower the antenna through the fender opening, using needle nose pliers to unscrew the antenna stanchion nut. Installation follows the reverse order of removal. For a manual antenna, detach the antenna lead retaining clips in the engine compartment, remove the screws, and detach the right cowl side trim panel. Then, remove the radio and unplug the antenna lead cable, take off the radio antenna base cap, remove the mounting screws, and pull the base and cable assembly through the fender opening into the engine compartment, with installation again being the reverse of removal.
    Posted by FordPartsGiant Specialist
    Q:
    How do you replace the antenna on Ford Bronco II? Posted by Customer
    A:
    To replace the antenna, first pull the antenna cable straight out of the radio if it plugs directly in; if not, disconnect the antenna lead-in cable from the in-line connector above the glove box. Next, work under the instrument panel to disengage the cable from its retainers, and if necessary, remove the instrument panel pad to access the cable. Outside, unsnap the cap from the antenna base, then remove the three screws and carefully lift off the antenna, pulling the cable with it. Discard the gasket, then place a new gasket in position on the cowl panel. Insert the antenna cable through the hole and seat the antenna base on the cowl, securing it with the three screws. Position the cap over the antenna base and snap it into place, then route the cable in the same position as before removal behind the instrument panel and connect it to the radio or in-line connector.
    Posted by FordPartsGiant Specialist
    If you have any questions about this product, please don't hesitate to ask us. We will be happy to help you!

Genuine Ford Part D3AZ-18A886-A, the Right Choice

To ensure reliability, purchase Ford part # D3AZ-18A886-A Rod Assembly - Replacement - Aerial. It is sometimes referred to as Mercury Antenna. In terms of quality and longevity, OEM parts are top-tier. This is because they are made according to Ford's demanding factory specifications and go through strict quality control. This part fits specific Mercury Capri, Cougar, Mystique models.

FordPartsGiant.com is a leading supplier of genuine Ford parts and accessories such as Ford D3AZ18A886A Rod Assembly - Replacement - Aerial. On our platform, we provide genuine Ford parts at incredible prices while ensuring top-tier quality. Feel at ease shopping with us, knowing our parts have a hassle-free return policy and rapid delivery service. For detailed Mercury parts information, click here.

Why choose Ford Parts Giant

  • Dedicated Service

    Your complete satisfaction is our #1 goal

  • Lowest Prices

    Best deals on genuine OE parts from dealerships

  • Fast Delivery

    Orders are processed and delivered promptly