Make sure this part fits

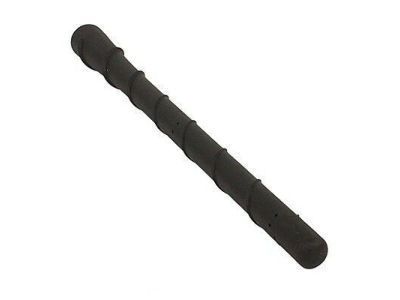
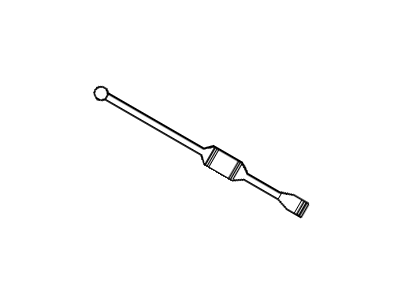
Mercury F1TZ-18A886-A Rod Assembly - Replacement - Aerial

1997-1998 Mercury Mountaineer F1TZ18A886A

Customer Questions & Expert Answers (3)
Ford F1TZ-18A886-A Rod Assembly - Replacement - Aerial
  • Part Description
    Rod Assy - Replacement - Aerial
  • Base No.
    18A886
  • Manufacturer
    Ford
Make sure this part fits
$23.12 MSRP: $33.80
You Save: $10.68 (32%)
Ships in 1-2 Business Days
1
ADD TO CART
  • Related Parts
  • Product Specifications
  • Vehicle Fitment
  • Customer Questions & Expert Answers
  • Product Specifications

    BrandGenuine Mercury
    Base No.18A886
    Manufacturer Part NumberF1TZ-18A886-A, F1TZ18A886A
    Part DescriptionRod Assy - Replacement - Aerial
    Other NamesAntenna Mast, Mast
    Manufacturer NoteBlack - w/boot
    Item Dimensions36.4 x 6.4 x 6.2 inches
    Item Weight1.20 Pounds
    ConditionNew
    Fitment TypeDirect Replacement
    ManufacturerFord
    SKUF1TZ-18A886-A
    WarrantyThis genuine Ford part is guaranteed by Ford's factory warranty.
    Shipping & ReturnShipping Policy Return Policy
    Warning: California’s Proposition 65
  • Vehicle Fitment

    Year Make Model Engine Important vehicle option details
    1997-1998 Mercury Mountaineer6 Cyl 4.0L, 8 Cyl 5.0L4AT 4R70W, 5AT 5R55E
  • Customer Questions & Expert Answers

    Q:
    Is the the correct part for the attached VIN? Posted by FordPartsGiant Specialist
    A:
    You can Select Your Vehicle to check if F1TZ-18A886-A fits your vehicle.
    Posted by FordPartsGiant Specialist
    Q:
    How do you remove and install the antenna and Antenna Cable on 1993-2011 Ford Ranger? Posted by Customer
    A:
    To remove on some vehicles for 2010 and earlier models you need to crawl under the instrument panel, unplug the antenna cable at the lead in connector, then unplug the cable from the plastic clips under the panel. Remove the antenna by first and the small cap by the use of a small and tight screwed screw driver. String or wire a piece of string or wire onto the radio end of the antenna cable with a view of pulling the new cable through the channel. Take out the screws fixing the base of the antenna to the body and, having disconnected the cable, with the help of the fingers pull out the body of the antenna together with the base and gasket. If at all, remove the antenna lead-in cable from the radio thus removing it from its clips. To access antenna for the models of 2011, remove the antenna by undoing the screws at the back, pry off the cover on the base using the help of a small screw driver, and the take out the rest of the screws along with the new base of the antenna from the cowl. Remove the antenna cable connector from the base to rewire the new installation; you are required to tie a string or wire at the end of the cable. Take out the radio and free the antenna cable at the rear of the unit. Pop the glove box completely, take the gasket at the rear and extracting the cable through the hole generated. For all models, installation is the reverse of removal as a new gasket has to be fitted and the string or wire to connect it to the new antenna cable has to be untied and slowly pulled back into place after which the string or wire is removed.
    Posted by FordPartsGiant Specialist
    Q:
    How do you remove and install the antenna from the instrument panel on Ford Explorer? Posted by Customer
    A:
    To replace the antenna on it first you have to removed the radio from the instrument panel and then unplug the antenna which is at the rear of the radio. Third, pull the antenna cable from the plastic clips that are found at the top of the defroster nozzle. The antenna cap is to be unscrewed; for models from 1997 and later, there is a sleeve that has to be pulled up, afterwards there are loosening screws and mast screws and finally the cap. Put a string through the radio end of the antenna cable and the other end is tied to the instrument panel so as to pull new antenna cable along the same as the old one. Unscrew the few screws that holds the combination of the antenna base and the body then gently pull the antenna cable through the hole in the body, then take out the antenna as well as the gasket. For reinstalling the device back do the following; replace the gasket, cut the string, reconnect the new string to the new antenna cable then try to pull it back to the body hole and eventually remove the string.
    Posted by FordPartsGiant Specialist
    If you have any questions about this product, please don't hesitate to ask us. We will be happy to help you!

Genuine Ford Part F1TZ-18A886-A, the Right Choice

To ensure reliability, purchase Ford part # F1TZ-18A886-A Rod Assembly - Replacement - Aerial. It is sometimes referred to as Mercury Antenna. In terms of quality and longevity, OEM parts are top-tier. This is because they are made according to Ford's demanding factory specifications and go through strict quality control. This part fits specific Mercury Mountaineer models.

FordPartsGiant.com is a leading supplier of genuine Ford parts and accessories such as Ford F1TZ18A886A Rod Assembly - Replacement - Aerial. On our platform, we provide genuine Ford parts at incredible prices while ensuring top-tier quality. Feel at ease shopping with us, knowing our parts have a hassle-free return policy and rapid delivery service. For detailed Mercury parts information, click here.

Why choose Ford Parts Giant

  • Dedicated Service

    Your complete satisfaction is our #1 goal

  • Lowest Prices

    Best deals on genuine OE parts from dealerships

  • Fast Delivery

    Orders are processed and delivered promptly