Make sure this part fits

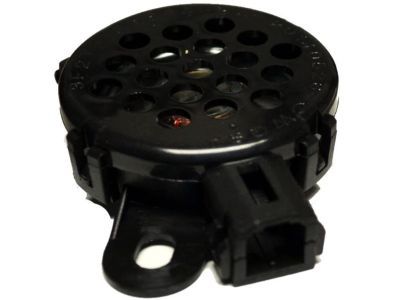
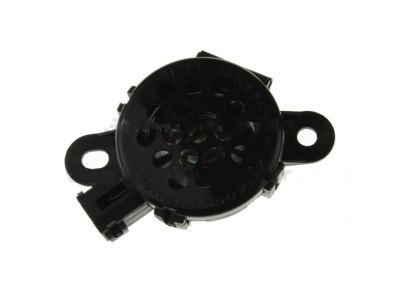
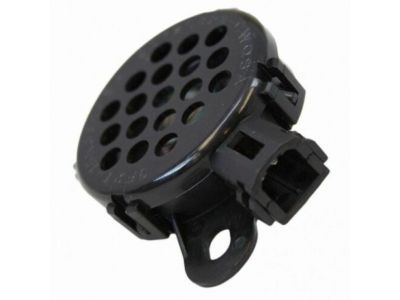
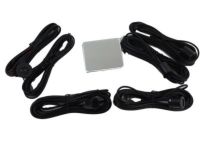
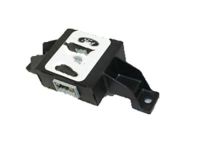
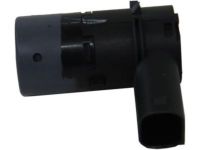
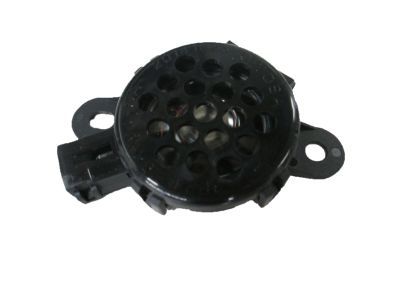
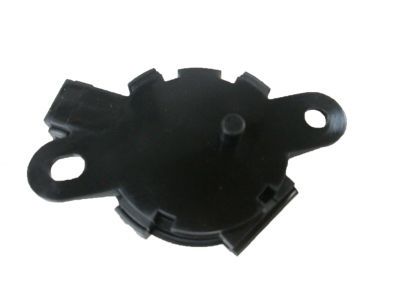
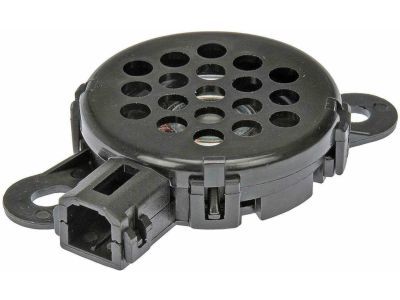
Mercury 3F2Z-15K864-BA Speaker Assy - Parking Control Aid

2004-2011 Mercury 3F2Z15K864BA

Customer Questions & Expert Answers (7)
Ford 3F2Z-15K864-BA Speaker Assy - Parking Control Aid
  • Part Description
    Speaker Assy - Parking Control Aid
  • Base No.
    15K864
  • Position
    Front
  • Manufacturer
    Ford
Make sure this part fits
$9.91 MSRP: $18.82
You Save: $8.91 (48%)
Ships in 1-2 Business Days
1
ADD TO CART
  • Related Parts
  • Product Specifications
  • Vehicle Fitment
  • Customer Questions & Expert Answers
  • Product Specifications

    BrandGenuine Mercury
    Base No.15K864
    Manufacturer Part Number3F2Z-15K864-BA, 3F2Z15K864BA
    Part DescriptionSpeaker Assy - Parking Control Aid
    Other NamesSpeaker
    Item Dimensions5.5 x 4.6 x 3.6 inches
    Item Weight0.30 Pounds
    PositionFront
    ConditionNew
    Fitment TypeDirect Replacement
    ManufacturerFord
    SKU3F2Z-15K864-BA
    WarrantyThis genuine Ford part is guaranteed by Ford's factory warranty.
    Shipping & ReturnShipping Policy Return Policy
    Warning: California’s Proposition 65
  • Vehicle Fitment

    Year Make Model Engine Important vehicle option details
    2008-2011 Mercury Milan4 Cyl 2.3L, 4 Cyl 2.5L Duratec HE PFI, 4 Cyl 2.5L PFI Gas/Electric, 6 Cyl 3.0L DOHC EFI, 6 Cyl 3.0L OHC Duratec, 6 Cyl 3.5L DOHC VCT SMPI5-Speed Automatic Transmission Mazda FNR5, 5-Speed Manual Transmission (G5M), 6-Speed Automatic Transaxle - AWF21, 6-Speed Automatic Transmission 6F Mid-Range, 6-Speed Manual Transmission Mazda G6M, CVT Auto Trans Powersplit Elec, Four-Wheel Drive (Full Time) (Left Hand Drive), Front-Wheel Drive (Left Hand Drive), Left Hand Drive
    2004-2007 Mercury Monterey6 Cyl 3.9L OHV EFI NA, 6 Cyl 4.2L OHV EFI4AT AX4N, Front-Wheel Drive (Left Hand Drive), Left Hand Drive
  • Customer Questions & Expert Answers

    Q:
    I would like to know is this part gonna fit with my car Posted by FordPartsGiant Specialist
    A:
    You can Select Your Vehicle to check if 3F2Z-15K864-BA fits your vehicle.
    Posted by FordPartsGiant Specialist
    Q:
    How to remove and install the radio and Speakers on Lincoln MKX? Posted by Customer
    A:
    The radio consists of the Front Controls Interface Module (FCIM) and the Audio Control Module (ACM), with the FCIM located in the center trim panel and the ACM positioned behind it in the dash. While the FCIM can be replaced at home, the ACM requires dealer service for replacement due to necessary module configuration programming. To begin, disconnect the negative battery terminal cable, then remove the center console side trim moldings and the fasteners securing the FCIM before disconnecting its electrical connector. If removing the ACM, take out its mounting screws, pull it out, and disconnect the antenna cable and electrical connectors. For the FCIM, remove its mounting screws, pull it out, and disconnect the electrical connectors. Installation follows the reverse order. For 2015 through 2018 Edge models, remove the left and right floor console side trim panels and the U-shaped trim around the floor shift console, followed by the shift console/cup holder trim panel and storage compartment fasteners. Remove the floor console support fasteners and the instrument panel center vents using a plastic trim tool, then disengage the FCIM retaining screws and remove the FCIM from the instrument panel. For 2019 Edge models, open the floor console storage armrest, disengage the retaining clips around the shift console/cup holder trim panel, and disconnect electrical connectors. Remove the storage bin edge trim fasteners, storage compartment fasteners, gear shift module console frame fasteners, and the instrument panel center vents, then remove the FCIM retaining screws and the FCIM itself. For 2016 and later MKX models, open the floor console storage armrest, disengage the retaining clips around the floor console/cup holder trim panel, and disconnect electrical connectors. Remove the left and right floor console upper side trim panels, the USB/media port trim, and the storage compartment fasteners, then lift and slide the storage compartment away from the instrument panel. Disengage the center speaker grille fasteners, remove the FCIM retaining screws, and take out the FCIM. If removing the FCIM from the trim panel, remove the mounting screws. For the Front Display Interface Module (FDIM), remove the FCIM, then take out the FDIM fasteners, pull the FDIM from the instrument panel, and disconnect its electrical connectors, with installation being the reverse of removal. For door speakers, remove the door trim panel, speaker mounting screws, and pull the speaker out while disconnecting its electrical connectors, with installation following the reverse order. For the front door tweeter speaker, remove the front door trim panel, disconnect the electrical connector, depress the retaining tabs, and remove the speaker, snapping it back into the door trim panel with an audible click, completing the installation in reverse order.
    Posted by FordPartsGiant Specialist
    Q:
    How to remove and install the radio and Speakers on Ford Edge? Posted by Customer
    A:
    The radio consists of the Front Controls Interface Module (FCIM) and the Audio Control Module (ACM), with the FCIM located in the center trim panel and the ACM positioned behind it in the dash. While the FCIM can be replaced at home, the ACM requires dealer service for replacement due to necessary module configuration programming. To begin, disconnect the negative battery terminal cable, then remove the center console side trim moldings and the fasteners securing the FCIM before disconnecting its electrical connector. If removing the ACM, take out its mounting screws, pull it out, and disconnect the antenna cable and electrical connectors. For the FCIM, remove its mounting screws, pull it out, and disconnect the electrical connectors. Installation follows the reverse order. For 2015 through 2018 Edge models, remove the left and right floor console side trim panels and the U-shaped trim around the floor shift console, followed by the shift console/cup holder trim panel and storage compartment fasteners. Remove the floor console support fasteners and the instrument panel center vents using a plastic trim tool, then disengage the FCIM retaining screws and remove the FCIM from the instrument panel. For 2019 Edge models, open the floor console storage armrest, disengage the retaining clips around the shift console/cup holder trim panel, and disconnect electrical connectors. Remove the storage bin edge trim fasteners, storage compartment fasteners, gear shift module console frame fasteners, and the instrument panel center vents, then remove the FCIM retaining screws and the FCIM itself. For 2016 and later MKX models, open the floor console storage armrest, disengage the retaining clips around the floor console/cup holder trim panel, and disconnect electrical connectors. Remove the left and right floor console upper side trim panels, the USB/media port trim, and the storage compartment fasteners, then lift and slide the storage compartment away from the instrument panel. Disengage the center speaker grille fasteners, remove the FCIM retaining screws, and take out the FCIM. If removing the FCIM from the trim panel, remove the mounting screws. For the Front Display Interface Module (FDIM), remove the FCIM, then take out the FDIM fasteners, pull the FDIM from the instrument panel, and disconnect its electrical connectors, with installation being the reverse of removal. For door speakers, remove the door trim panel, speaker mounting screws, and pull the speaker out while disconnecting its electrical connectors, with installation following the reverse order. For the front door tweeter speaker, remove the front door trim panel, disconnect the electrical connector, depress the retaining tabs, and remove the speaker, snapping it back into the door trim panel with an audible click, completing the installation in reverse order.
    Posted by FordPartsGiant Specialist
    Q:
    What is the first step to remove the radio in the 2019 Ford Fusion? Posted by Customer
    A:
    Disconnect the cable from the negative battery terminal.
    Posted by FordPartsGiant Specialist
    See expert answers on similar Car Speakers
    Q:
    How do you disconnect the electrical connectors to the speaker enclosure for the 2008 Ford Mustang? Posted by Customer
    A:
    Remove the speaker enclosure mounting bolts/nuts and move the assembly out enough to disconnect the electrical connectors.
    Posted by FordPartsGiant Specialist
    See expert answers on similar Car Speakers
    Q:
    What is the first step in removing the FCIM for the 2014 Ford Taurus? Posted by Customer
    A:
    Remove the center trim panels.
    Posted by FordPartsGiant Specialist
    See expert answers on similar Car Speakers
    Q:
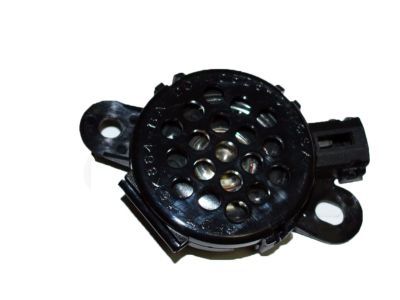
    Where is this parking control aid located? Posted by Customer
    A:
    The parking control aid is usually located by the right rear speaker
    Posted by FordPartsGiant Specialist 19/2/2021
    If you have any questions about this product, please don't hesitate to ask us. We will be happy to help you!

Genuine Ford Part 3F2Z-15K864-BA, the Right Choice

To ensure reliability, purchase Ford part # 3F2Z-15K864-BA Speaker Assy - Parking Control Aid. It is sometimes referred to as Mercury Car Speakers. In terms of quality and longevity, OEM parts are top-tier. This is because they are made according to Ford's demanding factory specifications and go through strict quality control. This part fits specific Mercury Milan, Monterey models.

FordPartsGiant.com is a leading supplier of genuine Ford parts and accessories such as Ford 3F2Z15K864BA Speaker Assy - Parking Control Aid. On our platform, we provide genuine Ford parts at incredible prices while ensuring top-tier quality. Feel at ease shopping with us, knowing our parts have a hassle-free return policy and rapid delivery service. For detailed Mercury parts information, click here.

Why choose Ford Parts Giant

  • Dedicated Service

    Your complete satisfaction is our #1 goal

  • Lowest Prices

    Best deals on genuine OE parts from dealerships

  • Fast Delivery

    Orders are processed and delivered promptly