Make sure this part fits

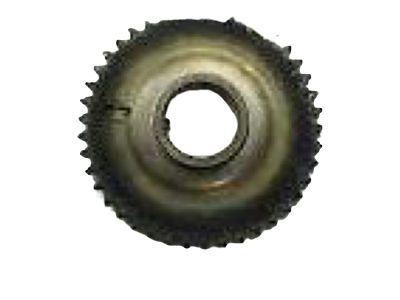
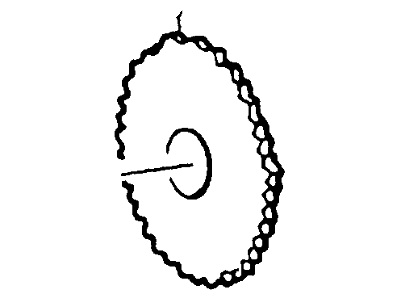
Mercury F3AZ-6256-A Sprocket - Camshaft

1994-1998 Mercury F3AZ6256A

Customer Questions & Expert Answers (7)
Ford F3AZ-6256-A Sprocket - Camshaft
  • Part Description
    SPROCKET - CAMSHAFT
  • Position
    Driver Side
  • Replaced By
    F8AZ-6256-BA
  • Manufacturer
    Ford
Make sure this part fits
$20.20 MSRP: $29.53
You Save: $9.33 (32%)
Ships in 1 Business Day
1
ADD TO CART
  • Related Parts
  • Product Specifications
  • Vehicle Fitment
  • Customer Questions & Expert Answers
  • Product Specifications

    BrandGenuine Mercury
    Manufacturer Part NumberF3AZ-6256-A, F3AZ6256A
    Part DescriptionSPROCKET - CAMSHAFT
    Item Dimensions6.1 x 6.1 x 2.2 inches
    Item Weight1.60 Pounds
    PositionDriver Side
    ConditionNew
    Fitment TypeDirect Replacement
    ManufacturerFord
    SKUF3AZ-6256-A
    WarrantyThis genuine Ford part is guaranteed by Ford's factory warranty.
    Shipping & ReturnShipping Policy Return Policy
    Warning: California’s Proposition 65
  • Vehicle Fitment

    Year Make Model Engine Important vehicle option details
    1994-1997 Mercury Cougar8 Cyl 4.6L4AT, 4AT 4R70W, 4AT AODE
    1994-1998 Mercury Grand Marquis8 Cyl 4.6L4AT, 4AT 4R70W, 4AT AODE
  • Customer Questions & Expert Answers

    Q:
    Is the the correct part for the attached VIN? Posted by FordPartsGiant Specialist
    A:
    You can Select Your Vehicle to check if F3AZ-6256-A fits your vehicle.
    Posted by FordPartsGiant Specialist
    Q:
    How to inspect and replace a timing chain and sprockets on Mercury Grand Marquis? Posted by Customer
    A:
    Remove the negative terminal of the battery and turn the engine to the interface of the piston travel in the number one cylinder. The crankshaft should be rotated 360 degrees and the number one piston should be several degrees before the TDC. Take of the right valve cover and install the dial indicator to the cylinder head so that the plunger part of the instrument touches the number one rocker arm. To do this turn the crankshaft in clockwise direction until the number one piston is on TDC for the second time then read the dial indicator on right side of the timing chain near the pulley and set it to zero. Then rotate the crankshaft anti-clockwise slowly until the pointer of the dial indicator rests on the upward movement, so identify the number of piston stroke it has traveled from the TDC point. In the event that the mark has shifted greater than 10 degrees, replace the timing chain and the sprockets. For timing chain inspection, once again, remove the negative battery cable and remove any parts that will limit the access to the timing chain cover but retain the hoses and wires. Remove the bolts from the accessory brackets and turn the number one piston to TDC on the compression stroke and do not turn the crankshaft until the chain and sprockets are replaced. Unbolt the vibration damper and unbolt the timing chain cover from the block and the oil pan being careful not to mar the cover. Turn the crankshaft in an anti-clockwise direction in order to tire the chain loosely on the left side then compare the degree of chain deflection from a fixed point on the block. If the deflection measurement is found to be more than ½ inch then fitting of a new timing chain and sprockets should be done as a set. Check the condition of the camshaft gear; original ones are aluminum with a nylon surface; they tend to chip, and these small particles may cause restrictions in the oil pump pick-up screen. Also, it is recommended to examine the crankshaft gear for such problems. For timing chain and sprocket removal ensure that the number one piston is at TDC to temporarily avoid crank shaft movement, then remove timing chain cover. Set the timing marks of the crankshaft and the camshaft sprockets before you remove them, if necessary. Take off the three camshaft sprocket mounting bolts and unbolt the chain from both the sprockets. As an installation procedure, always clean the cover and the engine block surfaces so that there is no trace of the old gasket material. Even check the cover flange for some distortion and locate the keyway in the crankshaft sprocket engaging on the Woodruff key while fitting the crank, sprocket to the crankshaft without hammering the sprocket. Rotate the crankshaft until the key is at the top dead center, lay the chain over the camshaft pulley and rotate it until the timing indicator is down. Make sure that there is straight line drawn from the center of the camshaft, the camshaft timing mark, the crankshaft timing mark to the center of the crankshaft before applying Loctite on the camshaft sprocket bolt and tightening it. Replace the timing chain, apply oil to the oil seal contact surface of the Vibration damper hub and fit the damper in the correct orientation and in alignment with the Woodruff key. Replace the rest of the parts in the reverse manner mentioned, pour more coolant, check the oil level and start the engine to check more leakage.
    Posted by FordPartsGiant Specialist
    Q:
    How to inspect and replace a timing chain and sprockets on Ford Crown Victoria? Posted by Customer
    A:
    Remove the negative terminal of the battery and turn the engine to the interface of the piston travel in the number one cylinder. The crankshaft should be rotated 360 degrees and the number one piston should be several degrees before the TDC. Take of the right valve cover and install the dial indicator to the cylinder head so that the plunger part of the instrument touches the number one rocker arm. To do this turn the crankshaft in clockwise direction until the number one piston is on TDC for the second time then read the dial indicator on right side of the timing chain near the pulley and set it to zero. Then rotate the crankshaft anti-clockwise slowly until the pointer of the dial indicator rests on the upward movement, so identify the number of piston stroke it has traveled from the TDC point. In the event that the mark has shifted greater than 10 degrees, replace the timing chain and the sprockets. For timing chain inspection, once again, remove the negative battery cable and remove any parts that will limit the access to the timing chain cover but retain the hoses and wires. Remove the bolts from the accessory brackets and turn the number one piston to TDC on the compression stroke and do not turn the crankshaft until the chain and sprockets are replaced. Unbolt the vibration damper and unbolt the timing chain cover from the block and the oil pan being careful not to mar the cover. Turn the crankshaft in an anti-clockwise direction in order to tire the chain loosely on the left side then compare the degree of chain deflection from a fixed point on the block. If the deflection measurement is found to be more than ½ inch then fitting of a new timing chain and sprockets should be done as a set. Check the condition of the camshaft gear; original ones are aluminum with a nylon surface; they tend to chip, and these small particles may cause restrictions in the oil pump pick-up screen. Also, it is recommended to examine the crankshaft gear for such problems. For timing chain and sprocket removal ensure that the number one piston is at TDC to temporarily avoid crank shaft movement, then remove timing chain cover. Set the timing marks of the crankshaft and the camshaft sprockets before you remove them, if necessary. Take off the three camshaft sprocket mounting bolts and unbolt the chain from both the sprockets. As an installation procedure, always clean the cover and the engine block surfaces so that there is no trace of the old gasket material. Even check the cover flange for some distortion and locate the keyway in the crankshaft sprocket engaging on the Woodruff key while fitting the crank, sprocket to the crankshaft without hammering the sprocket. Rotate the crankshaft until the key is at the top dead center, lay the chain over the camshaft pulley and rotate it until the timing indicator is down. Make sure that there is straight line drawn from the center of the camshaft, the camshaft timing mark, the crankshaft timing mark to the center of the crankshaft before applying Loctite on the camshaft sprocket bolt and tightening it. Replace the timing chain, apply oil to the oil seal contact surface of the Vibration damper hub and fit the damper in the correct orientation and in alignment with the Woodruff key. Replace the rest of the parts in the reverse manner mentioned, pour more coolant, check the oil level and start the engine to check more leakage.
    Posted by FordPartsGiant Specialist
    Q:
    What should be done after removing the rocker arms for the 1993 Mercury Grand Marquis? Posted by Customer
    A:
    Remove the timing chain cover, the crankshaft position sensor toothed wheel, and install the appropriate camshaft holding tools.
    Posted by FordPartsGiant Specialist
    Q:
    What should be removed after installing the camshaft holding tools for the 2007 Ford Crown Victoria? Posted by Customer
    A:
    Remove the right side timing chain tensioner, the right timing chain, the right side stationary guide, the left side timing chain tensioner, the left timing chain, and the left side stationary guide.
    Posted by FordPartsGiant Specialist
    Q:
    What is the next step after zeroing the dial indicator for the 1997 Ford Expedition? Posted by Customer
    A:
    Slowly turn the crankshaft counterclockwise until the slightest movement is seen on the dial indicator, then note how far the number one piston has moved away from TDC.
    Posted by FordPartsGiant Specialist
    Q:
    What should be noted when removing the crankshaft position sensor toothed-wheel for the 2008 Ford Expedition? Posted by Customer
    A:
    The crankshaft sensor toothed wheel has a specific direction for installation; look for the word "front" or "rear" stamped on it.
    Posted by FordPartsGiant Specialist
    See expert answers on similar Variable Timing Sprocket
    If you have any questions about this product, please don't hesitate to ask us. We will be happy to help you!

Genuine Ford Part F3AZ-6256-A, the Right Choice

To ensure reliability, purchase Ford part # F3AZ-6256-A Sprocket - Camshaft. It is sometimes referred to as Mercury Cam Gear, Mercury Variable Timing Sprocket. In terms of quality and longevity, OEM parts are top-tier. This is because they are made according to Ford's demanding factory specifications and go through strict quality control. This part fits specific Mercury Cougar, Grand Marquis models.

FordPartsGiant.com is a leading supplier of genuine Ford parts and accessories such as Ford F3AZ6256A Sprocket - Camshaft. On our platform, we provide genuine Ford parts at incredible prices while ensuring top-tier quality. Feel at ease shopping with us, knowing our parts have a hassle-free return policy and rapid delivery service. For detailed Mercury parts information, click here.

Why choose Ford Parts Giant

  • Dedicated Service

    Your complete satisfaction is our #1 goal

  • Lowest Prices

    Best deals on genuine OE parts from dealerships

  • Fast Delivery

    Orders are processed and delivered promptly