×
- Live Chat
- 1-888-788-9341


My Garage
My Account
Cart
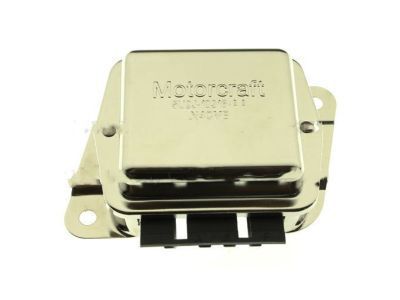
Genuine Mercury Lynx Voltage Regulator
Adjustable Voltage Regulator- Select Vehicle by Model
- Select Vehicle by VIN
Select Vehicle by Model
orMake
Model
Year
Select Vehicle by VIN
For the most accurate results, select vehicle by your VIN (Vehicle Identification Number).
1 Voltage Regulator found
Mercury Lynx Regulator Assembly - Voltage
Part Number: FOPZ-10316-A$38.65 MSRP: $61.64You Save: $22.99 (38%)Ships in 1-2 Business Days
Mercury Lynx Voltage Regulator
We provide a wide range of Mercury Lynx Voltage Regulator at the best prices possible. If you need Mercury Lynx Voltage Regulator, you can shop with confidence on our website. All our OEM parts come with a manufacturer's warranty and are delivered to your door step with a fast delivery service.
Mercury Lynx Voltage Regulator Parts Questions & Experts Answers
- Q: How to replace Voltage Regulator on Mercury Lynx?A: To install the new integral regulator the alternator has to be first unbolted and laid on a clean surface. Fourth, remove the four T20 Torx screws of the voltage regulator and it is recommended to use a special screwdriver in order not to scratch the heads of the screws. Remove the voltage regulator from the board and for the initial models of the circuit, unscrew the insulating plate from the A terminal; in the later models, the tab covering the A screw head should be clipped off. Unscrew the A terminal insulator and the two Torx screws that hold the brush holder in place on the regulator Remove the regulator along with the nuts, brushes and springs in the brush holder. Place the brush holder nuts at their respective place and place the brush lead terminals in between the holder and the nuts. The brushes must be kept in the holder during installation by hooking the short length of stiff wire for early models for later models a piece of flat thin steel is recommended. In preparation for assembly, it is requisite to clean the regulator base plate both inside and outside prior to welding of the regulator and the brush holder. If so required, fit the insulator on the bearing of the A terminal screw head or if the tab was found to be ruptured, then cover the head with electrical tape. Mount the regulator and brush on the alternator, and make sure that brushes will not be a problem once they are put in place, then take out the brush shield. Finally, install the alternator. For the external regulator, remove the negative battery cable and the wire harness from the regulator using a screwdriver and not pulling the wire. If necessary, the mounting bolts can be removed to take the regulator off and installation will be the opposite way.

