Make sure this part fits

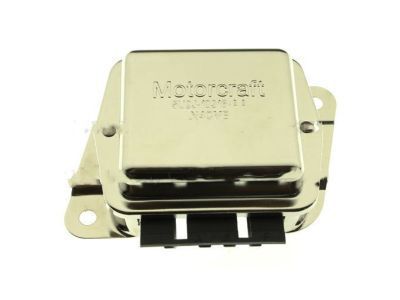
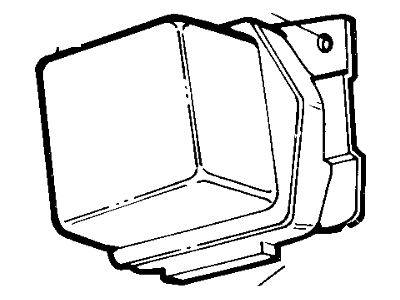
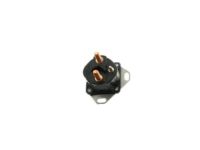
Ford FOPZ-10316-A Regulator Assembly - Voltage

1980-1992 Ford FOPZ10316A

Customer Questions & Expert Answers (14)
Ford FOPZ-10316-A Regulator Assembly - Voltage
  • Part Description
    Regulator Assy - Voltage
  • Base No.
    10316
  • Replaces
    FOAZ-10316-A
  • Manufacturer
    Ford
Make sure this part fits
$35.11 MSRP: $56.00
You Save: $20.89 (38%)
Ships in 1-2 Business Days
1
ADD TO CART
  • Related Parts
  • Product Specifications
  • Vehicle Fitment
  • Customer Questions & Expert Answers
  • Product Specifications

    BrandGenuine Ford
    Base No.10316
    Manufacturer Part NumberFOPZ-10316-A, FOPZ10316A
    Part DescriptionRegulator Assy - Voltage
    Other NamesRegulator, Voltage Regulator
    Item Dimensions4.7 x 1.7 x 4.7 inches
    Item Weight1.00 Pounds
    ConditionNew
    Fitment TypeDirect Replacement
    ReplacesFOAZ-10316-A
    ManufacturerFord
    SKUFOPZ-10316-A
    WarrantyThis genuine Ford part is guaranteed by Ford's factory warranty.
    Shipping & ReturnShipping Policy Return Policy
    Warning: California’s Proposition 65
  • Vehicle Fitment

    Year Make Model Engine Important vehicle option details
    1982-1985 Ford EXP4 Cyl 1.6L3AT ATX, 4MT, 5MT
    1990-1992, 1981-1985 Ford Escort4 Cyl 1.6L, 4 Cyl 1.8L, 4 Cyl 1.9L, 4 Cyl 2.0L3AT ATX, 4AT, 4MT, 5MT
    1980-1983 Ford Fairmont4 Cyl 2.3L, 6 Cyl 3.3L, 8 Cyl 4.2L, 8 Cyl 5.0L3AT C3, 3AT C4, 3AT C5, 4MT
    1990-1992 Ford Festiva4 Cyl 1.3L3AT ATX, 5MT
    1980 Ford Fiesta4 Cyl 1.6L4MT
    1980-1982 Ford Granada4 Cyl 2.3L, 6 Cyl 3.3L, 6 Cyl 3.8L, 6 Cyl 4.1L, 8 Cyl 4.2L, 8 Cyl 5.0L3AT C3, 3AT C4, 3AT C5, 4MT
    1980-1986 Ford Mustang4 Cyl 2.3L, 6 Cyl 3.3L, 6 Cyl 3.8L, 8 Cyl 4.2L, 8 Cyl 5.0L3AT C3, 3AT C4, 3AT C5, 4AT AOD, 4MT, 5MT
    1980 Ford Pinto4 Cyl 2.3L3AT C3, 3AT C4
    1990-1992 Ford Probe4 Cyl 2.2L, 6 Cyl 3.0L4AT, 5MT
    1986-1992 Ford Taurus4 Cyl 2.5L, 6 Cyl 3.0L, 6 Cyl 3.8L3AT ATX, 4AT AX4S, 4AT AXOD, 4AT AXOD-E, 5MT
    View More
  • Customer Questions & Expert Answers

    Q:
    Is the the correct part for the attached VIN? Posted by FordPartsGiant Specialist
    A:
    You can Select Your Vehicle to check if FOPZ-10316-A fits your vehicle.
    Posted by FordPartsGiant Specialist
    Q:
    How do you replace the Voltage Regulator on Ford Thunderbird? Posted by Customer
    A:
    To remove the alternator, set it on a clean workbench and detach the voltage regulator by removing the four mounting screws. Then, remove the plastic cover over one of the brush retaining screws and separate the brush leads from the holder by removing the screws and nuts. Take note of the brush relationship and remove both brushes, being careful not to lose the springs. If installing a new voltage regulator, insert the old brushes into the brush holder of the new regulator, or insert new brushes into the brush holder of the old regulator. Install the brush lead retaining screws and nuts, and cover the head of the "A" terminal screw with electrical tape. Use a thin wire, like a paper clip, to hold the brushes in the retracted position during regulator installation. Carefully install the regulator, ensuring the brushes don't hang on the rotor and the brush leads are looped toward the brush end of the holder. Tighten the regulator screws securely and remove the paper clip. For an internal fan type alternator, remove the four through bolts retaining the case together. Heat the bearing portion of the rear case with a soldering iron and then insert a flat-bladed screwdriver between the stator core and mounting flange to remove the rear cover. Use a soldering iron to remove solder from the rectifier and stator lead, and unsolder the regulator/brush holder assembly from the rectifier. Remove the solder from the brush pigtails. To install, reverse the removal procedure, making sure to push the brushes into the holder and use a paper clip to retain them in the retracted position when installing the rear cover. Heat the rear case bearing area before installing the rear case and remove the paper clip after installation.
    Posted by FordPartsGiant Specialist
    Q:
    What is the purpose and test procedure for an independent voltage regulator on Ford Pinto? Posted by Customer
    A:
    This type of voltage regulator is stand-alone and is situated inside the engine compartment; it can be either mechanical or electronic, based on the date of the vehicle manufacture and its type. The mechanical type is a closed-unit with no settings; in case it is suspected faulty due to battery charging problems, a voltmeter check can be performed by attaching leads on the battery terminals and observing the reading with all the electrical loads switched off. The engine should be started and idled at 1800 to 2200 rpms for few minutes with the voltmeter reading as expected to be 1 to 2 volts high than the starting reading. If the difference measured is less than 1 volt or is more than 2.5 volts then it is probable that the regulator is defective and needs to be replaced. For the electrical loads, a drop of not more than one volt when they activate should be observed; if not, then the regulator should be replaced. Before disconnecting the voltage regulator, battery current should be disconnected and if the regulator is placed behind the battery the battery should be shifted towards the front side. Like in the electro-mechanical type, voltage regulation is done by transistors and diodes but the levels can be adjusted if the regulator has reached the normal temperature. It should also be noted that adjusting screw must be rotated with an insulated tool, as in the case of the mechanical type of the unit. The electronic type, which is available in the later models, is enclosed, and should not be disassembled; when it has a problem, the entire assembly has to be replaced. In particular, it is necessary not to connect an old regulator to a new alternator, and there are individual rules for working with sealed electronic regulators: check the correct connection and connection before testing or adjustment.
    Posted by FordPartsGiant Specialist
    Q:
    How to replace External Voltage Regulator on Lincoln Mark VII? Posted by Customer
    A:
    To detach the cable from the negative terminal of the battery, locate the voltage regulator on the right side of the engine compartment. The external voltage regulator is placed in the corner of the engine compartment and then unplug the electrical connector from the voltage regulator, and remove the regulator mounting bolts. The installation is the reverse of removal.
    Posted by FordPartsGiant Specialist
    Q:
    How do you replace the Voltage Regulator of lAR-type alternator on Lincoln Mark VII? Posted by Customer
    A:
    To remove the alternator, set it on a clean workbench. Then, remove the four voltage regulator mounting screws to detach the voltage regulator/brush holder assembly. Lift the assembly from the alternator and detach the rubber plugs. Remove the brush lead retaining screws and nuts to separate the brush leads from the holder. Note that the screws have Torx heads and require a special screwdriver. After noting the relationship of the brushes to the brush holder assembly, remove both brushes, being careful not to lose the springs. If installing a new voltage regulator, insert the old brushes into the brush holder of the new regulator. If installing new brushes, insert them into the brush holder of the old regulator, ensuring the springs are properly compressed and the brushes are properly inserted into the recesses in the brush holder. Install the brush lead retaining screws and nuts. Insert a short section of wire, like a paper clip, through the hole in the voltage regulator to hold the brushes in the retracted position during regulator installation. Carefully install the regulator, making sure the brushes don't hang up on the rotor. Install the voltage regulator screws and tighten them securely. Finally, remove the wire or paper clip and install the alternator.
    Posted by FordPartsGiant Specialist
    Q:
    What is the purpose and test procedure for an independent voltage regulator on Mercury Bobcat? Posted by Customer
    A:
    This type of voltage regulator is stand-alone and is situated inside the engine compartment; it can be either mechanical or electronic, based on the date of the vehicle manufacture and its type. The mechanical type is a closed-unit with no settings; in case it is suspected faulty due to battery charging problems, a voltmeter check can be performed by attaching leads on the battery terminals and observing the reading with all the electrical loads switched off. The engine should be started and idled at 1800 to 2200 rpms for few minutes with the voltmeter reading as expected to be 1 to 2 volts high than the starting reading. If the difference measured is less than 1 volt or is more than 2.5 volts then it is probable that the regulator is defective and needs to be replaced. For the electrical loads, a drop of not more than one volt when they activate should be observed; if not, then the regulator should be replaced. Before disconnecting the voltage regulator, battery current should be disconnected and if the regulator is placed behind the battery the battery should be shifted towards the front side. Like in the electro-mechanical type, voltage regulation is done by transistors and diodes but the levels can be adjusted if the regulator has reached the normal temperature. It should also be noted that adjusting screw must be rotated with an insulated tool, as in the case of the mechanical type of the unit. The electronic type, which is available in the later models, is enclosed, and should not be disassembled; when it has a problem, the entire assembly has to be replaced. In particular, it is necessary not to connect an old regulator to a new alternator, and there are individual rules for working with sealed electronic regulators: check the correct connection and connection before testing or adjustment.
    Posted by FordPartsGiant Specialist
    Q:
    How do you replace the voltage regulator of lAR-type alternator on Mercury Capri? Posted by Customer
    A:
    To begin with, you have to remove the alternator and place it on a clean workbench. The voltage regulator/brush holder assembly can be detached by removing the four mounting screws. First, separate the voltage regulator and rubber plugs. After that, separate the brush leads from the holder by removing brush lead retaining screws and nuts. Remember, these screws require a special screwdriver because they have Torx heads in them. To avoid complex situations during the reinstallation of an entirely new voltage regulator, remove both brushes cautiously while avoiding loss of springs. Assuming you are fitting new brushes, place them into old regulator's brush holder then for new voltage regulators insert older brushes into the new regulators' brush holders. Ensure that springs are compressed and that brushes are installed properly in recesses on the brush holder. When fitting the regulator wire use a short wire like a paper clip to hold back brushes in a retracted position.
    Posted by FordPartsGiant Specialist
    Q:
    How do you replace the External voltage regulator on Mercury Capri? Posted by Customer
    A:
    Detach the cable from the negative terminal of the battery. Locate the voltage regulator on the right side of the engine compartment. If necessary, remove the battery or air cleaner duct to gain access to the voltage regulator. Unplug the electrical connector from the voltage regulator. Remove the regulator mounting bolts. Remove the regulator. Installation is the reverse of removal.
    Posted by FordPartsGiant Specialist
    Q:
    How do you replace the Voltage Regulator of lAR-type alternator on Lincoln Town Car? Posted by Customer
    A:
    To remove the alternator, set it on a clean workbench. Then, remove the four voltage regulator mounting screws to detach the voltage regulator/brush holder assembly. Lift the assembly from the alternator and detach the rubber plugs. Remove the brush lead retaining screws and nuts to separate the brush leads from the holder. Note that the screws have Torx heads and require a special screwdriver. After noting the relationship of the brushes to the brush holder assembly, remove both brushes, being careful not to lose the springs. If installing a new voltage regulator, insert the old brushes into the brush holder of the new regulator. If installing new brushes, insert them into the brush holder of the old regulator, ensuring the springs are properly compressed and the brushes are properly inserted into the recesses in the brush holder. Install the brush lead retaining screws and nuts. Insert a short section of wire, like a paper clip, through the hole in the voltage regulator to hold the brushes in the retracted position during regulator installation. Carefully install the regulator, making sure the brushes don't hang up on the rotor. Install the voltage regulator screws and tighten them securely. Finally, remove the wire or paper clip and install the alternator.
    Posted by FordPartsGiant Specialist
    Q:
    How to replace the External Voltage Regulator on Mercury Grand Marquis? Posted by Customer
    A:
    To detach the negative terminal cable of the battery, locate the voltage regulator on the right side of the engine compartment. Remove the battery or air cleaner duct to gain access to the voltage regulator if needed. Unplug the electrical connector from the voltage regulator and remove the mounting bolts and remove the regulator. Installation is the reverse of removal.
    Posted by FordPartsGiant Specialist
    Q:
    How do you replace the Voltage Regulator on Mercury Cougar? Posted by Customer
    A:
    To remove the alternator, set it on a clean workbench and detach the voltage regulator by removing the four mounting screws. Then, remove the plastic cover over one of the brush retaining screws and separate the brush leads from the holder by removing the screws and nuts. Take note of the brush relationship and remove both brushes, being careful not to lose the springs. If installing a new voltage regulator, insert the old brushes into the brush holder of the new regulator, or insert new brushes into the brush holder of the old regulator. Install the brush lead retaining screws and nuts, and cover the head of the "A" terminal screw with electrical tape. Use a thin wire, like a paper clip, to hold the brushes in the retracted position during regulator installation. Carefully install the regulator, ensuring the brushes don't hang on the rotor and the brush leads are looped toward the brush end of the holder. Tighten the regulator screws securely and remove the paper clip. For an internal fan type alternator, remove the four through bolts retaining the case together. Heat the bearing portion of the rear case with a soldering iron and then insert a flat-bladed screwdriver between the stator core and mounting flange to remove the rear cover. Use a soldering iron to remove solder from the rectifier and stator lead, and unsolder the regulator/brush holder assembly from the rectifier. Remove the solder from the brush pigtails. To install, reverse the removal procedure, making sure to push the brushes into the holder and use a paper clip to retain them in the retracted position when installing the rear cover. Heat the rear case bearing area before installing the rear case and remove the paper clip after installation.
    Posted by FordPartsGiant Specialist
    Q:
    How to replace Voltage Regulator on Mercury Lynx? Posted by Customer
    A:
    To install the new integral regulator the alternator has to be first unbolted and laid on a clean surface. Fourth, remove the four T20 Torx screws of the voltage regulator and it is recommended to use a special screwdriver in order not to scratch the heads of the screws. Remove the voltage regulator from the board and for the initial models of the circuit, unscrew the insulating plate from the A terminal; in the later models, the tab covering the A screw head should be clipped off. Unscrew the A terminal insulator and the two Torx screws that hold the brush holder in place on the regulator Remove the regulator along with the nuts, brushes and springs in the brush holder. Place the brush holder nuts at their respective place and place the brush lead terminals in between the holder and the nuts. The brushes must be kept in the holder during installation by hooking the short length of stiff wire for early models for later models a piece of flat thin steel is recommended. In preparation for assembly, it is requisite to clean the regulator base plate both inside and outside prior to welding of the regulator and the brush holder. If so required, fit the insulator on the bearing of the A terminal screw head or if the tab was found to be ruptured, then cover the head with electrical tape. Mount the regulator and brush on the alternator, and make sure that brushes will not be a problem once they are put in place, then take out the brush shield. Finally, install the alternator. For the external regulator, remove the negative battery cable and the wire harness from the regulator using a screwdriver and not pulling the wire. If necessary, the mounting bolts can be removed to take the regulator off and installation will be the opposite way.
    Posted by FordPartsGiant Specialist
    Q:
    What should you do if necessary to gain access to the voltage regulator for the 1982 Lincoln Town Car? Posted by Customer
    A:
    Remove the battery or air cleaner duct.
    Posted by FordPartsGiant Specialist
    See expert answers on similar Voltage Regulator
    Q:
    How do you remove the brushes for the 2003 Mercury Grand Marquis? Posted by Customer
    A:
    Carefully remove both brushes, being careful not to lose the springs.
    Posted by FordPartsGiant Specialist
    See expert answers on similar Voltage Regulator
    If you have any questions about this product, please don't hesitate to ask us. We will be happy to help you!

Genuine Ford Part FOPZ-10316-A, the Right Choice

To ensure reliability, purchase Ford part # FOPZ-10316-A Regulator Assembly - Voltage. It is sometimes referred to as Ford Voltage Regulator. In terms of quality and longevity, OEM parts are top-tier. This is because they are made according to Ford's demanding factory specifications and go through strict quality control. This part fits specific Ford EXP, Escort, Mustang models. It fits Lincoln Continental, Mark VI, Versailles. It also fits Mercury Bobcat, Capri, Cougar.

FordPartsGiant.com is a leading supplier of genuine Ford parts and accessories such as Ford FOPZ10316A Regulator Assembly - Voltage. On our platform, we provide genuine Ford parts at incredible prices while ensuring top-tier quality. Feel at ease shopping with us, knowing our parts have a hassle-free return policy and rapid delivery service. For detailed Ford parts information, click here.

Why choose Ford Parts Giant

  • Dedicated Service

    Your complete satisfaction is our #1 goal

  • Lowest Prices

    Best deals on genuine OE parts from dealerships

  • Fast Delivery

    Orders are processed and delivered promptly