Make sure this part fits

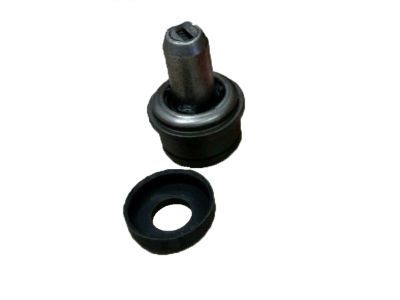
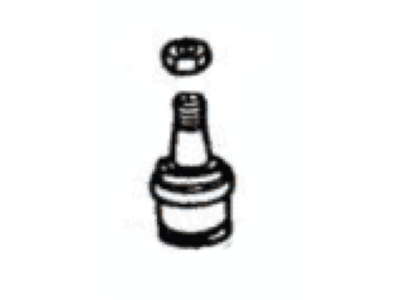
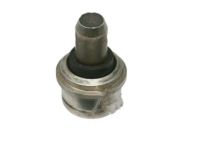
Ford F5UZ-3V049-A Joint Assembly - Ball

1990-2004 Ford F5UZ3V049A

Customer Questions & Expert Answers (8)
Ford F5UZ-3V049-A Joint Assembly - Ball
  • Part Description
    Joint Assy - Ball
  • Replaced By
    2U2Z-3V049-A
  • Manufacturer
    Ford
Make sure this part fits
$30.11 MSRP: $41.14
You Save: $11.03 (27%)
1
ADD TO CART
  • Related Parts
  • Product Specifications
  • Vehicle Fitment
  • Customer Questions & Expert Answers
  • Product Specifications

    BrandGenuine Ford
    Manufacturer Part NumberF5UZ-3V049-A, F5UZ3V049A
    Part DescriptionJoint Assy - Ball
    Manufacturer Note4x2
    Item Dimensions9.3 x 5.1 x 5.2 inches
    Item Weight1.80 Pounds
    ConditionNew
    Fitment TypeDirect Replacement
    Require Quantity2
    ManufacturerFord
    SKUF5UZ-3V049-A
    WarrantyThis genuine Ford part is guaranteed by Ford's factory warranty.
    Shipping & ReturnShipping Policy Return Policy
    Warning: California’s Proposition 65
  • Vehicle Fitment

    Year Make Model Engine Important vehicle option details
    1990 Ford Bronco II6 Cyl 2.9L4AT A4LD, 4AT AOD, 5MT
    1992-2004 Ford E-1506 Cyl 4.2L, 6 Cyl 4.9L, 8 Cyl 4.6L, 8 Cyl 5.0L, 8 Cyl 5.4L, 8 Cyl 5.8L3AT C6, 4AT 4R100, 4AT 4R70W, 4AT 4R75W, 4AT AOD, 4AT E4OD
    1992-2004 Ford E-2506 Cyl 4.2L, 6 Cyl 4.9L, 8 Cyl 4.6L, 8 Cyl 5.4L, 8 Cyl 5.8L3AT C6, 4AT 4R100, 4AT 4R70W, 4AT AOD, 4AT E4OD
    1992-2004 Ford E-350/E-350 Super Duty10 Cyl 6.8L, 6 Cyl 4.9L, 8 Cyl 5.4L, 8 Cyl 5.8L, 8 Cyl 6.0L Diesel Turbocharged, 8 Cyl 7.3L Diesel, 8 Cyl 7.3L Diesel Turbocharged, 8 Cyl 7.5L3AT C6, 4AT 4R100, 4AT 4R70W, 4AT 4R75W, 4AT AOD, 4AT E4OD, 5AT
    2002-2004 Ford E-450 Super Duty10 Cyl 6.8L, 8 Cyl 5.4L4AT 4R100, 4AT 4R70W
    1996-1999 Ford Econoline Super Duty(1996-1999)10 Cyl 6.8L, 8 Cyl 5.4L, 8 Cyl 5.8L, 8 Cyl 7.3L Diesel Turbocharged, 8 Cyl 7.5L3AT C6, 4AT 4R100, 4AT 4R70W, 4AT E4OD
    1991-1994 Ford Explorer6 Cyl 4.0L4AT A4LD, 5MT
    1990-1996 Ford F-1506 Cyl 3.8L, 6 Cyl 4.9L, 8 Cyl 5.0L, 8 Cyl 5.8L3AT C6, 4AT 4R70W, 4AT 4R75W, 4AT AOD, 4AT E4OD, 4MT, 5MT
    1990-1997 Ford F-2506 Cyl 4.9L, 8 Cyl 4.6L, 8 Cyl 4.9L, 8 Cyl 5.0L, 8 Cyl 5.4L, 8 Cyl 5.8L, 8 Cyl 7.3L, 8 Cyl 7.5L3AT C6, 4AT 4R70W, 4AT AOD, 4AT E4OD, 4MT, 5MT
    1990-1997 Ford F-3506 Cyl 4.9L, 8 Cyl 5.0L, 8 Cyl 5.8L, 8 Cyl 7.3L, 8 Cyl 7.5L3AT C6, 4AT AOD, 4AT E4OD, 4MT, 5MT
    View More
  • Customer Questions & Expert Answers

    Q:
    Is the the correct part for the attached VIN? Posted by FordPartsGiant Specialist
    A:
    You can Select Your Vehicle to check if F5UZ-3V049-A fits your vehicle.
    Posted by FordPartsGiant Specialist
    Q:
    How to remove and install balljoints on Ford Ranger? Posted by Customer
    A:
    For the 2WD sub-models, the removal is done by first removing the spindle after which unscrewing of the snap ring from the lower ball joint which practically means that the lower ball joint is removed from the spindle first. Use a special C-frame assembly tool in combination with the correct receiving cup to press the lower ball joint out of the spindle; if you do not have a suitable cup, contact a dealership or machine shop. Like the lower ball joint, the tool setup is repeated on the upper balljoint and pressed out too. When fitting the upper balljoint, use the C-frame assembly and the receiver cup to tighten the screw until fully seated, to avoid the heating of the parts. Further ontinine with the same tolls as above, press the lower balljoint into the axle until it is flush then fit the lower balljoint snap ring. For 4WD models, the tasks include the elimination of the spindle, axleshaft, and its joint, further, they need to dismantle the cotter pin and nut of the tie-rod. Shunt the snap ring from the above ball joint and the screw of pinch bolt also the cotter pin was removed and the nut was loosened of the lower ball joint. Tap on the inside of the steering knuckle close to each balljoint to release the axle arm fro mthe car and unbolt the camber adjuster sleeve, put a mark on it so that it can easily be realigned. Lose the nut on the lower ball joint and mount the steering knuckle in a vise to extract the snap ring from the lower ball joint socket. Utilize the C-frame assembly tool for pressing out the lower balljoint; do the same for the upper one. All the dust and debris around and inside the steering knuckle balljoint bores must then be removed, then the lower balljoint slot must then be aligned with the knuckle and the C-frame assembly that is to be placed in is then inserted and set in its position with a slight press. Insert lower balljoint snap ring and again perform the procedure for upper balljoint. Replace the camber adjuster on its right place so that the arrow provides correct indications for camber correction. Position the steering knuckle as the camber adjuster was set without moving it; torque the lower ball joint with a new nut; add a cotter pin. Fit the tie-rod end to the knuckle, then nut the tie-rod and put a new cotter pin to keep the nut tight. Reverse the above removal process to complete the installation and take the front end alignment.
    Posted by FordPartsGiant Specialist
    Q:
    How to inspect, remove, and install a upper ball joint on Ford Bronco II? Posted by Customer
    A:
    Check and adjust the front wheel bearings by raising the vehicle and positioning a jack stand under the I-beam axle beneath the coil spring. Have a helper grasp the lower edge of the tire and move the wheel assembly in and out while observing the upper spindle arm and the upper part of the axle jaw. A movement of 1/32 in. (0.8mm) or greater between the upper part of the axle jaw and the upper spindle arm indicates that the upper ball joint must be replaced. To remove and install, raise and support the vehicle safely with jack stands, then remove the spindle and the ball joint assembly. Take off the snap ring from the ball joint and use a ball joint removal tool to detach the ball joint from the spindle, avoiding any heating of the ball joint or axle. Installation follows the reverse of the removal procedure, ensuring the ball joint stud nut is torqued to 85-110 ft. lbs. for 1983-89 Ranger and Bronco II models.
    Posted by FordPartsGiant Specialist
    Q:
    How do you remove and install balljoints on Ford Explorer? Posted by Customer
    A:
    For 1991 through 1993 2WD models, removal starts with the spindle followed by the elimination of the snap-ring from the lower ball joint with the lower ball joint being first. By using a special ball joint assembly tool with the appropriate receiving cup one can force the lower ball joint out of the spindle; if this is not possible, one should consult a dealer or a machine shop. Do the same for the upper ball joint and secure it with the same tools used putting it into the axle without heating of the components. This is done as follows: Mount the lower balljoint as described above and tighten it with the snap-ring; later carry out a front-end alignment test. For four-wheel models, the spindle and shaft assembly needs to be removed of which the tie-rod and upper ball joint need to be detached. After the camber adjuster sleeve is out, one has to take out the lower balljoint using a vise and a tool to press it out. Very carefully scrape the channel in the steering knuckle bores before fitting the new lower balljoint which has to be straight and seating it into properly. Proceed with the upper balljoint with due regard for the camber adjuster and tighten the steering knuckle with a new nut and a cotter pin. Last of all, install the tie-rod end and examine the front-end geometry. As for the models manufactured after 1995, the balljoints both on the upper and lower control arms are non- serviceable; replace the control arm if it is damaged. The lower ball joint is interference fit in the 2005 model, meaning that it has to be pressed out using a removal tool after removing the spindle /knuckle and snapping off the snap-ring, and then it has to be pressed in the same manner.
    Posted by FordPartsGiant Specialist
    Q:
    How do you install the lower balljoint on early 1991 Ford F-250 axles? Posted by Customer
    A:
    Assemble the balljoint press and the appropriate adapters over the new balljoint, turn the forcing screw on the clamp until the balljoint is seated, and install the snap-ring. Always install the lower balljoint first. Repeat the procedure on the upper balljoint and install the snap-ring.
    Posted by FordPartsGiant Specialist
    See expert answers on similar Ball Joint
    Q:
    What should be done after removing the inner wheel bearing for the 1985 Ford Bronco II? Posted by Customer
    A:
    Remove the inner and outer bearing cups from the rotor with a bearing cup puller.
    Posted by FordPartsGiant Specialist
    Q:
    What should be removed from the 1987 Ford Bronco II after raising and supporting it? Posted by Customer
    A:
    Remove the spindle and the ball joint assembly from the vehicle.
    Posted by FordPartsGiant Specialist
    Q:
    VIN: 1FBNE31L6WHA39420 Part Number: F5UZ-3V049-A Is this the lower ball joint? If it is, what's the part # for upper ball joint? Thanks Posted by Customer: 1998 Ford E-350/E-350 Super Duty
    A:
    2U2Z-3V049-A is the lower ball joint and XC2Z-3V050-AA is the upper.
    Posted by FordPartsGiant Specialist 4/11/2021
    If you have any questions about this product, please don't hesitate to ask us. We will be happy to help you!

Genuine Ford Part F5UZ-3V049-A, the Right Choice

To ensure reliability, purchase Ford part # F5UZ-3V049-A Joint Assembly - Ball. It is sometimes referred to as Ford Ball Joint. In terms of quality and longevity, OEM parts are top-tier. This is because they are made according to Ford's demanding factory specifications and go through strict quality control. This part fits specific Ford E-350/E-350 Super Duty, F-150, Ranger models.

FordPartsGiant.com is a leading supplier of genuine Ford parts and accessories such as Ford F5UZ3V049A Joint Assembly - Ball. On our platform, we provide genuine Ford parts at incredible prices while ensuring top-tier quality. Feel at ease shopping with us, knowing our parts have a hassle-free return policy and rapid delivery service. For detailed Ford parts information, click here.

Why choose Ford Parts Giant

  • Dedicated Service

    Your complete satisfaction is our #1 goal

  • Lowest Prices

    Best deals on genuine OE parts from dealerships

  • Fast Delivery

    Orders are processed and delivered promptly