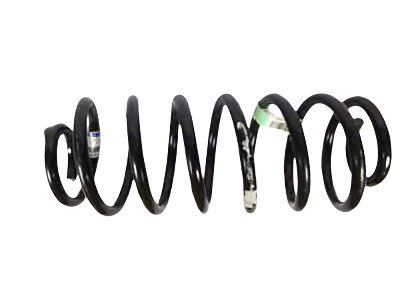
Make sure this part fits

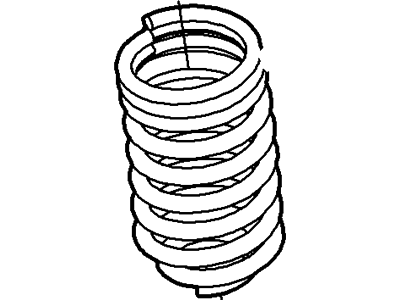
Ford 3W7Z-5560-CA Spring - Rear

1994-2011 Ford 3W7Z5560CA

Customer Questions & Expert Answers (5)
Ford 3W7Z-5560-CA Spring - Rear
  • Part Description
    Spring - Rear
  • Base No.
    5560
  • Position
    Rear
  • Replaces
    F4AZ-5560-A, F8AZ-5560-DA
  • Manufacturer
    Ford
Make sure this part fits
$80.28 MSRP: $111.50
You Save: $31.22 (28%)
Ships in 1-2 Business Days
1
ADD TO CART
  • Related Parts
  • Product Specifications
  • Vehicle Fitment
  • Customer Questions & Expert Answers
  • Product Specifications

    BrandGenuine Ford
    Base No.5560
    Manufacturer Part Number3W7Z-5560-CA, 3W7Z5560CA
    Part DescriptionSpring - Rear
    Other NamesCoil Spring, Spring
    Item Dimensions6.0 x 5.9 x 16.2 inches
    Item Weight8.10 Pounds
    PositionRear
    ConditionNew
    Fitment TypeDirect Replacement
    ReplacesF4AZ-5560-A, F8AZ-5560-DA
    Require Quantity2
    ManufacturerFord
    SKU3W7Z-5560-CA
    Shipping & ReturnShipping Policy Return Policy
    Warning: California’s Proposition 65
  • Vehicle Fitment

    Year Make Model Engine Important vehicle option details
    1994-2011 Ford Crown Victoria8 Cyl 4.6L, 8 Cyl 4.6L Romeo SOHC EFI4-Speed Automatic Transmission 4R75E Livonia, 4AT, 4AT 4R70W, 4AT 4R75W, 4AT AOD-E, Left Hand Drive, Rear-Wheel Drive (Left Hand Drive)
    1994-2011 Mercury Grand Marquis8 Cyl 4.6L, 8 Cyl 4.6L Romeo SOHC EFI4-Speed Automatic Transmission 4R75E Livonia, 4AT, 4AT 4R70W, 4AT AODE, Left Hand Drive, Rear-Wheel Drive (Left Hand Drive)
  • Customer Questions & Expert Answers

    Q:
    I would like to know is this part gonna fit with my car Posted by FordPartsGiant Specialist
    A:
    You can Select Your Vehicle to check if 3W7Z-5560-CA fits your vehicle.
    Posted by FordPartsGiant Specialist
    Q:
    How to remove and install rear coil springs on Mercury Grand Marquis? Posted by Customer
    A:
    Loosen the wheel lug nuts, raise the rear of the vehicle and support it securely on jackstands placed under the frame. Remove the wheel and block the front wheels. Remove the rear stabilizer bar. Support the rear axle assembly with a jack placed under the axle housing. Position a safety chain through one of the spring coils and around a convenient frame member. This will prevent the spring from flying out before it's fully extended. Unsnap the right parking brake cable clip from the right upper suspension arm. Disconnect the lower studs of the two rear shock absorbers from their mounting brackets on the axle tube. Detach the height sensor connector link from the upper control arm. On 1998 and later models, the lateral arms that are part of the Watts linkage must be disconnected at the chassis ends. Slowly lower the jack until the spring is fully extended. Remove the safety chain, coil spring and insulators from between the suspension arm and the spring upper seat. Set the upper insulator on top of the spring, using tape to hold it in place, if necessary. Place the spring between its seat on the axle tube and the frame seat, so that the pigtail (the lower end of the spring) is pointing toward the left side of the vehicle. Raise the axle assembly with the floor jack and insert the studs on the lower ends of the shocks into their holes in the brackets on the axle tubes. Install the stud retaining nuts, but don't fully tighten them yet. Snap the right parking brake cable into the upper suspension arm retainer. Install the rear stabilizer bar. Connect the height sensor connector link to the upper control arm. Remove the jackstands and lower the vehicle. Before attempting to drive a vehicle equipped with air suspension, turn the air suspension switch to On, start the engine and allow the compressor to inflate the air suspension springs (they deflate automatically when the rear of the vehicle is raised).
    Posted by FordPartsGiant Specialist
    Q:
    What should be done after disconnecting the components and lowering the axle assembly for the 2010 Ford Crown Victoria? Posted by Customer
    A:
    Slowly lower the jack until the coil spring is fully extended. Remove the safety chain, coil spring, and insulators from between the suspension arm and the spring upper seat.
    Posted by FordPartsGiant Specialist
    See expert answers on similar Coil Springs
    Q:
    What steps are involved in the installation of the coil spring for the 2000 Ford Crown Victoria? Posted by Customer
    A:
    Place the spring upper insulator on the spring and secure it with tape. Install the spring compressor according to the manufacturer's instructions and compress the spring. Position the spring on the lower control arm, ensuring the lower end properly engages with the seat. On 1988 through 1991 models, align the end of the spring to cover the first hole in the lower control arm spring seat, leaving the second hole uncovered. Carefully raise the lower control arm, guiding the inner end to align with the bolt holes in the frame. Install the pivot bolts into the control arm and the frame. Loosely attach the nuts on the bolts. Attach the center link to the Pitman arm. Attach the lower end of the shock absorber to the lower control arm. On 1988 through 1991 models, attach the stabilizer bar to the link. Install the shock absorber. Install the wheels. Remove the jackstands, lower the floor jack, and lower the vehicle. Tighten the wheel lug nuts to the specified torque. After lowering the vehicle, tighten the lower control arm pivot bolt nuts to the specified torque. This can also be done with the vehicle on jackstands by raising the lower control arm with a floor jack to simulate normal ride height.
    Posted by FordPartsGiant Specialist
    See expert answers on similar Coil Springs
    Q:
    What steps are involved in the installation of the coil spring for the 1991 Mercury Grand Marquis? Posted by Customer
    A:
    Place the spring upper insulator on the spring and secure it with tape. Install the spring compressor according to the manufacturer's instructions and compress the spring. Position the spring on the lower control arm, ensuring the lower end properly engages with the seat. On 1988 through 1991 models, align the end of the spring to cover the first hole in the lower control arm spring seat, leaving the second hole uncovered. Carefully raise the lower control arm, guiding the inner end to align with the bolt holes in the frame. Install the pivot bolts into the control arm and the frame. Loosely attach the nuts on the bolts. Attach the center link to the Pitman arm. Attach the lower end of the shock absorber to the lower control arm. On 1988 through 1991 models, attach the stabilizer bar to the link. Install the shock absorber. Install the wheels. Remove the jackstands, lower the floor jack, and lower the vehicle. Tighten the wheel lug nuts to the specified torque. After lowering the vehicle, tighten the lower control arm pivot bolt nuts to the specified torque. This can also be done with the vehicle on jackstands by raising the lower control arm with a floor jack to simulate normal ride height.
    Posted by FordPartsGiant Specialist
    See expert answers on similar Coil Springs
    If you have any questions about this product, please don't hesitate to ask us. We will be happy to help you!

Genuine Ford Part 3W7Z-5560-CA, the Right Choice

Your vehicle deserves only genuine OEM Ford parts and accessories. To ensure reliability, purchase Ford part # 3W7Z-5560-CA Spring - Rear with base parts number 5560. It is sometimes referred to as Ford Coil Springs. Our Ford parts and accessories are expedited directly from authorized Ford dealers strategically located all across the U.S. and are backed by the manufacturer's 12 month, 12,000 mile warranty. OEM Ford parts are the best for restoring your vehicle to factory condition performance. This part fits specific Ford Crown Victoria models. It fits Mercury Grand Marquis.

Affordable, reliable and built to last, Ford part # 3W7Z5560CA Spring - Rear stands out as the smart option. FordPartsGiant.com is your prime online source with the biggest and best selection of genuine Ford parts and accessories at giant discounted prices. We have the OEM Ford parts and accessories you need at the wholesale prices. FordPartsGiant.com has you covered no matter what type of Ford vehicle you drive. For detailed Ford parts information, click here.

Why choose Ford Parts Giant

  • Dedicated Service

    Your complete satisfaction is our #1 goal

  • Lowest Prices

    Best deals on genuine OE parts from dealerships

  • Fast Delivery

    Orders are processed and delivered promptly