Make sure this part fits

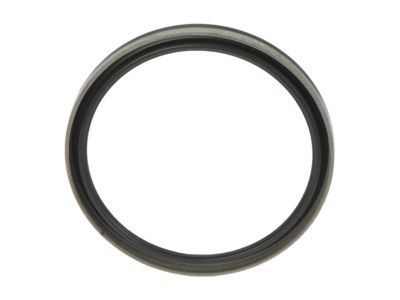
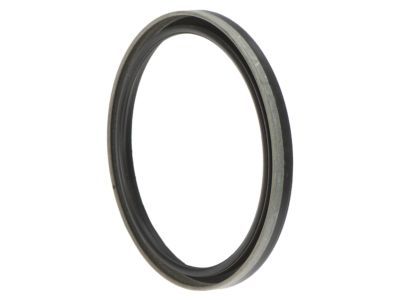
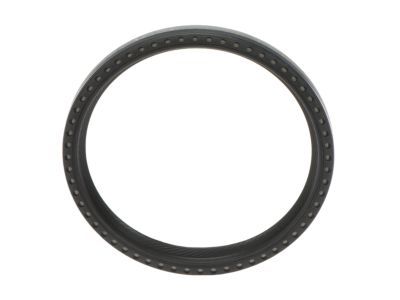
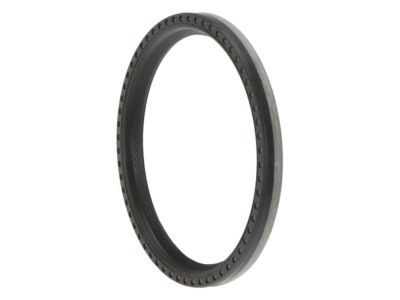
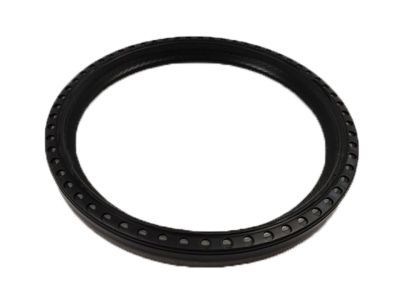
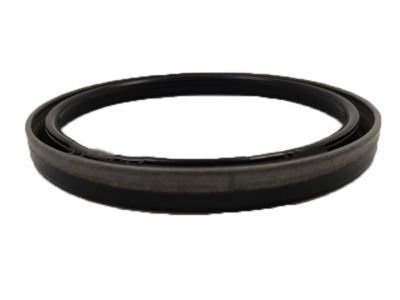
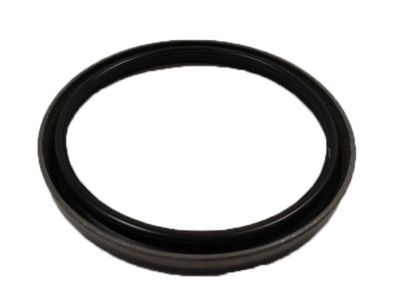
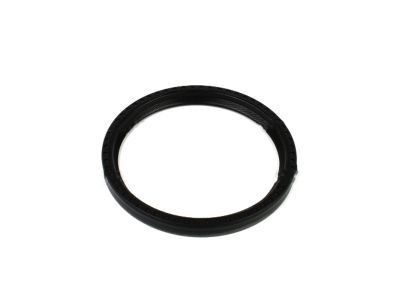
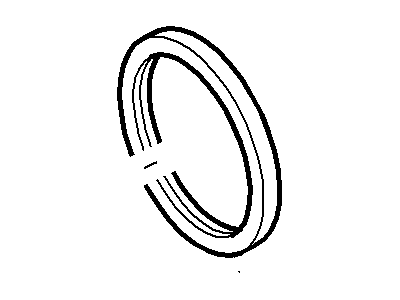
Lincoln F4AZ-6701-A Seal Assy - Crankshaft Oil

1991-2014 Lincoln F4AZ6701A

Customer Questions & Expert Answers (41)
Ford F4AZ-6701-A Seal Assy - Crankshaft Oil
  • Part Description
    Seal Assy - Crankshaft Oil
  • Base No.
    6701
  • Replaces
    F3AZ-6701-B
  • Manufacturer
    Ford
Make sure this part fits
$28.67 MSRP: $40.83
You Save: $12.16 (30%)
Ships in 1-2 Business Days
1
ADD TO CART
  • Related Parts
  • Product Specifications
  • Vehicle Fitment
  • Customer Questions & Expert Answers
  • Product Specifications

    BrandGenuine Lincoln
    Base No.6701
    Manufacturer Part NumberF4AZ-6701-A, F4AZ6701A
    Part DescriptionSeal Assy - Crankshaft Oil
    Item Dimensions8.4 x 6.7 x 1.0 inches
    Item Weight0.30 Pounds
    ConditionNew
    Fitment TypeDirect Replacement
    ReplacesF3AZ-6701-B
    ManufacturerFord
    SKUF4AZ-6701-A
    WarrantyThis genuine Ford part is guaranteed by Ford's factory warranty.
    Shipping & ReturnShipping Policy Return Policy
    Warning: California’s Proposition 65
  • Vehicle Fitment

    Year Make Model Engine Important vehicle option details
    2003-2005 Lincoln Aviator8 Cyl 4.6L DOHC EFI5-Speed Automatic Transmission 5R55S, Four-Wheel Drive (Full Time) (Left Hand Drive), Four-Wheel Drive (Part Time) (Left Hand Drive), Left Hand Drive, Rear-Wheel Drive (Left Hand Drive)
    2002-2003 Lincoln Blackwood8 Cyl 5.4L DOHC EFI4-Speed Automatic Transmission E4OD(4R100), Left Hand Drive, Rear-Wheel Drive (Left Hand Drive)
    1995-2002 Lincoln Continental8 Cyl 4.6L4AT 4F50N, 4AT AX4N, 4AT AX4S, 4AT AXOD-E
    2000-2006 Lincoln LS6 Cyl 3.0L DOHC EFI Modular5-Speed Automatic Transmission 5R55S, 5-Speed Automatic Transmission NAAO 5R55N, 5-Speed Manual Transmission Getrag-221, Left Hand Drive, Rear-Wheel Drive (Left Hand Drive), Rear-Wheel Drive (Right Hand Drive)
    2007-2012 Lincoln MKZ6 Cyl 3.0L DOHC EFI, 6 Cyl 3.0L OHC Duratec5-Speed Automatic Transmission Mazda FNR5, 5-Speed Manual Transmission (G5M), 6-Speed Automatic Transaxle - AWF21, 6-Speed Automatic Transmission 6F Mid-Range, 6-Speed Manual Transmission Mazda G6M, CVT Auto Trans Powersplit Elec, Four-Wheel Drive (Full Time) (Left Hand Drive), Front-Wheel Drive (Left Hand Drive), Left Hand Drive
    2010-2014, 2006-2008 Lincoln Mark LT8 Cyl 4.6L, 8 Cyl 4.6L Romeo SOHC EFI, 8 Cyl 5.4L4-Speed Automatic Transmission 4R75E Livonia, 4-Speed Automatic Transmission AODEW/4R70E W/TSS, 4-Speed Automatic Transmission AODEW/4R75E W/TSS, 5-Speed Manual Transmission - Mazda M5R2-C, 6-Speed Automatic Transmission (6R80), Four-Wheel Drive (Part Time) (Left Hand Drive), Left Hand Drive, Rear-Wheel Drive (Left Hand Drive)
    1993-1998 Lincoln Mark VIII8 Cyl 4.6L4AT, 4AT 4R70W
    1998-2014 Lincoln Navigator8 Cyl 5.4L, 8 Cyl 5.4L DOHC EFI4-Speed Automatic Transmission E4OD(4R100), 4AT 4R100, 4AT E4OD, 6-Speed Automatic Transmission (6R80), 6-Speed Automatic Transmission ZF 6HP26 Steptronic, Four-Wheel Drive (Part Time) (Left Hand Drive), Left Hand Drive, Rear-Wheel Drive (Left Hand Drive)
    1991-2011 Lincoln Town Car8 Cyl 4.6L, 8 Cyl 4.6L Romeo SOHC EFI4-Speed Automatic Transmission 4R70W (AODE), 4-Speed Automatic Transmission 4R75E Livonia, 4-Speed Automatic Transmission AODEW/4R70E W/TSS, 4-Speed Automatic Transmission AODEW/4R70E W/TSS*S/V, 4-Speed Automatic Transmission AODEW/4R75E W/TSS S/V, 4-Speed Automatic Transmission NAAO AODEW/4R70W*S/VIL, 4AT, 4AT 4R70W, 4AT AOD, 4AT AODE, Left Hand Drive, Rear-Wheel Drive (Left Hand Drive)
    2006 Lincoln Zephyr6 Cyl 3.0L DOHC EFI5-Speed Automatic Transmission Mazda FNR5, 5-Speed Manual Transmission (G5M), 6-Speed Automatic Transaxle - AWF21, Four-Wheel Drive (Full Time) (Left Hand Drive), Front-Wheel Drive (Left Hand Drive), Left Hand Drive
  • Customer Questions & Expert Answers

    Q:
    Is the the correct part for the attached VIN? Posted by FordPartsGiant Specialist
    A:
    You can Select Your Vehicle to check if F4AZ-6701-A fits your vehicle.
    Posted by FordPartsGiant Specialist
    Q:
    How do you remove and install a front crankshaft seal in four cylinder engine on Ford Fusion? Posted by Customer
    A:
    Take out the crankshaft pulley and, for 1.5L and 1.6L models, eliminate the timing belt as well as the crankshaft sprockets. To remove the seal, a screwdriver or hook tool is used while caution to avoid damaging the oil pump or the timing chain cover bore area where the seal fits, as well as, the nose and the sealing area of the crankshaft. On the other hand, you can drill a small hole on each side on the seal and then put in self tapping screws to pull it out without the use of a pry bar. Scrub the sealing surfaces on the engine cover and on the crankshaft and again treat them with clean oil. Start with applying the new seal to the oil pump or timing chain cover through the bore where it has to fit, whilst making sure it stays in a square position. After it is started use a seal driver or a suitable socket of the correct size to drive it consequently until it lays flush to the oil pump or timing cover while making sure it is square when installed. Before finally placing the crankshaft pulley back in place, use clean engine oil to lubricate the lip of the seal that is to come into contact with the crankshaft.
    Posted by FordPartsGiant Specialist
    Q:
    How to remove the crankshaft pulley and front Crankshaft Seal in V6 engine on Ford Mustang? Posted by Customer
    A:
    To remove the crankshaft pulley, 4.0L can be unbolted while using a bolt type puller while 3.7L can be removed using a 3- jaw puller. Start by removing the first connection of the battery before you can remove the drive belt and the engine cooling fan/shroud. Lift the car properly and support it on jack stands, you then can remove the mounting bolts of the power steering fluid cooler and set it apart and not take off the fluid lines. It is followed by the crankshaft pulley bolt's removal together with a centre bolt using a socket and a breaker bar, the centre bolt being thrown away and replaced by a new one. Cinch the pulley in an immovable position by using a strap or a chain wrench; putting a shop rag on the pullery before using the tool. To eliminate the pulley of your vehicle, you should utilize a puller and if an adapter is required in this case, you ought not to harm the crankshaft threads. Using a seal puller, to extract the crankshaft front oil seal and ensure not causing damage on the crankshaft or seal bore, after the pulley has been removed. Clean the seal bore gently and look for rough edges, etc, while inspecting the hub zone for fatigue or scoring, where a repair sleeve may be considered. To install, clean engine oil is applied on the lip of the new seal and driven into the bore with a socket or pipe slightly smaller in diameter than the seal with the open side facing inward the engine. Putting some clean engine oil to the sealing surface of the hub, then put the crankshaft pulley/damper through using the special installation tool and can't use hammer. Replace with a new center bolt and torque it to the needed level, others installing process would be done in a reverse order to the previous process.
    Posted by FordPartsGiant Specialist
    Q:
    How to replace the front crankshaft oil seal with the timing chain cover in place on Lincoln Town Car Overhead valve (OHV)engines? Posted by Customer
    A:
    First of all, to replace the front Crankshaft Seal with the timing chain cover in place, remove the fan shroud, fan/clutch assembly, and drive belts. Extract the crankshaft bolt, and use a puller to detach the vibration damper. Care should be taken not to damage the cover or seal bore as you remove it using a special tool or a chisel and hammer. Inspect for any damage. Use a special tool or a socket and hammer to install the new seal. For engines with the timing chain cover removed, drive out the seal, clean the bore, and install the new seal with a socket and hammer. The procedure for rear main oil seals differs depending on whether one-piece or two-piece seals are used. To replace a one-piece seal, you need to take out the transmission, drive plate, and rear cover plate first. Remove this old one by prying off carefully then clean up back in there before applying both oil and grease on a new one that is pressed in place.
    Posted by FordPartsGiant Specialist
    Q:
    How to replace the crankshaft front oil seal in four cylinder engine on Mercury Mariner? Posted by Customer
    A:
    When replacing the crankshaft seal on 2.0L engine make sure that the camshaft or crankshaft is locked in position especially when the timing belt is off so as to avoid causing serious damage to the engine. Start by pulling out the timing belt and followed by the crankshaft sprocket and the Woodruff key. It is advised to then remove the timing belt guide washer from the crankshaft. There should be a momentary access to the rear of the seal from below the right inner fender; the seal needs to be eased out, using a small screwed driver taped; be careful not to gouge the oil pump assembly, crank shaft or the seal bore. Polish the seal bore and crankshaft sealing surface and rectify any minor eccentricity apparent. Cover the new seal with the thin layer of the engine oil and, with the help of the hammer and an adequately sized socket, put in the new seal in with the crankshaft sprocket facing outside while the word 'FRONT' is placed facing outward. Replace the timing belt and the respective covers and start the engine to check whether there will be any oil leakage. The removal process for 2.3L and 2.5L engines mainly involves; lifting the front, and then; disconnecting the exhaust, unbolting the intercooler pipe and the crankshaft pulley followed by removing the seal without damaging the timing chain cover bore or the crank of the shaft. The other way is by using a hammer and a drill and making 8mm round holes in the seal so as to make use of self tapping screws to pull out the seal. Wipe off the sealing surfaces and apply clean engine oil to them then slip the new seal into the timing chain cover and make sure it is in the right position. It is advisable to use a seal driver or the right socket in an attempt to tighten the seal until it sits flat on the surface of the engine cover. Clean the lip of the seal and apply the engine oil to it and put back the crankshaft pulley. For camshaft oil seals, the number one piston top dead centre, remove the timing belt and for 2008 and earlier models remove the camshaft sprocket bolts and camshafts while noting the positions. Take out the old seal gently, degrease the cylinder, and, in turn, oil the new seal, and place the seal with the use of a hammer in such a way that it is perpendicular to the cylinder. Ensure that the camshafts are adjusted to TDC, then replace the sprockets and tighten the bolts followed by re-fixing the timing belt so that you can rev the engine in order to check for some leakage at the camshaft seal.
    Posted by FordPartsGiant Specialist
    Q:
    How to replace the Crankshaft Seal in V6 engine on Lincoln Navigator? Posted by Customer
    A:
    To change the front seal on the timing chain cover, remove the negative battery terminal and the electric cooling fan/shroud assembly and drivebelts. Locate the crank shaft pulley and the vibration damper for reinstallation, then set and undo the bolts holding the pulley and pull it on, always check the crank shaft position sensor ring for damages whenever you remove it. Loosen the bolt in front of the crankshaft and pull out the vibration damper with a puller to be sure use the right kind of puller. Scrub the crankshaft nose and the sealing face where the seal is to be fitted and keep the Woodruff key fitted. Take extra care while cutting out the old sealing ring from the cover not to scratch the same; also inspect the seal bore and crankshaft for any cuts. Place the new seal with the open end innermost, lubricate slightly so that it can be easily fitted in the bore till it fits perfectly. Before installing the vibration damper, apply a thin layer of engine grease or clean oils to the contact area of its seal and also apply a thin layer of seal to the keyway where Woodruff key will fit, this is to ensure that when the damper is fitted it will align well with the Woodruff key. If not, tap it into place and replace all parts considered removed; examine for leaks after the engine has begun to run. For the rear main seal, the transmission and flywheel or driveplate has to be removed, and then the rear cover plate has to be unbolted. The old seal can be popped out carefully or removal with the help of slide-hammer puller, also we have to take into consideration that the new seal is recessed. Scrub the crankshaft and the seal fitment groove, inspecting for wear and tear and lubricate the new seal's outside with oil and the inner lips with grease and then push the seal into the bore until it's flush with the surface - preferably with the help of a special tool. Last but not the least install the rear cover plate, flywheel or drive plate and the transmission.
    Posted by FordPartsGiant Specialist
    Q:
    How to remove and install the crankshaft oil seal on Ford Crown Victoria? Posted by Customer
    A:
    Remove the bolts attaching the fan shroud to the radiator and position the shroud back over the fan. Next, detach the fan/clutch assembly and the shroud. Remove the drivebelts, then take off the bolt from the front of the crankshaft and use a puller to detach the vibration damper, ensuring the puller grips only the hub. Clean the crankshaft nose and the seal contact surface on the vibration damper, leaving the Woodruff key in place. The crankshaft front oil seal can be removed using a special tool or carefully with a small chisel and hammer, taking care not to damage the cover or crankshaft. If the engine has high mileage, apply penetrating oil to the seal-to-cover joint before removal. Check the seal bore and crankshaft for nicks and burrs, then position the new seal in the bore with the open end facing inward, applying a small amount of oil to ease installation. The seal can be reinstalled using a special tool or by driving it into the bore with a large socket and hammer until fully seated, ensuring not to damage the seal. If installing a new vibration damper, ensure balance pins are in the same positions as the original and apply clean engine oil to the seal contact surface. Install the damper on the crankshaft, aligning the keyway with the Woodruff key, and if necessary, tap it into place with a soft-face hammer. Reinstall the remaining parts and check for leaks after starting the engine. For the timing chain cover, remove it and drive the seal out from the back side, supporting the cover to avoid distortion. Clean the bore, position the new seal with the open end facing inward, and drive it into place until fully seated. For the rear main oil seal, remove the transmission, driveplate, and rear cover plate, then pry out the old seal carefully, noting its recess depth. Clean the crankshaft and seal bore, checking for damage, and apply a thin coat of engine oil to the new seal's outer edge. Press the new seal squarely into the bore, avoiding hammering directly, and reinstall the engine rear cover plate, driveplate, and transmission.
    Posted by FordPartsGiant Specialist
    Q:
    How do you replace the Crankshaft seals in gasoline engine on Ford Excursion? Posted by Customer
    A:
    The front seal can be reached only after removing drivebelt, engine cooling fan, shroud assembly as well as the crankshaft pulley. Very cautiously and with great delicacy you should open the seal in the cover by applying a special seal opener or a screw-driver, not damaging the crankshaft. If the timing cover is off, you can use a chisel or a small punch to knock the seal out from behind taking care to support the cover with wooden blocks. Check for sharp edges on the seal bore and cranks shaft coupling and remove any sharp edges that may exist before fitting the new seal with it open side facing inwards and apply a drop of engine oil when fitting in. Insert the seal into its bore using a large socket wrench to hammer down the seal until it is snapped into place and apply some clean engine oil to the seal lip, then tighten the crankshaft pulley making sure that the keyway of the pulley fits onto the Woodruff key. If anymore is needed to align the pulley, one can gently hammer the pulley into place using a soft- faced hammer or turn the bolt to inturn press it in. Remove the front cover and adjust the crankshaft pulley bolt to the specified EGT torque then replace the belt, other removed parts and ensure the engine is properly started to check for any burst. As for the rear seal the negative battery terminal should be disconnected, the vehicle should be properly lifted, and then the flywheel/driveplate and the reinforcement plate should be removed. Remove the bolts that define the seal retainer then clean off any gasket or sealant that might be present. Place wooden blocks under the seal and retainer assembly and expel the old seal from the rear section. Assemble the new seal into the retainer and strike it gently with a wood block, and cleaning the crankshaft and seal bore, and identifying any evident damage to the interface area of the new seal. Coat the crankshaft seal journal and the new seal lip with engine oil then apply a bead of the anaerobic sealant to the block of engine or the seal retainer. Place the oil seal retainer back in to the crank shaft position putting the seal lip in the right direction then carefully push down to lock it in place. Perform retainer bolts to the normal torque, replace the engine rear cover plate, make sure that it is well aligned by positioning dowels. The flywheel/drive plate and the transmission must be refitted; the oil level must be examined, and the engine must be started to see if there are any signs of oil leakage.
    Posted by FordPartsGiant Specialist
    Q:
    How to replace the crankshaft front oil seal in four cylinder engine on Ford Escape? Posted by Customer
    A:
    When replacing the crankshaft seal on 2.0L engine make sure that the camshaft or crankshaft is locked in position especially when the timing belt is off so as to avoid causing serious damage to the engine. Start by pulling out the timing belt and followed by the crankshaft sprocket and the Woodruff key. It is advised to then remove the timing belt guide washer from the crankshaft. There should be a momentary access to the rear of the seal from below the right inner fender; the seal needs to be eased out, using a small screwed driver taped; be careful not to gouge the oil pump assembly, crank shaft or the seal bore. Polish the seal bore and crankshaft sealing surface and rectify any minor eccentricity apparent. Cover the new seal with the thin layer of the engine oil and, with the help of the hammer and an adequately sized socket, put in the new seal in with the crankshaft sprocket facing outside while the word 'FRONT' is placed facing outward. Replace the timing belt and the respective covers and start the engine to check whether there will be any oil leakage. The removal process for 2.3L and 2.5L engines mainly involves; lifting the front, and then; disconnecting the exhaust, unbolting the intercooler pipe and the crankshaft pulley followed by removing the seal without damaging the timing chain cover bore or the crank of the shaft. The other way is by using a hammer and a drill and making 8mm round holes in the seal so as to make use of self tapping screws to pull out the seal. Wipe off the sealing surfaces and apply clean engine oil to them then slip the new seal into the timing chain cover and make sure it is in the right position. It is advisable to use a seal driver or the right socket in an attempt to tighten the seal until it sits flat on the surface of the engine cover. Clean the lip of the seal and apply the engine oil to it and put back the crankshaft pulley. For camshaft oil seals, the number one piston top dead centre, remove the timing belt and for 2008 and earlier models remove the camshaft sprocket bolts and camshafts while noting the positions. Take out the old seal gently, degrease the cylinder, and, in turn, oil the new seal, and place the seal with the use of a hammer in such a way that it is perpendicular to the cylinder. Ensure that the camshafts are adjusted to TDC, then replace the sprockets and tighten the bolts followed by re-fixing the timing belt so that you can rev the engine in order to check for some leakage at the camshaft seal.
    Posted by FordPartsGiant Specialist
    Q:
    How do you replace the Crankshaft seals in V8 engine on Ford Expedition? Posted by Customer
    A:
    Pop the negative terminal off the battery and then take off the drivebelt, and then the fan/shroud. Subsequently, take out the crankshaft pulley followed by taking out the seal of this cover with the aid of seal removal tool or a screw driver provided that there is no scratching on the crank shaft. If the timing cover is removed, and you have to remove the seal from the back side, then it may be removed by placing the wooden blocks on the side of the timing cover and use small punch chisel or hammer to force out the seal. Check the condition of the seal bore and crank though the journal and remove any sharp edges and then places the new seal with the open slit inside and apply a drop of engine oil on the outer periphery to ease the insertion. C-Insert a large socket and hammer the seal into the bore until it is fully seated, that is if the socket or the tubing is not of the diameter of the seal. Apply clean engine oil on the seal lip and fit the crankshaft pulley in such a manner that the key way matches with the Woodruff key. However, if needed pulley is tapped into position with a soft face hammer or the bolt is tightened to make pulley settle in. Torque crankshaft pulley bolt appropriately, replace drivebelt and any other part which was removed before cranking the engine to check for oil leaks. To reach the rear seal, it is required to connect the negative terminal of the battery, lift the vehicle properly, and remove the transmission. Remove the flywheel/driveplate and rear cover plate and remove the seal retainer and scrap off the old gasket material. Place the seal and retainer assembly on wooden blocks and remove the old seal with the help of drift punch and hammer. Shoot the new seal into the retainer with a wood block, in the meantime ensure that the seal is not cocked in the bore. Remove any deposits and debris on the crankshaft and seal bore surfaces and looks at the surface of the crankshaft for any signs of wear that may influence the new seal. An insulating layer of engine oil should be applied on the crankshaft seal journal and the new seal lip but an anaerobic sealant should be applied along the engine block or the seal retainer. However, the oil seal retainer should be installed by placing the seal over the crankshaft with a smooth manner of operating an implement to help. Torque the retainer bolts, install the engine rear cover plate, driveplate, transmission, then proceed with reversal of the above procedures. Last of all, inspect if the oil is low, contribute if needed, start the engine and look out for oil stains.
    Posted by FordPartsGiant Specialist
    Q:
    How to remove and install the crankshaft pulley and front crankshaft seal in V8 engine on Ford F-150? Posted by Customer
    A:
    To take out the crankshaft pulley, let pull out the cable from the negative terminal of the battery and set down that of the drive-belt. For 2010 and earlier models raise the vehicle properly on jackstands and take out the engine cooling fan and shroud assembly. Take off the crankshaft pulley center bolt with the socket and breaker bar; when doing this, make sure that the pulley is locked in position with a strap or the chain wrench and place a shop rag or a piece of drivebelt material around the crankshaft pulley. If there are holes provided on the pulley to thread in, then a bolt type puller should be used but where there are no holes, then the pulley should be pulled off using a three jawed puller. There is always the need for an adapter between the puller bolt and the crankshaft so as not to damage them. Third, employ a seal puller to remove the crankshaft front oil seal without scratching the crankshaft or damage the bore. Clean the crossland bore and check for nicks or gouges and also the hub zone for signs of abnormal wearing. As for the installation, there is a requirement of a new bolt for the 5.0L and 6.2L engines to reinstall the crankshaft pulley. Slather the external lip of the new seal with clean engine oil before forcing it into place with the use of a seal driver or a socket that is a little smaller than the seal while the 'open-end' must be facing the engine. Any contact surface of the crankshaft pulley hub with the oil seal must be smeared with multi-purpose grease or clean engine oil and the front end of the keyway in the crankshaft pulley must be treated with RTV sealant before assembling. Withdraw the crankshaft pulley with an especial installation tool without the need for a hammer and fasten the center bolt and torque it to the recommended value. The remaining steps are-again-the reverse order of removal steps.
    Posted by FordPartsGiant Specialist
    Q:
    What is the note regarding the rear main oil seal replacement for the 2006 Ford F-150? Posted by Customer
    A:
    The rear main oil seal replacement is a time-consuming job that requires several special tools. It is advised to read through the procedure and obtain the necessary tools before beginning.
    Posted by FordPartsGiant Specialist
    Q:
    How do you remove the old seal for the 2005 Ford Mustang? Posted by Customer
    A:
    Pry out the old seal with a special seal removal tool or a flat blade screwdriver.
    Posted by FordPartsGiant Specialist
    Q:
    What is the second step in the procedure for the 2009 Ford Fusion? Posted by Customer
    A:
    Remove the driveplate.
    Posted by FordPartsGiant Specialist
    Q:
    How do you start installing the new front oil seal for the 2011 Ford Ranger? Posted by Customer
    A:
    Start installing the new seal by pressing it into the engine front cover.
    Posted by FordPartsGiant Specialist
    Q:
    What is the next step after raising the 2006 Ford Mustang? Posted by Customer
    A:
    The transmission should be removed.
    Posted by FordPartsGiant Specialist
    Q:
    What additional steps are required for the 2015 Ford Fusion during installation? Posted by Customer
    A:
    On 3.0L engines, apply RTV sealant to the keyway and inner bore of the pulley and lubricate the outer sealing surface of the pulley with clean engine oil. The pulley should be installed and tightened within four minutes of applying the sealant. Align the pulley keyway with the crankshaft key and install the pulley with a suitable pulley installation tool available at auto parts stores. Install and tighten the pulley bolt. Note: The manufacturer suggests that a new pulley bolt be installed.
    Posted by FordPartsGiant Specialist
    Q:
    How do you remove the crankshaft pulley center bolt for the 2005 Ford Mustang? Posted by Customer
    A:
    Use a breaker bar and socket to remove the crankshaft pulley center bolt, ensuring to wrap a shop rag or a piece of drivebelt material around the pulley before installing the strap wrench.
    Posted by FordPartsGiant Specialist
    Q:
    What is the final step in the process for the 2009 Ford Ranger? Posted by Customer
    A:
    Run the engine and check for leaks.
    Posted by FordPartsGiant Specialist
    Q:
    What is the first step in removing the rear seal for the 2009 Ford Ranger? Posted by Customer
    A:
    Remove the transmission.
    Posted by FordPartsGiant Specialist
    Q:
    How should the new seal be prepared and installed for the 1999 Ford Ranger? Posted by Customer
    A:
    Apply engine oil to the seal lips. Slide the seal into place with the spring side facing the engine.
    Posted by FordPartsGiant Specialist
    Q:
    How should the new seal be positioned and installed for the 1994 Ford Ranger? Posted by Customer
    A:
    The new seal should be positioned onto the crankshaft. If the seal is marked with the words "THIS SIDE OUT," these words must face out, toward the rear of the engine. Use a special rear main oil seal installation tool or a socket with the exact diameter of the seal to drive the seal in place. Ensure the seal is not off-set and is flush along the entire circumference of the seal carrier.
    Posted by FordPartsGiant Specialist
    Q:
    What should be done after aligning the oil seal carrier for the 2012 Ford Fusion? Posted by Customer
    A:
    Carefully remove the plastic liner or tool so that the new seal contacts the crankshaft mating surface correctly.
    Posted by FordPartsGiant Specialist
    Q:
    What is the first step in replacing the front oil seal for the 2004 Ford Ranger? Posted by Customer
    A:
    Remove the crankshaft pulley (see Steps 1 through 3 above). Carefully pry the oil seal out with a screwdriver.
    Posted by FordPartsGiant Specialist
    Q:
    What additional step should be taken regarding the Woodruff key slot for the 2000 Ford Ranger? Posted by Customer
    A:
    Apply silicone sealant to the Woodruff key slot.
    Posted by FordPartsGiant Specialist
    Q:
    How do you drive the new seal into place for the 2000 Lincoln Navigator? Posted by Customer
    A:
    Drive the seal into the bore with a large socket and hammer until it is completely seated.
    Posted by FordPartsGiant Specialist
    Q:
    What should be done after removing the seal retainer for the 1998 Lincoln Town Car? Posted by Customer
    A:
    Clean off any old gasket or sealant material from both the engine block and the seal retainer.
    Posted by FordPartsGiant Specialist
    See expert answers on similar Crankshaft Seal
    Q:
    How do you access the rear main oil seal for the 1998 Mercury Grand Marquis? Posted by Customer
    A:
    Chapter 7 and remove the transmission, then detach the driveplate and the rear cover plate from the engine.
    Posted by FordPartsGiant Specialist
    Q:
    What should be done after all parts are reinstalled for the 2011 Mercury Grand Marquis? Posted by Customer
    A:
    Check the oil level and add if necessary, run the engine and check for oil leaks.
    Posted by FordPartsGiant Specialist
    See expert answers on similar Crankshaft Seal
    Q:
    What should be done after disconnecting the battery for the 2005 Mercury Mariner? Posted by Customer
    A:
    Loosen the right front wheel lug nuts, raise the front of the vehicle, and support it securely on jackstands, then remove the wheel.
    Posted by FordPartsGiant Specialist
    Q:
    What should be checked after removing the old seal for the 2000 Ford Crown Victoria? Posted by Customer
    A:
    Check the seal bore and crankshaft, as well as the seal contact surface on the vibration damper for nicks and burrs.
    Posted by FordPartsGiant Specialist
    Q:
    What is the final step for the installation on the 2010 Mercury Mariner? Posted by Customer
    A:
    Tighten the retainer plate bolts in the proper sequence to the torque, then remove the installation and alignment tool. The remainder of installation is the reverse of removal.
    Posted by FordPartsGiant Specialist
    Q:
    What should be done with the pulley before installation for the 2008 Ford Escape? Posted by Customer
    A:
    Apply RTV sealant to the keyway and inner bore of the pulley, lubricate the outer sealing surface with clean engine oil, align the pulley keyway with the crankshaft key, and install the pulley.
    Posted by FordPartsGiant Specialist
    Q:
    How should the new seal be positioned and installed for the 1997 Ford Expedition? Posted by Customer
    A:
    Position the new seal in the bore with the open end facing in, apply a small amount of oil to the outer edge, and drive it into the bore with a large socket and hammer until it's completely seated.
    Posted by FordPartsGiant Specialist
    Q:
    What should you do if you don't have access to the special tool set for the 2001 Ford Excursion? Posted by Customer
    A:
    Do not attempt the procedure if you don't have access to the special tool set.
    Posted by FordPartsGiant Specialist
    Q:
    What is the first step for replacing the rear main oil seal on the 2009 Ford Escape? Posted by Customer
    A:
    Remove the oil pan.
    Posted by FordPartsGiant Specialist
    Q:
    How should the remainder of the installation be completed for the 2010 Ford Ranger? Posted by Customer
    A:
    The remainder of the installation is the reverse of the removal procedure.
    Posted by FordPartsGiant Specialist
    Q:
    What is the final step in the installation process for the 2003 Ford Excursion? Posted by Customer
    A:
    Installation is otherwise the reverse of removal.
    Posted by FordPartsGiant Specialist
    Q:
    What is the first step in the process of replacing the seal for the 2006 Ford F-150? Posted by Customer
    A:
    Disconnect the cable from the negative battery terminal.
    Posted by FordPartsGiant Specialist
    Q:
    How can the seal installation be made easier for the 2008 Ford F-150? Posted by Customer
    A:
    The seal installation can be made easier by unbolting and removing the seal retainer plate. After removing all the mounting bolts, use two of the retainer-to-oil pan bolts and start them into the two threaded holes in the retainer plate. Tightening these two bolts alternately will push the retainer from the engine.
    Posted by FordPartsGiant Specialist
    Q:
    What should be done to the seal bore before installing a new seal for the 2005 Ford F-150? Posted by Customer
    A:
    Clean the bore to remove any old seal material and corrosion.
    Posted by FordPartsGiant Specialist
    If you have any questions about this product, please don't hesitate to ask us. We will be happy to help you!

Genuine Ford Part F4AZ-6701-A, the Right Choice

To ensure reliability, purchase Ford part # F4AZ-6701-A Seal Assy - Crankshaft Oil. It is sometimes referred to as Lincoln Crankshaft Seal. In terms of quality and longevity, OEM parts are top-tier. This is because they are made according to Ford's demanding factory specifications and go through strict quality control. This part fits specific Lincoln Aviator, Navigator, Zephyr models.

FordPartsGiant.com is a leading supplier of genuine Ford parts and accessories such as Ford F4AZ6701A Seal Assy - Crankshaft Oil. On our platform, we provide genuine Ford parts at incredible prices while ensuring top-tier quality. Feel at ease shopping with us, knowing our parts have a hassle-free return policy and rapid delivery service. For detailed Lincoln parts information, click here.

Why choose Ford Parts Giant

  • Dedicated Service

    Your complete satisfaction is our #1 goal

  • Lowest Prices

    Best deals on genuine OE parts from dealerships

  • Fast Delivery

    Orders are processed and delivered promptly