Make sure this part fits

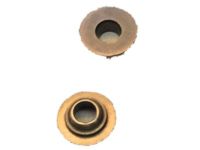
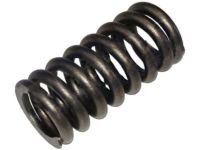
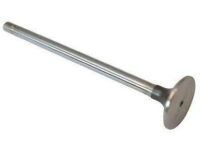
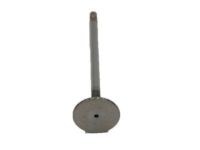
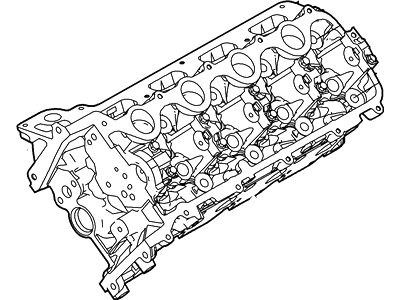
Mercury 3L3Z-6049-KA Cylinder Head Assembly

2006-2008 Mercury Mountaineer 3L3Z6049KA

Customer Questions & Expert Answers (8)
Ford 3L3Z-6049-KA Cylinder Head Assembly
  • Part Description
    Cylinder Head Assy
  • Position
    Passenger Side
  • Replaced By
    5R3Z-6049-A
  • Manufacturer
    Ford
  • Manufacturer's Notes
    This part is discontinued.
Make sure this part fits
  • Related Parts
  • Product Specifications
  • Vehicle Fitment
  • Customer Questions & Expert Answers
  • Product Specifications

    BrandGenuine Mercury
    Manufacturer Part Number3L3Z-6049-KA, 3L3Z6049KA
    Part DescriptionCylinder Head Assy
    Item Weight40.20 Pounds
    PositionPassenger Side
    ConditionNew
    Fitment TypeDirect Replacement
    ManufacturerFord
    SKU3L3Z-6049-KA
    WarrantyThis genuine Ford part is guaranteed by Ford's factory warranty.
    Shipping & ReturnShipping Policy Return Policy
    Warning: California’s Proposition 65
  • Vehicle Fitment

    Year Make Model Engine Important vehicle option details
    2006-2008 Mercury Mountaineer8 Cyl 4.6L5-Speed Automatic Transmission 5R55S, 5-Speed Automatic Transmission 5R55W, 5-Speed Manual Transmission (M5R4), 6-Speed Automatic Transmission (6R80), 6-Speed Automatic Transmission 6R60, Four-Wheel Drive (Full Time) (Left Hand Drive), Four-Wheel Drive (Part Time) (Left Hand Drive), Four-Wheel Drive (Part Time) (Right Hand Drive), Left Hand Drive, Rear-Wheel Drive (Left Hand Drive)
  • Customer Questions & Expert Answers

    Q:
    I would like to know is this part gonna fit with my car Posted by FordPartsGiant Specialist
    A:
    You can Select Your Vehicle to check if 3L3Z-6049-KA fits your vehicle.
    Posted by FordPartsGiant Specialist
    Q:
    How to remove and install Cylinder Head on Ford Mustang? Posted by Customer
    A:
    The heads need to come off while the engine is cold for this reason, to avoid warping of the heads due to heat. This is a tiresome exercise; the best approach is to pull the engine out of the car and fit it on an engine hoist, though it can be performed intricated with the right tools and hassles. For the 4.0L engine, the rocker arms and valve lash adjusters have to be detached for work in the cylinder heads as well as the timing chains and the jackshaft chains. First, remove the fuel system pressure and, set the negative terminal of the battery aside; drain the cooling system. Take off the intake manifold and exhaust manifolds, and also the valve covers, the drivebelt, and the drivebelt tensioner. Next, take out the camshaft and the lifters, the two camshaft position sensors located at the back of the cylinder heads also remove any other wiring connectors connected to the camshaft or the lifters and it is advisable to label the connectors so that they can easily be reconnected. Unscrew the little M6 bolt that can be found at the front of the cylinder head and dispose the bolt when installing, use new bolts. Over-tightening the cylinder head bolts must be avoided and they should be loosened a quarter turn at a time until they can be taken out without the use of a tool, in a criss-cross pattern starting from the opposite sequence to the original lighting technique. Remove the cylinder head(s) gently, and if there is any resistance apply a piece of wood and a hammer to remove it, and place the cylinder head(s) on wooden blocks. Cylinder head disassembly and inspection should not be done by any qualm's, professional automotive machine shops should do it. Make sure the surfaces of the cylinder heads and the engine block are absolutely clean before uniting them, with a plastic scraper and the silicone gasket remover, then with brake cleaner. Many times there is slight nicks or scratches on the mating surfaces so be sure to check for it and if there is, file it or get it machined to smooth the mating surfaces. The threads of the block head bolt holes should be chased using a tap, to guarantee correct torque readings. Place the new gasket(s) on the dowel pins of the engine block so that the dowel pins are positioned appropriately. Place the cylinder head(s) back onto the engine block with equal care so that you do not displace the gaskets; lightly lubricate new cylinder head bolts; turn them down until they are hand tight. Loosen the bolts in the recommended sequence by rotating the breaker bar clockwise and tighten the bolts with a torque wrench and a special torque angle adapter to the recommended torque and the number of rotations. The other part of the installation process is removal is exactly the opposite. Replace the engine oil and filter, top off the cooling system, and then engage the engine to search for any leaks from oil and or water. The procedure for the 4.0L engine is the same as described above: take off the intake manifold, electrical connectors from the fuel injectors, exhaust manifolds, drivebelt, and drivebelt tensioner, first remove the engine from the vehicle and mount it on an engine stand, and drain the cooling system and then disconnect the negative terminal of the battery. Take out the rocker arms and the valve lash adjusters, the alternator and lower alternator mounting bracket as well as the upper part of the radiator housing and the coolant tube bracket together with the coolant bypass hose, the engine coolant temperature sensor as well as the thermostat housing. If working in-vehicle, take off large plug on rear of jackshaft, secure rear sprocket chain with rubber band, take off lower cassette bolt and cassette and chain. For the left cylinder head remove the radio capacitor, the ignition coil assembly, the accessory bracket, hydraulic chain tensioner, the camshaft sprocket bolt and chain cassette. On both the cylinder heads, loosening had to be done in a reverse order to the tightening procedure; the gasket seal was broken with a pry bar if necessary and both or one of the cylinder heads were taken off from the engine. Support the cylinder heads on wooden spacers and get rid of the old seals; it still is essential to keep track of their location. Mating surfaces should be free of contaminants, and the bolt holes should be free of defects such as cracks; threads in the bolt holes should be chased, and the new gaskets installed properly. The cylinder heads need to be firmly bolted down and the new bolts in the right sequence need to be tightened to the right amount of torque The rest of the process is a reverse sequence. Last but not the least, vary the engine oil and oil filter, fill up the cooling system, and inspect for any sign of leakage in the system.
    Posted by FordPartsGiant Specialist
    Q:
    What parts need to be removed after draining the engine oil and cooling system for the 2001 Ford Excursion? Posted by Customer
    A:
    Remove the valve covers, timing chain cover, timing chains, tensioners, chain guides, intake manifold, and exhaust manifolds.
    Posted by FordPartsGiant Specialist
    See expert answers on similar Cylinder Head
    Q:
    What is the final step after reassembling the cylinder head for the 2002 Ford Excursion? Posted by Customer
    A:
    After the head is fully reassembled, install the engine.
    Posted by FordPartsGiant Specialist
    Q:
    What are the cautions to consider when working on the 2012 Ford Mustang? Posted by Customer
    A:
    Caution 1: These engines are difficult to work on and require special tools for many procedures. For any procedure involving timing chains, camshafts, or cylinder head removal, the steps must be read carefully, and disassembly must proceed using the special tools; otherwise, damage to the engine could result. Caution 2: The engine must be completely cool when the cylinder heads are removed. Failure to allow the engine to cool off could result in cylinder head warpage. Caution 3: The manufacturer states that the cylinder head cannot be machined in the event of warping. If the cylinder head warpage exceeds 0.001 inch (0.0254 mm), it must be replaced.
    Posted by FordPartsGiant Specialist
    Q:
    What caution should be taken when following the torque sequence for the 2011 Ford F-150? Posted by Customer
    A:
    Do not loosen all the bolts at the same time or the gasket will not seal properly. Loosen the first bolt in the sequence, tighten it to the final torque, then proceed to the next bolt.
    Posted by FordPartsGiant Specialist
    Q:
    What should be noted about working on the 2004 Ford F-150? Posted by Customer
    A:
    These engines are difficult to work on and require special tools for many procedures. It is crucial to read the steps carefully for any procedure involving timing chains, as improper disassembly can result in engine damage.
    Posted by FordPartsGiant Specialist
    See expert answers on similar Cylinder Head
    Q:
    What should be done if warpage is beyond specifications for the 2008 Ford F-150? Posted by Customer
    A:
    Have the head machined at an automotive machine shop.
    Posted by FordPartsGiant Specialist
    If you have any questions about this product, please don't hesitate to ask us. We will be happy to help you!

Genuine Ford Part 3L3Z-6049-KA, the Right Choice

To ensure reliability, purchase Ford part # 3L3Z-6049-KA Cylinder Head Assembly. It is sometimes referred to as Mercury Cylinder Head. In terms of quality and longevity, OEM parts are top-tier. This is because they are made according to Ford's demanding factory specifications and go through strict quality control. This part fits specific Mercury Mountaineer models.

FordPartsGiant.com is a leading supplier of genuine Ford parts and accessories such as Ford 3L3Z6049KA Cylinder Head Assembly. On our platform, we provide genuine Ford parts at incredible prices while ensuring top-tier quality. Feel at ease shopping with us, knowing our parts have a hassle-free return policy and rapid delivery service. For detailed Mercury parts information, click here.

Why choose Ford Parts Giant

  • Dedicated Service

    Your complete satisfaction is our #1 goal

  • Lowest Prices

    Best deals on genuine OE parts from dealerships

  • Fast Delivery

    Orders are processed and delivered promptly