Make sure this part fits

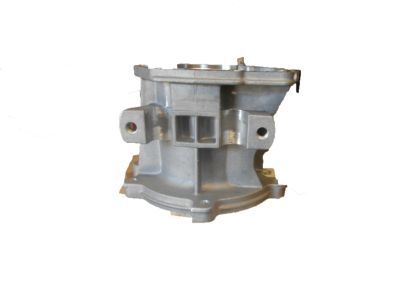
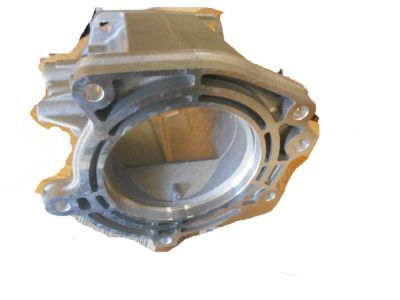
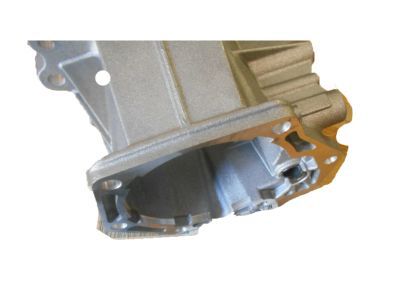
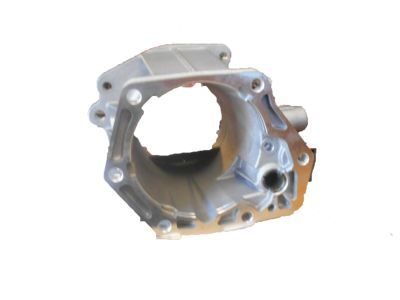
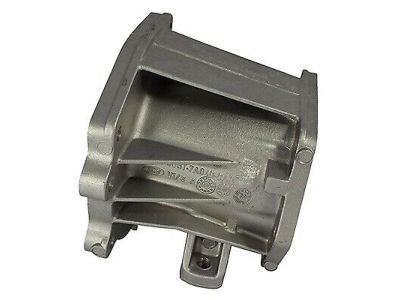
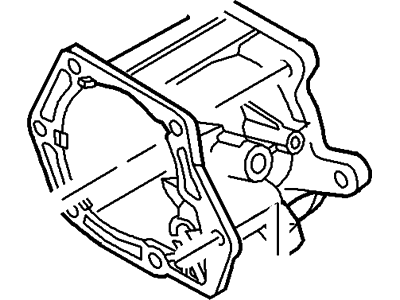
Mercury FOTZ-7A039-B Transmission Extension Housing

1998-2001 Mercury Mountaineer FOTZ7A039B

Customer Questions & Expert Answers (8)
Ford FOTZ-7A039-B Transmission Extension Housing
  • Part Description
    Housing - Transmission Extension
  • Base No.
    7A039
  • Manufacturer
    Ford
Make sure this part fits
$148.20 MSRP: $216.67
You Save: $68.47 (32%)
1
ADD TO CART
  • Related Parts
  • Product Specifications
  • Vehicle Fitment
  • Customer Questions & Expert Answers
  • Product Specifications

    BrandGenuine Mercury
    Base No.7A039
    Manufacturer Part NumberFOTZ-7A039-B, FOTZ7A039B
    Part DescriptionHousing - Transmission Extension
    Item Dimensions9.1 x 8.0 x 10.3 inches
    Item Weight6.30 Pounds
    ConditionNew
    Fitment TypeDirect Replacement
    ManufacturerFord
    SKUFOTZ-7A039-B
    WarrantyThis genuine Ford part is guaranteed by Ford's factory warranty.
    Shipping & ReturnShipping Policy Return Policy
    Warning: California’s Proposition 65
  • Vehicle Fitment

    Year Make Model Engine Important vehicle option details
    1998-2001 Mercury Mountaineer6 Cyl 4.0L, 8 Cyl 5.0L4AT 4R70W, 5AT 5R55E
  • Customer Questions & Expert Answers

    Q:
    Is the the correct part for the attached VIN? Posted by FordPartsGiant Specialist
    A:
    You can Select Your Vehicle to check if FOTZ-7A039-B fits your vehicle.
    Posted by FordPartsGiant Specialist
    Q:
    How to remove and install the transfer case on 1993-2011 Ford Ranger? Posted by Customer
    A:
    On 2011 models, ensure the transfer case is in the 2H position before starting the procedure. Begin by raising the vehicle and securely supporting it on jackstands. If applicable, remove the four skid plate-to-frame bolts and take off the skid plate. For models equipped with a damper, remove it from the transfer case. Drain the transfer case lubricant only if disassembling, then reinstall the drain plug. For electronically controlled models, squeeze the locking tabs labeled PUSH toward each other and pull the electrical connector apart, disconnecting it from the transfer case motor and the connector mounting bracket. If applicable, disconnect the speed sensor electrical connector and speedometer cable from the transfer case. Disconnect the front driveshaft, followed by the rear driveshaft. Disconnect the vent hose from the shift lever bracket or mounting bracket. For manually controlled models, remove the nut from the shift lever and take off the shift lever. Remove the large and small bolts retaining the shifter to the extension housing, then pull on the control lever unit until the bushing slides off the transfer case shift lever pin. Place a transmission jack beneath the transfer case and apply pressure to slightly raise it, using safety chains for stability. Remove the five bolts securing the transfer case to the transmission extension housing, then slide the transfer case rearward off the transmission output shaft and lower it from the vehicle. Remove and discard the gasket between the transfer case and extension housing, cleaning and inspecting the mating surfaces. Installation follows the reverse order of removal with some additions: install a new gasket between the transfer case and extension housing, slide the transfer case onto the transmission output shaft ensuring the splines align until it seats over the dowel pin, and install the five bolts securing the transfer case, tightening them to the specified torque. For manually controlled models, always tighten the large bolt securing the shifter to the extension housing before the small bolt. Install the vent assembly so the white marking on the hose is positioned in the notch in the shift lever bracket or mounting bracket, ensuring the upper end of the vent hose is 3/4 inch above the top of the shifter on manually controlled models. Connect the rear driveshaft to the transfer case output flange and tighten the bolts to the specified torque. Finally, refill the transfer case with the proper type of lubricant.
    Posted by FordPartsGiant Specialist
    Q:
    What are the fluid recommendations and procedures for checking, draining, and refilling the transfer case on Ford Bronco II? Posted by Customer
    A:
    Use Dexron automatic transmission fluid for refilling or adding fluid to all transfer cases except the Sorg-Warner model 13-59, which is a run-dry unit and contains no fluid. To check the fluid level, position the vehicle on level ground and remove the transfer case fill plug located on the rear of the transfer case; the fluid level should be up to the fill hole. If lubricant does not run out when the plug is removed, add lubricant until it does, then install the fill plug. It is recommended to change the transfer case fluid every 60,000 miles (96,000 km), or sooner if the truck has been driven in deep water. Warming the fluid by driving 15-20 miles on the highway before draining will help it flow better and remove more contaminants. To drain and refill, drive the vehicle to ensure the fluid is at normal operating temperature, then securely raise and support the vehicle on jack stands. Place a drain pan under the transfer case housing below the drain plug, ensuring it is positioned to catch the fluid as it flows outward. Remove the fill plug before the drain plug to avoid complications, then allow the fluid to drain completely. Once drained, install the drain plug securely, fill the transfer case to the proper level with the required fluid, reinstall the filler plug, and finally remove the jack stands to lower the vehicle.
    Posted by FordPartsGiant Specialist
    Q:
    How to remove and install the transfer case on Ford Explorer? Posted by Customer
    A:
    Removing the transfer case requires lifting the rig on jack stands and, if it has Automatic Ride Control, turning off the air suspension switch. If models have a skid plate, then first of all the bolts of fastening this plate to the frame and it should be removed. If so required, remove the damper from the transfer case then turn the case to drain the lubricant. For electronically-controlled models-Press the locking tabs on the electrical connecter and pull it to separate it from the transfer case motor as well as the connector mounting bracket. Also, remove the speed sensor electrical connector and speedometer cable if it is available, this in addition to removing the front and rear driveshafts. Take off the vent hose from the shift lever bracket or the mounting bracket, for the models with manual-control; unscrew the nut from the shift lever and pull the lever off. Slacken and then completely withdraw the bolts that attach the shifter to the extension housing; then use a transmission jack to lift the transfer case upward just enough for the safety chains to hold it in place. Take out the five bolts that screw the transfer case onto the transmission extension housing, push the transfer case back off the transmission output shaft and eliminate the gasket laying between the transfer case and transmission extension housing. For installation take the reverse process that of the removal including putting in a new gasket, ensure that the splines are aligned when sliding the transfer case over the transmission output shaft before fixing it using the five bolts and in the right torque sequence. The white marking on the vent assembly must be properly oriented, the rear driveshaft must be mated to the transfer case output flange, and the transfer case should be filled with the correct lubricant.
    Posted by FordPartsGiant Specialist
    Q:
    How does the cost and time of an overhaul compare to purchasing a rebuilt unit for the 2010 Ford Ranger? Posted by Customer
    A:
    The time and money involved in an overhaul are almost sure to exceed the cost of a rebuilt unit.
    Posted by FordPartsGiant Specialist
    Q:
    What is the final step in the procedure for the 1990 Ford Bronco II? Posted by Customer
    A:
    Reconnect the negative battery cable.
    Posted by FordPartsGiant Specialist
    Q:
    What is the first step in installing the transfer case for the 1986 Ford Bronco II? Posted by Customer
    A:
    Place a new gasket between the transfer case and the extension housing.
    Posted by FordPartsGiant Specialist
    Q:
    What should be done on the 2002 Ford Explorer Sport Trac regarding the shift lever? Posted by Customer
    A:
    On manually-controlled models, remove the nut from the shift lever and remove the shift lever.
    Posted by FordPartsGiant Specialist
    See expert answers on similar Transfer Case
    If you have any questions about this product, please don't hesitate to ask us. We will be happy to help you!

Genuine Ford Part FOTZ-7A039-B, the Right Choice

To ensure reliability, purchase Ford part # FOTZ-7A039-B Transmission Extension Housing. It is sometimes referred to as Mercury Transfer Case. In terms of quality and longevity, OEM parts are top-tier. This is because they are made according to Ford's demanding factory specifications and go through strict quality control. This part fits specific Mercury Mountaineer models.

FordPartsGiant.com is a leading supplier of genuine Ford parts and accessories such as Ford FOTZ7A039B Transmission Extension Housing. On our platform, we provide genuine Ford parts at incredible prices while ensuring top-tier quality. Feel at ease shopping with us, knowing our parts have a hassle-free return policy and rapid delivery service. For detailed Mercury parts information, click here.

Why choose Ford Parts Giant

  • Dedicated Service

    Your complete satisfaction is our #1 goal

  • Lowest Prices

    Best deals on genuine OE parts from dealerships

  • Fast Delivery

    Orders are processed and delivered promptly