Make sure this part fits

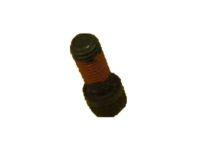
Mercury C3AZ-4635-J U-Joint

1980-1988 Mercury C3AZ4635J

Customer Questions & Expert Answers (23)
Ford C3AZ-4635-J U-Joint
  • Part Description
    Kit - Universal Joint Repair
  • Position
    Front And Rear
  • Manufacturer
    Ford
Make sure this part fits
$13.73 MSRP: $18.75
You Save: $5.02 (27%)
1
ADD TO CART
  • Related Parts
  • Product Specifications
  • Vehicle Fitment
  • Customer Questions & Expert Answers
  • Product Specifications

    BrandGenuine Mercury
    Manufacturer Part NumberC3AZ-4635-J, C3AZ4635J
    Part DescriptionKit - Universal Joint Repair
    Other NamesUniversal Joint
    Item Weight1.20 Pounds
    PositionFront And Rear
    ConditionNew
    Fitment TypeDirect Replacement
    ManufacturerFord
    SKUC3AZ-4635-J
    WarrantyThis genuine Ford part is guaranteed by Ford's factory warranty.
    Shipping & ReturnShipping Policy Return Policy
    Warning: California’s Proposition 65
  • Vehicle Fitment

    Year Make Model Engine Important vehicle option details
    1980 Mercury Bobcat4 Cyl 2.3L3AT C3, 3AT C4, 4MT
    1980-1986 Mercury Capri4 Cyl 2.3L, 6 Cyl 3.3L, 6 Cyl 3.8L, 8 Cyl 4.2L, 8 Cyl 5.0L3AT C3, 3AT C4, 3AT C5, 4AT AOD, 4MT, 5MT
    1980-1988 Mercury Cougar4 Cyl 2.3L, 6 Cyl 3.3L, 6 Cyl 3.8L, 8 Cyl 4.2L, 8 Cyl 5.0L3AT C3, 3AT C4, 3AT C5, 4AT AOD, 4MT, 5MT
    1980-1988 Mercury Grand Marquis8 Cyl 4.2L, 8 Cyl 5.0L, 8 Cyl 5.8L3AT, 3AT C4, 3AT C6, 4AT AOD
    1983-1986 Mercury Marquis4 Cyl 2.3L, 6 Cyl 3.3L, 6 Cyl 3.8L3AT C3, 3AT C5, 4MT
    1980-1983 Mercury Zephyr4 Cyl 2.3L, 6 Cyl 3.3L, 8 Cyl 4.2L3AT C3, 3AT C4, 3AT C5, 4MT
  • Customer Questions & Expert Answers

    Q:
    Does the PN fit my vehicle? Posted by FordPartsGiant Specialist
    A:
    You can Select Your Vehicle to check if C3AZ-4635-J fits your vehicle.
    Posted by FordPartsGiant Specialist
    Q:
    How to repair different types of universal joints, including outer snap-ring, injected plastic, and double cardan type constant velocity joints on Ford F-250? Posted by Customer
    A:
    To service the outer snap-ring type universal joint, first, remove the driveshaft and mark the joint yokes' positions. Extract the snap-rings from the bearing cups, then use sockets or pipe pieces in a vise to press one cup while displacing the opposite one into a larger socket, gripping and twisting the bearing cup out with pliers. Clean the yoke and inspect for damage, then obtain a repair kit that includes trunnion, cups, needle rollers, seals, washers, and snap-rings. Before reassembly, pack grease into the trunnion reservoirs and needle bearings without displacing them. Position the trunnion in the yoke, partially install one cup, insert the trunnion, partially install the opposite cup, center the trunnion, and press both cups into place using sockets slightly smaller than the bearing cups, ensuring needle bearings remain in place. Install the snap-rings and align the shaft yokes to install the other bearing cups similarly. For the injected plastic type, destroy the production line plastic retainers and fit conventional snap-ring repair kits. Support the joint yoke in a press and use a forked tool to apply pressure to eject the bearing cups, then twist them out with a vise. Clean any plastic remnants and obtain a repair kit with a prelubricated trunnion assembly and other components. Assemble the joint, noting that snap-rings are installed inside the yokes, and if the joint is stiff after reassembly, apply hammer blows to free the bearing cups. For the double cardan type constant velocity joint, use an inspection kit to dismantle the joint for inspection, marking the flange and coupling yokes for reassembly. Disengage the flange yoke and trunnion from the centering ball, remove the seal, washers, spring, and ball seats, then clean and inspect all components for wear, replacing any damaged parts. Remove plastic from the coupling yoke groove if necessary, inspect and replace the centering ball if damaged, and press a new ball onto the stud. Lubricate all parts with grease from the repair kit and insert them into the ball seat cavity in the correct order, lubricate the seal lips, and press it into the cavity, filling it with grease. Finally, install the flange yoke to the centering ball, ensuring alignment marks are correct, and install the trunnion caps as previously described.
    Posted by FordPartsGiant Specialist
    Q:
    How do you remove and reinstall a driveshaft and U-joint on Ford Fairmont? Posted by Customer
    A:
    Remove the driveshaft and clean away any dirt and foreign matter from the universal joint area. Remove the snap-rings from the U-joint end caps. Use Ford tool T74P-4635 to remove the bearing caps from the U-joint yoke; if this tool or an equivalent is not available, a vise, a selection of sockets, and a quantity of bearing grease are required. Open the vise wide enough to accommodate the U-joint and two sockets, selecting a socket larger than the bearing cup to allow space for the cup to be pushed into it, and a second socket as close as possible in size to the cup's outer diameter. Apply pressure to the vise, forcing the bearing cup from the yoke into the larger socket, then remove the bearing cup from the yoke. Clean the yokes with a suitable solvent, and if the bearings are to be reinstalled, clean and re-grease them, filling the cups one-third full with grease. Using new seals, start the bearing cup into the yoke and press it into position so that the cup is ¾ inch below the yoke surface, then install the bearing snap-rings. Check the U-joint for free movement in all directions and replace the driveshaft to the vehicle.
    Posted by FordPartsGiant Specialist
    Q:
    How do I overhaul the rear universal joint on Ford Pinto? Posted by Customer
    A:
    This is easier than for the front universal joint as only two spider cups have to be removed. The Remaining cups simply slide off the spider journals, these being held in position by the two U-bolts and small lips on the pinion flange cup locations. Overhaul is otherwise.
    Posted by FordPartsGiant Specialist
    Q:
    How do I overhaul the rear universal joint on Mercury Bobcat? Posted by Customer
    A:
    This is easier than for the front universal joint as only two spider cups have to be removed. The Remaining cups simply slide off the spider journals, these being held in position by the two U-bolts and small lips on the pinion flange cup locations. Overhaul is otherwise.
    Posted by FordPartsGiant Specialist
    Q:
    How can single-cardan and double-cardan U-joints be replaced on Lincoln Mark VII? Posted by Customer
    A:
    Single-cardan U-joints on some 1970 through 1988 models and all 1989 and later models can be replaced by following these steps. First, remove the driveshaft and snap-rings from the spider. Place the driveshaft on a workbench equipped with a vise and use a pipe or large socket to press out the bearing caps. Transfer the sockets to the other side and press out the opposite bearing cap. Pack the new universal joint bearings with grease and position the spider in the yoke. Install the bearing caps and snap-rings, then fill the joint with grease. Finally, reinstall the driveshaft. For double-cardan U-joints, remove the snap-rings and mark the relationship of the components. Press out the bearing caps and remove the centering ball and dust cover. Install new components and press in the bearing caps. Install new snap-rings and reassemble the front U-joint by removing the centering socket.
    Posted by FordPartsGiant Specialist
    Q:
    How to inspect Universal Joint on Ford Pinto? Posted by Customer
    A:
    Wear in the needle roller bearings is characterised by vibration in drive-line, clunks' on taking up the drive, and in extreme cases of lack of lubrication, metallic squeaking, and ultimately grating and shrieking. It is easy to check if the needle roller bearings are worn with the driveshaft in position, by trying to turn the shaft with one hand, the other hand holding the rear axle pinion flange when the rear universal joint is being checked, and the front half coupling when the front universal is being checked, Any movement between the driveshaft and the front and rear half couplings is indicative of considerable wear. If worn, the old bearings and spiders will have to be discarded and repair kit, comprising new universal joint spiders, bearings, oil seals,and retainers purchased. Check also by trying to lift the shaft and noticing any movement in the joints. Examine the driveshaft splines for wear. If worn it will be necessary to purchase a new front half coupling, or if the yokes are badly worn, an exchange driveshaft. It is not possible to fit oversized bearings and journals to the trunnion bearing holes.
    Posted by FordPartsGiant Specialist
    Q:
    How to overhaul front Universal Joint on Ford Pinto? Posted by Customer
    A:
    Clean away all traces of dirt and grease from the snap-rings located on the ends of the bearing cups. Remove the snap-rings by pressing their open ends together with a pair of pliers, and lever them out with a screwdriver, If they are difficult to remove, tap the bearing cup face resting on the top of the spider with a soft-faced hammer which will ease the pressure on the snap-ring. Take off the bearing cups on the driveshaft yoke. To do this select two sockets from a socket spanner set, one large enough to fit completely over the bearing cup and the other smaller than the bearing cup. Open the jaws of the vise and with the sockets opposite each other and the universal joint in between, tighten the vise and so force the narrower socket to move the opposite cup partially out of the yoke into the larger socket. Remove the cup with a pair of pliers. Remove the opposite cup.and then free the yoke from the driveshaft. To remove the remaining two cups now repeat the instructions, or use a socket and hammer. Recover the thrust bearing from inside each cup and remove the seal from the base of each spider journal. Before reassembling, using new parts as necessary, thoroughly clean out the yokes and journals. Fit new oil seals to the spider journals and then assemble the needle rollers in the bearing cups with the assistance of some thin grease. Fill each bearing cup about one third full with a universal grease.not forgetting to refit the thrust bearings first. Refit the bearing cups on the spider and tap the bearings home so that they lie squarely in position. Replace the snap-rings and settle the cups by tapping the whole assembly with a soft faced hammer. Check that angular movement of the universal joint is free throughout its full range without signs of stiffness.
    Posted by FordPartsGiant Specialist
    Q:
    How to inspect Universal Joint on Mercury Bobcat? Posted by Customer
    A:
    Wear in the needle roller bearings is characterised by vibration in drive-line, clunks' on taking up the drive, and in extreme cases of lack of lubrication, metallic squeaking, and ultimately grating and shrieking. It is easy to check if the needle roller bearings are worn with the driveshaft in position, by trying to turn the shaft with one hand, the other hand holding the rear axle pinion flange when the rear universal joint is being checked, and the front half coupling when the front universal is being checked, Any movement between the driveshaft and the front and rear half couplings is indicative of considerable wear. If worn, the old bearings and spiders will have to be discarded and repair kit, comprising new universal joint spiders, bearings, oil seals,and retainers purchased. Check also by trying to lift the shaft and noticing any movement in the joints. Examine the driveshaft splines for wear. If worn it will be necessary to purchase a new front half coupling, or if the yokes are badly worn, an exchange driveshaft. It is not possible to fit oversized bearings and journals to the trunnion bearing holes.
    Posted by FordPartsGiant Specialist
    Q:
    What is the function and maintenance of the driveshaft and Universal Joint on Mercury Capri? Posted by Customer
    A:
    The driveshaft is a long tube extending from the transmission to the rear end housing and supplied at the two ends is supplied with what are known as universal joints that allow the shaft to transfer power to the rear wheels despite the fact that the wheels may be at right angles to each other. In front, it comes with a splined yoke which engages with the extension housing of the transmission such that it moves from side to side while in use. An oil seal avoids the loss of fluids and the intrusion of undesirable substances; if there is seepage, the oil seal will have to be changed. The driveshaft assembly only needs little servicing because the universal joints are pre-lubricated and can only be replaced when one has problems which require the withdrawal of the driveshaft from the car. The alignment of the driveshaft is very important, therefore it should be very clean, and checked for signs of damage, also the small weights that are used to balance the shaft should not be lost. Depending on whether the problem involves noise or deliberate vibration while driving, a road test can be carried out to validate if 'the' driveshaft is the cause. This includes recording the magnitude and frequency of the complaint as well as the network speed at which the problem is particularly noticeable and varies the vehicle in a range of gear. If the noise or vibration increases with the increase of engine speed then the driveshaft does not seem to be the problem. On the other hand if the problem reduces or disappears a physical examination of the driveshaft to determine the presence of any damage, balance affecting material, missing weights and indications of damaged universal joints should be carried out besides checking for balanced tires. To inspect worn universal joints, one may accelerate slowly in High gear, or coast and then accelerate and listen for clunks or knocks, it is also possible to coast in Neutral at low speed, to hear any strange noise. Further, if the vehicle is raised and the driveshaft is manually turned while looking at the universal joints for a lot of play, then, this indicates that they may have worn out.
    Posted by FordPartsGiant Specialist
    Q:
    How do you remove and reinstall a driveshaft and U-joint on Mercury Zephyr? Posted by Customer
    A:
    Remove the driveshaft and clean away any dirt and foreign matter from the universal joint area. Remove the snap-rings from the U-joint end caps. Use Ford tool T74P-4635 to remove the bearing caps from the U-joint yoke; if this tool or an equivalent is not available, a vise, a selection of sockets, and a quantity of bearing grease are required. Open the vise wide enough to accommodate the U-joint and two sockets, selecting a socket larger than the bearing cup to allow space for the cup to be pushed into it, and a second socket as close as possible in size to the cup's outer diameter. Apply pressure to the vise, forcing the bearing cup from the yoke into the larger socket, then remove the bearing cup from the yoke. Clean the yokes with a suitable solvent, and if the bearings are to be reinstalled, clean and re-grease them, filling the cups one-third full with grease. Using new seals, start the bearing cup into the yoke and press it into position so that the cup is ¾ inch below the yoke surface, then install the bearing snap-rings. Check the U-joint for free movement in all directions and replace the driveshaft to the vehicle.
    Posted by FordPartsGiant Specialist
    Q:
    How to overhaul front Universal Joint on Mercury Bobcat? Posted by Customer
    A:
    Clean away all traces of dirt and grease from the snap-rings located on the ends of the bearing cups. Remove the snap-rings by pressing their open ends together with a pair of pliers, and lever them out with a screwdriver, If they are difficult to remove, tap the bearing cup face resting on the top of the spider with a soft-faced hammer which will ease the pressure on the snap-ring. Take off the bearing cups on the driveshaft yoke. To do this select two sockets from a socket spanner set, one large enough to fit completely over the bearing cup and the other smaller than the bearing cup. Open the jaws of the vise and with the sockets opposite each other and the universal joint in between, tighten the vise and so force the narrower socket to move the opposite cup partially out of the yoke into the larger socket. Remove the cup with a pair of pliers. Remove the opposite cup.and then free the yoke from the driveshaft. To remove the remaining two cups now repeat the instructions, or use a socket and hammer. Recover the thrust bearing from inside each cup and remove the seal from the base of each spider journal. Before reassembling, using new parts as necessary, thoroughly clean out the yokes and journals. Fit new oil seals to the spider journals and then assemble the needle rollers in the bearing cups with the assistance of some thin grease. Fill each bearing cup about one third full with a universal grease.not forgetting to refit the thrust bearings first. Refit the bearing cups on the spider and tap the bearings home so that they lie squarely in position. Replace the snap-rings and settle the cups by tapping the whole assembly with a soft faced hammer. Check that angular movement of the universal joint is free throughout its full range without signs of stiffness.
    Posted by FordPartsGiant Specialist
    Q:
    How to repair different types of universal joints, including outer snap-ring, injected plastic, and double cardan type constant velocity joints on Ford Bronco? Posted by Customer
    A:
    To service the outer snap-ring type universal joint, first, remove the driveshaft and mark the joint yokes' positions. Extract the snap-rings from the bearing cups, then use sockets or pipe pieces in a vise to press one cup while displacing the opposite one into a larger socket, gripping and twisting the bearing cup out with pliers. Clean the yoke and inspect for damage, then obtain a repair kit that includes trunnion, cups, needle rollers, seals, washers, and snap-rings. Before reassembly, pack grease into the trunnion reservoirs and needle bearings without displacing them. Position the trunnion in the yoke, partially install one cup, insert the trunnion, partially install the opposite cup, center the trunnion, and press both cups into place using sockets slightly smaller than the bearing cups, ensuring needle bearings remain in place. Install the snap-rings and align the shaft yokes to install the other bearing cups similarly. For the injected plastic type, destroy the production line plastic retainers and fit conventional snap-ring repair kits. Support the joint yoke in a press and use a forked tool to apply pressure to eject the bearing cups, then twist them out with a vise. Clean any plastic remnants and obtain a repair kit with a prelubricated trunnion assembly and other components. Assemble the joint, noting that snap-rings are installed inside the yokes, and if the joint is stiff after reassembly, apply hammer blows to free the bearing cups. For the double cardan type constant velocity joint, use an inspection kit to dismantle the joint for inspection, marking the flange and coupling yokes for reassembly. Disengage the flange yoke and trunnion from the centering ball, remove the seal, washers, spring, and ball seats, then clean and inspect all components for wear, replacing any damaged parts. Remove plastic from the coupling yoke groove if necessary, inspect and replace the centering ball if damaged, and press a new ball onto the stud. Lubricate all parts with grease from the repair kit and insert them into the ball seat cavity in the correct order, lubricate the seal lips, and press it into the cavity, filling it with grease. Finally, install the flange yoke to the centering ball, ensuring alignment marks are correct, and install the trunnion caps as previously described.
    Posted by FordPartsGiant Specialist
    Q:
    What is another method to check for universal joint wear for the 1980 Ford F-250? Posted by Customer
    A:
    Another method to check for universal joint wear is to: 1. Use a pry bar inserted into the gap between the universal joint and the driveshaft or flange. 2. Leave the vehicle in gear and try to pry the joint both radially and axially. 3. Any looseness should be apparent with this method.
    Posted by FordPartsGiant Specialist
    Q:
    What are universal joints for the 1985 Ford F-250? Posted by Customer
    A:
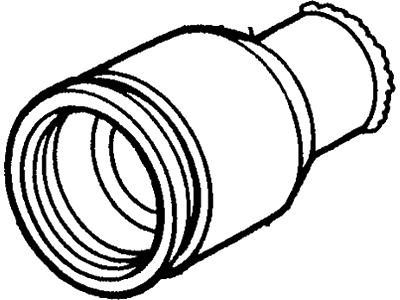
    Universal joints are mechanical couplings that connect two rotating components that meet each other at different angles.
    Posted by FordPartsGiant Specialist
    Q:
    How can you make a simple check of the universal joint condition for the 1982 Ford Fairmont? Posted by Customer
    A:
    To make a simple check of the universal joint condition, park the vehicle on a level surface with the transmission in gear or 'Park'. Block the wheels and engage the parking brake.
    Posted by FordPartsGiant Specialist
    Q:
    What are the steps to replace single-cardan U-joints the 1985 Lincoln Continental? Posted by Customer
    A:
    The steps are as follows: 1. Remove the driveshaft and snap-rings from the spider. 2. Place the driveshaft on a workbench equipped with a vise. 3. Use a pipe or large socket to press out the bearing caps. 4. Transfer the sockets to the other side and press out the opposite bearing cap. 5. Pack the new universal joint bearings with grease. 6. Position the spider in the yoke. 7. Install the bearing caps and snap-rings. 8. Fill the joint with grease. 9. Reinstall the driveshaft.
    Posted by FordPartsGiant Specialist
    See expert answers on similar Universal Joint
    Q:
    How do you remove the snap-rings from the spider for the 1986 Mercury Capri? Posted by Customer
    A:
    Using a small pair of pliers, remove the snap-rings from the spider. A pair of needle-nose pliers can be used to remove the universal joint snap-rings.
    Posted by FordPartsGiant Specialist
    Q:
    How do you replace double-cardan U-joints from the 1982 Lincoln Town Car? Posted by Customer
    A:
    The steps to replace double-cardan U-joints are as follows: 1. Remove the snap-rings and mark the relationship of the components. 2. Press out the bearing caps. 3. Remove the centering ball and dust cover. 4. Install new components. 5. Press in the bearing caps. 6. Install new snap-rings. 7. Reassemble the front U-joint by removing the centering socket.
    Posted by FordPartsGiant Specialist
    See expert answers on similar Universal Joint
    Q:
    How should you install the driveshaft for the 1999 Mercury Grand Marquis? Posted by Customer
    A:
    Tighten the companion flange bolts to the torque specifications.
    Posted by FordPartsGiant Specialist
    See expert answers on similar Universal Joint
    Q:
    What are the symptoms of wear in the universal joints for the 1983 Mercury Zephyr? Posted by Customer
    A:
    Wear in the universal joints is characterized by vibration in the driveline, "clunking" noises when starting from a standstill, and metallic squeaking and grating sounds. Another symptom of universal joint or driveline bearing problems is a harmonic rumbling at highway cruising speeds.
    Posted by FordPartsGiant Specialist
    Q:
    What are universal joints for the 1995 Ford Bronco? Posted by Customer
    A:
    Universal joints are mechanical couplings that connect two rotating components that meet each other at different angles.
    Posted by FordPartsGiant Specialist
    Q:
    What is a final test for wear in the universal joints for the 1995 Ford Bronco? Posted by Customer
    A:
    A final test for wear is to attempt to lift the shaft and note any movement between the yokes of the joints.
    Posted by FordPartsGiant Specialist
    If you have any questions about this product, please don't hesitate to ask us. We will be happy to help you!

Genuine Ford Part C3AZ-4635-J, the Right Choice

To ensure reliability, purchase Ford part # C3AZ-4635-J U-Joint. It is sometimes referred to as Mercury Universal Joint. In terms of quality and longevity, OEM parts are top-tier. This is because they are made according to Ford's demanding factory specifications and go through strict quality control. This part fits specific Mercury Bobcat, Capri, Cougar models.

FordPartsGiant.com is a leading supplier of genuine Ford parts and accessories such as Ford C3AZ4635J U-Joint. On our platform, we provide genuine Ford parts at incredible prices while ensuring top-tier quality. Feel at ease shopping with us, knowing our parts have a hassle-free return policy and rapid delivery service. For detailed Mercury parts information, click here.

Why choose Ford Parts Giant

  • Dedicated Service

    Your complete satisfaction is our #1 goal

  • Lowest Prices

    Best deals on genuine OE parts from dealerships

  • Fast Delivery

    Orders are processed and delivered promptly