Make sure this part fits

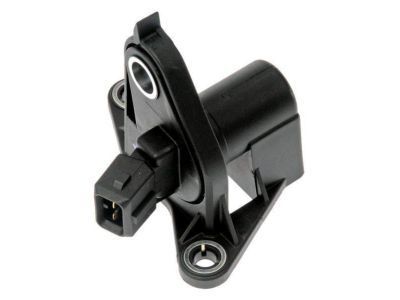
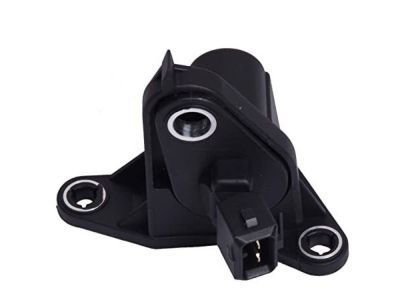
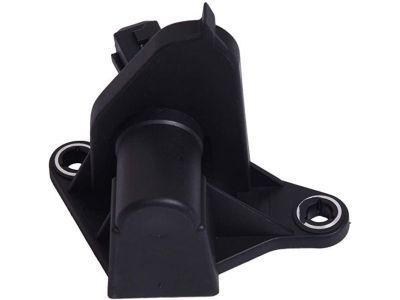
Mercury 1L2Z-6C315-BB Sensor - Crankshaft Position - CPS

2002-2004 Mercury Mountaineer 1L2Z6C315BB

Customer Questions & Expert Answers (4)
Ford 1L2Z-6C315-BB Sensor - Crankshaft Position - CPS
  • Part Description
    Sensor - Crankshaft Position - Cps
  • Replaced By
    5L2Z-6C315-A
  • Manufacturer
    Ford
Make sure this part fits
$38.51 MSRP: $60.36
You Save: $21.85 (37%)
Ships in 1-2 Business Days
1
ADD TO CART
  • Related Parts
  • Product Specifications
  • Vehicle Fitment
  • Customer Questions & Expert Answers
  • Product Specifications

    BrandGenuine Mercury
    Manufacturer Part Number1L2Z-6C315-BB, 1L2Z6C315BB
    Part DescriptionSensor - Crankshaft Position - Cps
    Item Dimensions6.1 x 6.2 x 6.3 inches
    Item Weight1.20 Pounds
    ConditionNew
    Fitment TypeDirect Replacement
    ManufacturerFord
    SKU1L2Z-6C315-BB
    WarrantyThis genuine Ford part is guaranteed by Ford's factory warranty.
    Shipping & ReturnShipping Policy Return Policy
    Warning: California’s Proposition 65
  • Vehicle Fitment

    Year Make Model Engine Important vehicle option details
    2002-2004 Mercury Mountaineer6 Cyl 4.0L SOHC EFI5-Speed Automatic Transmission 5R55S, 5-Speed Automatic Transmission 5R55W, 5-Speed Manual Transmission (M5R4), 6-Speed Automatic Transmission (6R80), 6-Speed Automatic Transmission 6R60, Four-Wheel Drive (Full Time) (Left Hand Drive), Four-Wheel Drive (Part Time) (Left Hand Drive), Four-Wheel Drive (Part Time) (Right Hand Drive), Left Hand Drive, Rear-Wheel Drive (Left Hand Drive)
  • Customer Questions & Expert Answers

    Q:
    Does the PN fit my vehicle? Posted by FordPartsGiant Specialist
    A:
    You can Select Your Vehicle to check if 1L2Z-6C315-BB fits your vehicle.
    Posted by FordPartsGiant Specialist
    Q:
    How to replace the CKP sensor on Ford Mustang? Posted by Customer
    A:
    A CKP sensor for the 3.7L V6 engine is situated at the rear of the engine block at an opening on the side of the engine. First, remove the cable involving the negative terminal of the battery, then follow the correct procedure that is the raising of the automobile off the ground with the aid of jacks and placement of jackstands. Remove heat shield fasteners; heat shield then rubber grommet/plug from the left side of the engine block. Open the access hole to quickly unplug the electrical connector from CKP sensor, and then the center bolt can be removed to take the sensor out of the rear oil seal retainer. Coat the O-ring for the sensor with the clean engine oil, insert the sensor to the seal retainer until it is hidden and lock it with the mounting bolt. For the 4.0L V6 engine, the CKP sensor is installed on the front side of the timing chain cover . Remove the bolt of the negative terminal of the battery, jack up the front of the car and remove the electrical connector from the CKP sensor. These are removed by using nut/bolt that are found on top of the mounting rails and this process involves detaching and physically pulling out the sensor note that the process of installing is done by reversing the removal process. In the 4.6L V8 engine, the CKP sensor is mounted with its connector at the right frontal corner of the engine block which means that the air conditioning compressor must be removed to access the sensor. The negative terminal of the battery must be disconnected, the drivebelt removed and the front of the vehicle raised. Unplug the wiring harness clips from the air conditioning compressor and remove the electrical connector from the compressor clutch, accompanied by removal of the air conditioning compressor screws that do not involve disconnecting of the refrigerant lines. Loosen the electrical connector of the CKP sensor, unbolt and extract the sensor. Installation is done in the reverse sequence. Like in the 5.0L V8, the CKP sensor is located at the back side of the engine block between the engine block and bell housing. Remove the negative terminal from the battery, then the electrical connector from CKP sensor. After that, you have to take out the mounting bolt and to pull the sensor through the rear oil seal retainer and the engine block boss. Put a few drops of clean engine oil on the O-ring of the sensor and bring the sensor in sitting position securely and tighten the nut using the retaining bolt care should be taken for not damaging the gasket if it is not placed fully seated. The rest of installation is the reverse of removal.
    Posted by FordPartsGiant Specialist
    Q:
    How to diagnose and replace a crankshaft position sensor on Ford Explorer Sport Trac? Posted by Customer
    A:
    If the following tests indicate that a sensor is good, and not the cause of a driveability problem or OTC, check the wiring harness and connectors between the sensor and the PCM for an open or short circuit. If no problems are found, have the vehicle checked by a dealer service department or other qualified repair shop. The crankshaft position CKP) sensor is mounted on the engine front cover, next to a toothed trigger wheel. The trigger wheel has 35 evenly spaced teeth and one gap where a 36th tooth would be. The gap lets the CKP sensor signal the PCM when the crankshaft is 60-degrees before TDC for cylinders 1 and 5. The PCM then computes actual TDC or any number of degrees before or after TDC and uses this information to control ignition spark advance. The CKP sensor also provides the engine speed signal to the PCM and is part of the misfire monitor circuit integrated into the PCM. The Electronic Engine Control (EEC)system can detect different CKP sensor problems and set a trouble code to indicate the specific fault. Disconnect the CKP sensor connector, turn the ignition On but do not start the engine. Use a voltmeter to check for voltage between the sensor connector and ground. Disable the fuel system, connect a voltmeter to the CKP sensor, set the meter on the AC scale, and check for voltage pulses as you crank the engine. Caution: Keep voltmeter leads away circuit voltage at the sensor connector should from the drivebelt and rotating engine parts while cranking the engine. If no pulsing voltage signal is produced, replace the crankshaft sensor. Be sure the ignition is off and disconnect the sensor electrical connector. Remove the retaining bolts and remove the sensor from the engine front cover. Installation is the reverse of removal. Note: On 2001 and later models, if you are replacing the CKP sensor, the new sensor will have small wear tabs at the crank pulley side. Install the sensor with the spacer tabs touching the damper, then tighten the mounting bolt(s). Once the engine is running, the tabs will quickly wear off, leaving the correct sensor-to-puller spacing.
    Posted by FordPartsGiant Specialist
    Q:
    How do you replace the Intake Air Temperature (IAT) sensor for the 1995 Ford Ranger? Posted by Customer
    A:
    To replace the Intake Air Temperature (IAT) sensor, disconnect the battery, unplug the IAT connector, and remove the sensor from the air intake duct.
    Posted by FordPartsGiant Specialist
    See expert answers on similar Crankshaft Position Sensor
    If you have any questions about this product, please don't hesitate to ask us. We will be happy to help you!

Genuine Ford Part 1L2Z-6C315-BB, the Right Choice

To ensure reliability, purchase Ford part # 1L2Z-6C315-BB Sensor - Crankshaft Position - CPS. It is sometimes referred to as Mercury Crankshaft Position Sensor. In terms of quality and longevity, OEM parts are top-tier. This is because they are made according to Ford's demanding factory specifications and go through strict quality control. This part fits specific Mercury Mountaineer models.

FordPartsGiant.com is a leading supplier of genuine Ford parts and accessories such as Ford 1L2Z6C315BB Sensor - Crankshaft Position - CPS. On our platform, we provide genuine Ford parts at incredible prices while ensuring top-tier quality. Feel at ease shopping with us, knowing our parts have a hassle-free return policy and rapid delivery service. For detailed Mercury parts information, click here.

Why choose Ford Parts Giant

  • Dedicated Service

    Your complete satisfaction is our #1 goal

  • Lowest Prices

    Best deals on genuine OE parts from dealerships

  • Fast Delivery

    Orders are processed and delivered promptly