Make sure this part fits

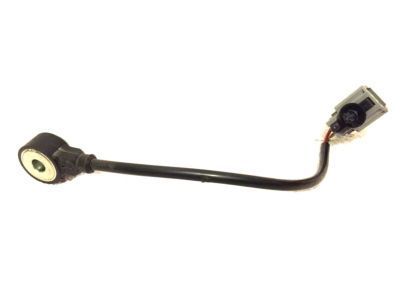
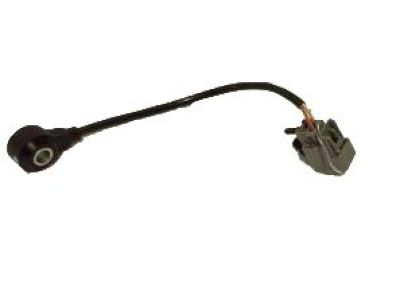
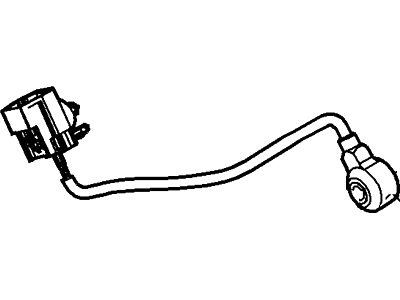
Mercury 1S7Z-12A699-BB Sensor - Engine Knock

2005-2011 Mercury 1S7Z12A699BB

Customer Questions & Expert Answers (10)
Ford 1S7Z-12A699-BB Sensor - Engine Knock
  • Part Description
    Sensor - Engine Knock
  • Base No.
    12A699
  • Replaces
    1S7Z-12A699-BA
  • Manufacturer
    Ford
Make sure this part fits
$38.26 MSRP: $57.82
You Save: $19.56 (34%)
Ships in 1-3 Business Days
1
ADD TO CART
  • Related Parts
  • Product Specifications
  • Vehicle Fitment
  • Customer Questions & Expert Answers
  • Product Specifications

    BrandGenuine Mercury
    Base No.12A699
    Manufacturer Part Number1S7Z-12A699-BB, 1S7Z12A699BB
    Part DescriptionSensor - Engine Knock
    Other NamesKnock Sensor, Sensor
    Item Weight0.30 Pounds
    ConditionNew
    Fitment TypeDirect Replacement
    Replaces1S7Z-12A699-BA
    ManufacturerFord
    SKU1S7Z-12A699-BB
    WarrantyThis genuine Ford part is guaranteed by Ford's factory warranty.
    Shipping & ReturnShipping Policy Return Policy
    Warning: California’s Proposition 65
  • Vehicle Fitment

    Year Make Model Engine Important vehicle option details
    2005-2011 Mercury Mariner4 Cyl 2.3L, 4 Cyl 2.3L Hybrid Gas/Electric DOHC, 4 Cyl 2.5L Duratec (110kW/150PS), 4 Cyl 2.5L PFI Gas/Electric4AT CD4E, 5-Speed Manual Transmission, 5-Speed Manual Transmission - AK, 6-Speed Automatic Transmission 6F Mid-Range, CVT Auto Trans Powersplit Elec, Four-Wheel Drive (Full Time) (Left Hand Drive), Four-Wheel Drive (Right Hand Drive), Front-Wheel Drive (Left Hand Drive), Left Hand Drive, Two-Wheel Drive (Left Hand Drive), Two-Wheel Drive (Right Hand Drive)
    2006-2011 Mercury Milan4 Cyl 2.3L, 4 Cyl 2.5L Duratec HE PFI, 4 Cyl 2.5L PFI Gas/Electric5-Speed Automatic Transmission Mazda FNR5, 5-Speed Manual Transmission (G5M), 6-Speed Automatic Transaxle - AWF21, 6-Speed Automatic Transmission 6F Mid-Range, 6-Speed Manual Transmission Mazda G6M, CVT Auto Trans Powersplit Elec, Four-Wheel Drive (Full Time) (Left Hand Drive), Front-Wheel Drive (Left Hand Drive), Left Hand Drive
  • Customer Questions & Expert Answers

    Q:
    Does the PN fit my vehicle? Posted by FordPartsGiant Specialist
    A:
    You can Select Your Vehicle to check if 1S7Z-12A699-BB fits your vehicle.
    Posted by FordPartsGiant Specialist
    Q:
    How to install a knock sensor on a Ford Focus engine? Posted by Customer
    A:
    A knock sensor is installed on both 2.0L SPI engines and 20LZetec-E engines. On Zetec-E engines, it's bolted to the firewall-side of the cylinder block, just ahead of the starter motor, On SPI engines, it is located on the front side of the block, just below the exhaust manifold,On 2.3L and 2005 and later 2.0L engines, it is located on the block,under the intake manifold. The knock sensor wiring plug is clipped to a bracket next to the engine oil dipstick. Slide the wiring plug downward to remove it from the clip, then separate the two halves of the wiring plug. Trace the wiring down to the knock sensor, then unscrew the center bolt and remove the sensor from the engine. On 2.3L and 2005 and later 2.0L engines, the intake manifold must be removed first. Installation is a reversal of removal, noting the following points: Clean the sensor and its location on the engine. The sensor must be positioned so that it does not contact the cylinder head,or the crankcase ventilation system oil separator housing (where applicable). The sensor bolt must be tightened to the specified torque, as this is critical to the sensor's correct operation.
    Posted by FordPartsGiant Specialist
    Q:
    Where is the location and how to remove and install the knock sensor on 1993-2011 Ford Ranger? Posted by Customer
    A:
    The knock sensor is positioned in the valley between the cylinder heads on V6 engines and on the left side of the block on 2.3L engines, underneath the intake manifold. Disconnecting the cable from the negative battery terminal is paramount. Disconnecting the knock sensor harness connector, removing the sensor mounting bolt and also removing the sensor are some of these steps for 2.3L engines. Take off intake manifold for V6 engines. For early V6 engines, remove noise shield also. Delicately remove noise shield which is packed inside lower intake manifold's intake runners. Disconnect knock sensor electrical connector also. Some models have their knock sensor connectors placed at the left end of firewall whereas others have theirs located in between a top of a cylinder head or closer to this knock sensor. Remove the retaining bolt for a knock sensor and then take out that knock sensor.
    Posted by FordPartsGiant Specialist
    Q:
    How to remove and install the knock sensor on 2000-2011 Ford Ranger? Posted by Customer
    A:
    The knock sensor is found between the cylinder heads on V6 engines, and on the left side of the block on 2.3L engines. Disconnect the negative battery terminal cable. On 2.3L engines, disconnect the sensor harness, remove the mounting bolt and sensor. A new sensor is needed once the old one is removed. On V6 engines, remove the intake manifold and noise shield if necessary. Disconnect the sensor electrical connector, which varies in location depending on the model. Remove the sensor retaining bolt and sensor. Installation is the reverse of removal, ensuring the bolt is tightened securely.
    Posted by FordPartsGiant Specialist
    Q:
    How to remove and install knock sensors in a Lincoln MKX? Posted by Customer
    A:
    Disconnect the negative battery terminal. Find the knock sensors behind the intake manifold on the front side of the block. Remove the manifold, disconnect the sensor's electrical connector, and remove the bolt and sensor. Install the right-hand sensor with the wire end at 6 o'clock, and the left at 3 o'clock. For V6 models, sensors are between the cylinder heads. They share a wiring harness and must be replaced together. Remove the intake manifold, thermostat housing, coolant tube, disconnect the sensor connector(s), remove the bolt(s) and sensor(s). Reverse the process for installation, and tighten the new ECT sensor.
    Posted by FordPartsGiant Specialist
    Q:
    How to remove and install knock sensors on Mercury Mariner? Posted by Customer
    A:
    For 2006 and earlier four-cylinder models, start by disconnecting the cable from the negative battery terminal, then raise the front of the vehicle and secure it on jackstands. Locate the knock sensor on the back side of the block near the alternator; for the 2.3L model, remove the intake manifold first. Detach the knock sensor electrical connector from its bracket and disconnect it, followed by removing the retaining nut and the sensor itself. Installation is the reverse of removal, ensuring the retaining nut is tightened to the specified torque. After reconnecting the battery, the Powertrain Control Module (PCM) must relearn its idle and fuel trim strategy for optimal performance. For 2008 and earlier V6 models, the process begins similarly with the negative battery terminal disconnection and vehicle elevation. The knock sensor is located on the rear side of the block near the transaxle; trace the electrical lead to the connector, disconnect it, and then remove the retaining bolt and sensor. Again, installation is the reverse, with attention to torque specifications. After reconnecting the battery, the PCM must relearn its idle and fuel trim strategy. For 2007 and later four-cylinder models, disconnect the negative battery terminal, remove the intake manifold, disconnect the wiring harness from the sensor, and then remove the mounting bolt and sensor, with installation being the reverse. For 2009 and later V6 models, note that there are two knock sensors; one is on the left end of the rear cylinder head and the other is under the lower intake manifold. Disconnect the negative battery terminal, remove the lower intake manifold if working on the engine block-mounted sensor, disconnect the wiring harness, and remove the mounting bolt and sensor, with installation following the reverse order.
    Posted by FordPartsGiant Specialist
    Q:
    How to remove and install knock sensors on Ford Escape? Posted by Customer
    A:
    For 2006 and earlier four-cylinder models, start by disconnecting the cable from the negative battery terminal, then raise the front of the vehicle and secure it on jackstands. Locate the knock sensor on the back side of the block near the alternator; for the 2.3L model, remove the intake manifold first. Detach the knock sensor electrical connector from its bracket and disconnect it, followed by removing the retaining nut and the sensor itself. Installation is the reverse of removal, ensuring the retaining nut is tightened to the specified torque. After reconnecting the battery, the Powertrain Control Module (PCM) must relearn its idle and fuel trim strategy for optimal performance. For 2008 and earlier V6 models, the process begins similarly with the negative battery terminal disconnection and vehicle elevation. The knock sensor is located on the rear side of the block near the transaxle; trace the electrical lead to the connector, disconnect it, and then remove the retaining bolt and sensor. Again, installation is the reverse, with attention to torque specifications. After reconnecting the battery, the PCM must relearn its idle and fuel trim strategy. For 2007 and later four-cylinder models, disconnect the negative battery terminal, remove the intake manifold, disconnect the wiring harness from the sensor, and then remove the mounting bolt and sensor, with installation being the reverse. For 2009 and later V6 models, note that there are two knock sensors; one is on the left end of the rear cylinder head and the other is under the lower intake manifold. Disconnect the negative battery terminal, remove the lower intake manifold if working on the engine block-mounted sensor, disconnect the wiring harness, and remove the mounting bolt and sensor, with installation following the reverse order.
    Posted by FordPartsGiant Specialist
    Q:
    Where are the knock sensors located, and how many should be replaced for the 2018 Ford Fusion? Posted by Customer
    A:
    The knock sensors on four-cylinder models are located on the front side of the block, behind the intake manifold. The 1.5L, 1.6L, and 2.0L engines have two knock sensors.
    Posted by FordPartsGiant Specialist
    See expert answers on similar Knock Sensor
    Q:
    What should be done after raising the 2008 Ford Taurus? Posted by Customer
    A:
    Loosen the knock sensor heat shield and position it aside.
    Posted by FordPartsGiant Specialist
    See expert answers on similar Knock Sensor
    Q:
    How do you remove the knock sensors on the 2014 Ford Edge? Posted by Customer
    A:
    To remove the knock sensors on V6 models, you need to remove the upper and lower intake manifold, as well as the thermostat housing and coolant tube. Then, disconnect the knock sensor electrical connector(s) and remove the knock sensor bolt(s) and knock sensor(s).
    Posted by FordPartsGiant Specialist
    See expert answers on similar Knock Sensor
    If you have any questions about this product, please don't hesitate to ask us. We will be happy to help you!

Genuine Ford Part 1S7Z-12A699-BB, the Right Choice

To ensure reliability, purchase Ford part # 1S7Z-12A699-BB Sensor - Engine Knock. It is sometimes referred to as Mercury Knock Sensor. In terms of quality and longevity, OEM parts are top-tier. This is because they are made according to Ford's demanding factory specifications and go through strict quality control. This part fits specific Mercury Mariner, Milan models.

FordPartsGiant.com is a leading supplier of genuine Ford parts and accessories such as Ford 1S7Z12A699BB Sensor - Engine Knock. On our platform, we provide genuine Ford parts at incredible prices while ensuring top-tier quality. Feel at ease shopping with us, knowing our parts have a hassle-free return policy and rapid delivery service. For detailed Mercury parts information, click here.

Why choose Ford Parts Giant

  • Dedicated Service

    Your complete satisfaction is our #1 goal

  • Lowest Prices

    Best deals on genuine OE parts from dealerships

  • Fast Delivery

    Orders are processed and delivered promptly