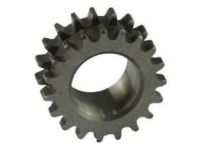
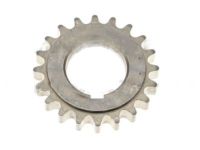
Make sure this part fits

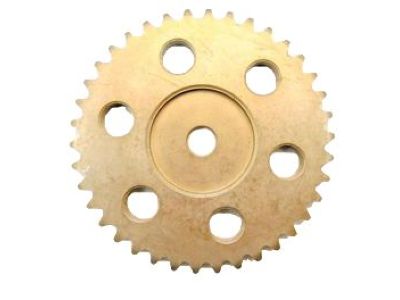
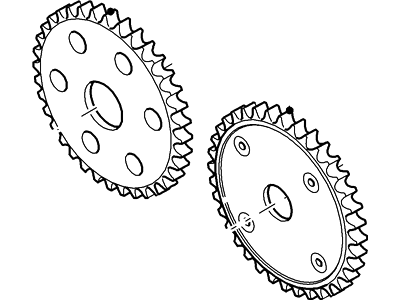
Mercury 1S7Z-6256-AA Sprocket - Camshaft

2005-2011 Mercury 1S7Z6256AA

Customer Questions & Expert Answers (13)
Ford 1S7Z-6256-AA Sprocket - Camshaft
  • Part Description
    Sprocket - Camshaft
  • Base No.
    6256
  • Position
    Driver Side & Passenger Side
  • Manufacturer
    Ford
Make sure this part fits
$16.25 MSRP: $23.75
You Save: $7.50 (32%)
Ships in 1-2 Business Days
1
ADD TO CART
  • Related Parts
  • Product Specifications
  • Vehicle Fitment
  • Customer Questions & Expert Answers
  • Product Specifications

    BrandGenuine Mercury
    Base No.6256
    Manufacturer Part Number1S7Z-6256-AA, 1S7Z6256AA
    Part DescriptionSprocket - Camshaft
    Item Dimensions6.3 x 6.1 x 2.2 inches
    Item Weight0.90 Pounds
    PositionDriver Side & Passenger Side
    ConditionNew
    Fitment TypeDirect Replacement
    ManufacturerFord
    SKU1S7Z-6256-AA
    WarrantyThis genuine Ford part is guaranteed by Ford's factory warranty.
    Shipping & ReturnShipping Policy Return Policy
    Warning: California’s Proposition 65
  • Vehicle Fitment

    Year Make Model Engine Important vehicle option details
    2005-2011 Mercury Mariner4 Cyl 2.3L, 4 Cyl 2.3L Hybrid Gas/Electric DOHC, 4 Cyl 2.5L Duratec (110kW/150PS), 4 Cyl 2.5L PFI Gas/Electric4AT CD4E, 5-Speed Manual Transmission, 5-Speed Manual Transmission - AK, 6-Speed Automatic Transmission 6F Mid-Range, CVT Auto Trans Powersplit Elec, Four-Wheel Drive (Full Time) (Left Hand Drive), Four-Wheel Drive (Right Hand Drive), Front-Wheel Drive (Left Hand Drive), Left Hand Drive, Two-Wheel Drive (Left Hand Drive), Two-Wheel Drive (Right Hand Drive)
    2007-2011 Mercury Milan4 Cyl 2.3L, 4 Cyl 2.5L Duratec HE PFI, 4 Cyl 2.5L PFI Gas/Electric5-Speed Automatic Transmission Mazda FNR5, 5-Speed Manual Transmission (G5M), 6-Speed Automatic Transaxle - AWF21, 6-Speed Automatic Transmission 6F Mid-Range, 6-Speed Manual Transmission Mazda G6M, CVT Auto Trans Powersplit Elec, Four-Wheel Drive (Full Time) (Left Hand Drive), Front-Wheel Drive (Left Hand Drive), Left Hand Drive
  • Customer Questions & Expert Answers

    Q:
    Does the PN fit my vehicle? Posted by FordPartsGiant Specialist
    A:
    You can Select Your Vehicle to check if 1S7Z-6256-AA fits your vehicle.
    Posted by FordPartsGiant Specialist
    Q:
    How do you check, remove, and install the timing chain and sprockets in 3.0L V6 engine on 2000-2011 Ford Ranger? Posted by Customer
    A:
    Firstly, the left valve cover has to be taken off, and with that, loosen the number 5 cylinder exhaust valve rocker arm, turning it to the side. Fix a dial indicator on the end of the push rod in order to measure the vibration of the valve lifter. Loosen the crankshaft sprocket by a clock wise rotation providing the correct timing mark at piston number 1 at the Top Dead Center on degree indicator on the right side the chain will have slack. Scribe a zero line on the dial indicator stick and turn the crankshaft in the anticlockwise direction until the pointer shows the next increment on the dial indicator, observe how far the damper TDC timing mark has been from the pointer. If the reading is more than 6 then the timing chain and sprockets have to be replaced. Secondly, rotate the crankshaft in anticlock wise direction till the number one piston is at TDC, remove the negative terminal of the battery and lastly remove the timing chain cover. Locate the camshaft sprocket bolt and loosen it but make sure that the engine is off when you do this, you then remove the sprocket with the chain still on. Pop the crankshaft sprocket off some ways, and make sure that you do not lose the tiny crankshaft key, then have a look at the timing chain and sprockets if they are worn or have been damaged and replace them altogether. For installation ensure that the sprockets and the chain are fixed on the camshaft and the crankshaft in such a way that the timing marks are in line then use a brass drift and hammer to fix the crankshaft sprocket into place. The camshaft bolt and washer are to be installed and the bolts tightened to the specified torque, if the camshaft bolt has a drilled to oil passage it has to be open before installing the bolt and do not use any other type of bolt than specified. Last of all, lubricate the timing chain and the sprockets and replace the timing chain cover as well as the other parts that were disconnected.
    Posted by FordPartsGiant Specialist
    Q:
    What are the steps involved in the removal, inspection, and installation of the timing chain,Tensioner and Timing Chain Guide in V6 engine on Mercury Mariner? Posted by Customer
    A:
    Because of the confined space, it is very difficult to undertake this process with the engine still installed and if a lot of work is needed then it may be advisable to remove the engine in the first instance. Timing is quite complex, and an error in it can cause significant levels of damage to the car engine; thus, it should only be done by professionals or else the expert should be consulted in cases of doubt. Firstly, you would have to take away the timing chain cover and then ease out the crankshaft position sensor trigger wheel off the crankshaft but ensure that you mark the pulse wheel to get a perfect position for a replacement. Take off the spark plugs, then apply the crankshaft with the retaining bolt and rotate the crank to the TDC using both the index marks marked on the camshaft sprockets with the keyway located at 11 o clock position. That is, if the marks are not lined up, the crankshaft should be turned a full turn before rechecking. There it is important to rotate the crank shaft in an anticlockwise direction only to prevent stretching of timing chains. After that, ensure proper alignment of both covers and then, unbolt the rear timing chain tensioner and the tensioner arm while putting numbered marks on those bolts which are supposed to be used again. To do this, first, remove the rear timing chain from the contact with the sprockets and take out the rear chain guide and ultimately move the sprocket from the crankshaft vicinity. Turn the crankshaft 600 ccw to make the camshafts lie in the neutral position, then extract the front timing chain tensioner and the associated arm, the front timing chain off the sprockets, and, finally, the front chain guide. Wash all components diligently and the chain tensioners, guides and chains and check for signs of wear or damage and replace if necessary. However, with the engine off, try to turn the crankshaft at least two complete revolutions by hand before igniting the engine and ensuring there is extra tightness that can be a major issue. For the timing chain tensioners, compress them then lock into position; Introduce the crank sprocket for the front timing chain in which the key way must face 11 o clock position. The index marks on the camshaft sprockets must be aligned and then place the front timing chain guide, then the front timing chain, the colored links of the chain must be properly aligned. Then bolt in the front tensioner arm and the tensioner assembly into its rightful place where it must fit tightly. Perform the same process as the front timing chain, to make sure the rear timing chain and its assembly is also in the right position and fixed tightly. If there are any locking pins still in the tensioners, rotate the crankshaft back to '11 o'clock' and check the timing marks. Set the crankshaft position sensor pulse wheel in its correct position and manually turn the engine to look for signs of bind up. Last of all when all parts are reconnected, fill the crankcase and other system with the correct fluids, reconnecting the battery, and start the engine then check for any sign of leakage while allowing the Powertrain Control Module learn the correct idle and fuel trim strategy for the best performance.
    Posted by FordPartsGiant Specialist
    Q:
    What are the steps involved in the removal, inspection, and installation of the timing chain,Tensioner and Timing Chain Guide in V6 engine on Ford Escape? Posted by Customer
    A:
    Because of the confined space, it is very difficult to undertake this process with the engine still installed and if a lot of work is needed then it may be advisable to remove the engine in the first instance. Timing is quite complex, and an error in it can cause significant levels of damage to the car engine; thus, it should only be done by professionals or else the expert should be consulted in cases of doubt. Firstly, you would have to take away the timing chain cover and then ease out the crankshaft position sensor trigger wheel off the crankshaft but ensure that you mark the pulse wheel to get a perfect position for a replacement. Take off the spark plugs, then apply the crankshaft with the retaining bolt and rotate the crank to the TDC using both the index marks marked on the camshaft sprockets with the keyway located at 11 o clock position. That is, if the marks are not lined up, the crankshaft should be turned a full turn before rechecking. There it is important to rotate the crank shaft in an anticlockwise direction only to prevent stretching of timing chains. After that, ensure proper alignment of both covers and then, unbolt the rear timing chain tensioner and the tensioner arm while putting numbered marks on those bolts which are supposed to be used again. To do this, first, remove the rear timing chain from the contact with the sprockets and take out the rear chain guide and ultimately move the sprocket from the crankshaft vicinity. Turn the crankshaft 600 ccw to make the camshafts lie in the neutral position, then extract the front timing chain tensioner and the associated arm, the front timing chain off the sprockets, and, finally, the front chain guide. Wash all components diligently and the chain tensioners, guides and chains and check for signs of wear or damage and replace if necessary. However, with the engine off, try to turn the crankshaft at least two complete revolutions by hand before igniting the engine and ensuring there is extra tightness that can be a major issue. For the timing chain tensioners, compress them then lock into position; Introduce the crank sprocket for the front timing chain in which the key way must face 11 o clock position. The index marks on the camshaft sprockets must be aligned and then place the front timing chain guide, then the front timing chain, the colored links of the chain must be properly aligned. Then bolt in the front tensioner arm and the tensioner assembly into its rightful place where it must fit tightly. Perform the same process as the front timing chain, to make sure the rear timing chain and its assembly is also in the right position and fixed tightly. If there are any locking pins still in the tensioners, rotate the crankshaft back to '11 o'clock' and check the timing marks. Set the crankshaft position sensor pulse wheel in its correct position and manually turn the engine to look for signs of bind up. Last of all when all parts are reconnected, fill the crankcase and other system with the correct fluids, reconnecting the battery, and start the engine then check for any sign of leakage while allowing the Powertrain Control Module learn the correct idle and fuel trim strategy for the best performance.
    Posted by FordPartsGiant Specialist
    Q:
    What is the process for removing the timing belt guide pulley(s) for the 2002 Ford Focus? Posted by Customer
    A:
    To remove the upper guide pulley, the timing belt upper and middle covers must be removed. For the lower guide pulley (early models only), the timing belt lower cover must be removed. The guide pulley bolt should be loosened, and the pulley withdrawn from the belt, taking care not to let the timing belt come off the sprockets.
    Posted by FordPartsGiant Specialist
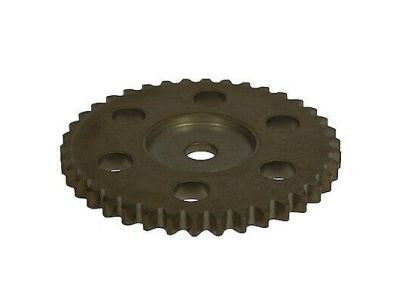
    See expert answers on similar Variable Timing Sprocket
    Q:
    What is the next step after positioning the index marks on the sprockets for the 2020 Ford Fusion? Posted by Customer
    A:
    Install the front timing chain guide/VCT assembly. Tighten the mounting bolts.
    Posted by FordPartsGiant Specialist
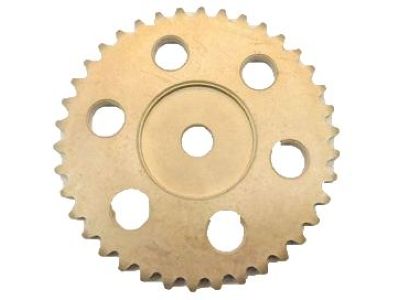
    See expert answers on similar Variable Timing Sprocket
    Q:
    What should be done after ensuring the sprocket timing marks are aligned for the 1996 Ford Ranger? Posted by Customer
    A:
    Install the camshaft sprocket and tighten the bolt to the torque.
    Posted by FordPartsGiant Specialist
    Q:
    What is the function of the jackshaft in this engine for the 2008 Ford Ranger? Posted by Customer
    A:
    The jackshaft drives the camshaft timing chains and the oil pump. The left cylinder bank camshaft is driven by a chain at the front of the engine, and the right cylinder bank camshaft is driven by a chain from the rear of the jackshaft.
    Posted by FordPartsGiant Specialist
    Q:
    How do you inspect the timing chain and tensioner for the 2002 Ford Ranger? Posted by Customer
    A:
    1. Remove the timing chain cover. 2. Align the crankshaft and camshaft timing marks. 3. Mark a reference point on the top chain link and position a ruler over the top of the chain. 4. Attach a torque wrench to the camshaft sprocket bolt and apply 15 ft-lbs of torque in the counterclockwise direction without allowing the crankshaft to rotate. 5. Note the point where your mark aligns on the ruler. 6. Apply 15 ft-lbs of torque in the clockwise direction and note the amount of movement. 7. The measurement is the timing chain deflection. If deflection is more than 1/8-inch, replace the timing chain (see below). 8. Check the tensioner for wear and damage. If tensioner face wear is excessive, replace the tensioner. Before reinstalling the tensioner, it must be retracted (see Step 28). Tighten the tensioner bolts to the torque.
    Posted by FordPartsGiant Specialist
    Q:
    What is the next step after removing the jackshaft chain tensioner and guide for the 1996 Ford Ranger? Posted by Customer
    A:
    Remove the bolt in the center of the jackshaft sprocket, then remove the sprocket with the jackshaft chain.
    Posted by FordPartsGiant Specialist
    Q:
    How can the crankshaft sprocket be removed for the 1993 Ford Ranger? Posted by Customer
    A:
    It can easily be pulled from the crankshaft once the oil pump drive chain is removed.
    Posted by FordPartsGiant Specialist
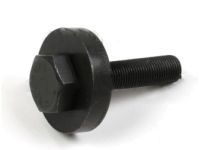
    Q:
    How do you hold the camshaft while turning the camshaft sprocket bolt for the 2007 Ford Ranger? Posted by Customer
    A:
    Use a wrench on the hexagonal area of the camshaft to hold it while turning the camshaft sprocket bolt.
    Posted by FordPartsGiant Specialist
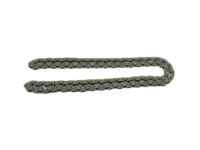
    Q:
    What is the first step in the removal process for the 1997 Ford Ranger? Posted by Customer
    A:
    Turn the crankshaft clockwise until the number one piston is at Top Dead Center.
    Posted by FordPartsGiant Specialist
    If you have any questions about this product, please don't hesitate to ask us. We will be happy to help you!

Genuine Ford Part 1S7Z-6256-AA, the Right Choice

To ensure reliability, purchase Ford part # 1S7Z-6256-AA Sprocket - Camshaft. It is sometimes referred to as Mercury Cam Gear, Mercury Variable Timing Sprocket. In terms of quality and longevity, OEM parts are top-tier. This is because they are made according to Ford's demanding factory specifications and go through strict quality control. This part fits specific Mercury Mariner, Milan models.

FordPartsGiant.com is a leading supplier of genuine Ford parts and accessories such as Ford 1S7Z6256AA Sprocket - Camshaft. On our platform, we provide genuine Ford parts at incredible prices while ensuring top-tier quality. Feel at ease shopping with us, knowing our parts have a hassle-free return policy and rapid delivery service. For detailed Mercury parts information, click here.

Why choose Ford Parts Giant

  • Dedicated Service

    Your complete satisfaction is our #1 goal

  • Lowest Prices

    Best deals on genuine OE parts from dealerships

  • Fast Delivery

    Orders are processed and delivered promptly