Make sure this part fits

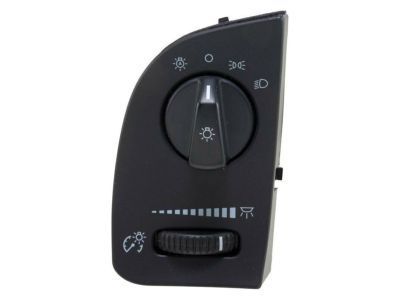
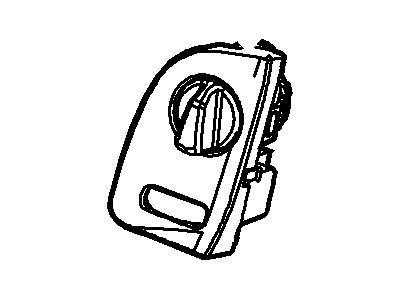
Mercury 4W7Z-11654-AAB Switch Assy - Headlamp Levelling

2004-2006 Mercury Grand Marquis 4W7Z11654AAB

Customer Questions & Expert Answers (3)
Ford 4W7Z-11654-AAB Switch Assy - Headlamp Levelling
  • Part Description
    Switch Assy - Headlamp Levelling
  • Manufacturer
    Ford
  • Manufacturer's Notes
    This part is discontinued.
Make sure this part fits
  • Related Parts
  • Product Specifications
  • Vehicle Fitment
  • Customer Questions & Expert Answers
  • Product Specifications

    BrandGenuine Mercury
    Manufacturer Part Number4W7Z-11654-AAB, 4W7Z11654AAB
    Part DescriptionSwitch Assy - Headlamp Levelling
    Item Dimensions4.2 x 4.2 x 3.3 inches
    Item Weight0.50 Pounds
    ConditionNew
    Fitment TypeDirect Replacement
    ManufacturerFord
    SKU4W7Z-11654-AAB
    WarrantyThis genuine Ford part is guaranteed by Ford's factory warranty.
    Shipping & ReturnShipping Policy Return Policy
    Warning: California’s Proposition 65
  • Vehicle Fitment

    Year Make Model Engine Important vehicle option details
    2004-2006 Mercury Grand Marquis8 Cyl 4.6L4AT 4R70W
  • Customer Questions & Expert Answers

    Q:
    Is the the correct part for the attached VIN? Posted by FordPartsGiant Specialist
    A:
    You can Select Your Vehicle to check if 4W7Z-11654-AAB fits your vehicle.
    Posted by FordPartsGiant Specialist
    Q:
    How do you replace the headlight switch on Mercury Grand Marquis? Posted by Customer
    A:
    Relax the connection of the cable on the negative terminal of the battery. On 1989 and models before it, you will need to reach under the dash and press at the bottom of the switch where it can be found to release the knob and to allow the shaft to be removed from the switch. Take off the instrument cluster bezel and then, with the help of a 5/8-inch socket, turn the nut and get the switch down, disconnect the electrical connector and take it out. Insert the new switch into the position on the bracket and tightened the nut for holding the switch firmly. Put the knob and shaft into the switch and the rest of the process would be the opposite of the removal process. Pry the headlight switch knob counterclockwise by inserting a pointed instrument beneath the release tab at the base of the knob For the 1990-1995 models, you have to first remove the instrument cluster bezel. Screw and pull out the switch out of the instrument panel, and then unbolt the switch, disconnect its connector and then take the switch out of the car while the process of installation will be vice versa. For the 1996 to 2004 models-with the switch cavity exposed, turn the headlight knob counter clockwise until it can be separated from the bottom of the switch shaft, then remove the instrument cluster bezel, press on the connector release tab on the back of the switch to disconnect the electrical wiring connector, unscrew the switch retainer nut and pull the switch from the bracket and to install, reverse the above noted removal procedures. For the 2005 and later models the headlight switch assembly is clipped to the instrument panel and it required to use trim panel tool to pry it out, disconnect the electrical connectors, this process followed by disconnecting the assembly from the dash and reconnecting the electrical connectors and reinstalled the assembly.
    Posted by FordPartsGiant Specialist
    Q:
    How do you replace the headlight switch on Ford Crown Victoria? Posted by Customer
    A:
    Relax the connection of the cable on the negative terminal of the battery. On 1989 and models before it, you will need to reach under the dash and press at the bottom of the switch where it can be found to release the knob and to allow the shaft to be removed from the switch. Take off the instrument cluster bezel and then, with the help of a 5/8-inch socket, turn the nut and get the switch down, disconnect the electrical connector and take it out. Insert the new switch into the position on the bracket and tightened the nut for holding the switch firmly. Put the knob and shaft into the switch and the rest of the process would be the opposite of the removal process. Pry the headlight switch knob counterclockwise by inserting a pointed instrument beneath the release tab at the base of the knob For the 1990-1995 models, you have to first remove the instrument cluster bezel. Screw and pull out the switch out of the instrument panel, and then unbolt the switch, disconnect its connector and then take the switch out of the car while the process of installation will be vice versa. For the 1996 to 2004 models-with the switch cavity exposed, turn the headlight knob counter clockwise until it can be separated from the bottom of the switch shaft, then remove the instrument cluster bezel, press on the connector release tab on the back of the switch to disconnect the electrical wiring connector, unscrew the switch retainer nut and pull the switch from the bracket and to install, reverse the above noted removal procedures. For the 2005 and later models the headlight switch assembly is clipped to the instrument panel and it required to use trim panel tool to pry it out, disconnect the electrical connectors, this process followed by disconnecting the assembly from the dash and reconnecting the electrical connectors and reinstalled the assembly.
    Posted by FordPartsGiant Specialist
    If you have any questions about this product, please don't hesitate to ask us. We will be happy to help you!

Genuine Ford Part 4W7Z-11654-AAB, the Right Choice

To ensure reliability, purchase Ford part # 4W7Z-11654-AAB Switch Assy - Headlamp Levelling. It is sometimes referred to as Mercury Headlight Switch. In terms of quality and longevity, OEM parts are top-tier. This is because they are made according to Ford's demanding factory specifications and go through strict quality control. This part fits specific Mercury Grand Marquis models.

FordPartsGiant.com is a leading supplier of genuine Ford parts and accessories such as Ford 4W7Z11654AAB Switch Assy - Headlamp Levelling. On our platform, we provide genuine Ford parts at incredible prices while ensuring top-tier quality. Feel at ease shopping with us, knowing our parts have a hassle-free return policy and rapid delivery service. For detailed Mercury parts information, click here.

Why choose Ford Parts Giant

  • Dedicated Service

    Your complete satisfaction is our #1 goal

  • Lowest Prices

    Best deals on genuine OE parts from dealerships

  • Fast Delivery

    Orders are processed and delivered promptly