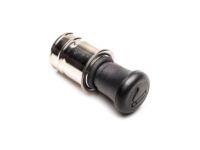
Make sure this part fits

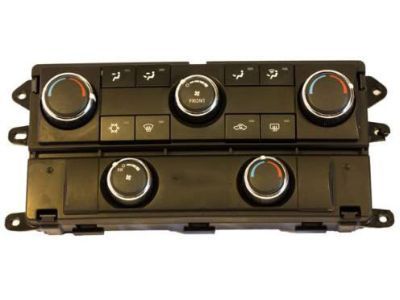
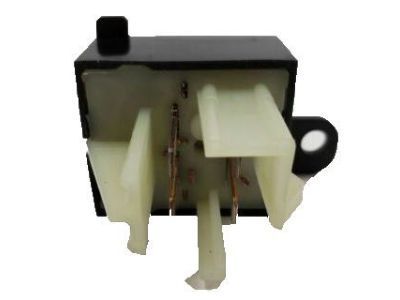
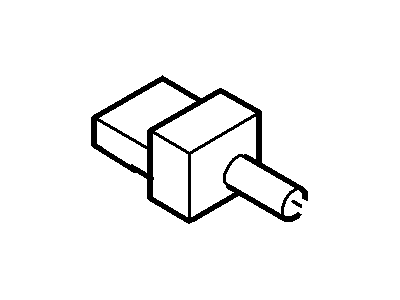
Mercury F4DZ-19986-A Switch Assembly

1992-2011 Mercury F4DZ19986A

Customer Questions & Expert Answers (7)
Ford F4DZ-19986-A Switch Assembly
  • Part Description
    Switch Assy
  • Base No.
    19986
  • Replaces
    F2DZ-19986-A
  • Manufacturer
    Ford
Make sure this part fits
$20.63 MSRP: $32.91
You Save: $12.28 (38%)
Ships in 1-2 Business Days
1
ADD TO CART
  • Related Parts
  • Product Specifications
  • Vehicle Fitment
  • Customer Questions & Expert Answers
  • Product Specifications

    BrandGenuine Mercury
    Base No.19986
    Manufacturer Part NumberF4DZ-19986-A, F4DZ19986A
    Part DescriptionSwitch Assy
    Item Dimensions3.2 x 1.7 x 2.6 inches
    Item Weight0.40 Pounds
    ConditionNew
    Fitment TypeDirect Replacement
    ReplacesF2DZ-19986-A
    ManufacturerFord
    SKUF4DZ-19986-A
    WarrantyThis genuine Ford part is guaranteed by Ford's factory warranty.
    Shipping & ReturnShipping Policy Return Policy
    Warning: California’s Proposition 65
  • Vehicle Fitment

    Year Make Model Engine Important vehicle option details
    1995-2011 Mercury Grand Marquis8 Cyl 4.6L, 8 Cyl 4.6L Romeo SOHC EFI4AT, 4AT 4R70W, 4AT AODE, 4-Speed Automatic Transmission 4R75E Livonia, Left Hand Drive, Rear-Wheel Drive (Left Hand Drive)
    1997-2001 Mercury Mountaineer6 Cyl 4.0L, 8 Cyl 5.0L4AT 4R70W, 5AT 5R55E
    1992-1999 Mercury Sable6 Cyl 3.0L, 6 Cyl 3.8L4AT 4F50N, 4AT AX4N, 4AT AX4S, 4AT AXOD, 4AT AXOD-E
  • Customer Questions & Expert Answers

    Q:
    Is the the correct part for the attached VIN? Posted by FordPartsGiant Specialist
    A:
    You can Select Your Vehicle to check if F4DZ-19986-A fits your vehicle.
    Posted by FordPartsGiant Specialist
    Q:
    How to remove and install the control assembly on 2000-2011 Ford Ranger? Posted by Customer
    A:
    On 2001 and later models, turn the temperature control knob to the full cool position. Disconnect the negative cable from the battery. Remove the radio. On 2001 and later models, remove the two screws that are located just above the climate control knobs that secure the cluster trim. For all years (with or without screws) pull the trim carefully as this will release the spring clips holding the trim on. Once the trim is released, disconnect any electrical connectors. Remove the four screws securing the A/C Switch to the instrument panel. Pull the A/C Switch through the opening in the instrument panel far enough to allow removal of electrical and vacuum connections. On 2000 models, the assembly can now be removed from the vehicle. On 2001 and later models, pull the temperature control knob from the front. From behind, remove the screw that holds the switch with the cable then separate it as a unit from the A/C Switch. Remove the A/C Switch away from the instrument panel. Use a small screwdriver and remove the vacuum harness from the vacuum switch on the side of the A/C Switch. At the back of the A/C Switch, use a screwdriver or needle-nose pliers and disconnect the temperature and function cable from the white control bracket, if equipped. At the bottom of the A/C Switch, disconnect the temperature control cable from the control, if equipped. Pull enough cable through the instrument opening until the function cable can be held vertical to the A/C Switch, then remove the cable end from the function lever. Remove the A/C Switch from the instrument panel. Installation is the reverse of removal. Note: If a new A/C Switch is installed, the original blower switch and function switch must be transferred to the new unit.
    Posted by FordPartsGiant Specialist
    Q:
    How to remove and install the control assembly on Mercury Grand Marquis? Posted by Customer
    A:
    The following procedure requires the removal of several interior trim parts. Remove the left side and right side instrument panel molding assemblies. Remove the cluster trim panel screws. Remove the knob from the headlamp switch and remove the headlamp switch shaft. Remove the lower insulator/knee protector panel. Remove the steering column upper and lower covers. Remove the screws retaining the steering column trim panel reinforcement bracket and remove the bracket. Position the wheels in the straight ahead position. Remove the nuts retaining the steering column. Lower the steering column and remove the PRNDL cable. Let the steering column rest on the front seat. Remove the instrument cluster bezel and the center bezel. Disconnect the electrical connectors to any of the accessory switches. Remove four cap screws from the A/C Switch. After the trim is removed, remove the four screws and pull the control assembly out of the dash. Pull the control out of the instrument panel. The vacuum lines are clustered together, and removed as a single connection. The vacuum lines and electrical switch can be disconnected after the control has been removed from the dash. Installation is the reverse of the removal procedure.
    Posted by FordPartsGiant Specialist
    Q:
    How to remove and install the control assembly on Ford Crown Victoria? Posted by Customer
    A:
    The following procedure requires the removal of several interior trim parts. Remove the left side and right side instrument panel molding assemblies. Remove the cluster trim panel screws. Remove the knob from the headlamp switch and remove the headlamp switch shaft. Remove the lower insulator/knee protector panel. Remove the steering column upper and lower covers. Remove the screws retaining the steering column trim panel reinforcement bracket and remove the bracket. Position the wheels in the straight ahead position. Remove the nuts retaining the steering column. Lower the steering column and remove the PRNDL cable. Let the steering column rest on the front seat. Remove the instrument cluster bezel and the center bezel. Disconnect the electrical connectors to any of the accessory switches. Remove four cap screws from the A/C Switch. After the trim is removed, remove the four screws and pull the control assembly out of the dash. Pull the control out of the instrument panel. The vacuum lines are clustered together, and removed as a single connection. The vacuum lines and electrical switch can be disconnected after the control has been removed from the dash. Installation is the reverse of the removal procedure.
    Posted by FordPartsGiant Specialist
    Q:
    How do you remove and install the control panel for Ford Explorer Sport Trac? Posted by Customer
    A:
    Disconnect the negative battery cable and remove the instrument cluster trim panel. Unscrew the four screws securing the control panel and disconnect electrical connections, blower switch, and illumination light. Remove the vacuum harness, release the temperature and function cable snap-in flag, and remove the temperature control cable. For 1995 and later models, remove the radio and instrument panel surround, disconnect connectors, and unscrew the four mounting screws. Pull the panel out to access connectors, tag and disconnect them. For 1994 and earlier models, pull control cables through the instrument panel opening, attach function and temperature control cables to plastic levers, connect electrical wire harness, and attach the vacuum hose. For 1995 and later models, connect electrical and vacuum connectors, position the A/C Switch assembly, install the four mounting screws, and reinstall trim panels. Adjust cables if necessary.
    Posted by FordPartsGiant Specialist
    Q:
    How is the control assembly removed from the 1999 Ford Ranger after releasing the trim? Posted by Customer
    A:
    For 1995 through 2000 models, once the trim is released, pull the control assembly through the opening in the instrument panel to allow removal of electrical and vacuum connections.
    Posted by FordPartsGiant Specialist
    See expert answers on similar A/C Switch
    Q:
    What steps should be followed after disconnecting the control panel for the 1996 Ford Explorer? Posted by Customer
    A:
    Move the control panel close to the dashboard, connect electrical and vacuum connectors, then position the control assembly, install the four mounting screws, and complete the installation by reinstalling trim panels and checking for proper operation.
    Posted by FordPartsGiant Specialist
    See expert answers on similar A/C Switch
    If you have any questions about this product, please don't hesitate to ask us. We will be happy to help you!

Genuine Ford Part F4DZ-19986-A, the Right Choice

To ensure reliability, purchase Ford part # F4DZ-19986-A Switch Assembly. It is sometimes referred to as Mercury A/C Switch, Mercury Blower Control Switches. In terms of quality and longevity, OEM parts are top-tier. This is because they are made according to Ford's demanding factory specifications and go through strict quality control. This part fits specific Mercury Grand Marquis, Mountaineer, Sable models.

FordPartsGiant.com is a leading supplier of genuine Ford parts and accessories such as Ford F4DZ19986A Switch Assembly. On our platform, we provide genuine Ford parts at incredible prices while ensuring top-tier quality. Feel at ease shopping with us, knowing our parts have a hassle-free return policy and rapid delivery service. For detailed Mercury parts information, click here.

Why choose Ford Parts Giant

  • Dedicated Service

    Your complete satisfaction is our #1 goal

  • Lowest Prices

    Best deals on genuine OE parts from dealerships

  • Fast Delivery

    Orders are processed and delivered promptly