×
- Live Chat
- 1-888-788-9341


My Garage
My Account
Cart
Genuine Ford Bronco II Side Marker Light
Side Marker Lamp- Select Vehicle by Model
- Select Vehicle by VIN
Select Vehicle by Model
orMake
Model
Year
Select Vehicle by VIN
For the most accurate results, select vehicle by your VIN (Vehicle Identification Number).
2 Side Marker Lights found
Ford Bronco II Side Marker Light
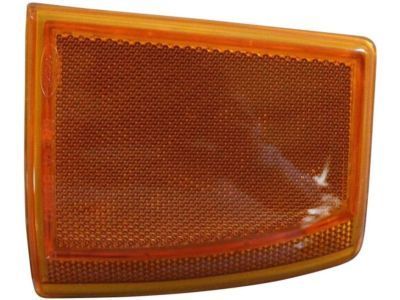
Ford Bronco II Side Marker Light are an article of convenience that make your Ford Bronco II easily visible to others on the road especially when turning or performing any lane change. These lights are available in different models with either smoked or clear lenses and the additional options of red or amber lenses, and to increase the illumination - high-performance LED. side marker lights are also found near the bottom of the car and they function as turn signals flashing to signal a change in direction and made to last for years. Also, there upgraded repeaters that act as reflectors that will increase the visibility of the cars and other vehicles in the dark. Apart from the function, they also provide fashionable lights for your car and give your car a new look on the road.
We provide a wide range of Ford Bronco II Side Marker Light at the best prices possible. If you need Ford Bronco II Side Marker Light, you can shop with confidence on our website. All our OEM parts come with a manufacturer's warranty and are delivered to your door step with a fast delivery service.
Ford Bronco II Side Marker Light Parts Questions & Experts Answers
- Q: How to remove and reinstall the side marker light on Ford Bronco II?A: Remove the screws retaining the headlight door for the front side marker light and turn signal. Carefully rotate the headlight door away from the vehicle, rotating the inboard side away from the vehicle. Remove the side marker light, parking and turn signal bulbs and sockets from the headlamp door assembly. They can be removed by turning them. Remove the retaining screws for the lens to be changed and remove it from the headlight door. Install the removed lens assembly and install the bulbs and sockets. Install the headlight door assembly. Check the operation of the lights. For the rear side marker light and rear lamps, remove the 4 screws retaining the lamp assembly to the vehicle. Remove the lamp assembly from the vehicle by pulling it outward. Remove the bulbs and sockets. Install the lamp assembly in position. For the high mount brake light, remove the screws retaining the lamp to the liftgate (Bronco II models) or the cab (Ranger models). Pull the lamp away from the vehicle and disconnect the wiring connector. Some later models retain the lamp socket to the lens with a screw. Remove the screw and pull the lamp socket away from the lens to access the bulbs. If there is no retaining screw, remove the lamp socket from the lens by twisting it and pulling outward. Pull the bulb straight out from the lamp socket to remove it. Install the bulb into the lamp socket. Install the lamp socket to the lens and either twist it to lock it in position or install its retaining screw. Position the lens assembly to the body. Install the lens assembly retaining screws. Check the operation of the lights. For the license plate light, twist the lens counterclockwise. Pull the lamp away from the vehicle. Twist the socket and remove the bulb. For the dome and map lights, remove the plastic cover. Pull the map or area bulb from the dome light assembly. Installation is the reverse of the removal procedure. The Ranger may have an optional rear cargo light which illuminates the pick-up bed. It is incorporated with the high mount brake light. For removal & installation procedures remove the cargo lamp socket and bulb instead of the brake lamp components.


